Ed Nisley's Blog: Shop notes, electronics, firmware, machinery, 3D printing, laser cuttery, and curiosities. Contents: 100% human thinking, 0% AI slop.
The ER-16 and ER-32 collet chucks use an M12×1.75 bolt to snug their MT3 tapers in the Mini-Lathe spindle. As nearly as I could figure, I needed a 190 mm bolt to get enough thread engagement, but the nearest available sizes were either too short or too long.
Fortunately, making round things is what a lathe is all about:
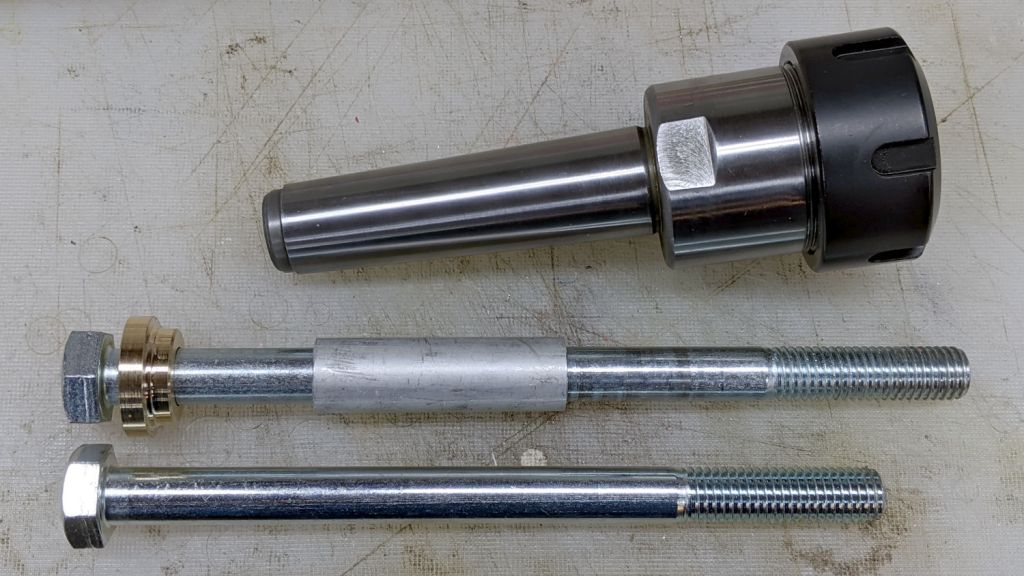
MT3 drawbar – assembled
The aluminum bellyband adds 30 mm to the length and aligns the bolt sections, with the threaded section from a long 5/16-18 bolt inside holding the metric bolt together:
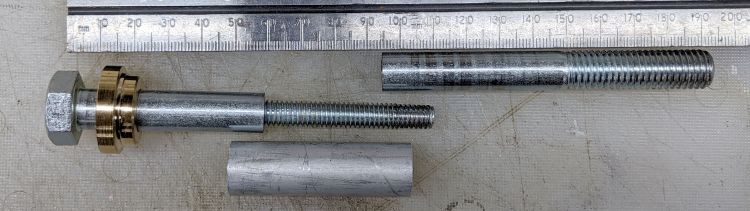
MT3 drawbar – parts
Although I got it right on the first try (!), the bellyband lets me fine-tune the length as needed.
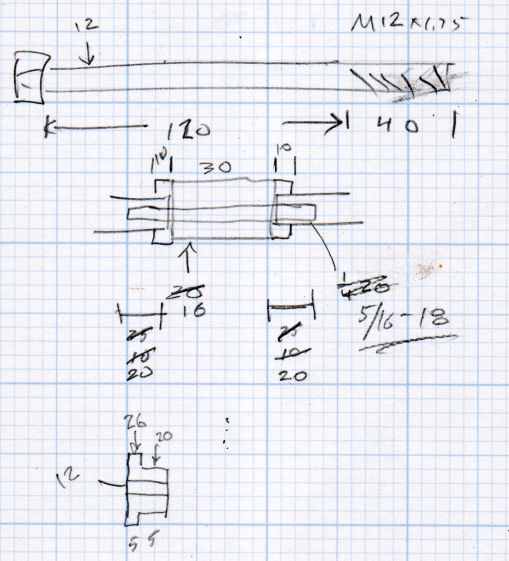
The original dimension doodle and some in-flight updates:
ER Collets – MT3 drawbar bolt – dimension doodles
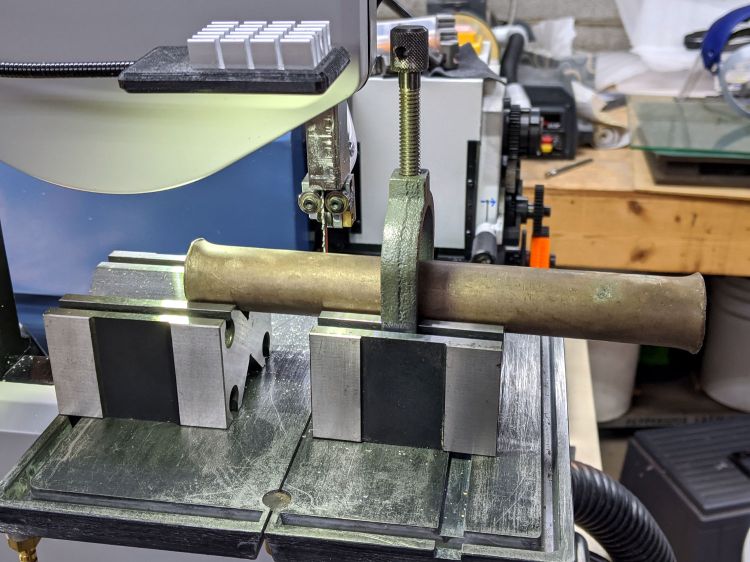
The fancy brass / bronze washer comes from a battered rod with mushroomed ends. A pair of V-blocks let me cut a chunk off one end with negligible drama:
Bronze Bar Stock – support fixture
It’s clamped firmly to the right block and a few licks with a file knocked off enough of the mushroom on the left end to put it flat(-ish) into the V; the near side of the right block is barely raised off the surface.
Face off the mushroom to get a flat spot for a center drill:
MT3 drawbar – battered bronze rod
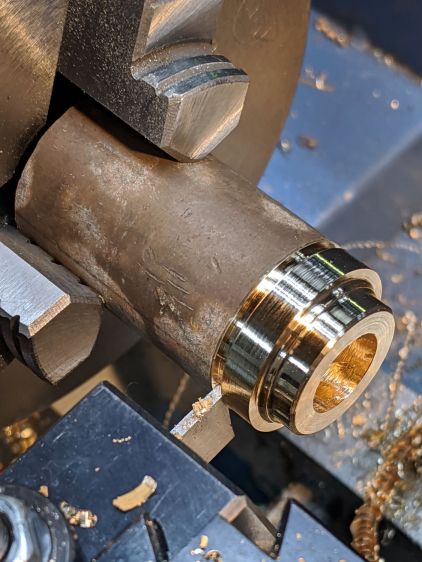
Some peaceful turning & boring produces a pretty washer:
MT3 drawbar – washer cutoff
The bore needed a bit of relief to seat the bolt head squarely on the outer surface:
MT3 drawbar – spindle washer
And then It Just Fit™:
MT3 drawbar – installed
Loctite on the inner bolt threads should keep everything together.
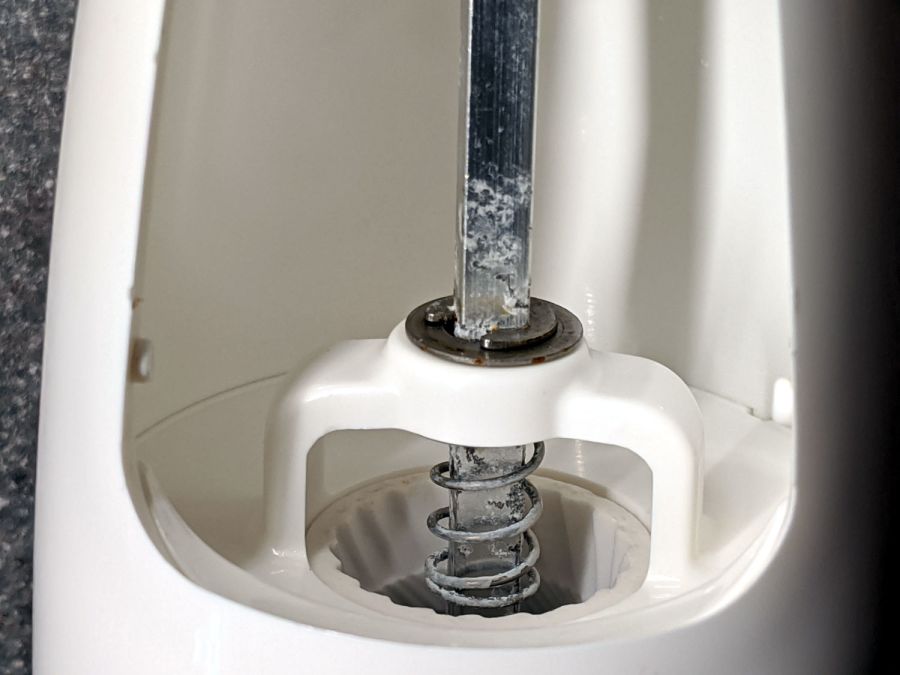
Being that type of guy, I’m reasonably sure I would not have bought what’s now clearly labeled as an OXO Radial Pepper Grinder for use as a salt mill:
OXO Salt Mill – corrosion
Mary recalls we got it at Target, back when one could go places and buy things, and I vaguely recall contemplating a wall of OXO gadgets. It’s been a while and I neglected to save the packaging for future reference.
Obviously not stainless steel, but not lethal, so we’ll continue abusing it.
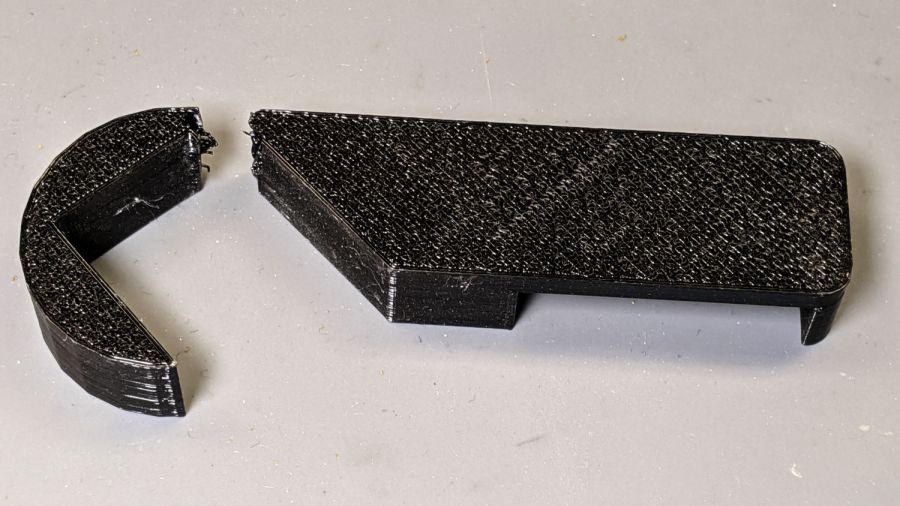
After three years, the retainer holding the front bathroom door open against winds blowing through the house on stormy days finally fractured, right at the top of the towel rack where you’d expect it:
Bathroom Door Retainer – fractured
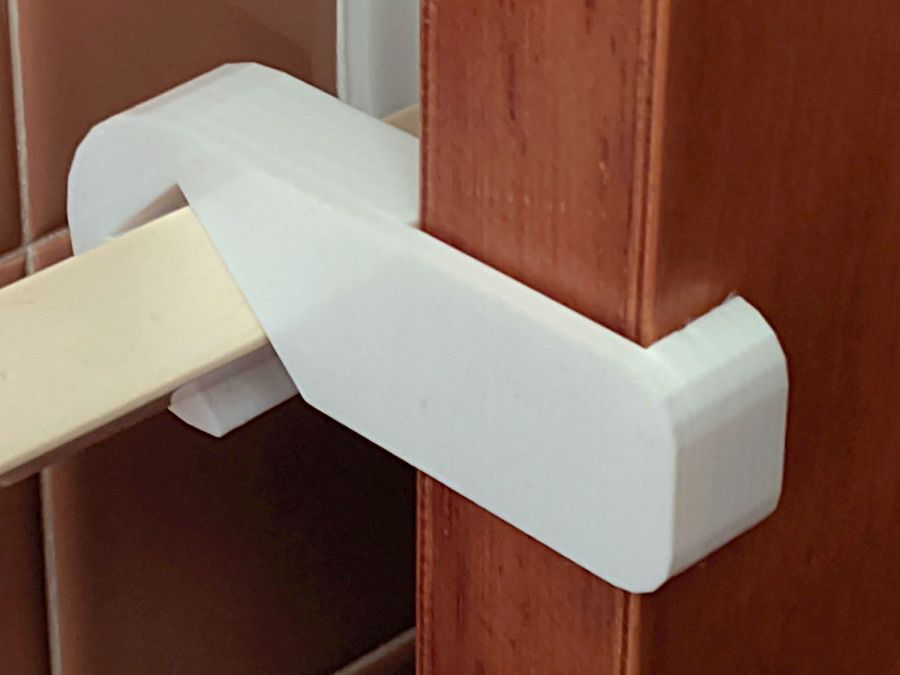
I was all set to add reinforcing pins and whatnot, then came to my senses and just made the whole thing a few millimeters larger:
Bathroom Door Retainer – stronger
Customer feedback indicates white blends better with the background.
I made a few minor tweaks to the original design, including slightly larger bumps to hold it against the towel bar that, regrettably, put corresponding gouges into the bar. Who knew they used such soft plastic back in the day?
This file contains hidden or bidirectional Unicode text that may be interpreted or compiled differently than what appears below. To review, open the file in an editor that reveals hidden Unicode characters.
Learn more about bidirectional Unicode characters
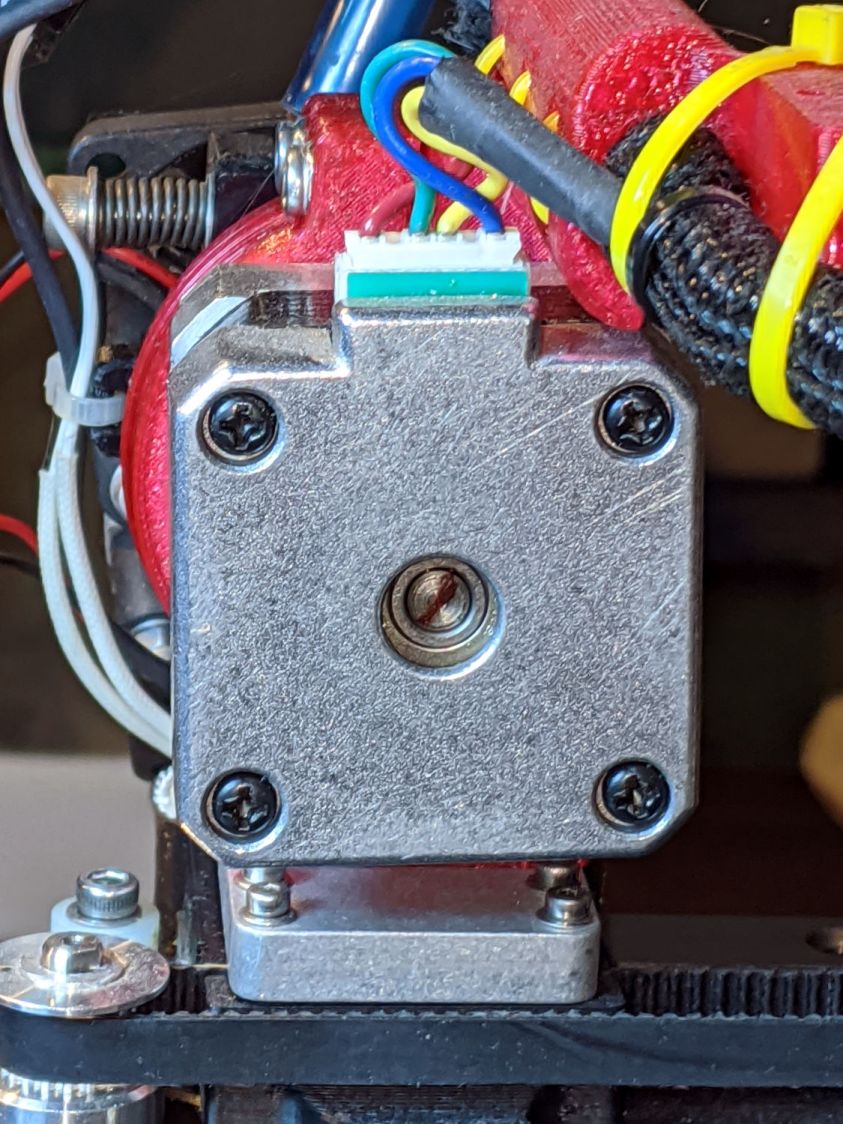
While sorting out an extrusion problem on the Makergear forum, I suggested marking the motor shaft and the filament drive shaft to see if the motor pinion inside the gearbox had worn out: if the motor turns and the filament gear doesn’t, then it’s dead inside.
For future reference, you mark the motor shaft thusly:
Makergear M2 – filament drive motor – rear shaft
Two marks on the filament drive gear tell you if the shaft is turning and if the gear is slipping on the shaft:
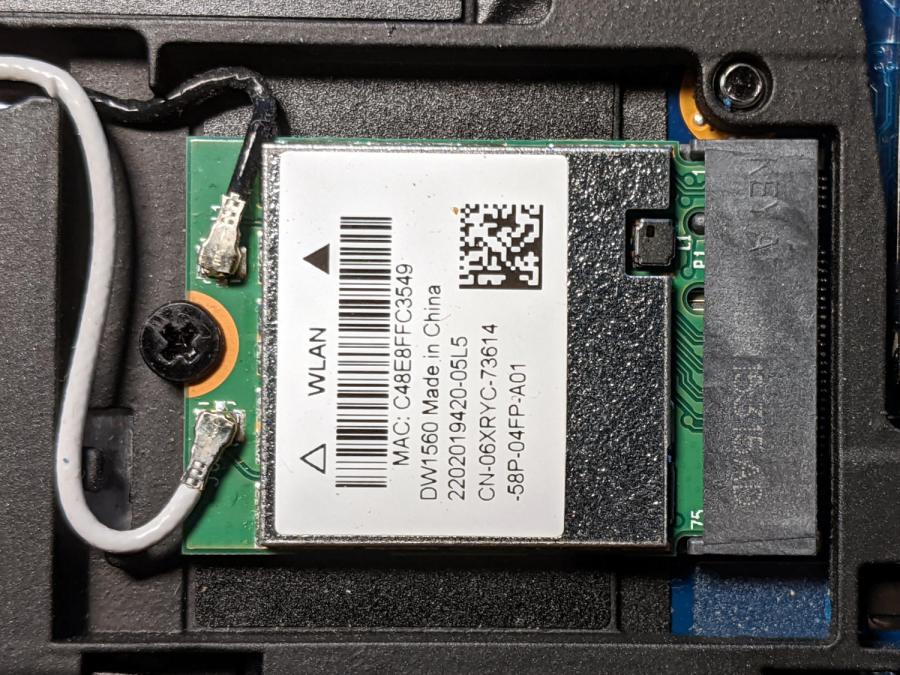
Although the Dell Latitude E7250 allegedly had Bluetooth capability and the Blueman applet tried connecting to my Bluetooth headsets, the connection aways failed and nothing worked. There’s a WLAN module stuck in an M.2 socket inside the laptop providing both WiFi and Bluetooth:
Dell E7250 – DW1560 card in place
A bit of searching suggested the driver wasn’t loading properly, which became obvious after I knew where to look:
dmesg | grep -i blue
… snippage …
[    5.678610] Bluetooth: hci0: BCM20702A1 (001.002.014) build 1572
[    5.678851] bluetooth hci0: Direct firmware load for brcm/BCM20702A1-0a5c-216f.hcd failed with error -2
[    5.678853] Bluetooth: hci0: BCM: Patch brcm/BCM20702A1-0a5c-216f.hcd not found
[   10.854607] Bluetooth: RFCOMM TTY layer initialized
[   10.854613] Bluetooth: RFCOMM socket layer initialized
[   10.854619] Bluetooth: RFCOMM ver 1.11
Without having the proper firmware / patch loaded, the module won’t work, even though the TTY / socket layers know it’s present, which explains why Blueman did everything except actually connect to the headsets.
More searching suggested you must extract the firmware HEX file from the Windows driver. Feeding the Service Tag into the Dell support site, then feeding “Bluetooth” and “Windows 8.1, 64-bit” (preinstalled on the laptop) into the Drivers & Downloads tab gets you the relevant EXE file: Dell Wireless 1550/1560 Wi-Fi and Bluetooth Driver. It turns out to be a self-extracting ZIP file (in Windows, anyway), so unzip it all by yourself:
This produces a blizzard of HEX files in the newly created Drivers/production/Windows8.1-x64 directory. Each firmware HEX file is keyed to the USB Product Code identifying the unique USB gadget, found with lsusb:
lsusb
… snippage …
Bus 002 Device 003: ID 0a5c:216f Broadcom Corp. BCM20702A0 Bluetooth
… snippage …
The DW1560 apparently has a USB RAM interface, with the specific HEX file identified in the CopyList stanza of the INF file corresponding to that USB Product Code:
However, the Linux firmware loader needs a different file format with a different name, mashed together from the HEX file, USB Vendor, and USB Product codes:
The firmware may be in one of the myriad Bluetooth packages not installed by default, so perhaps identifying & installing the proper package would sidestep the hocus-pocus.
Maybe next time?
Now I can wear my Bose Hearphones in Zoom sessions with the E7250, because my Pixel 3a phone heats up almost to the gets-bendy level while thrashing its battery to death.
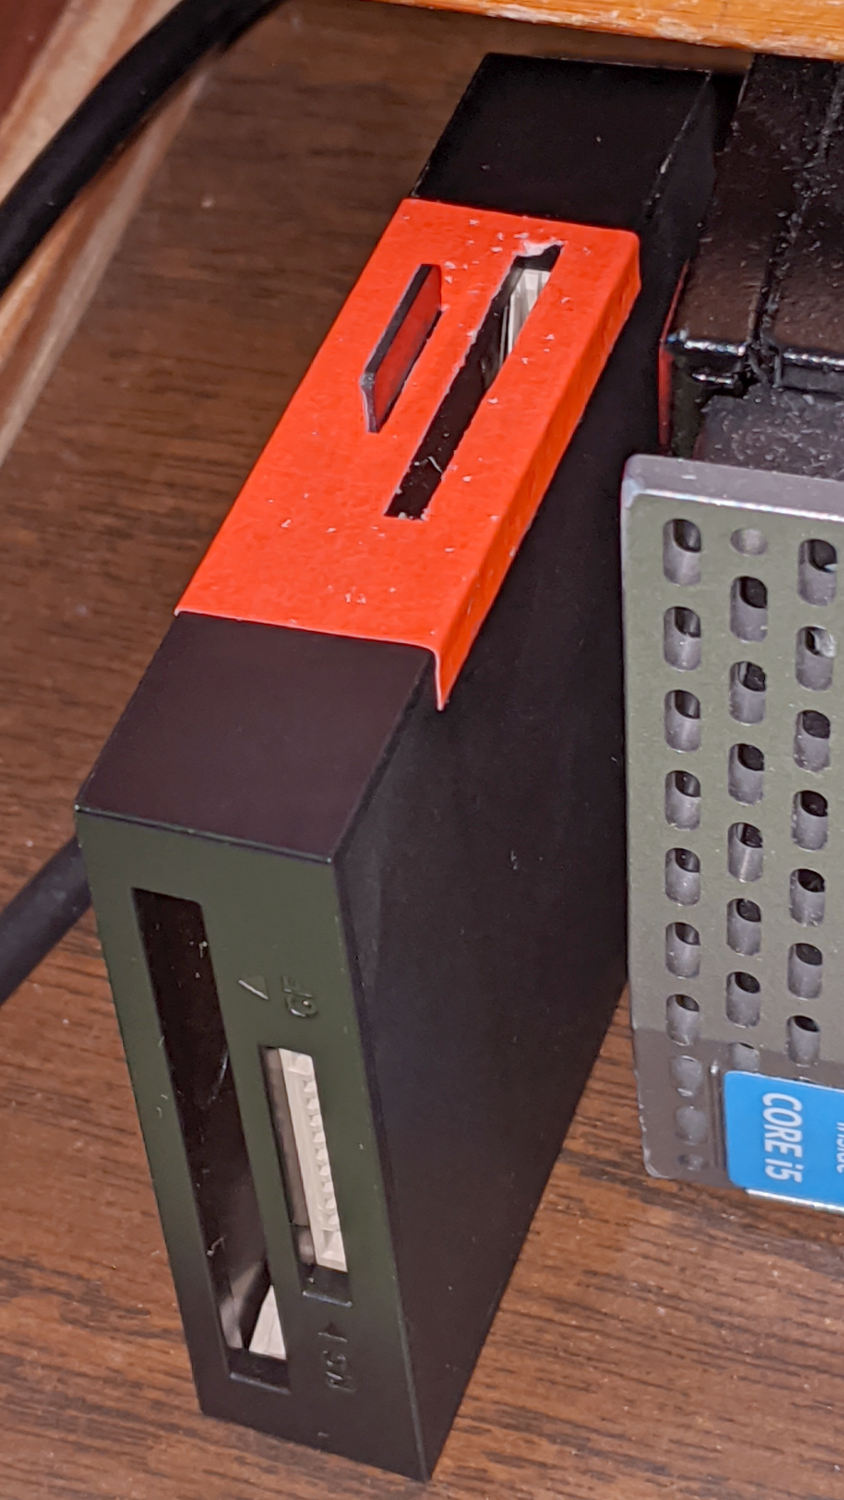
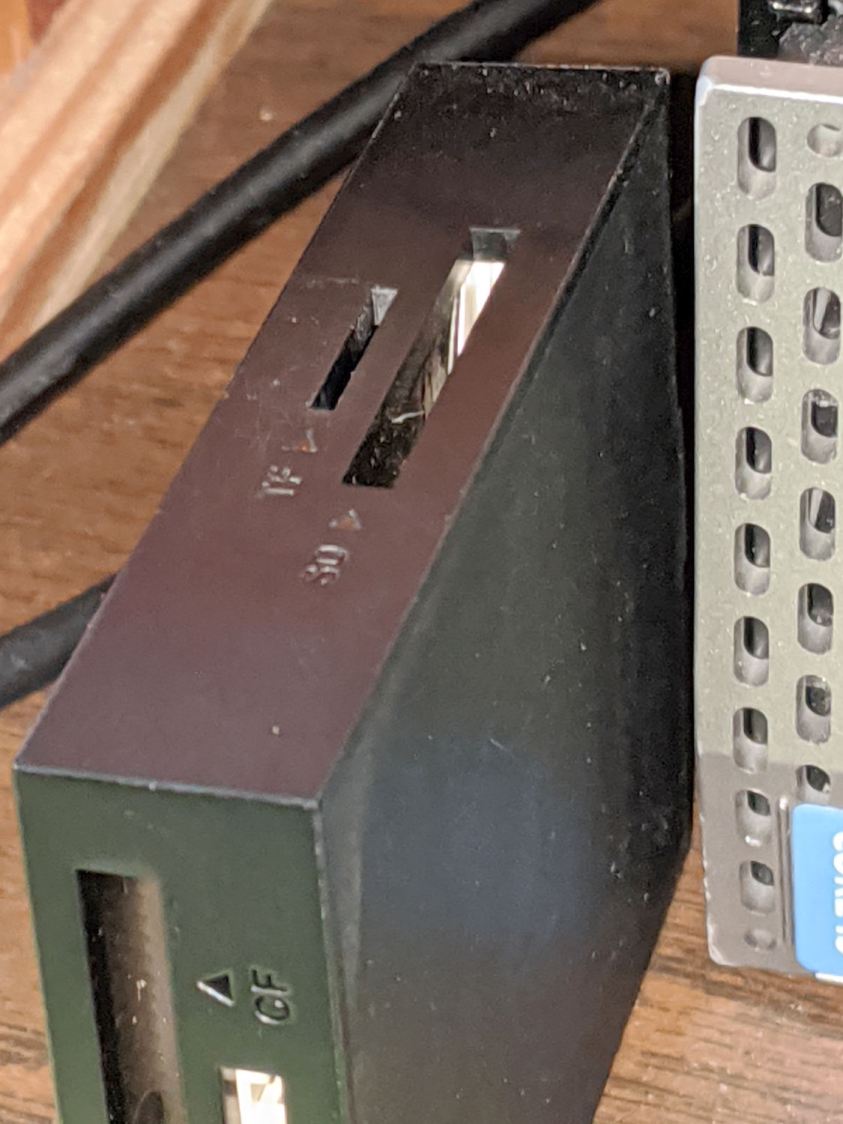
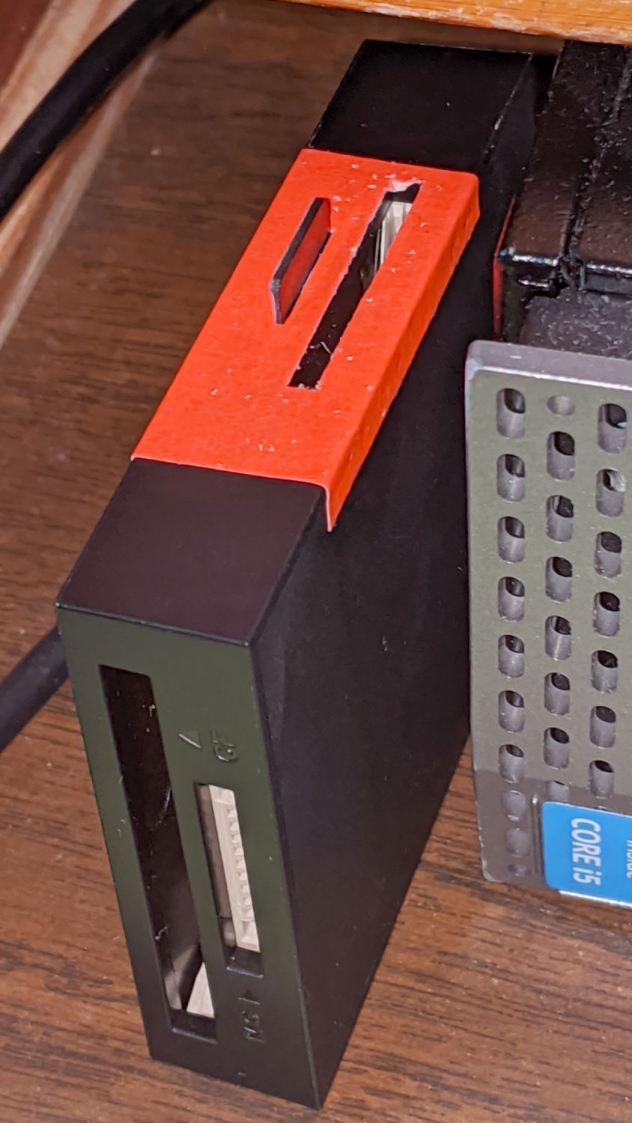
Consumer electronics designers seem to favor low- or no-contrast markings, with this USB reader falling on the vanishing end of the spectrum:
USB card reader – low-contrast slots
I poke the MicroSD card from the AS30V helmet camera into the smaller slot on the top surface, but, contrary to what’s revealed by the camera’s flash, the slot is a black-on-black target.
Well, I finally fixed that:
USB card reader – high-contrast slots
Although white tape surely would have sufficed, the roll of fluorescent red came to hand and that’s what it’ll be. The CompactFlash and Memory Stick slots on the front don’t see much traffic and have better access.
I slapped tape on case, trimmed the slots with a razor knife, and declared victory.