Ed Nisley's Blog: Shop notes, electronics, firmware, machinery, 3D printing, laser cuttery, and curiosities. Contents: 100% human thinking, 0% AI slop.
Mary spotted a White-breasted Nuthatch facing off against a red squirrel on the patio near the birdfeeder, wherein the nuthatch spread its wings to look as fearsome as possible. The squirrel seemed unfazed, perhaps because a bird the size of my thumb simply doesn’t pose much of a threat.
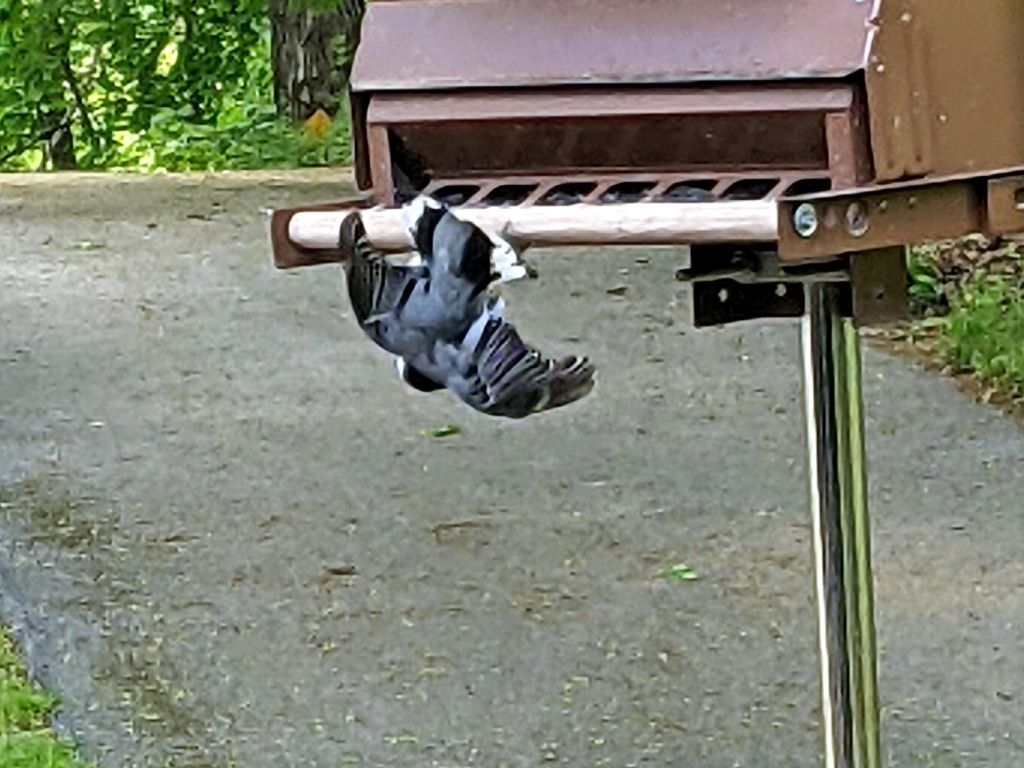
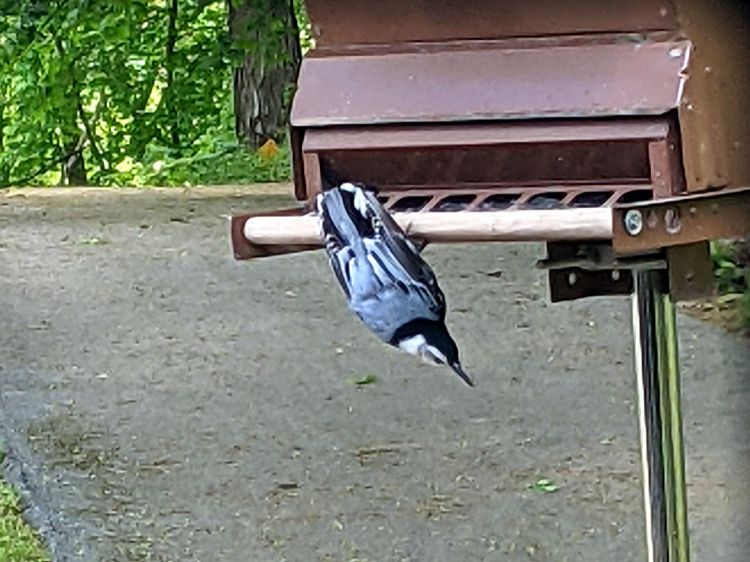
A few minutes later, the nuthatch repeated the display from the feeder, starting with a hostile side-eye:
Nuthatches are perfectly happy hanging upside-down from any convenient perch, so it’s not quite as ungainly as it may seem. However, the threat bounced off the squirrel, which continued stuffing itself from seeds scattered by none other than the nuthatch.
The nuthatch threat display seems identical to the nuthatch courtship display, so we may have been witnessing an offer for rishathra.
Ya never know!
Taken through two layers of 1955 window glass with the Pixel 3a zoomed all the way, then ruthlessly cropped.
So these brief notes, compiled before I read the Okendo TOS, should serve the same purpose as an actual review, minus the nonsense of providing even more of my sensitive bits.
Bose discontinued their Hearphones last year. While I’m reasonably happy with how mine work, they seem to last about a year before something fails. Bose replaced the first unit after its covering delaminated, replaced the second unit when a wire failed in the left microphone, and the third unit is now approaching one year of steady use.
The Hearphone necklace curled around the IQbuds charging case:
Bose Hearphones – Nuheara IQbuds2 MAX
Comparing the IQBuds² MAX to the Bose Hearphones:
Heavier in the ears, but without the necklace
Poor battery runtime, both have non-replaceable batteries
Poor ear seal with silicone tips, OK with Nuheara’s foam tips
Immediate access to “World off” mode!
“World off” mode seems noisier, even with ANC on
Better dynamic noise control / filtering
The tradeoff for not having the Bose necklace is, of course, carrying a smaller battery in each ear. Everybody’s claimed run times are optimistic, but after a year the Hearphones still last the better part of a day, while new IQbuds generate range anxiety after a morning and must then spend a while recharging in their case.
The stock IQbud silicone tips exert entirely too much pressure on my ear canals. The foam tips produce a much better seal and were easier to wear for more than a few hours. The Bose “Stayhear” shaped silicone tips fit much better and suppress external sound just as well as the IQbud foam tips.
Replacing the stock IQbuds foam tips (described as “Comply memory foam”) with actual Comply memory foam tips directly from Comply was a definite step up that should not be necessary; they are similar, but visibly different. According to Comply’s online fit selector, you need their Isolation T-167 Sennheiser-specific tips, even though Nuheara hardware appears in Comply’s selector.
The IQbuds tap controls, except for the simplest single tap, barely work. I cannot perform a double-tap, because the bud registers the first tap as a single tap and either discards the second tap or registers it as another single tap. Long taps generally work, except when they don’t, having nothing to do with tap duration or force. Tech support tells me the buds use the audio signal to determine when a finger taps the bud, but AFAICT tap sensitivity is much too high and the discrimination entirely too unfussy.
Amusingly, nibbling dark chocolate can produce exactly the correct audio signal to trigger the “World off” tap in the right bud and, occasionally, the “Play / Pause” tap in the left bud. I rest my case.
For someone requiring far more audio gain than a typical hipster, firmly tapping an ear bud is an … uncomfortable … user interface.
Fortunately, a single correctly executed tap on the right bud mutes the microphones and turns on Active Noise Cancellation; the Hearphones bury that vital function on a tiny icon inside the Bose app, requiring many seconds to start and activate.
The IQbuds app (and, presumably, the bud firmware) does not allow assigning any tap function to any bud + tap pattern. For example, there’s no way to access both “change location” and “change focus” by tapping, because both those functions can be activated only by the right bud’s long tap: you may select one or the other. Weirdly, volume and media controls appear nearly everywhere and, if double taps worked, they’d be useful.
The Hearphones are much better at muting relatively quiet ambient sound, to the extent that I thought the IQbud “World off” function didn’t work. It does, even though it seems tuned to suppress much higher noise levels. Both do a surprisingly good job suppressing loud yard tools, perhaps due to my inability to hear frequencies over a few kHz.
The IQbud noise suppression exhibits horrible gain pumping in noisy environments and windy conditions. It rolls off the overall gain and filters the higher frequencies as the ambient noise increases, then restores them in a rush as the noise subsides: repeating the cycle as the noise level changes. This is very unpleasant and, AFAICT, there is no way to forcibly set a specific gain / bandwidth other than turning the suppression completely off, which misses the point.
Bottom line: I use the IQbuds and they definitely help my hearing, but I don’t particularly like them.
To be fair, I don’t like the Hearphones necklace very much, either, even though, overall, Bose did a better job with the actual earpieces.
The objective being to reduce the number of onion maggots in Mary’s Vassar Farm plot without chemical agents, I conjured sticky trap screen frames from the vasty digital deep:
Sticky Trap – first production run
Each one contains half a sheet of yellow sticky plastic, which is easy enough to cut before peeling off the protective covering sheets. The cage is half-inch galvanized hardware cloth snipped with hardened diagonal cutters. A bead of acrylic adhesive around the base holds the cage in place
Although you can deploy sticky sheets without cages, they tend to attract and affix beneficial critters: butterflies, small birds, furry critters, toads, gardeners, and the like. We don’t know how effective the cages will be, but they seemed better than nothing.
They mount on ski poles cut in half:
Sticky Trap – ski pole installed
And on fence posts around the perimeter:
Sticky Trap – angle bracket installed
To my untrained eye, some of those doomed critters are, indeed, onion maggot flies. The rest seem to be gnats and other nuisances, so IMO we’re applying population pressure in the right direction.
Each base-and-cap frame takes about three hours to print, so I did them one at a time over the course of a few days while applying continuous product improvement.
The sheets rest on small V blocks intended to keep them centered within the cage:
Sticky Sheet Cage – angle bracket – solid model
The ski pole attachment must build with the cap on top, but it bridges well enough for the purpose:
Sticky Sheet Cage – ski pole – solid model
The overhanging hooks on the blocks (just barely) engage the grid to keep the lid in place, while remaining short enough to not droop too badly. You could probably delete the hooks from the bottom plate, but they align the cage while the adhesive cures.
The sheets tend to bend in the middle, so I’ll stick a thin slat or two vertically to keep them straight.
This file contains hidden or bidirectional Unicode text that may be interpreted or compiled differently than what appears below. To review, open the file in an editor that reveals hidden Unicode characters.
Learn more about bidirectional Unicode characters
For what should be obvious reasons, we armored Mary’s “kitchen garden” with buried concrete blocks and deer fence. I secured the fence to 7 foot plastic-coated steel-core posts strapped to shorter stakes supporting the lower wire fence, using cable ties we both knew wouldn’t survive exposure to the sun.
As part of the spring garden prep, I summoned proper supports from the vasty digital deep:
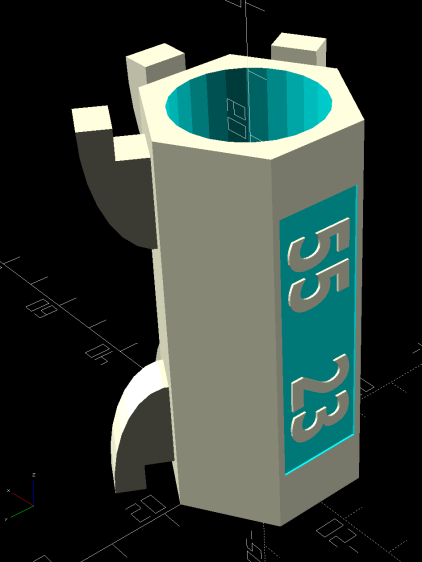
Deer Fence Hanger – Build view
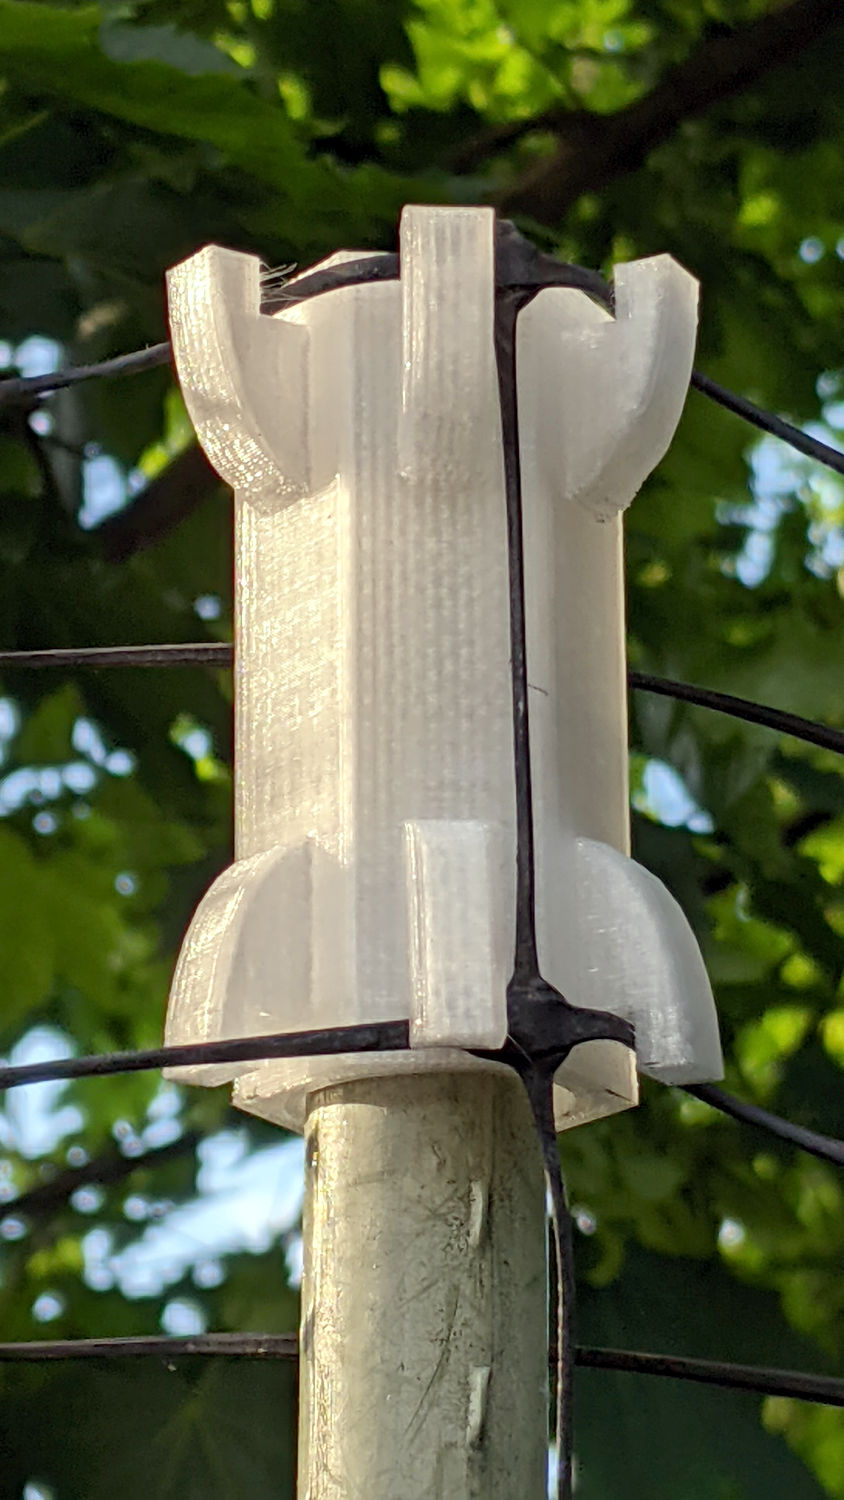
The general idea is to plunk one atop each post and tangle wrap the netting through the hooks, thusly:
Deer Fence Hanger – installed
The garden looks like we killed an entire chess set and impaled their carcasses as a warning to others of their kind, but the fence now hangs neatly from the top of the posts rather than drooping sadly.
Each one of those things takes nigh onto two hours to emerge from the M2, so I printed them one by one over the course of a few days while making continuous product improvements.
The “natural” PETG isn’t UV stabilized, either, but it ought to last longer than those little bitty nylon cable ties. We shall see.
This file contains hidden or bidirectional Unicode text that may be interpreted or compiled differently than what appears below. To review, open the file in an editor that reveals hidden Unicode characters.
Learn more about bidirectional Unicode characters
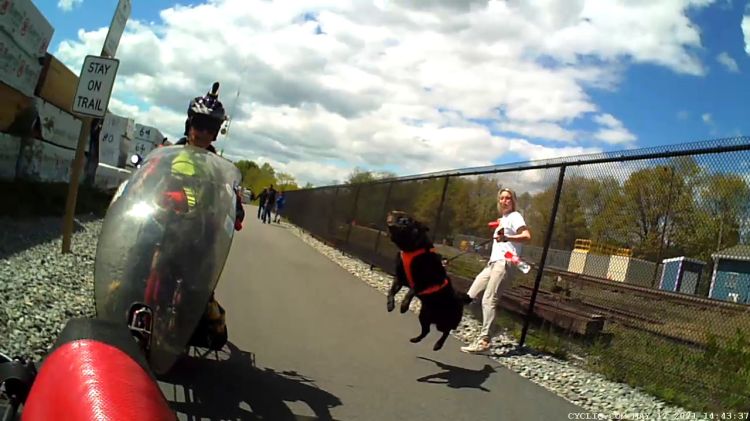
We’re riding southbound on the recently opened section of the Empire State Trail, just south of Hopewell Junction, and are approaching a dog walker totally face-sucked by her phone in the middle of the path:
Empire State Trail – Dog Lunge – 2021-05-12 – 0
Mary has been dinging her bike bell for the last few seconds and finally manages to break through:
Empire State Trail – Dog Lunge – 2021-05-12 – 1
The dog walker leans against the fence while pulling on the leash as hard as she can, as if she knows the dog poses a threat:
Empire State Trail – Dog Lunge – 2021-05-12 – 2
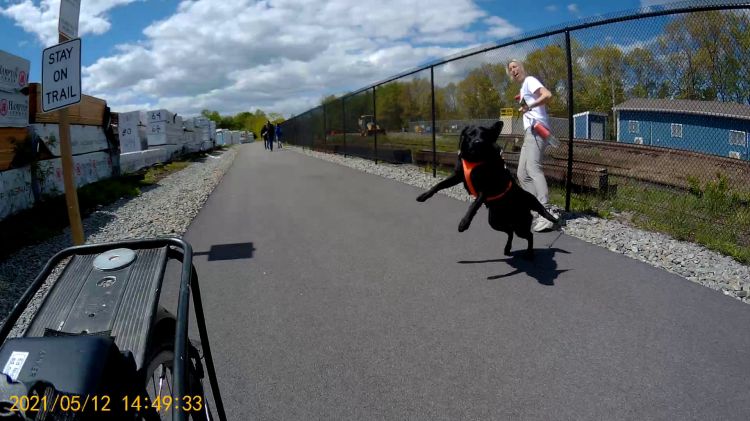
Which it does:
Empire State Trail – Dog Lunge – 2021-05-12 – 3
The leash is too long for close-quarters work:
Empire State Trail – Dog Lunge – 2021-05-12 – 4
Nice teeth, doggie:
Empire State Trail – Dog Lunge – 2021-05-12 – 5
Surely, the dog just wants to lick me to death:
Empire State Trail – Dog Lunge – 2021-05-12 – 6
Tell me again how well-trained this dog is:
Empire State Trail – Dog Lunge – 2021-05-12 – 7
Seven seconds after the first picture:
Empire State Trail – Dog Lunge – 2021-05-12 – 8
The dog also lunged at the pair of bicyclists following us, so perhaps this is how she makes sure it get its exercise during the walk.
As mentioned earlier, the Bafang brake sensors on Mary’s Tour Easy require a magnet on the brake levers to activate the switches. They arrived with disk magnets that did not suit the levers, so I used neodymium “bar magnets”:
Tour Easy Bafang BBS02 – brake sensor – installed
That worked for a few rides, but the alignment turned out to be entirely too critical, because the magnetization is through the bar’s thin dimension, rather than along its length, making the field weakest in the direction of the switch.
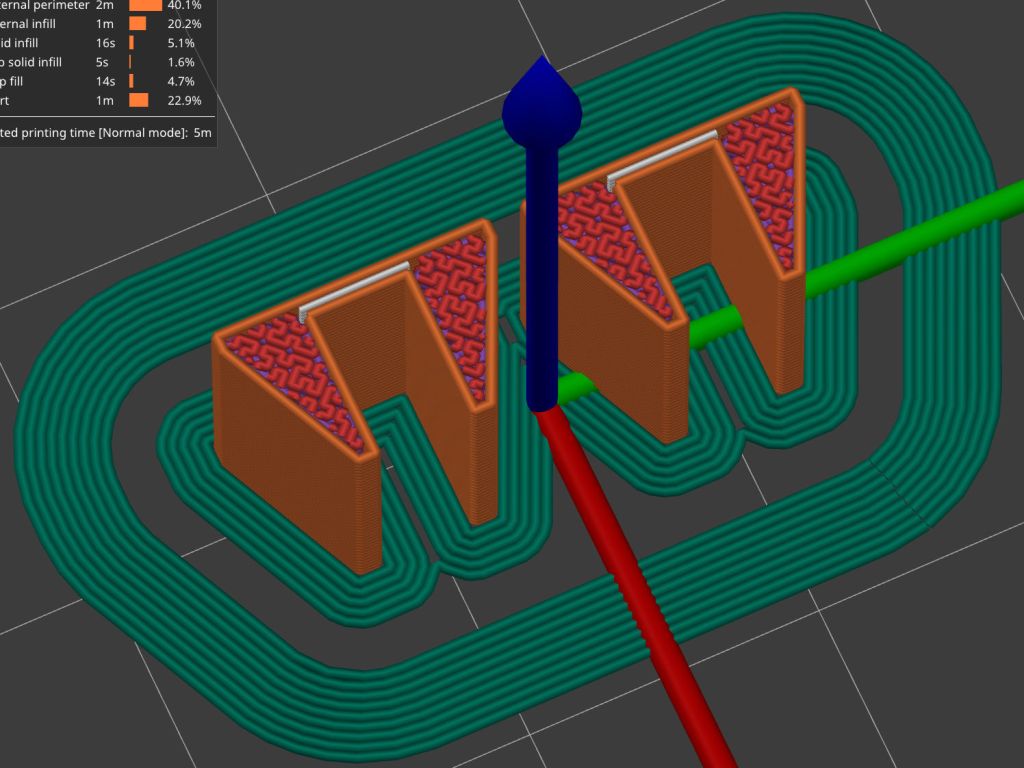
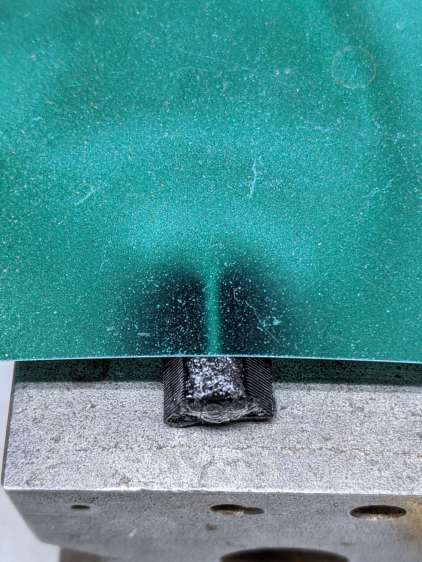
That’s a slightly shorter magnet from a different toothbrush head, cemented edgewise into a holder conjured from the vasty digital deep:
Brake Magnet Mount – PrusaSlicer prevew
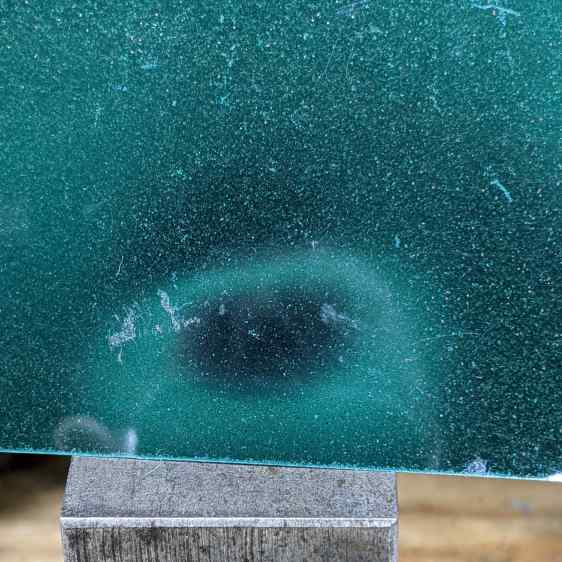
The field is much more uniform on the flat side of the bar:
Neodymium bar magnet – side field
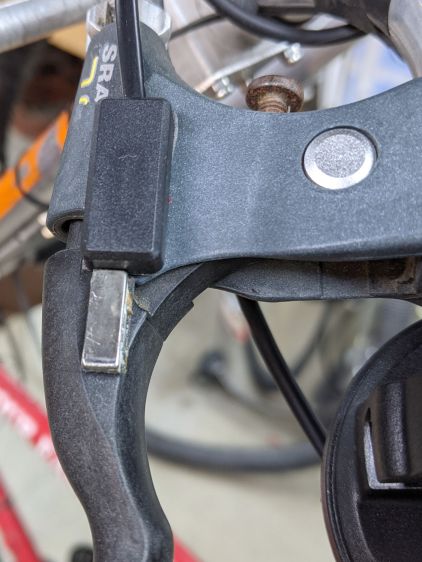
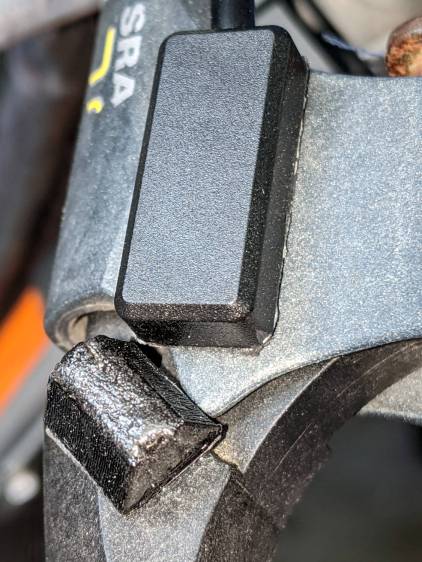
Some double-sided foam tape snuggles the sensor and the magnet together on the brake lever:
Bafang Brake Sensor – released detail
I coated the magnet with JB Plastic Bonder urethane adhesive in the hope of filling any gaps in its nickel coating caused while extricating it from the toothbrush head.
The rusty screw head in the upper right positions the lever at the proper distance from the grip to suit Mary’s hand. An earlier version of the holder shows the alignment:
Bafang Brake Sensor – released position
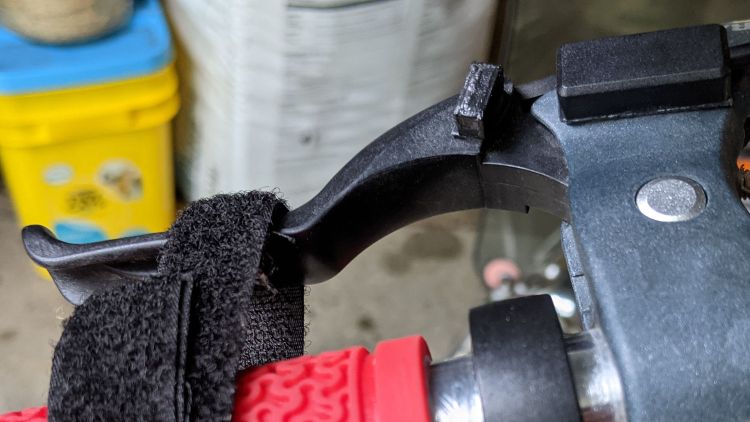
The switch trips (opens) with the lever roughly parallel to the grip, again with the earlier holder:
Bafang Brake Sensor – activated position
A detailed view of the gap with the lever at the tripped position:
Bafang Brake Sensor – activated detail
The levers have enough travel to prevent accidental trips due to light finger pressure, which turned out to be a problem with the original end-on alignment.
The brake pads don’t quite touch the rim when the switch trips, so the motor has plenty of time to shut off before the brakes take effect. It also stops when the pedals stop turning, so we should not see any disagreement between motor and brakes as to the bike’s momentum.
The wider base on the new mounts makes them much more stable on the levers, although I don’t like having them stick up so far. Mounting everything underneath the levers would look better, but any problems will be more obvious with everything in plain sight.
I may affix the magnets directly to the levers with Plastic Bonder if the foam tape doesn’t live up to its reputation. Removing them would be more challenging; a shot with a small chisel should suffice.