The process of switching the laser cutter from “normal” operation to the Ortur YRC-1 rotary and back again requires a checklist:
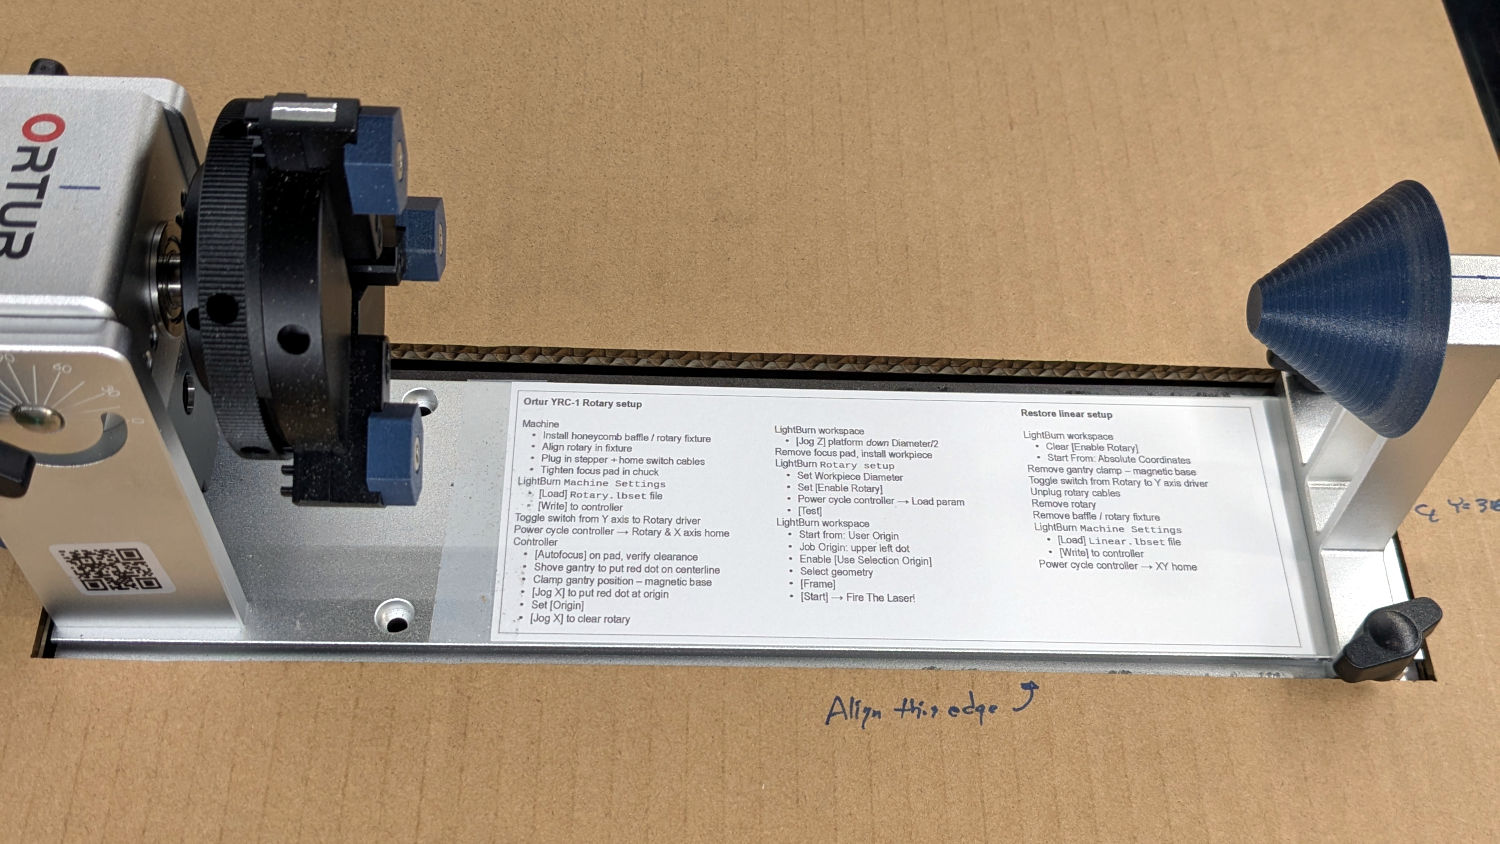
Which looks like this:
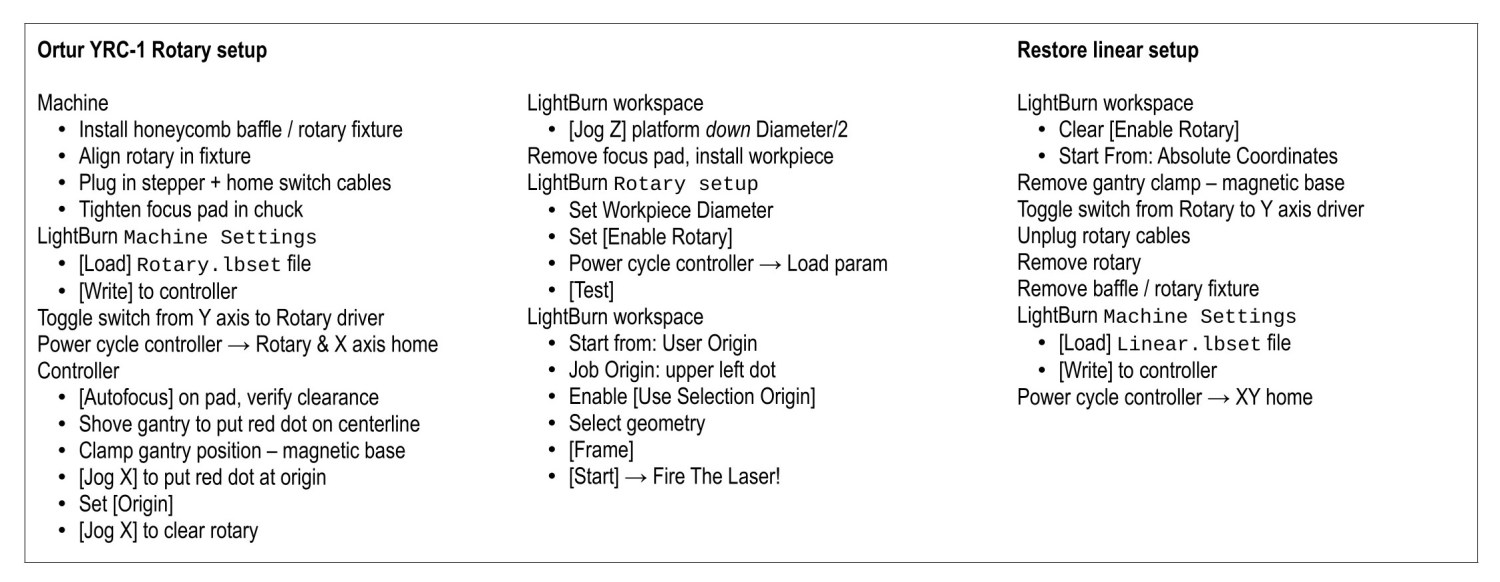
The same thing as a PDF will be more printable or readable.
Previous posts cover what goes into making it work:
- Adding a stepper driver & mode switch
- Rotary wiring, cables, and connectors
- Adding a home switch in a custom cover
- Using a 3 inch focus lens for more clearance
- Printing petite chuck jaws for less interference
- Printing an autofocus pad
- Printing conical tailstock centers
- More on
Home OffsetandFocus Distance - Tweaking the autofocus pen = switch
Notes:
- Always disable the rotary’s stepper driver before connecting or disconnecting its cable.
- The Ortur YRC-1 rotary has a pulley ratio of 1:3, so the step/rev value is three times the DIP switch setting on the stepper driver. For this setup, 1600 → 4800 step/rev.
- The honeycomb frame is a parallelogram, not a rectangle. I align the cardboard baffle / fixture to the bottom edge of the frame and the rotary to the bottom edge of the fixture opening, but your machine will be different. The angular alignment may not be off by enough to matter, but consistency is a virtue.
- The
Rotary.lbsetandLinear.lbsetfiles live on a file server with daily backups. Such backups will come in handy when you inadvertently overwrite one of those files with the other one. Trust me on this. - The
Rotary.lbsetfile does not haveRotary Modeenabled, because the KT332N does not home the Y axis in that mode. If your rotary lacks a home switch, then it doesn’t matter and you’re on your own. - The KT332N controller has a
[Reset]button that allegedly does a power-on reset and reloads all the changedMachine Settings. This sometimes does not work as expected: power-cycling the controller is the only way to be sure. - The autofocus operation must hit the focus pad, which can be ensured by positioning the pen near the pad, jogging the platform a few millimeters under the pen, tweaking X and the gantry while peering down parallel to the pen, then doing the autofocus.
- The focus pad has a crosshair clearing the chonky Ortur 3-step jaws, but I set the controller’s
[Origin]at the foot of the pad’s base for more elbow room. - The Z axis distance field in LightBurn’s
Movewindow does not accept formulas, so you must divide the workpiece diameter by two. Using a focus stick to verify the ensuing nozzle-to-workpiece distance is a Good Idea™. - The LightBurn
Job Origindot must be on the top row, because the KT332N does not go into regions with negative coordinates. With the chuck on the left and the[Origin]just to its right, the upper left dot locks the LightBurn selection to the physical limits. - Selecting
[Use Selection Origin]puts theJob Originat the upper left (per the dot) of whatever you’ve selected, not everything on the LightBurn workspace.[User Origin]then locks the selection to the[Origin]set on the controller.
As the saying goes, it works for me …

Spam comments get trashed, so don’t bother. Comment moderation may cause a delay.