Change the physical sizes in the SVG layered paper generator to match 24×18 inch construction paper:
PageSize = (round(24*INCH,3), round(18*INCH,3))

SheetCenter = (PageSize[X]/2,PageSize[Y]/2)

SheetSize = (610,450)           # overall sheet

AlignOC = (600,440)             # alignment pins in corners
AlignOD = 5.0                    #  … pin diameter

MatrixOA = (590,430)            # outer limit of cell matrix
Tweak the defaults for 59×43 squares:
parser = ArgumentParser()
parser.add_argument('--layernum', type=int, default=0)
parser.add_argument('--colors', type=int, default=8)
parser.add_argument('--seed', type=int, default=1)
parser.add_argument('--width', type=int, default=59)
parser.add_argument('--height', type=int, default=43)
args = parser.parse_args()
Run the program ten times to generate ten SVG images:
for i in {00..09} ; do python Layers\ -\ 24x18.py --layernum=$i --colors=9 > Test_$i.svg ; done
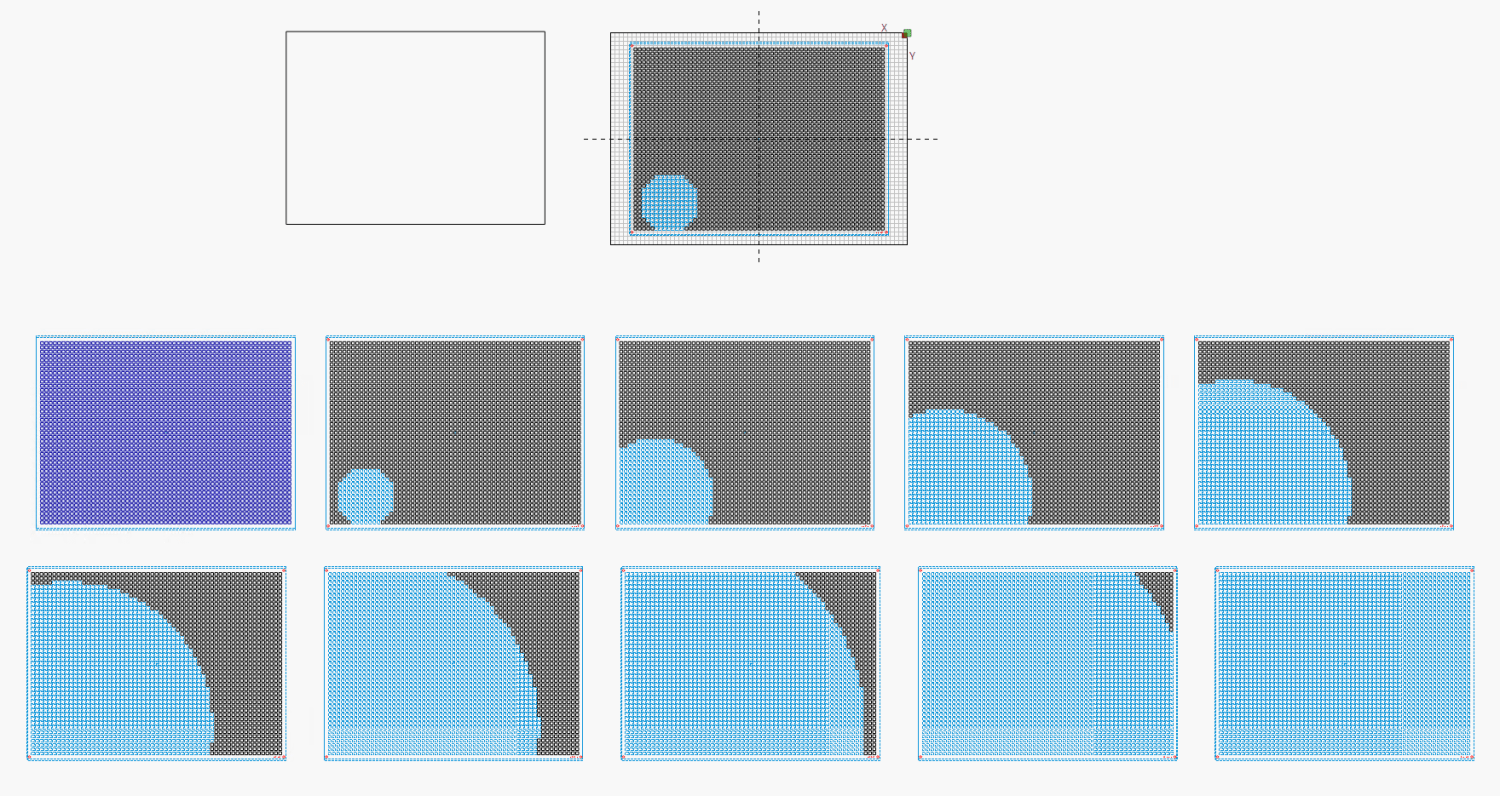
The LightBurn layout dwarfs the machine platform:
Fire The Laser ten times and you get a wall hanging:
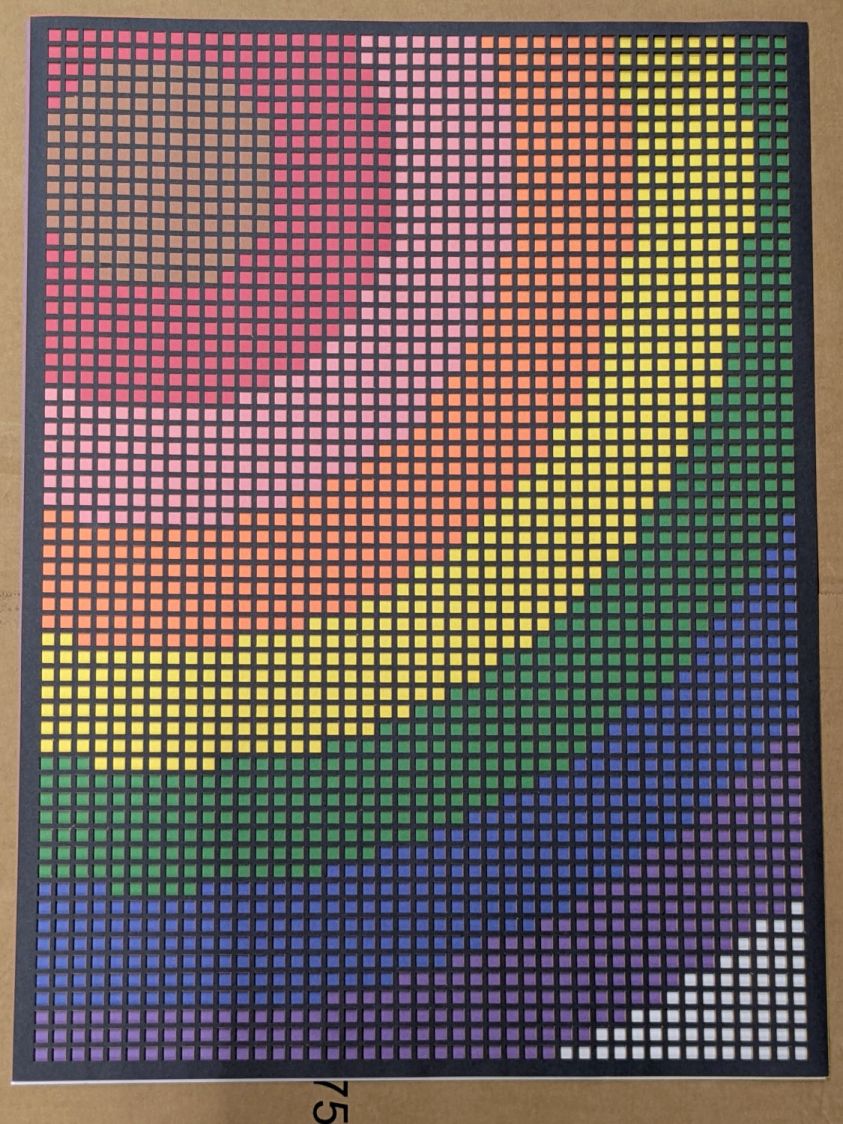
That’s a trial alignment atop a cardboard box on the Basement Shop floor, because gluing those 24×18 inch sheets of paper requires time on the Sewing Table, which is currently occupied by a much higher priority project. The brown innermost circle in the design is entirely separate from the brown Amazon cardboard box underneath everything.
Fairly obviously, you’d want something other than brown at the focal point of that design, but following the EIA color code gives me some confidence the result matches the intention. Feel free to tart it up with your own colors.
I laid a 29×23 inch sheet of sketch paper on the honeycomb, distributed neodymium bar magnets around the perimeter, and cut a 24×18 rectangle out of the middle:
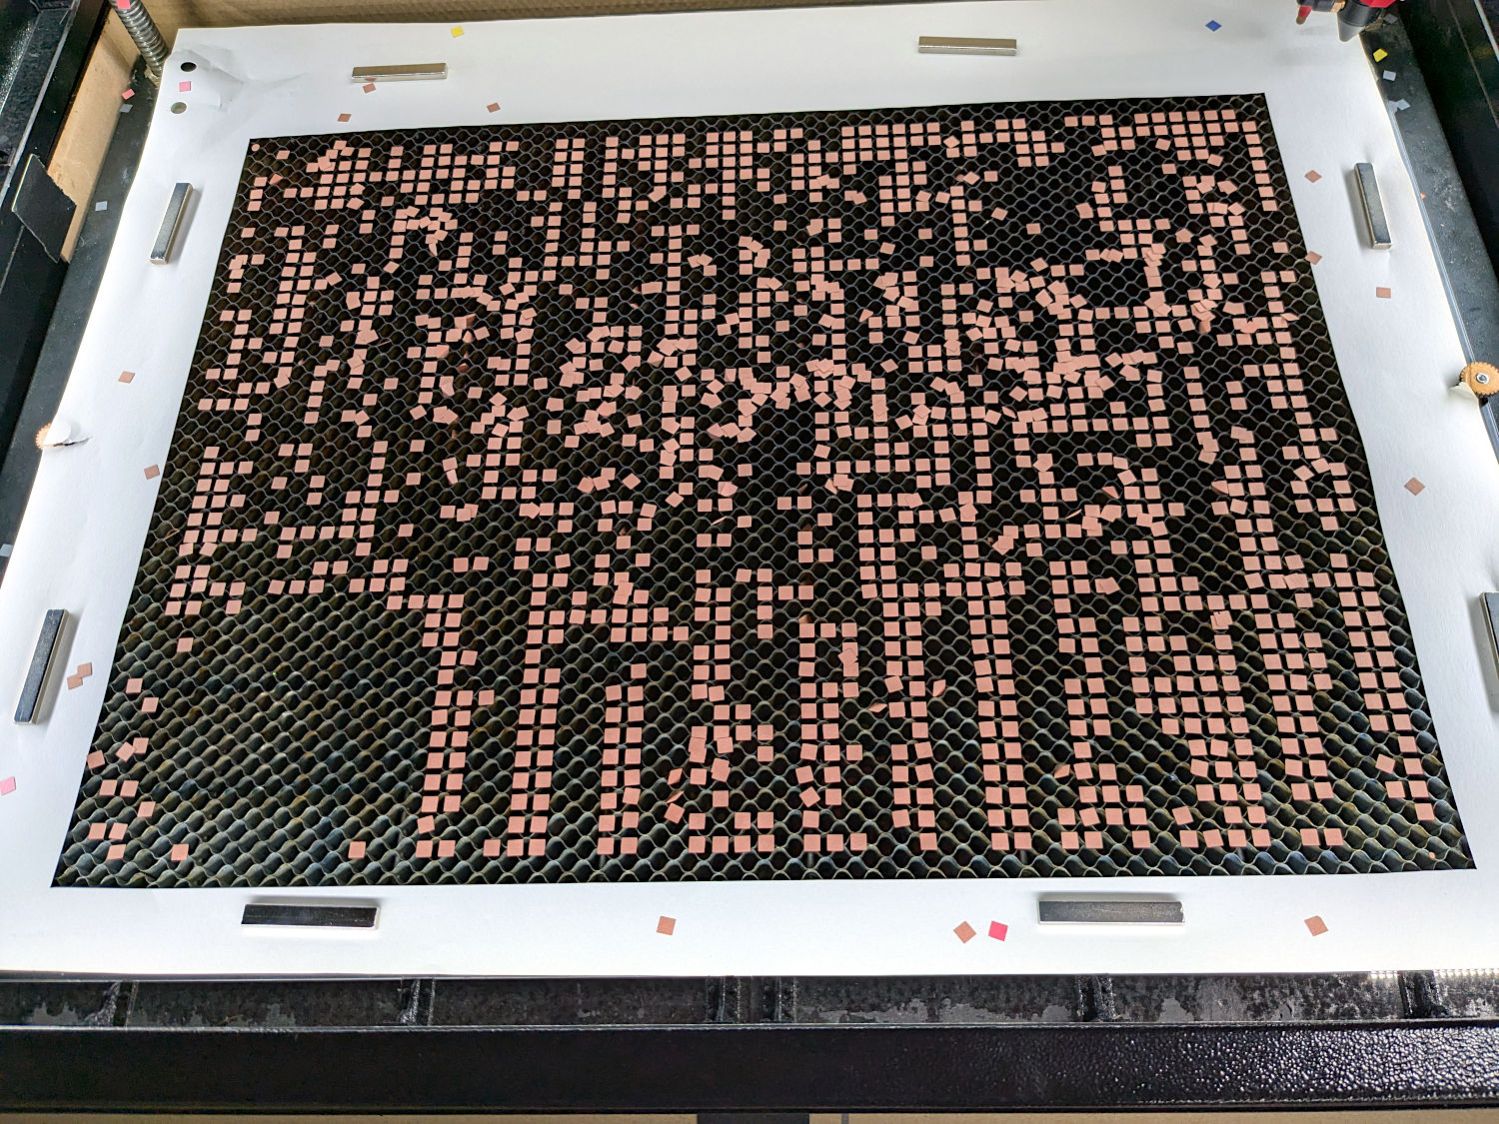
Those squares are the cutouts from the brown sheet, minus what you see in the lead picture.
The black rectangle on the left of the LightBurn layout above is the 24×18 inch cut for the fixture. Centering that rectangle on the LightBurn layout (click-select, Ctrl-D to duplicate, then hit P to move it to the center) means aligning each of the ten patterns requires nothing more than the same click-select / dupe / P, with no delicate fiddling.
Then just lay each colored sheet into the hole and it’s properly aligned. Because the machine homes to the same physical location every time it’s turned on and the fixture is mmm fixed to the platform, cutting all ten sheets over the course of two days proceeded smoothly.
Cutting 2537 holes in the black mask takes a little under an hour:

The other sheets have fewer holes and go progressively faster:

The white sheet on the bottom has four alignment holes and four layer ID holes, so the cuts take a few seconds.
That was easy …
