Along with the Beelink PC, putting the Anker USB hub on the monitor mount pole helped tidy the cables just a little bit:

It’s still jumbled, but at least the cables aren’t wagging the hub.
This clamp needs only one M6 screw into a square nut:

Again better seen in cross-section:
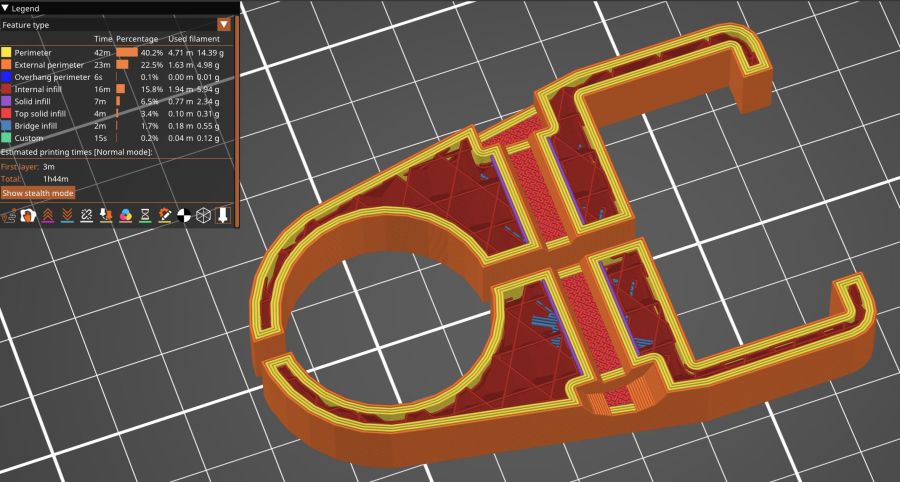
The OpenSCAD code extrudes the shape from a 2D arrangement, then punches the screw through the side:
// Monitor Pole box clamp
// Ed Nisley - KE4ZNU
// 2025-01-23

include <BOSL2/std.scad>

/* [Hidden] */

ID = 0;
OD = 1;
LENGTH = 2;

Protrusion = 0.1;

Box = [22.5,45.5,25.0];         // Z is clamp height
BoxGrip = 5.0;                  // on outer side clearing connectors

PoleOD = 30.5;

WallThick = 5.0;

Kerf = 3.0;                     // clamping space
Clearance = 2*0.2;              // space around objects

Washer = [6.0,12.0,1.5];        // M6 washer
Nut = [6.0,10.0,5.0];           // M6 square nut

MidSpace = 35.0;                // pole to box spacing

ClampOAL = Box.x + MidSpace + PoleOD + 2*WallThick;

//----------
// Build it

        difference() {
            linear_extrude(height=Box.z,convexity=5)
                difference() {
                    hull() {
                        right(MidSpace/2 + Box.x/2)
                            rect(Box + 2*[WallThick,WallThick],rounding=WallThick);
                        left(MidSpace/2 + PoleOD/2)
                            circle(d=PoleOD + 2*WallThick);
                    }
                    right(MidSpace/2 + Box.x/2)
                        square(Box + [Clearance,Clearance],center=true);
                    right(MidSpace/2 + Box.x)
                        square([Box.x,Box.y - 2*BoxGrip],center=true);
                    left(MidSpace/2 + PoleOD/2)
                        circle(d=PoleOD + Clearance);
                    square([2*ClampOAL,Kerf],center=true);
                }
            up(Box.z/2) {
                xrot(90)
                    cylinder(d=Washer[ID] + Clearance,h=2*Box.y,center=true,$fn=6);
                fwd(Box.y/2 - Washer[LENGTH])
                    xrot(90) zrot(180/12)
                        cylinder(d=Washer[OD] + Clearance,h=Box.y,center=false,$fn=12);
                back(Box.y/2 + Nut[LENGTH]/2)
                    xrot(90)
                        cube([Nut[OD],Nut[OD],2*Nut[LENGTH]],center=true);
            }
        }
The alert reader will have noticed I didn’t peel the protective film off the hub, which tells you how fresh this whole lashup is.

Comments
2 responses to “Monitor Mount: USB Hub Clamp”
I printed a bunch of little clamps that clipped onto the shanks of the 3/8″ bits for my Sherline mill, so I could set them to the same stickout, and about two years later went back to use that set of bits, and all the 3d PLA prints were cracked. Similarly I recently took apart a Mendelmax from about 9 years ago, and many of its brackets were cracked. I feel like a lot of prints don’t do well under indefinite tension, which is kind of frustrating.
(I’m digging through your site relearning stuff about mill tool length probes and switches…)
That’s part of my motivation for reporting on how things survive over the course of years. I hope carbon fiber PETG behaves better than plain PETG, but IMO the “fibers” are just too short to do anything useful.
And the Sherline remains not set up, due to a chronic outlet shortage down there …