The kitchen counter has only two useful places for the cutting board and the spot Mary favors puts a distinct swale under one corner. A bit of measuring and solid modeling produced a simple shim to make the answer come out right:

The basic shape is union() of a trio of hull() operations forming the three sides, with the text label as a separate object to verify I understood how to build a multi-material object.
Export it as a 3mf file, open it in PrusaSlicer, slice, print:
Putting the label on the bottom surface takes advantage of the nubbly finish on the Textured Steel Sheet to make it look like it just grew in there.
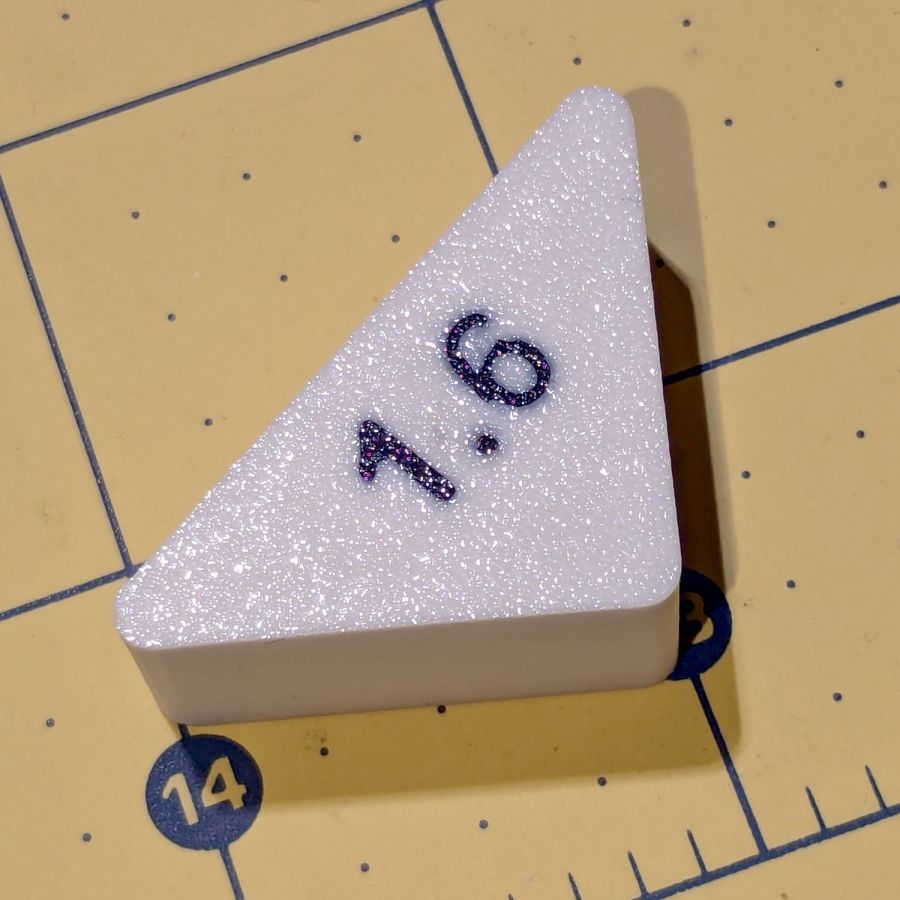
The label is just barely visible from the top, despite extending only 1/4 of the way through the 1.6 mm bottom slab:

So white PETG needs more than 1.2 mm of thickness to hid a black feature. Today I Learned, etc.
Multi-material printing produces a Wipe Tower to hold all the extruded junk during color changes:
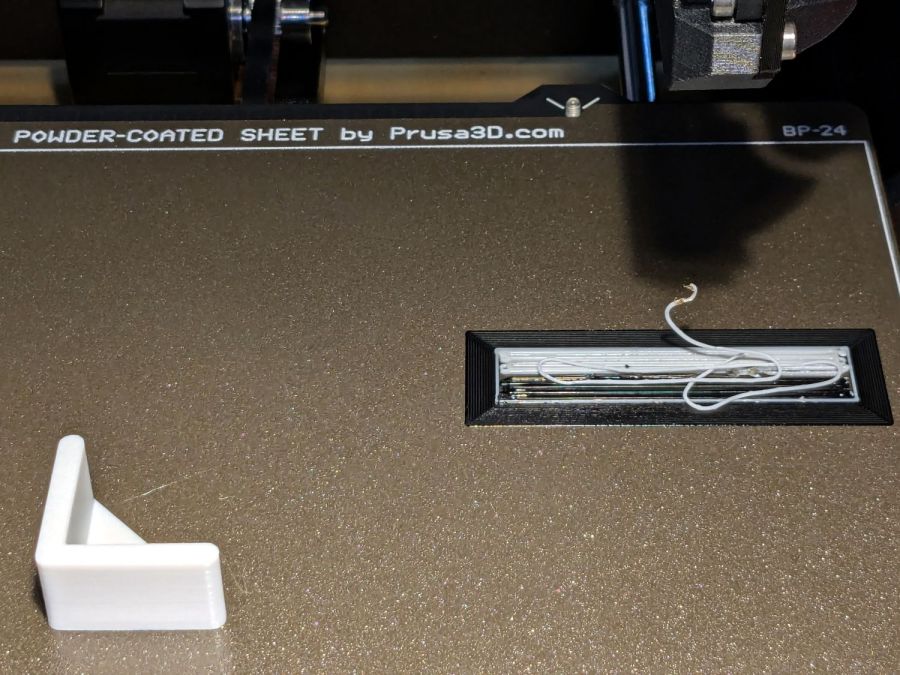
The curl under the nozzle comes from the final ramming used to shape the end of the filament into a point for reliable material / color changing.
Although a shim is something of a nuisance, it works perfectly:
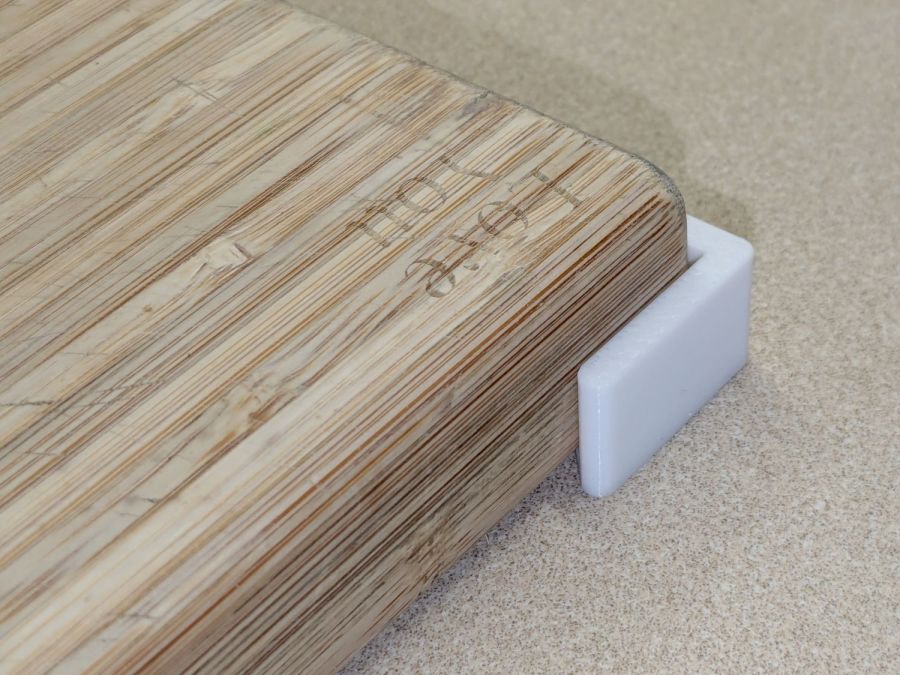
Much easier than installing an L-shaped Corian slab with a sink cutout!
The faded engraving dates back to the early days of the laser …
The OpenSCAD source code as a GitHub Gist:
| // Cutting Board alignment shim | |
| // Ed Nisley KE4ZNU – 2024-08-20 | |
| //—– | |
| // Dimensions | |
| ShimThick = 1.6; // thickness of shim under board | |
| /* [Hidden] */ | |
| ShimOA = [25.0,25.0,15.0]; // overall size of shim | |
| WallThick = 4.0; | |
| ShimRadius = WallThick/2; | |
| LabelThick = ShimThick/4; | |
| NumSides = 3*4; | |
| //—– | |
| // Build it | |
| union() { | |
| hull() | |
| for (i=[0,1]) | |
| translate([i*(ShimOA.x – ShimRadius),0,0]) | |
| cylinder(r=ShimRadius,h=ShimOA.z,$fn=NumSides); | |
| hull() | |
| for (j=[0,1]) | |
| translate([0,j*(ShimOA.y – ShimRadius),0]) | |
| cylinder(r=ShimRadius,h=ShimOA.z,$fn=NumSides); | |
| hull() { | |
| for (i=[0,1]) | |
| translate([i*(ShimOA.x – ShimRadius),0,0]) | |
| cylinder(r=ShimRadius,h=ShimThick,$fn=NumSides); | |
| translate([0,1*(ShimOA.y – ShimRadius),0]) | |
| cylinder(r=ShimRadius,h=ShimThick,$fn=NumSides); | |
| } | |
| } | |
| color("Black") | |
| translate([ShimOA.x/3,ShimOA.y/3,LabelThick]) | |
| rotate([180,0,90 + 45]) | |
| linear_extrude(height=LabelThick,convexity=20) | |
| text(text=str(ShimThick),size=6,spacing=1.00, | |
| font="Arial:style:Bold",halign="center",valign="center"); | |

Comments
2 responses to “Cutting Board Shim”
Do you used 2-sided foam tape keep the Shim in place?
Of coarse this would result in the cutting board having only one proper orientation – sorta like a polarized 2-prong plug
Nope! A bulldog clip on the wire rack holding the lesser cutting boards keeps it out of the way when not in use.
I really must plane / sand the board surfaces flat someday, but … that definitely won’t eliminate the shim, because the countertop has a real swale.