The story so far:
Daubing urethane adhesive into each pocket, sliding a tiny magnet atop the goo, and flipping them over onto a sheet of plastic atop the surface plate to let them cure went about the way you’d expect. Given the state of my fingertips, however, I was not about to fiddle with the phone / camera / anything, but it really did happen.
The final result:
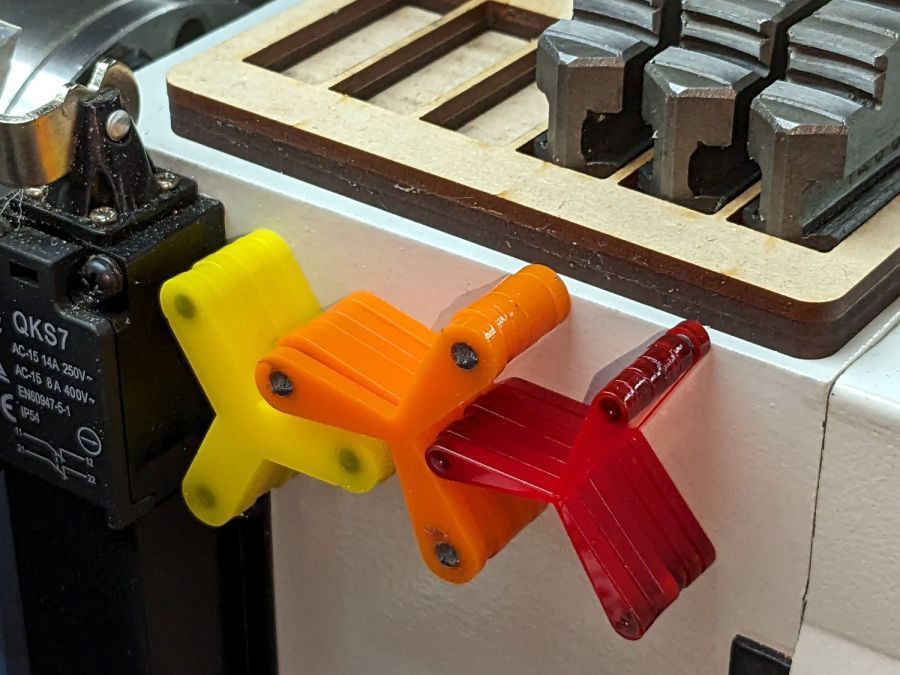
The alert reader will notice the slight gap under the left leg of the first orange stop, which provides a good introduction for a few things that should happen differently the next time I do something like this.
To my credit, I got all but one of the 54=3×6×3 magnets into their pockets in the same orientation. That’s gotta count for something and, hey, that orange stop sticks to the chuck just fine.
That one also suffered from my failure to switch the Axis UI to metric units before touching off the Z axis at 0.1 mm, thereby putting the Z=0.0 level 2.53 mm below the surface. Fortunately, the 3 mm MDF baseplate prevented that error from creating three pockets in the tooling plate, although it did produce holes instead of pockets in the stop.
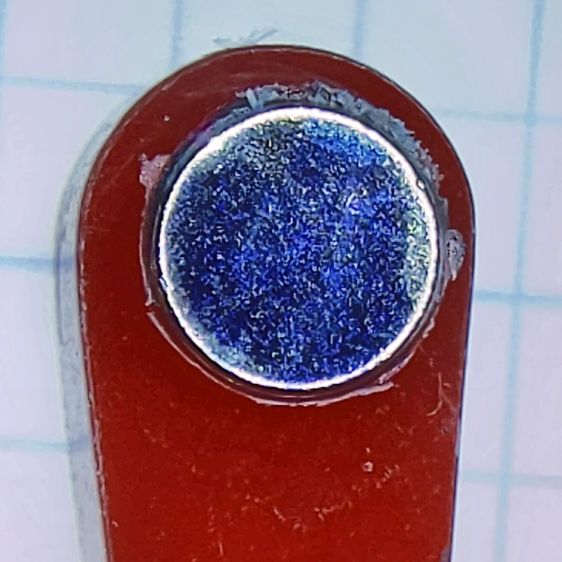
I dropped the magnets into the thru-cut stop on the surface plate and dabbed some adhesive atop the magnets to bond them into their holes. This worked fine and led me to suspect the easiest way to make these stops would be to just laser-cut the holes and skip the whole CNC thing.
The disadvantage of cutting the holes through is that adhesive will inevitably ooze out around the magnet and mess up the bottom surface of the stop. Sticking both the stop and the magnets onto kapton tape seems like it should seal well, but liquid always finds a way.
In any event, the two-part urethane adhesive (JB Plastic Bonder) expands slightly as it cures, which is great for gap filling and not so good for precision bonding. With the pockets in the other 17 stops arranged open-side down, the magnets held themselves firmly to the plastic sheet atop the surface plate and the expanding urethane pushed the acrylic stop upward, leaving the magnets standing slightly proud of the stop’s surface:
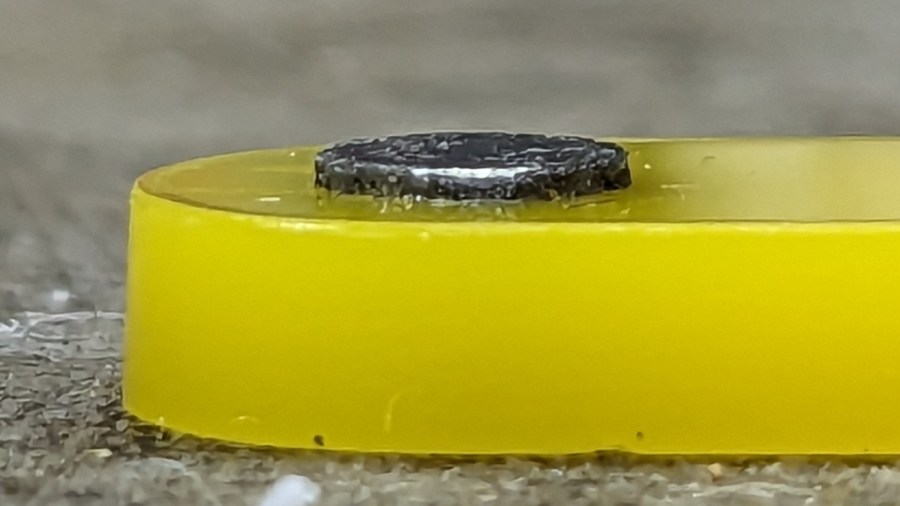
Not by much, mind you, but not what I wanted, having painstakingly cut the pockets 2.2 mm deep for a 2.0 mm magnet.
Next time, dot some slow-cure clear pouring epoxy in each pocket, put the stop on the surface plate with the pocket facing up, then drop the magnet in place. The magnet pulls itself into the pocket, the epoxy doesn’t expand, any overflow will fill in over the magnet, and anything sticking out can be sanded off.
The fixtures worked well and aligned perfectly on the Sherline’s tooling plate. The 0.1 mm outset around the stops in the chipboard probably wasn’t needed, although the total repeatability seemed to be around 0.2 mm and pocket position errors are visible only on the smallest (red) stops:
All in all, this turned out pretty well. Next time will be even better!
And, perhaps, making the stops with 3D printing would be even better than that, at the cost of the usual gnarly surface finish.

Comments
One response to “Mini-Lathe Chuck Stops: Better Next Time”
[…] the kind of job chuck stops really […]