Ed Nisley's Blog: Shop notes, electronics, firmware, machinery, 3D printing, laser cuttery, and curiosities. Contents: 100% human thinking, 0% AI slop.
With the information you shared, we were able to successfully model and reconstruct the drive wheel in only a couple of days.
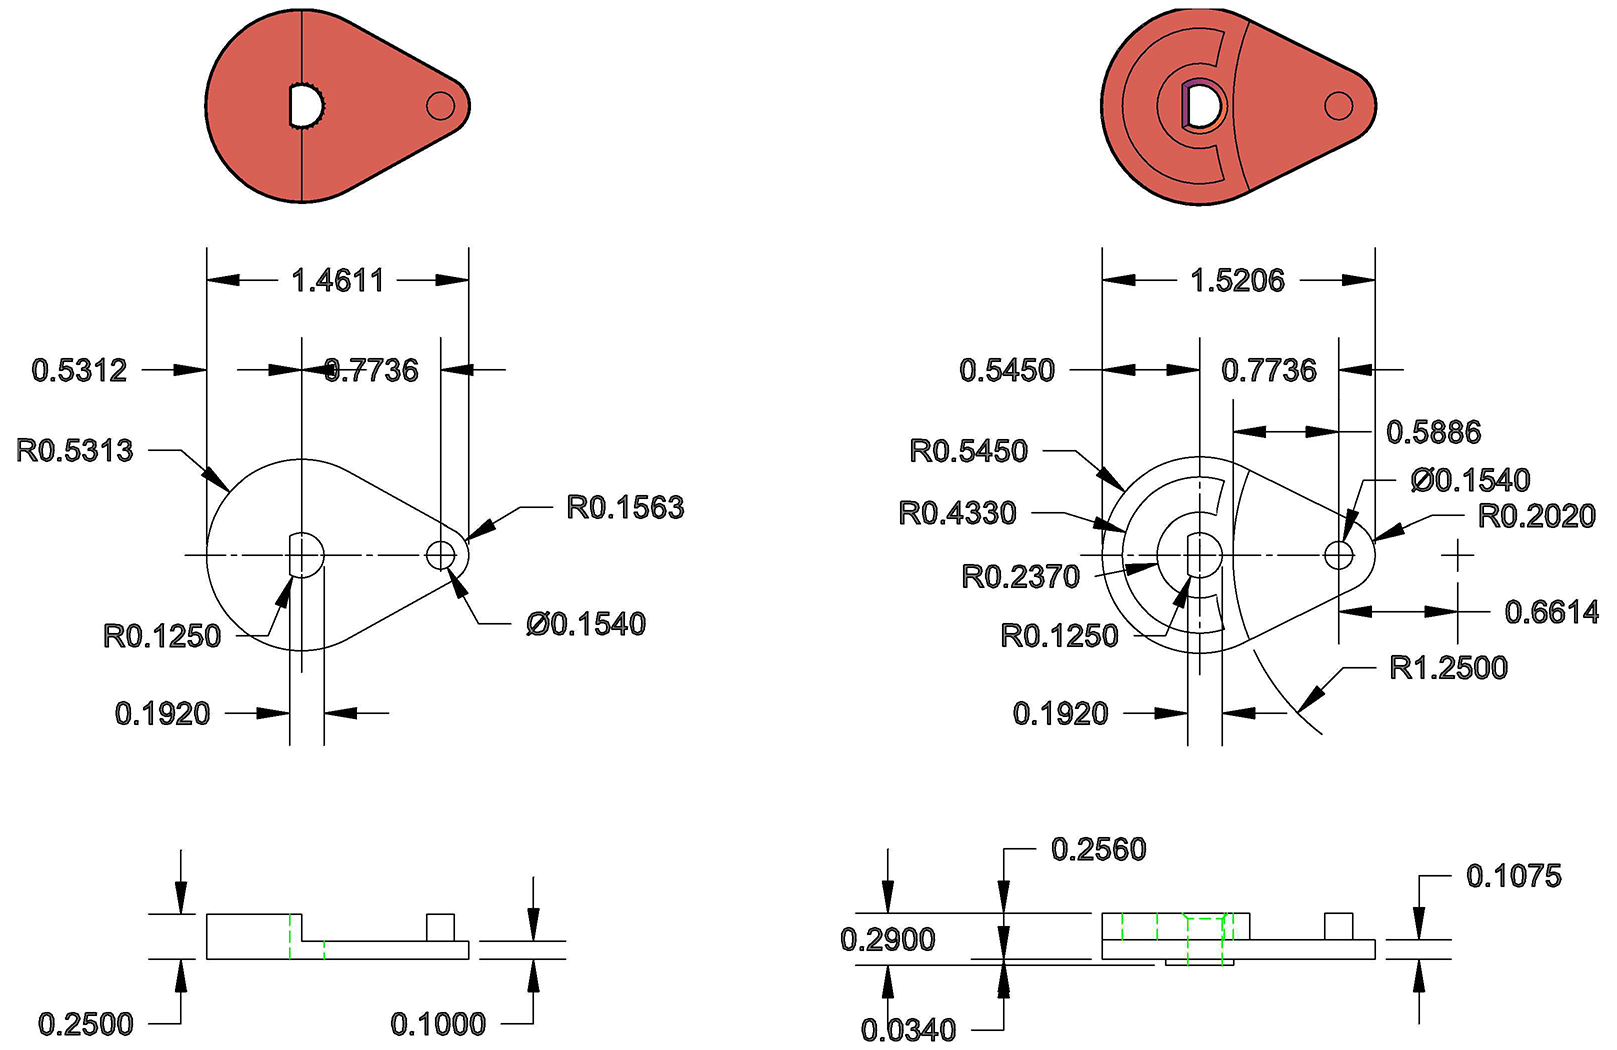
One useful thing we discovered is there’s a lot of room for error – so long as the pin catches and the wheel isn’t slipping on the motor shaft, the mechanism will work. The grooves and the interior radius of the original part aren’t critical.
Because of your heads up about Geneva wheels, I found this excellent website – https://newgottland.com/2012/01/08/make-geneva-wheels-of-any-size/ – which includes a link to a Geneva wheel calculator. With the measurements you sent and a measurement off of the pen carousel, the calculator generated near perfect dimensions for a replacement. There was a little sanding and rounding to fit but it was certainly within tolerance.
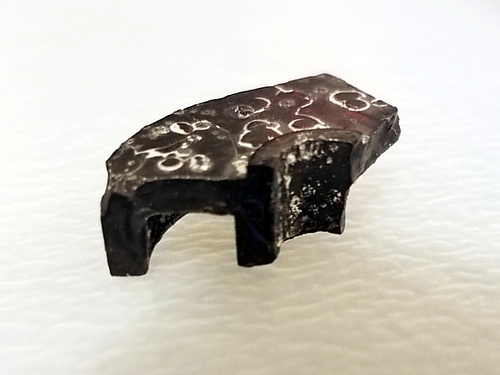
Interestingly, the pieces of the drive wheel that I pulled out of the case revealed a small hidden detail. On the underside, there’s a collar around the motor shaft that gives the cam an extra ~.03″ thickness. Presumably this is to help reduce friction during travel. Our prototype doesn’t take this detail into consideration – we’ve had no issues with friction, and we compensated for the thickness by making the pin a little longer – but it’s meaningful to note.
HP7475A Carousel Drive – cam1
The broken pieces also confirmed the thicknesses and radii of the original part, and so my partner was able to build an accurate technical drawing of the drive wheel for future fabrication.
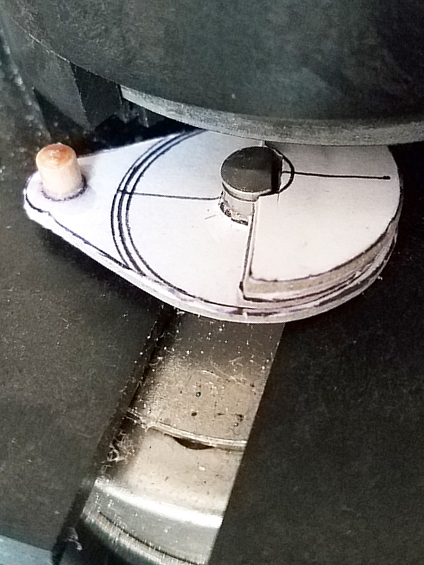
While we intend to make a better replacement, our prototype was built with dense 1/8″ mat board, PVA glue, binder clips, and a short piece of wooden dowel from our bits box. Basically just stuff we had kicking around the studio. It’s held up shockingly well. A little dented around the edges from hitting the carousel, but there’s no slippage. I’m thinking I’ll use it until it falls apart, just to see how long it takes.
HP7475A Carousel Drive – repaired – cam2
Attached, find a technical drawing comparing the original drawing to our prototype (measured in good old fashioned 1980s inches); a photo of the retrieved piece, showing the collar on the reverse side; and a photo of the prototype in place. Feel free to share these – everyone deserves a working plotter!
7475a drive wheel
Once the carousel was working, my roommate – an electrical engineer – hooked me up with a custom serial cable, a Raspberry Pi, and a crash course in Python, so now that I can communicate with the plotter, the possibilities are staggering. I’m thrilled to add this machine to my print studio arsenal!

Comments
One response to “HP 7475A Plotter: Rebuilt Carousel Drive”
[…] [Update: It lives! ] […]