The Smell of Molten Projects in the Morning

Ed Nisley's Blog: Shop notes, electronics, firmware, machinery, 3D printing, laser cuttery, and curiosities. Contents: 100% human thinking, 0% AI slop.

Month: February 2017

  • Vacuum Tube Lights: Plate Wire Plug

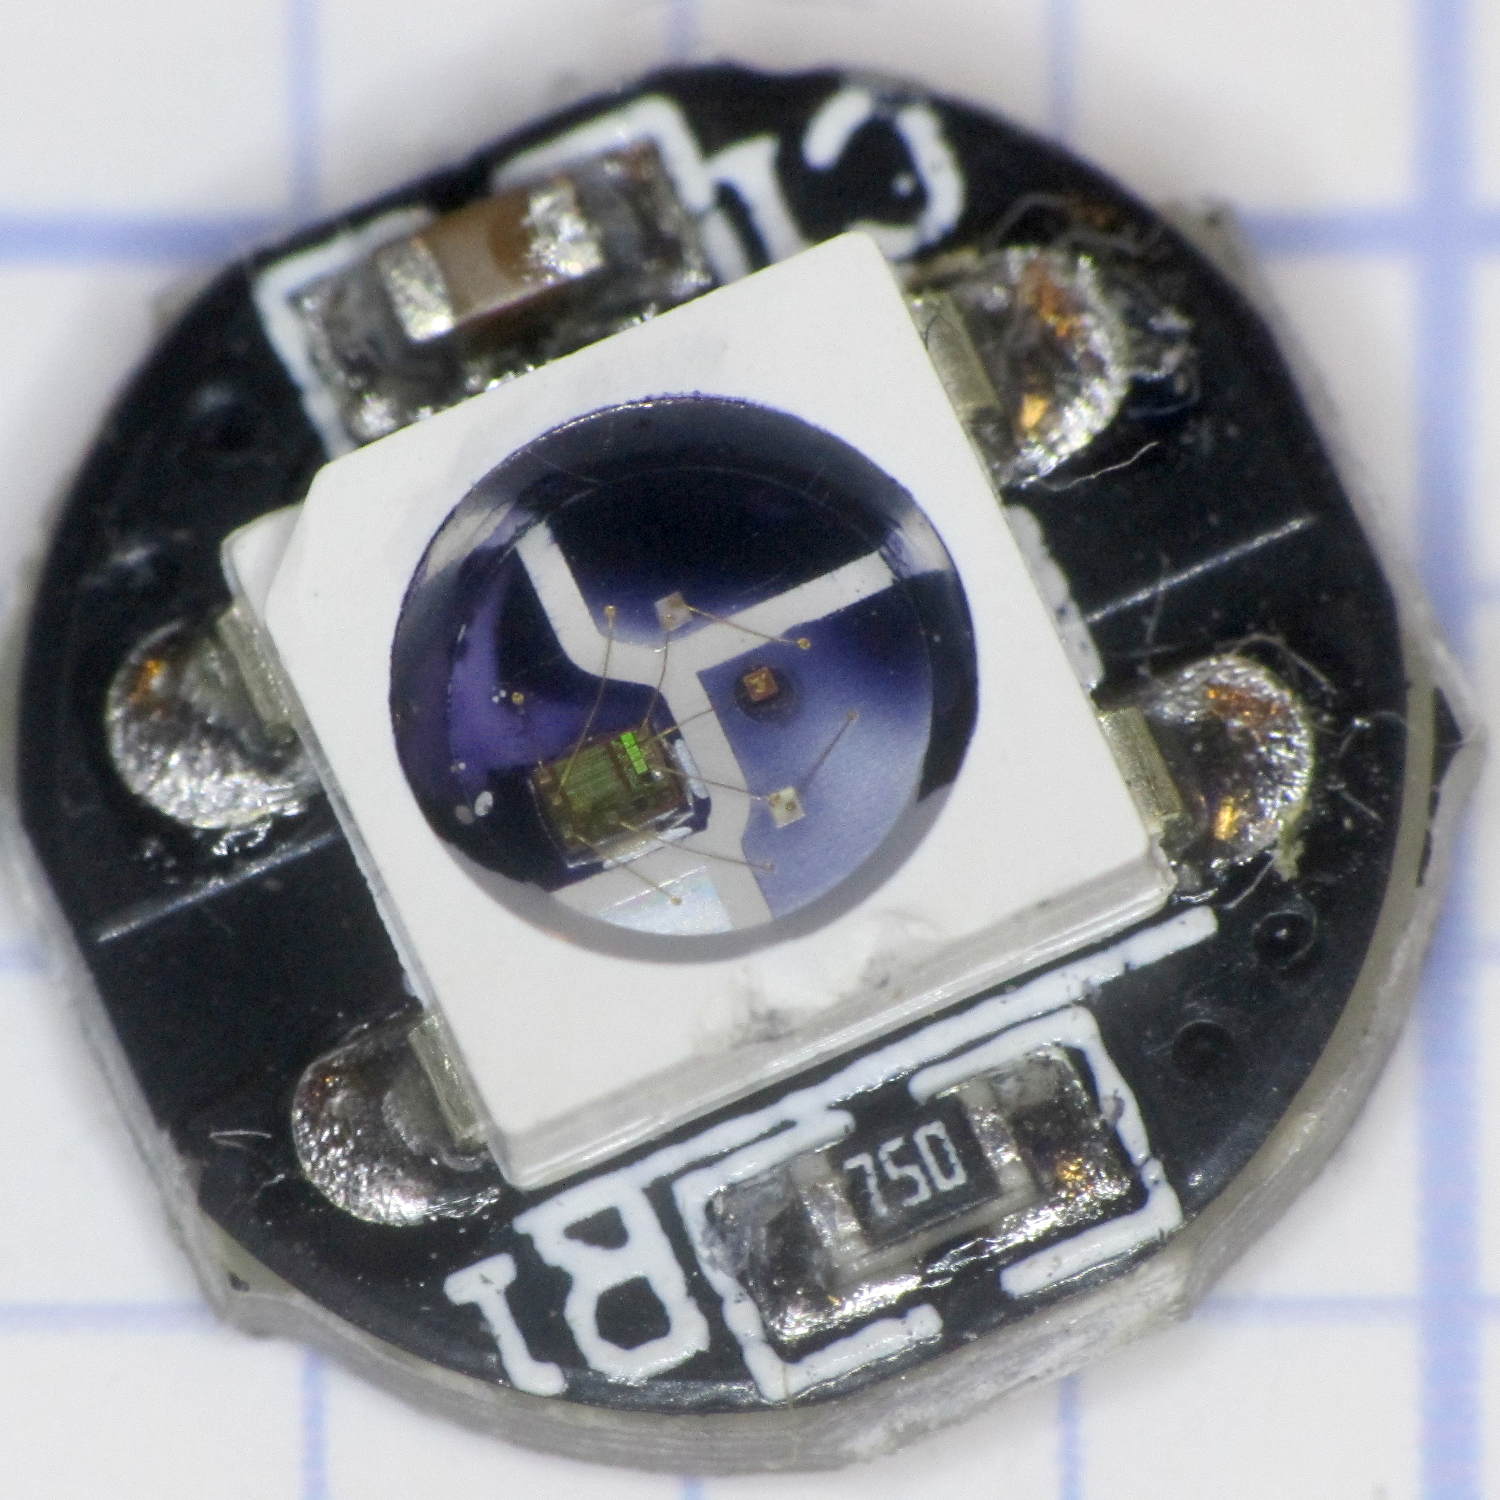
    After replacing the WS2812 LED in the 21HB5A socket, I drilled out the hole in the disk platter for a 3.5 mm stereo jack, wired a nice knurled metal plug onto the plate lead, and it’s all good:

    21HB5A - Audio plug cable
    21HB5A – Audio plug cable

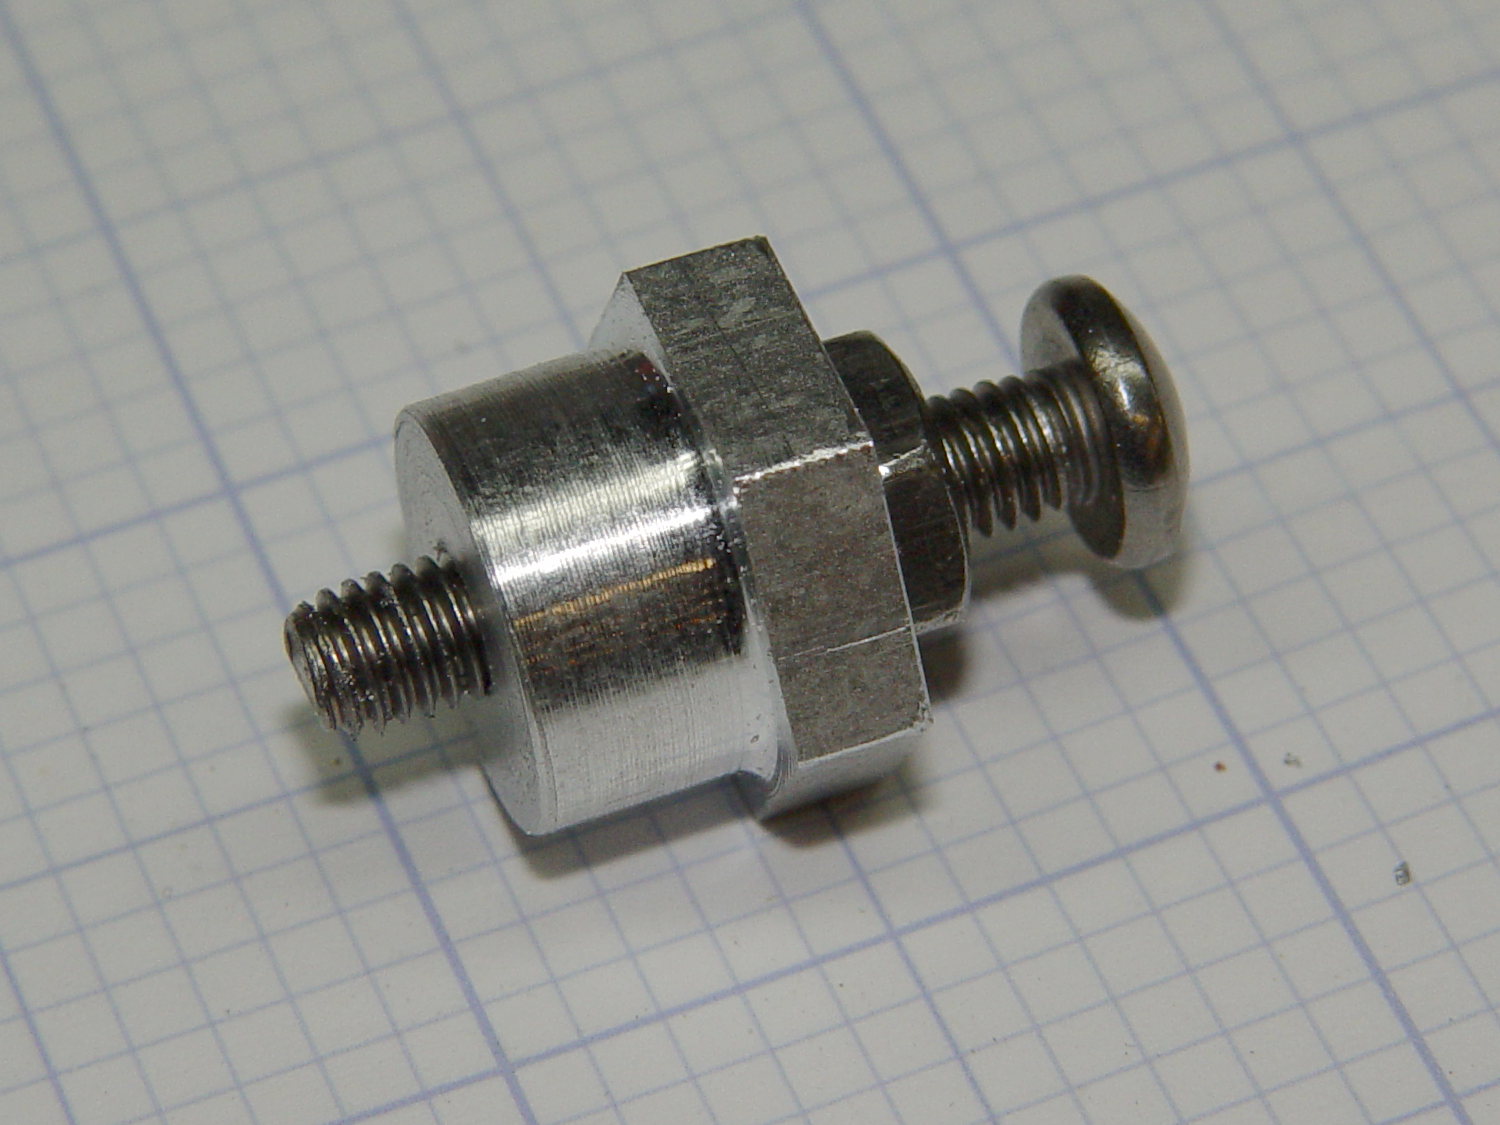
    The plug had a rather large cable entry that cried out for a touch of brass:

    Audio plug - brass trim turning
    Audio plug – brass trim turning

    Fancy plugs have a helical spring strain relief insert about the size & shape of that brass snout; might have to buy me some fancy plugs.

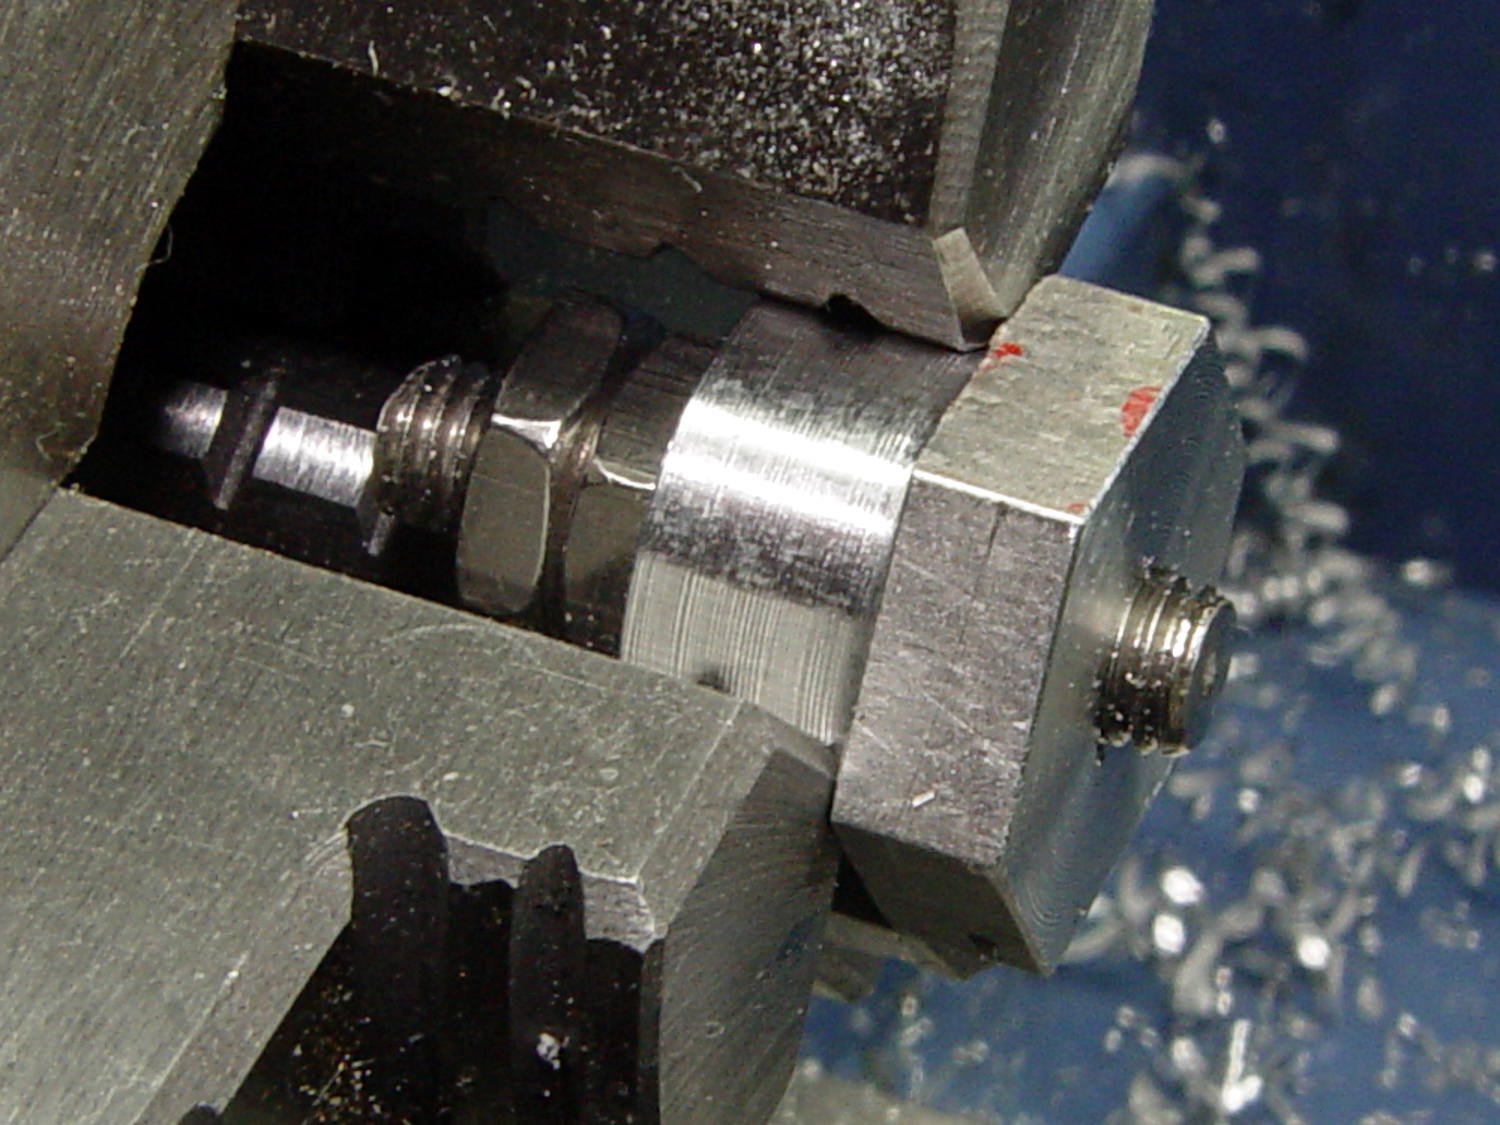
    This time, I got the alignment right by clamping everything in the lathe while the epoxy cured:

    Audio plug - brass trim gluing
    Audio plug – brass trim gluing

    I flipped the drill end-for-end, which was surely unnecessary.

    It’s now sitting on the kitchen table, providing a bit of light during supper while I wait for a WS2812 controller failure. Again.

  • Cheap WS2812 LEDs: Leak Tests vs. Failures

    Applying the Josh Sharpie Test to three defunct WS2812 LEDs produced one failure:

    Failed WS2812 LED - leak view 2
    Failed WS2812 LED – leak view 2

    The other side shows where the ink stopped seeping under the silicone:

    Failed WS2812 LED - leak view 1
    Failed WS2812 LED – leak view 1

    I don’t know if I melted the side of the LED or if it came that way, but, oddly, there’s no leakage on that side.

    This LED matches the layout of Josh’s “crappy” LEDs, as does the entire lot below, although I suspect that’s more coincidence than anything else; there aren’t that many different layouts around.

    Flushed with success, so to speak, I ran the Sharpie around all the unused LEDs from that order:

    WS2812 LEDs - leak test
    WS2812 LEDs – leak test

    I tested the process on the three LEDs in front, then wiped the ink off with denatured alcohol.

    A closer look shows the ink all around the silicone-to-case border, with plenty of opportunity to seep in:

    WS2812 LEDs - leak test - detail
    WS2812 LEDs – leak test – detail

    After wiping the ink off, none of the 31 unused LEDs showed any sign of poor sealing.

    I haven’t been keeping good records of the failures, but right now I have twelve functional WS2812 LEDs attached to various glass doodads. That leaves 7-ish failed LEDs out of the 15-ish with long term use (not counting four recent replacements).

    In round numbers, that’s a 50% failure rate…

    I should wire up the remaining sheet of LEDs as a test fixture, let them cook for a while, and see what happens.

  • Red Oaks Mill Dam Ice

    Custom-trimmed icicles festoon a tree trunk lodged over the crumbling Red Oaks Mill dam:

    Red Oaks Mill Dam - ice formation
    Red Oaks Mill Dam – ice formation

    Last September those logs were in the same position:

    Wappinger Creek - Red Oaks Mill Dam - 2016-09-23
    Wappinger Creek – Red Oaks Mill Dam – 2016-09-23

    The lighter debris comes and goes at the whim of the waters.

    The sprayward side of this branch must have an inch of ice wrapped around it:

    Red Oaks Mill Dam - ice coated branch
    Red Oaks Mill Dam – ice coated branch

    A quiet day for a walk…

  • Turkeys in the Snow

    These guys looked completely disgusted with the situation:

    Turkeys on rail fence in snow
    Turkeys on rail fence in snow

    They’re about 130 feet away in a heavy snowstorm that eventually deposited about a foot of wet snow on the area.

    The top rail really does slant downward: the tenon on the right end broke and fell out of the mortise.

    The DSC-H5 carries the 1.7× teleadapter, zoomed all the way tight through two layers of 1955-ish window glass, hand-held, braced against the pane.

    The day before that snowstorm, we biked 18 miles out-and-back over the Walkway in beautiful, sunny, mid-50s (°F) weather:

    KE4ZNU-9 - APRS track - 2017-02-08
    KE4ZNU-9 – APRS track – 2017-02-08

    We ride when we can and shovel when we must!

  • Screw Cutting Fixture vs. Lathe Ways

    A length of aluminum hex bar became a nice 10-32 screw trimmer:

    Screw cutting fixture - 10-32 - first cut
    Screw cutting fixture – 10-32 – first cut

    The hex neatly fits a 5/8 inch wrench, so I can tighten the jam nuts enough to run the lathe forward, part off the screw, and clean up the end just fine.

    Unfortunately, the second test cut didn’t work nearly so well:

    Screw cutting fixture - 10-32 - wrecked
    Screw cutting fixture – 10-32 – wrecked

    With the cross-slide gib adjusted to the snug side of easy, the cut put enough pressure on the parting tool to lift the way on the tailstock side about 4 mil = 0.1 mm. The parting tool submarined under the cut, dislodged the fixture, and didn’t quite stall the motor while the chuck jaws ate into the aluminum.

    Well, that was a learning experience.

    After tightening the cross-slide gib to the far side of hard-to-turn:

    • Put a longer screw in the fixture
    • Grab it in the tailstock drill chuck
    • Crunch the hex end of the fixture in the spindle chuck
    • Remove the screw through the spindle (*)
    • Put a slight taper on the end of the fixture threads with a center drill
    • Deploy the live center to support the fixture

    Like this:

    Screw cutting fixture - 10-32 - rechucked
    Screw cutting fixture – 10-32 – rechucked

    Turns out that angling the bit by 10° dramatically reduces chatter. If I had BR and BL turning tools, I’d be using them with the QCTP set to 0°, but they weren’t included in the set that came with the lathe.

    It’s a good thing I’m not fussy about the diameter of that cylindrical section:

    Screw cutting fixture - 10-32 - reshaped
    Screw cutting fixture – 10-32 – reshaped

    I knew the craptastic lathe ways needed, mmmm, improvement and it’s about time to do something.

    (*) By concatenating all my ¼ inch socket extension bars into an absurd noodle capped with square-to-hex adapter holding a Philips bit.

  • Improved Cable Clips

    Those ugly square cable clips cried out for a cylindrical version:

    LED Cable Clips - round - solid model
    LED Cable Clips – round – solid model

    Which prompted a nice button:

    LED Cable Clips - button - solid model
    LED Cable Clips – button – solid model

    Which suggested the square version needed some softening:

    LED Cable Clips - square - solid model
    LED Cable Clips – square – solid model

    Apart from the base plate thickness, all the dimensions scale from the cable OD; I’ll be unsurprised to discover small cables don’t produce enough base area for good long-term foam tape adhesion. Maybe the base must have a minimum size or area?

    I won’t replace the ones already on the saw, but these will look better on the next project…

    The OpenSCAD source code as a GitHub Gist:

    // Cable Clips
    // Ed Nisley – KE4ZNU – October 2014
    // February 2017 – adapted for USB cables
    Layout = "Show"; // Show Build
    Style = "Button"; // Square Round Button
    //- Extrusion parameters must match reality!
    ThreadThick = 0.25;
    ThreadWidth = 0.40;
    HoleWindage = 0.2; // extra clearance
    Protrusion = 0.1; // make holes end cleanly
    function IntegerMultiple(Size,Unit) = Unit * ceil(Size / Unit);
    //———————-
    // Dimensions
    CableOD = 3.8; // cable jacket
    Base = [4*CableOD,4*CableOD,3*ThreadThick]; // overall base and slab thickness
    CornerRadius = CableOD/2; // radius of square corners
    CornerSides = 4*4; // total sides on square corner cylinders
    NumSides = 6*3; // total sides for cylindrical base
    //– Oval clip with central passage
    module CableClip() {
    intersection() {
    if (Style == "Square")
    hull()
    for (i=[-1,1], j=[-1,1])
    translate([i*(Base[0]/2 – CornerRadius),j*(Base[1]/2 – CornerRadius),0])
    rotate(180/CornerSides) {
    cylinder(r=CornerRadius,h=Base[2] + CableOD/2,$fn=CornerSides,center=false);
    translate([0,0,Base[2] + CableOD/2])
    sphere(d=CableOD,$fn=CornerSides);
    }
    else if (Style == "Round")
    cylinder(d=Base[0],h=Base[2] + 1.00*CableOD,$fn=NumSides);
    else if (Style == "Button")
    resize(Base + [0,0,2*(Base[2] + CableOD)])
    sphere(d=Base[0],$fn=NumSides);
    union() {
    translate([0,0,Base[2]/2]) // base defines slab thickness
    cube(Base,center=true);
    for (j=[-1,1]) // retaining ovals
    translate([0,j*(Base[1]/2 – 0.125*(Base[1] – CableOD)/2),(Base[2] – Protrusion)])
    resize([Base[0]/0.75,0,0])
    cylinder(d1=0.75*(Base[1]-CableOD),
    d2=(Base[1]-CableOD)/cos(0*180/NumSides),
    h=(CableOD + Protrusion),
    center=false,$fn=NumSides);
    }
    }
    if (Layout == "Show")
    color("Green",0.2)
    translate([0,0,Base[2] + CableOD/2])
    rotate([0,90,0])
    cylinder(d=CableOD,h=2*Base[0],center=true,$fn=48);
    }
    //———————-
    // Build it
    CableClip();


  • Monthly Image: Turkeys in the Trees

    A turkey flock forages through the bottomlands along the Wappinger Creek and, at night, roosts in the trees at the far end of our driveway:

    Roosting Turkeys - visible
    Roosting Turkeys – visible

    I’m a sucker for that moon:

    Roosting Turkeys - visible
    Roosting Turkeys – visible

    It’s rising into the eastward-bound cloud cover bringing a light snowfall, so we missed the penumbral eclipse.

    If you’re counting turkeys, it’s easier with a contrasty IR image:

    Roosting Turkeys - infra-red mode
    Roosting Turkeys – infra-red mode

    Mary recently counted forty turkeys on the ground, so that’s just part of their flock. I think their air boss assigns one turkey per branch for safety; they weigh upwards of 10 pounds each!

    Taken with the DSC-H5 and DSC-F717, both the the 1.7× teleadapter, hand-held in cold weather.

    Searching the blog for turkey will turn up more pix, including my favorite IR turkey shot.