Mary wanted a rigid cap for a Clover seam ripper that came with a small plastic sheath, so I called one from the vasty digital deep:
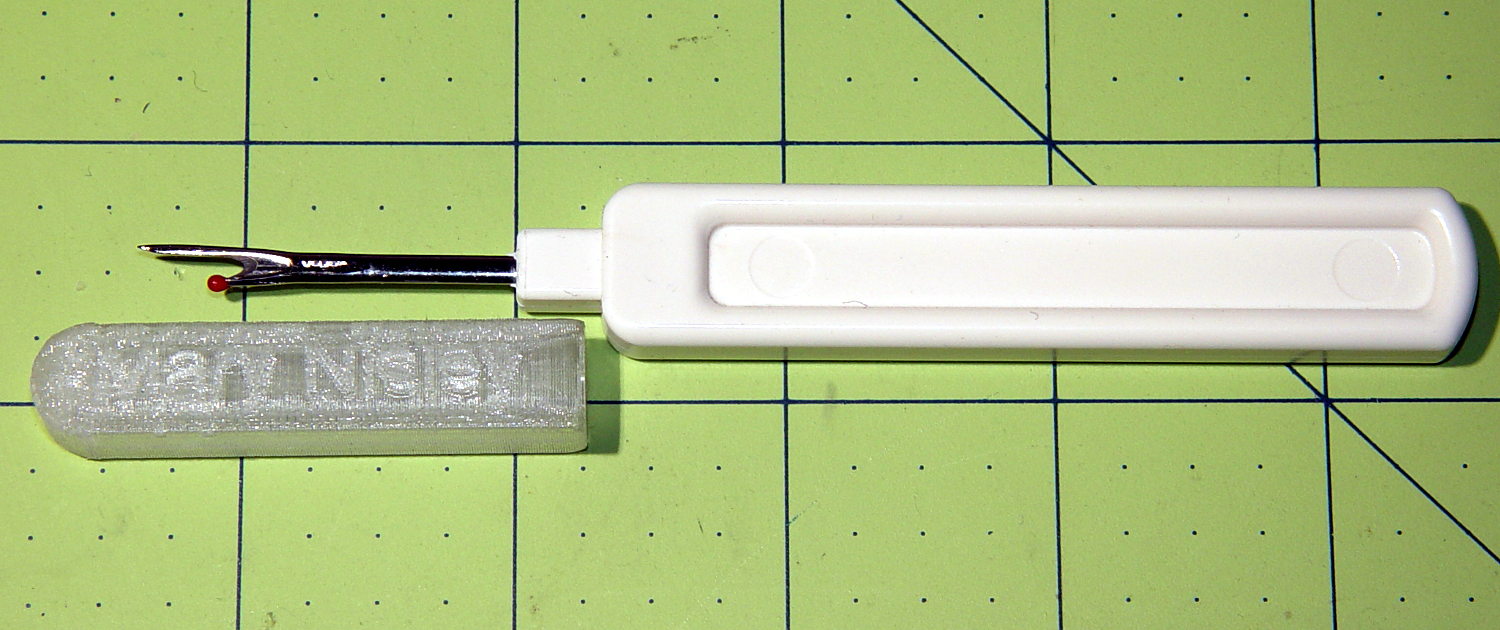
The solid model looks about like you’d expect, with a brim around the bottom to paste it on the platform:
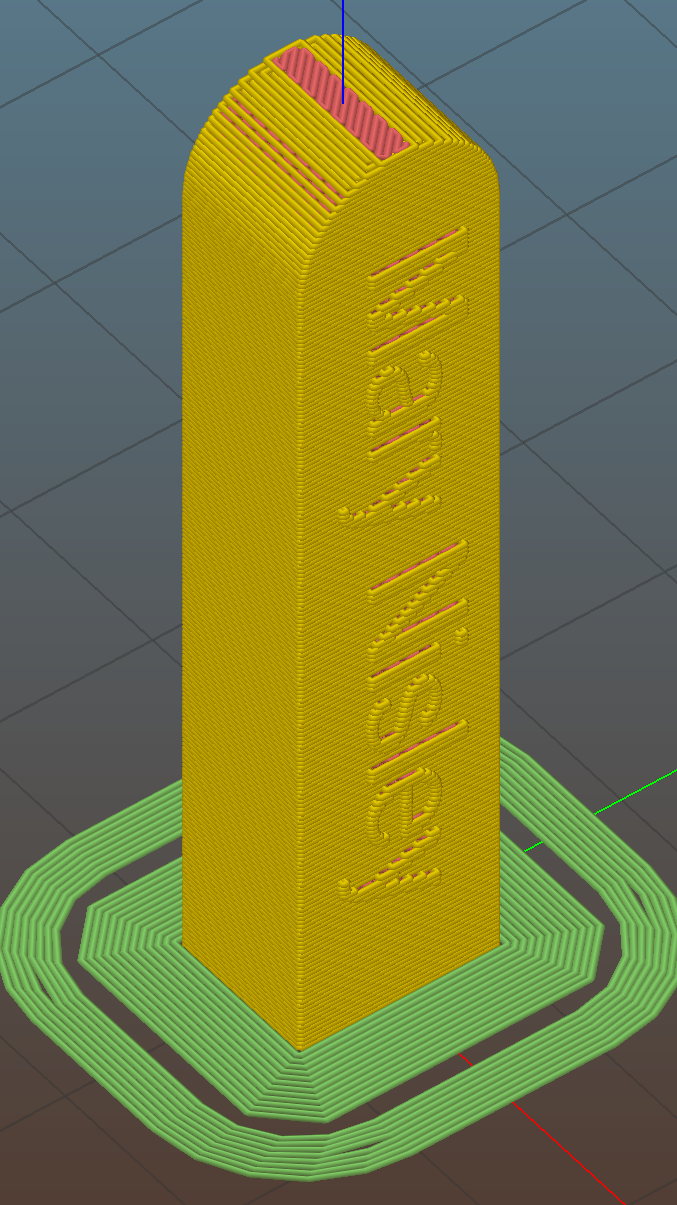
I added a slightly tapered entry to work around the usual tolerance problems:

The taper comes from a hull wrapped around eight small spheres:
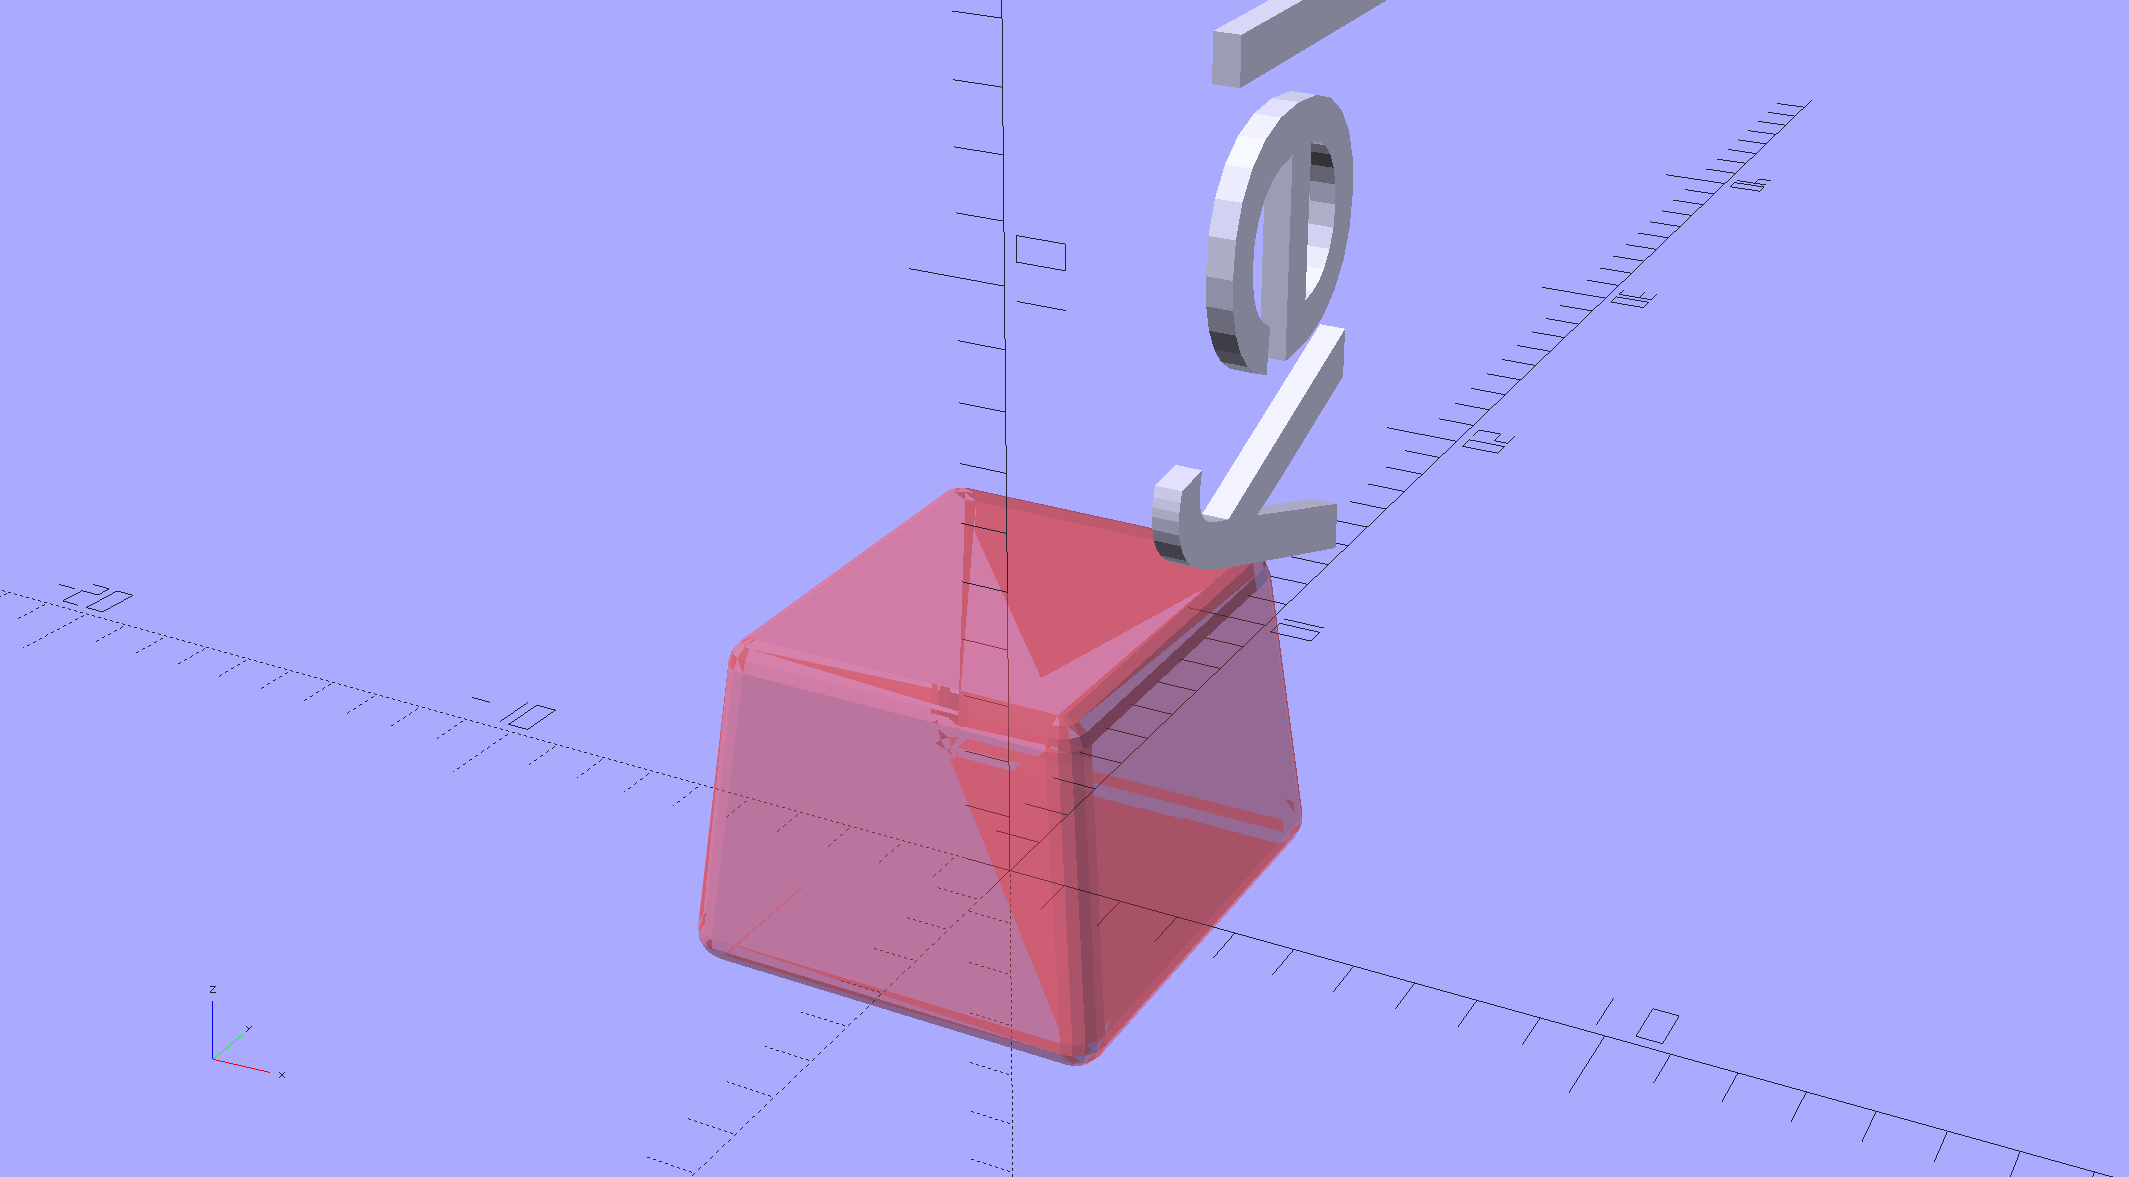
That’s surprisingly easy to accomplish, at least after you get used to this sort of thing:
hull() {																		// entry taper
	for (i=[-1,1] , j=[-1,1])
		translate([i*(HandleEntry[0]/2 - StemRadius),j*(HandleEntry[1]/2 - StemRadius),0])
			sphere(r=StemRadius,$fn=4*4);
	for (i=[-1,1] , j=[-1,1])
		translate([i*(HandleStem[0]/2 - StemRadius),j*(HandleStem[1]/2 - StemRadius),HandleEntry[2] - StemRadius])
			sphere(r=StemRadius,$fn=4*4);
}
The side walls are two threads thick and, at least in PETG, entirely too rigid to slide on easily. I think a single-thread wall with a narrow ridge would provide more spring; if this one gets too annoying, I’ll try that.
The OpenSCAD source code as a GitHub gist:
This file contains hidden or bidirectional Unicode text that may be interpreted or compiled differently than what appears below. To review, open the file in an editor that reveals hidden Unicode characters.
Learn more about bidirectional Unicode characters
| // Clover seam ripper cap | |
| // Ed Nisley KE4ZNU – April 2016 | |
| //- Extrusion parameters – must match reality! | |
| // Build with a 5 mm brim to keep it glued to the platform | |
| ThreadThick = 0.25; | |
| ThreadWidth = 0.40; | |
| Protrusion = 0.1; | |
| //—— | |
| // Dimensions | |
| StemRadius = 0.50; // corner radius | |
| HandleStem = [6.1, 7.1, 9.0]; | |
| HandleEntry = HandleStem + [1.0,1.0,-4.0]; // Z is -(straight part of stem) | |
| Cap = [8.5,11.0,45.0]; // XY exterior, Z interior | |
| //———————- | |
| //- Build it | |
| difference() { | |
| union() { | |
| translate([0,0,Cap[2]/2]) // main body column | |
| cube(Cap,center=true); | |
| translate([-Cap[0]/2,0,Cap[2]]) // rounded cap | |
| rotate([0,90,0]) | |
| cylinder(d=Cap[1],h=Cap[0],$fn=8*4); | |
| translate([Cap[0]/2 – Protrusion,0,(Cap[2] + Cap[1]/2)/2]) // text | |
| rotate([0,90,0]) | |
| linear_extrude(height=ThreadWidth,convexity=10) | |
| text("Mary Nisley",halign="center",valign="center",size=0.5*Cap[1],font="Arial"); | |
| } | |
| hull() // stem + blade clearance | |
| for (i=[-1,1] , j=[-1,1]) | |
| translate([i*(HandleStem[0]/2 – StemRadius),j*(HandleStem[1]/2 – StemRadius),-Protrusion]) | |
| cylinder(r=StemRadius,h=Cap[2] + Protrusion,$fn=4*4); | |
| hull() { // entry taper | |
| for (i=[-1,1] , j=[-1,1]) | |
| translate([i*(HandleEntry[0]/2 – StemRadius),j*(HandleEntry[1]/2 – StemRadius),0]) | |
| sphere(r=StemRadius,$fn=4*4); | |
| for (i=[-1,1] , j=[-1,1]) | |
| translate([i*(HandleStem[0]/2 – StemRadius),j*(HandleStem[1]/2 – StemRadius),HandleEntry[2] – StemRadius]) | |
| sphere(r=StemRadius,$fn=4*4); | |
| } | |
| } |

Comments
7 responses to “Clover Seam Ripper Cap”
I’d probably put both sets of spheres in the same for() loop. Another option for a slide fit that’s not too tight is internal ribs. I see this approach on commercial products occasionally.
Mmmph. That makes more sense; not sure what I was thinking. Delete the second iterator, wrap curly brackets around the two sets of spheres, done!
For the rib, maybe a single-thread wall with a dent-and-bump ridge in the middle of each side would work? That’ll take some doodling to get the dimensions right…
If you ever get tired of OpenSCAD (or just want a visual alternative), try Onshape (onshape.com). It’s a fairly new browser-based 3D CAD service that works incredibly well on a Linux system and there is nothing to install.
I read good things about OnShape, so I should devote some time to figuring it out. Thanks for the recommendation!
Their “Check Browser” report says my Firefox 45.0 isn’t compatible (something about the renderer not being available), but that’s most likely due to all the armor I use…
[…] From The Smell of Molten Projects in the Morning: […]
Nice insight into adapting the model. Thanks.
I just wanted to add that it’s also an opportunity to improve the part that you are making the replacement for. If you have ever used a seam ripper, you know that cap gets lost easily once you put it down and hence the replacement cap. For some reason, they don’t come with caps that can be placed on the back end like a stick ballpoint pen. It would also improve the ergonomics since the handle is small already. You would be a hero to the sewing world if you came up with something to fit that need.
As nearly as I can tell, the only way to solve the “lost cap” problem is being able to produce more of them on request!