This is a classic case of investing more time and effort creating the fixture than machining the parts.
Start by squaring up the block, which came from the end of a random chunk of smoke gray polycarbonate, with two 10-32 holes matching the tooling plate hole spacing:

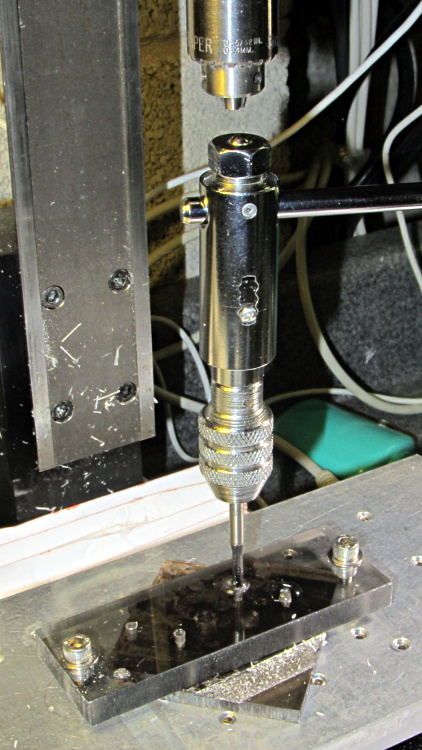
Then drill-and-tap four holes:
The left station will be for drilling the blanks clamped under a sacrificial sheet, so those screw holes aren’t used for anything other than clearance; the top millimeter will get chewed up pretty quickly. The screws in the right station will clamp a stack of drilled blanks under a cover plate. If I went into production, I could see using both stations for both functions, but …
There’s a locating pip in the front left corner that works perfectly with laser alignment:
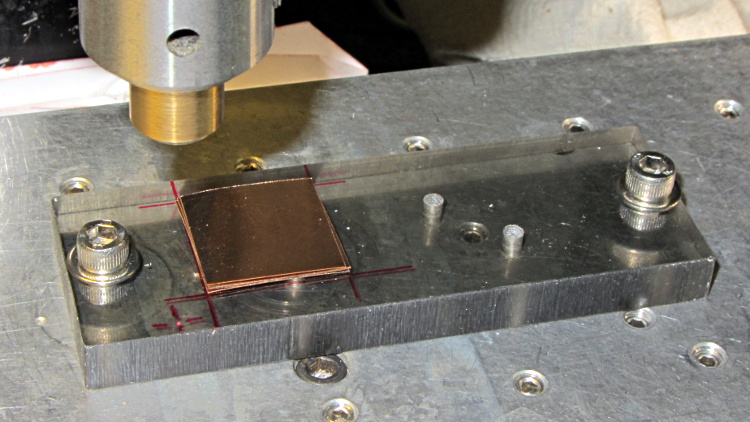
The blank sheets show where they’d be located for drilling, minus the sacrificial sheet and its clamps that you’ll see below.
The G54 coordinate system origin sits at the locating pip. The G-Code then slaps a G55 origin at each of the two stations in turn to simplify their coordinates, with offsets from M54:
- Drilling = (+5,+5)
- Milling = (+40,+5)
With all that in hand: stack, clamp, and drill some blanks:
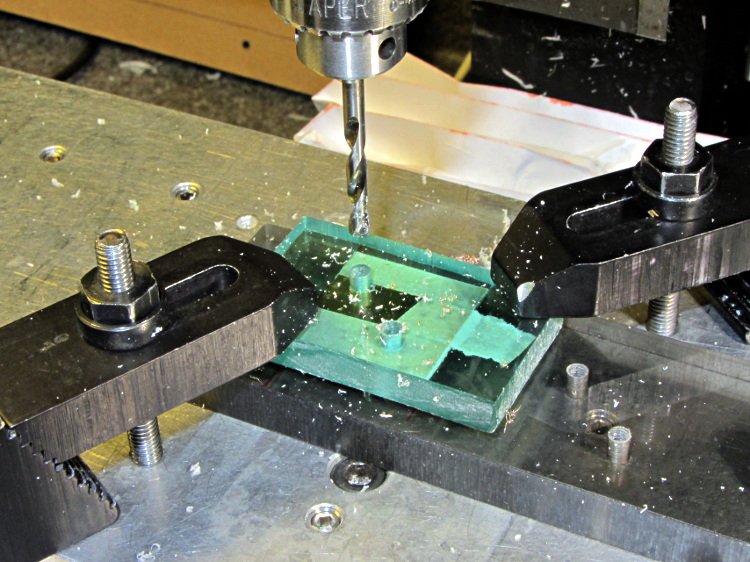
I tried milling a single drilled blank with a sacrificial plastic top plate:

But that didn’t work well. I don’t know if this was due to an inept combination of climb milling, using the wrong speed / feed / material / cutter, and just poor style, but the edges of the blank mashed against the clamp plate and curled, instead of cutting cleanly:

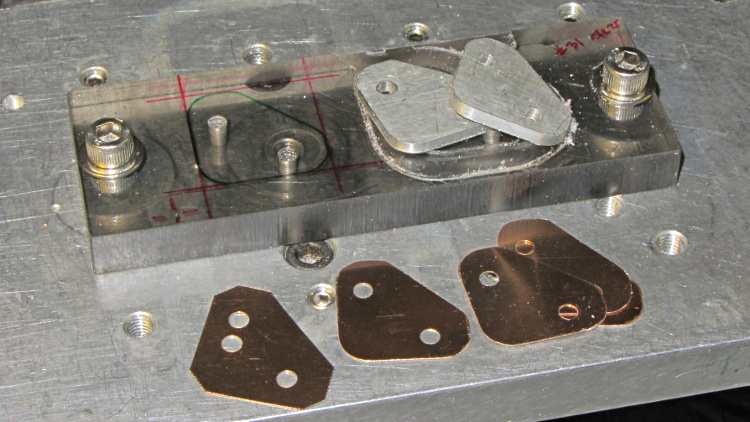
So I made a pair of aluminum plates to clamp both sides of the blanks, then milled another stack:

That worked quite well, although the top and bottom clips needed some slight attention from a riffler file and I did break the edges on all the clips. This shows four new clips along with a hand-cut prototype:
So I made a dozen more clips, picked the best eight for two sets, sent one set to Dan, installed the other, and … now I have a bunch of spares.
I suppose I should sell clip sets on Etsy / eBay to all the other M2 owners, but I have no idea how to price ’em. If you want some fancy corner clips, send whatever you think they’re worth … [grin]

Comments
3 responses to “CNC Platform Corner Clip Fixture”
Please tell us about the cool tap holder in the first photo. Looks like it may have a ratchet. Does it also have a spring?
The ball in the top isn’t spring-loaded, but fits neatly inside an opened drill press chuck; nothing fancier than that. I generally use it just as you see it, with eyeballometric alignment to the chuck. I’m such a sissy that I don’t break too many taps… perhaps because I don’t tap very many holes?
If you squint, you can see the slide that switches forward / lock / backward is a 2-56 screw replacing the long-broken plastic tab.
It’s been around forever and bears no maker’s mark. I vaguely recall getting it from Enco, so it may be related to that crappy one. It has interchangeable chucks, although I use the “big chuck” very, very rarely.
[…] Makergear M2: Prototype Corner Clips CNC Platform Corner Clip Fixture […]