The Smell of Molten Projects in the Morning

Ed Nisley's Blog: Shop notes, electronics, firmware, machinery, 3D printing, laser cuttery, and curiosities. Contents: 100% human thinking, 0% AI slop.

Tag: RPi

Raspberry Pi

  • Raspberry Pi: Jessie Lite Setup for Streaming Audio

    As a first pass at a featureless box that simply streams music from various sources, I set up a Raspberry Pi with a Jessie Lite Raspbian image. I’m mildly astonished that they use dd to transfer the image to the MicroSD card, but it certainly cuts out a whole bunch of felgercarb that comes with a more user-friendly interface.

    I used dcfldd (for progress reports while copying) and verify the copied image:

    sudo dcfldd statusinterval=10 bs=4M if=/mnt/diskimages/ISOs/Raspberry\ Pi/2015-11-21-raspbian-jessie-lite.img of=/dev/sdb
    sudo dcfldd statusinterval=10 bs=4M if=/dev/sdb of=/tmp/rpi.img count=350
    truncate --reference /mnt/diskimages/ISOs/Raspberry\ Pi/2015-11-21-raspbian-jessie-lite.img /tmp/rpi.img
    diff -s /tmp/rpi.img /mnt/diskimages/ISOs/Raspberry\ Pi/2015-11-21-raspbian-jessie-lite.img
    

    That fits neatly on a minuscule 2 GB MicroSD card:

    df -h
    Filesystem      Size  Used Avail Use% Mounted on
    /dev/root       1.8G  1.1G  549M  67% /
    devtmpfs        214M     0  214M   0% /dev
    tmpfs           218M     0  218M   0% /dev/shm
    tmpfs           218M  4.5M  213M   3% /run
    tmpfs           5.0M  4.0K  5.0M   1% /run/lock
    tmpfs           218M     0  218M   0% /sys/fs/cgroup
    /dev/mmcblk0p1   60M   20M   41M  34% /boot
    

    Set the name of the Raspberry Pi to something memorable, perhaps streamer1.

    Disable IPV6, because nothing around here supports it, by tweaking /etc/modprobe.d/ipv6.conf:

    alias ipv6 off
    

    Enable the USB WiFi dongle by adding network credentials to /etc/wpa_supplicant/wpa_supplicant.conf:

    ctrl_interface=DIR=/var/run/wpa_supplicant GROUP=netdev
    update_config=1
    
    network={
     ssid="your network SSID goes here"
     psk="pick your own"
    }
    

    Nowadays, there’s no need for a fixed IP address, because after adding your public key to the (empty) list in ~/.ssh/authorized_keys, you can sign in using a magic alias:

    ssh -p12345 pi@streamer1.local
    

    I have absolutely no idea how that works, nor how to find out. If it ever stops working, I’m doomed.

    The Raspberry Pi Model B+ has “improved” audio that, to Mary’s ears, comes across as pure crap; even my deflicted ears can hear low-level hissing and bad distortion at moderate volumes. An old Creative Labs Sound Blaster USB box sidesteps that problem, but requires a tweak in /etc/asound.conf to route the audio to the proper destination:

    # Make USB sound gadget the default output
    
    pcm.!default {
     type hw card 1
    }
    ctl.!default {
     type hw card 1
    }
    

    ALSA then seems to default to the wrong channel (or something), although this tweak in the middle of /usr/share/alsa/alsa.conf may not be needed:

    #pcm.front cards.pcm.front
    pcm.front cards.pcm.default
    

    Good old mplayer seems to handle everything involved in streaming audio from the Interwebs.

    Set up blank /etc/mplayer/input.conf and ~/.mplayer/input.conf files to eliminate kvetching:

    # Dummy file to quiet the "not found" error message
    

    Set up ~/.mplayer/config thusly:

    prefer-ipv4=true
    novideo=true
    #ao=alsa:device=hw=1.0
    ao=alsa
    format=s16le
    #mixer-channel=Master
    softvol=true
    volume=25
    quiet=true
    

    The commented-out ao option will force the output to the USB gadget if you want to route the default audio to the built-in headphone jack or HDMI output.

    Telling mplayer to use its own software volume control eliminates a whole bunch of screwing around with the ALSA mixer configuration.

    The quiet option silences the buffer progress display, while still showing the station ID and track information.

    With that in hand, the Public Domain Project has a classical music stream that is strictly from noncommercial:

    mplayer -playlist http://relay.publicdomainproject.org/classical.aac.m3u
    

    Send them a sack of money if you like them as much as we do.

    By contrast, the local NPR station comes across as talk radio:

    mplayer http://live.str3am.com:2070/wmht1
    

    You can’t feed nested playlists into mplayer, but fetching the contents of the stream playlists produces a one-station-per-line playlist file that one might call RadioList.txt:

    http://relay.publicdomainproject.org:80/classical.aac
    http://relay.publicdomainproject.org:80/jazz_swing.aac
    http://live.str3am.com:2070/wmht1
    

    So far, I’ve been manually starting mplayer just to get a feel for reliability and suchlike, but the setup really needs an autostart option with some user-friendly way to select various streams, plus a way to cleanly halt the system. A USB numeric keypad may be in order, rather than dinking around with discrete buttons and similar nonsense.

    There exists a horrible hack to transfer the stream metadata from mplayer onto an LCD, but I’m flat-out not using PHP or Perl. Perhaps the Python subprocess management module will suffice to auto-start a Python program that:

    • starts mplayer with the default playlist
    • parses mplayer’s piped output
    • updates the LCD accordingly
    • reads / translates keypad input

    This being a Pi, not an Arduino, one could actually use a touchscreen LCD without plumbing the depths of absurdity, but that starts looking like a lot of work…

  • Raspberry Pi Model B+ Reset Connector

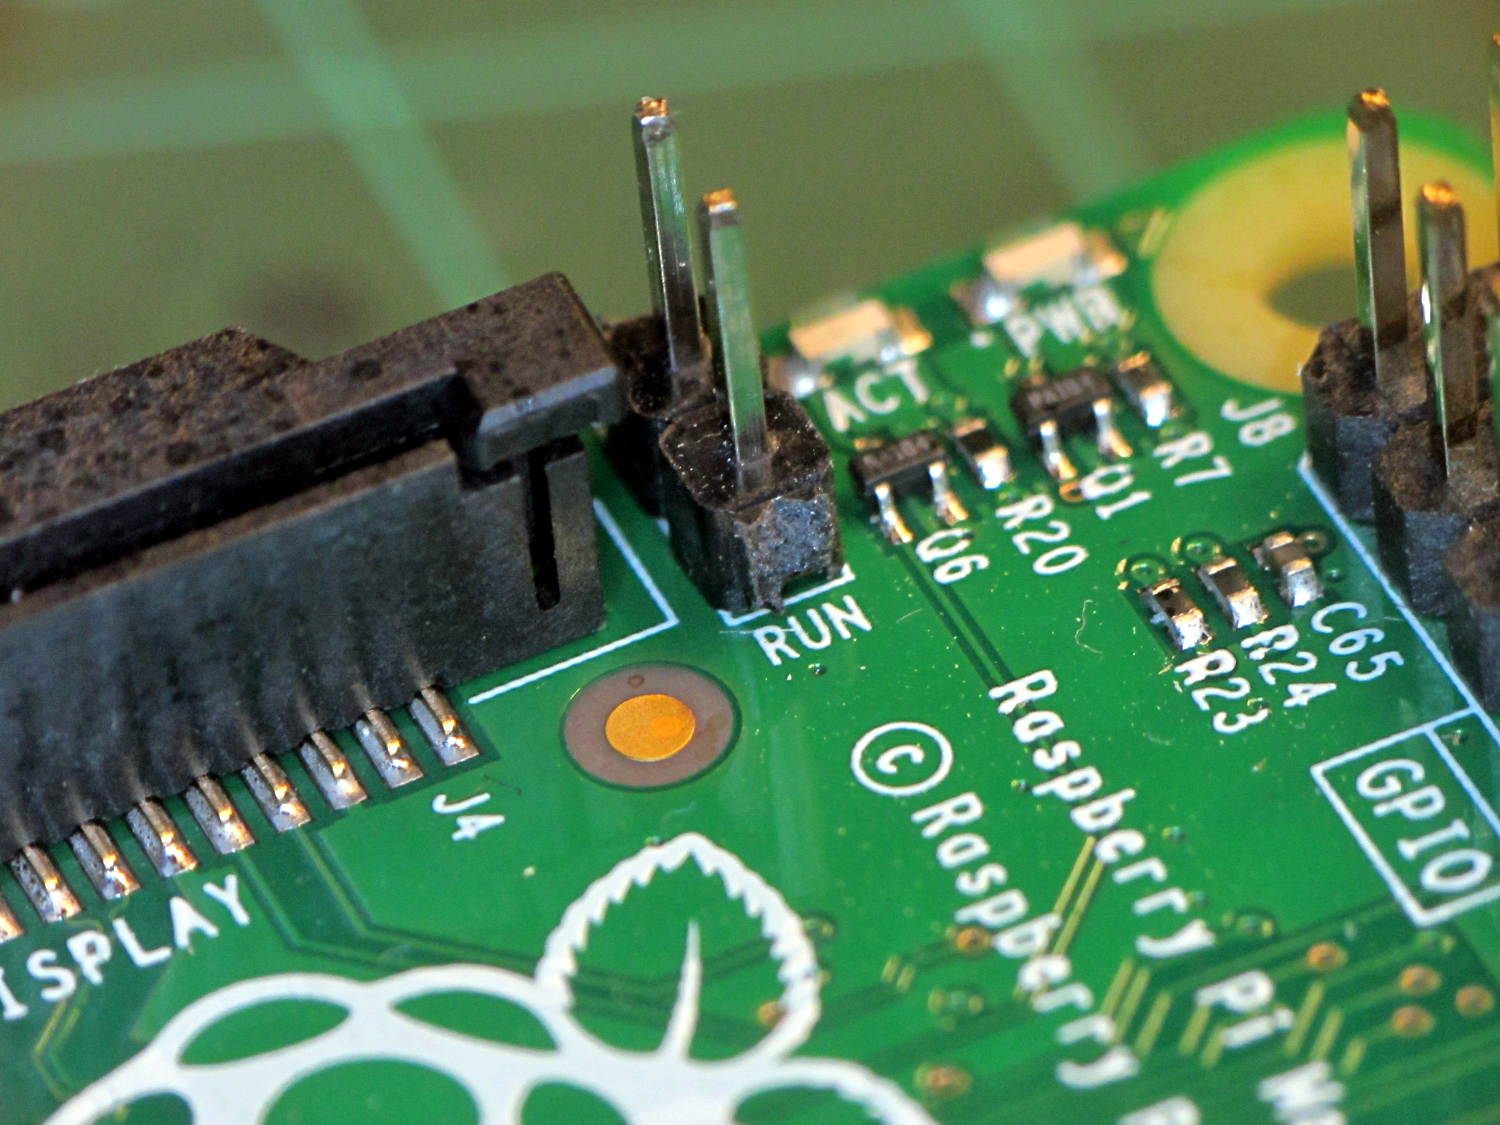
    Turns out Raspberry Pi boards have provision for a Reset switch, but you gotta dig for it. On the Model B+, it’s labeled RUN:

    Raspberry Pi BPlus - RUN header
    Raspberry Pi BPlus – RUN header

    Soldering in that 2-pin header and plugging a pushbutton switch on a short cable will suffice until I get around to thinking of / scrounging a suitable case.

    Poking the button forces a power-on reset, which you shouldn’t do with the RPi running, lest you trash the filesystem. After shutting down with sudo halt, however, the switch does exactly what’s needed: restarts the CPU from scratch.

    The RPi draws little enough power that there’s no point in actually pulling the plug; stressing that Micro-B connector is definitely a Bad Idea.

  • No Affordance for Pulling

    Well, I didn’t expect this:

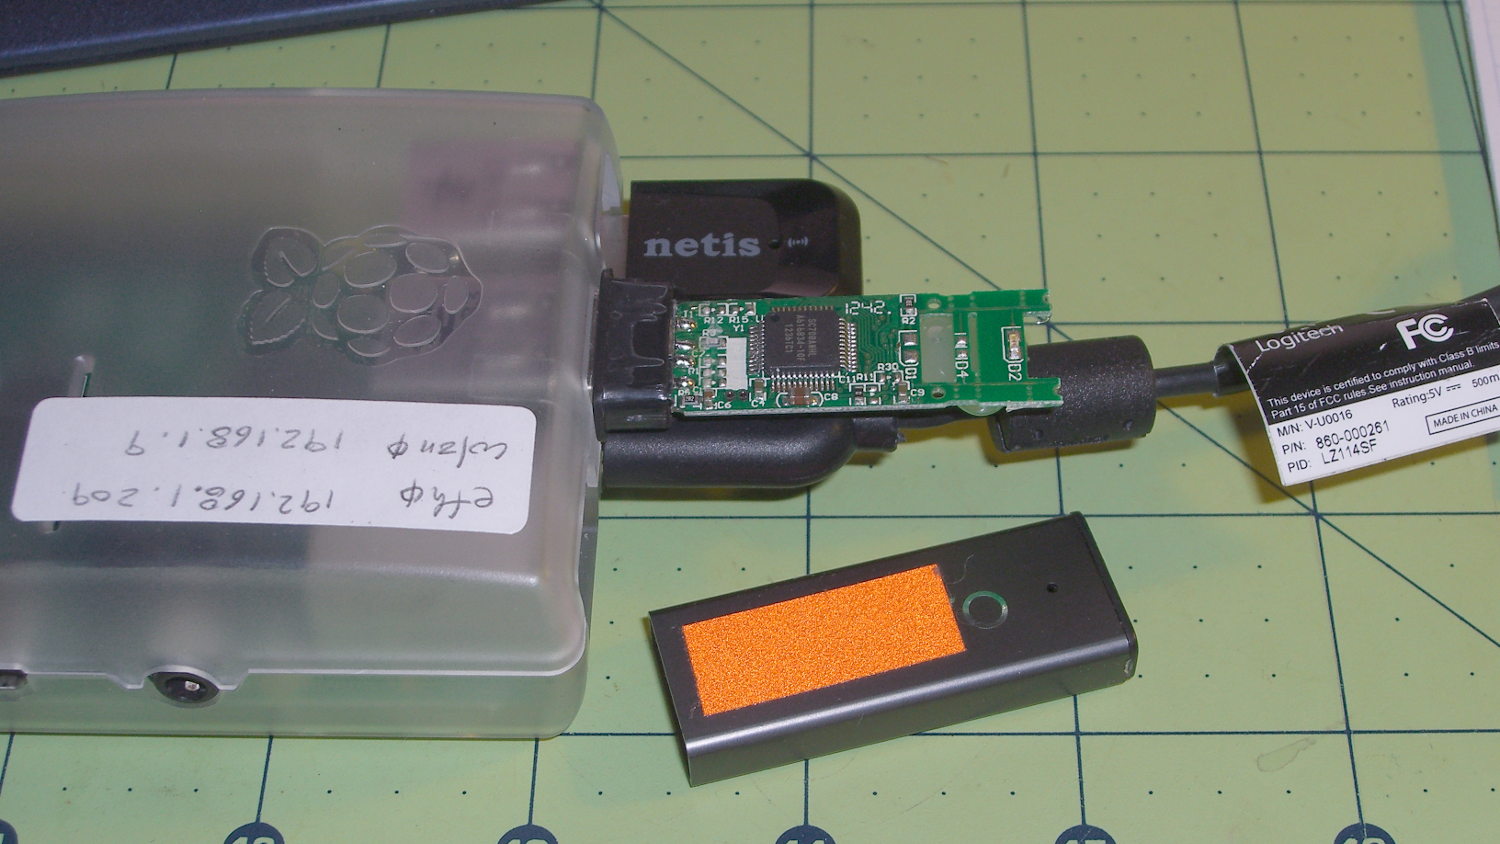
    Unsleeved USB memory
    Unsleeved USB memory

    Turns out the only thing holding that case in place was a blob of hot-melt glue on the bottom of the PCB. Hot-melt glue doesn’t bond well to anodized aluminum, the RPi had been sitting outside on a winter day taking time-lapse bird feeder pictures, and the USB connector seemed a bit more snug than usual.

    So I slobbered more hot-melt glue on the end of the PCB, jammed the case back in place, and that was that.

    The PCB has two snap lines to accommodate shorter cases, with corresponding activity LED locations; it seems I got the long-case version.

  • RPi: Time-lapse Photos

    The Raspberry Pi doc provides a recipe for the simplest possible time-lapse webcam: fire fswebcam once a minute from a cron job.

    The crontab entry looks much like their example:

    * * * * * /home/ed/bin/grabimg.sh 2>&1
    

    I put all the camera details in the ~/.config/fswebcam.conf config file:

    # Logitech C130 / C510 camera
    device v4l2:/dev/video0
    input 0
    resolution 1280x720
    set sharpness=128
    jpeg 95
    set "power line frequency"="60 hz"
    #no-banner
    

    That simplifies the ~/bin/grabimg.sh script:

    #!/bin/bash
    DATE=$(date +"%Y-%m-%d_%H.%M.%S")
    fswebcam -c /home/ed/.config/fswebcam.conf /mnt/samba/webcam/$DATE.jpg
    

    The output directory lives on a Samba-shared USB stick jammed in the back of the Asus router, so I need not putz with a Samba server on the RPi.

    Manually mounting the share, which for the moment is the /testfolder/webcam directory on the USB stick:

    sudo mount -t cifs -o user=ed //gateway/testfolder/webcam /mnt/samba
    

    I’m pretty sure automagically mounting the share will require the same workarounds as on my desktop box, but this fstab entry is a start:

    #-- ASUS router Samba share
    //gateway/testfolder/webcam	/mnt/samba	cifs	auto,uid=ed,credentials=/root/.gateway-id 0 0
    

    That requires a corresponding credentials file with all the secret info:

    domain=WHATSMYNET
    username=ed
    password=pick-your-own
    

    This is mostly a test to see how long it takes before something on the RPi goes toes-up enough to require a manual reboot. Disabling the WiFi link’s power saving mode seems to keep the RPi on the air all the time, which is a start.

  • RPi: Logitech QuickCam for Notebook vs. fswebcam

    Combining the camera data I collected a while ago with a few hours of screwing around with this old Logitech camera:

    Logitech QuickCam for Notebook Plus - front
    Logitech QuickCam for Notebook Plus – front

    I’m convinced it’s the worst camera I’d be willing to use in any practical application.

    The camera offers these controls:

    fswebcam --list-controls
    --- Opening /dev/video0...
    Trying source module v4l2...
    /dev/video0 opened.
    No input was specified, using the first.
    Available Controls Current Value Range
    ------------------ ------------- -----
    Brightness 128 (50%) 0 - 255
    Contrast 128 (50%) 0 - 255
    Gamma 4 1 - 6
    Exposure 2343 (8%) 781 - 18750
    Gain, Automatic True True | False
    Power Line Frequency Disabled Disabled | 50 Hz | 60 Hz
    Sharpness 2 0 - 3
    Adjusting resolution from 384x288 to 320x240.
    

    Putting the non-changing setup data into a fswebcam configuration file:

    cat ~/.config/fswebcam.conf
    # Logitech QuickCam for Notebook Plus -- 046d:08d8
    device v4l2:/dev/video0
    input gspca_zc3xx
    resolution 320x240
    scale 640x480
    set sharpness=1
    #jpeg 95
    set "power line frequency"="60 hz"
    

    Trying to use 640×480 generally produces a Corrupt JPEG data: premature end of data segment error, which looks no better than this and generally much worse:

    Logtech 08d8 - 640x480
    Logtech 08d8 – 640×480

    The top of the picture looks pretty good, with great detail on those dust particles, but at some point the data transfer coughs and wrecks the rest of the image. I could crop the top half to the hipster 16:9 format of 640×360, but the transfer doesn’t always fail that far down the image.

    The -R flag that specifies using direct reads instead of mmap, whatever that means, doesn’t help. In fact, the camera generally crashes hard enough to require a power cycle.

    Delaying a second with -D1 and / or skipping a frame with -S1 don’t help, either.

    The camera works perfectly at 640×480 using fswebcam under Xubuntu 14.04 on a Dell Latitude E6410 laptop, so I’m pretty sure this is a case of the Raspberry Pi being a bit underpowered for the job / the ARM driver taking too long / something totally obscure. A random comment somewhere observed that switching from Raspbian to Arch Linux (the ARM version) solved a similar video camera problem, so there’s surely room for improvement.

    Dragorn of Kismet reports that the Raspberry Pi USB hardware doesn’t actually support USB 2.0 data rates, which also produces problems with Ethernet throughput. The comments in that slashdot thread provide enough details: the boat has many holes and it’s not a software problem.

    For lack of anything more adventurous, the config file takes a 320×240 image and scales it up to 640×480, which looks about as crappy as you’d expect:

    Logtech 08d8 - 320x240 scaled
    Logtech 08d8 – 320×240 scaled

    Even that low resolution will occasionally drop a few bytes along the way, but much less often.

    The picture seems a bit blown out, so set the exposure to the absolute minimum:

    fswebcam -c ~/.config/fswebcam.conf --set exposure=781 "Logitech 08d8 - expose 781.jpg"
    

    Which looks like this:

    Logitech 08d8 - expose 781
    Logitech 08d8 – expose 781

    Given that’s happening a foot under a desk lamp aimed well away from the scene, the other end of the exposure scale around 18000 produces a uselessly burned out image. I think a husky neutral-density filter would be in order for use with my M2’s under-gantry LED panels. The camera seems to be an early design targeting the poorly illuminated Youtube / video chat market segment (I love it when I can talk like that).

    There’s probably a quick-and-dirty Imagemagick color correction technique, although Fred’s full-blown autocorrection scripts seem much too heavy-handed for a Raspberry Pi…

  • RPi: Static WiFi Addressing

    Having configured ssh on the Raspberry Pi for public keys, the next step is to cut the cord by configuring the USB WiFi dongle to automagically come up with a static IP.

    [Update: As of 2017, set a static IP by tweaking /etc/dhcpcd.conf instead. Search the blog for that to find recent descriptions. ]

    Make /etc/network/interfaces look like this:

    auto lo
    
    iface lo inet loopback
    
    #iface eth0 inet dhcp
    
    auto eth0
    #iface eth0 inet static
    iface eth0 inet manual
     address 192.168.1.209
     gateway 192.168.1.1
     netmask 255.255.255.0
     network 192.168.1.0
     broadcast 192.168.1.255
    
    allow-hotplug wlan0
    
    #iface wlan0 inet manual
    iface wlan0 inet static
     address 192.168.1.9
     gateway 192.168.1.1
     netmask 255.255.255.0
     network 192.168.1.0
     broadcast 192.168.1.255
    
    #wpa-roam /etc/wpa_supplicant/wpa_supplicant.conf
    wpa-conf /etc/wpa_supplicant/wpa_supplicant.conf
    
    iface default inet dhcp
    

    Then set up /etc/wpa_supplicant/wpa_supplicant.conf thusly:

    ctrl_interface=DIR=/var/run/wpa_supplicant GROUP=netdev
    update_config=1
    
    network={
    	ssid="whatever it might be"
    	psk="choose your own password"
    }
    

    You want different IP addresses for the eth0 and wlan0 devices, because you never know when you’ll be forced to use them at the same time.

    Using wpa-conf rather than wpa-roam prevents the machinery from automagically doing things when you’re not watching.

    The router can hand out IP addresses based on MACs, but that means bottling up all that configuration in a single device that might go toes up. Forcibly configuring each device to a static IP adds a bit of resilience to the network, right up to the point where you must change all of them at once.

    Alas, the router seemed to lose track of the Pi after a day. Pinging from my desktop box reported Destination Host Unreachable, even though signing on through the USB keyboard showed the USB WiFi link (a netis WF2123) was still up. Signing on to the router and refreshing the DHCP list (even though the RPi has a static IP) knocked things loose: suddenly the RPi became pingable.

    It seems the WiFi link turns itself off after a while, which can be averted by tweaking the options:

    sudo nano /etc/modprobe.d/8192cu.conf
    # Disable power saving
    options 8192cu rtw_power_mgnt=0 rtw_enusbss=0


    The WordPress sourcecode tag seems to turn underscores into blanks [Update: on the last line of a sourcecode block, which I’ve now forced to be a blank line; the options should read rtw_power_mgmt and rtw_enusbss, respectively.

    Anyhow, the rtw_enusbss option prevents the USB interface from going down. It was already zero in the default configuration, but I presume there’s no harm in clearing it again.

  • RPi: Logitech Camera Data

    After installing things like imagemagick and mjpg_streamer on the Raspberry Pi, I exhumed a quartet of Logitech cameras from the heap to see how they worked. None bear any identification, apart from a tag on the cable, so here’s what I found out for later reference.

    They’re all reasonably good for still pictures, if you don’t mind terrible initial exposures. The default program works OK:

    fswebcam -d /dev/video0 -r 320x240 image.jpg
    

    On the other hand, getting any streaming video requires searching through the parameter space, which wasn’t helped by the total lack of documentation. The Arch Linux wiki has a useful summary of camera & drivers, with pointers to additional lists-of-lists. The OctoPrint repo documents the mjpg-streamer plugin parameters.

    So, we begin…

    This camera, one of two identical cameras in the heap, has a clip that used to fit on the upper edge of a laptop display:

    Logitech QuickCam for Notebook Plus - front
    Logitech QuickCam for Notebook Plus – front

    One has a tag:

    Logitech QuickCam for Notebook Plus - tag
    Logitech QuickCam for Notebook Plus – tag

    To make the tag data more useful for search engine inquiries:

    • M/N: V-UBG35
    • P/N: 861228-0000
    • PID: CE64105

    From lsusb:

    Bus 001 Device 008: ID 046d:08d8 Logitech, Inc. QuickCam for Notebook Deluxe
    

    With Raspbian on the RPi, 640×480 video tears and stutters, leaving 320×240 as the least-worst alternative:

    mjpg_streamer -i "/usr/local/lib/input_uvc.so -r 320x240" -o "/usr/local/lib/output_http.so -w /usr/local/www"
    

    The cameras don’t support YUYV at all and the video quality is mediocre, at best, but they do have a manual focus ring that lets you snuggle the camera right up against the subject.

    This ball camera:

    Logitech QuickCam Pro 5000 - on tripod
    Logitech QuickCam Pro 5000 – on tripod

    Has a tag:

    Logitech QuickCam Pro 5000 - tag
    Logitech QuickCam Pro 5000 – tag

    Which reads:

    • M/N: V-UAX16
    • P/N: 861306-0000
    • PID: LZ715BQ

    From lsusb:

    Bus 001 Device 009: ID 046d:08ce Logitech, Inc. QuickCam Pro 5000
    

    It requires YUYV at 320×240 (on the Pi) and nothing else works at all:

    mjpg_streamer -i "/usr/local/lib/input_uvc.so -r 320x240 -y" -o "/usr/local/lib/output_http.so -w /usr/local/www"
    

    It produces even worse video than the Notebook camera.

    This HD 720p camera has C130 scrawled on the front in my handwriting:

    Logitech HD Webcam C510 - front
    Logitech HD Webcam C510 – front

    And a tag:

    Logitech HD Webcam C510 - tag
    Logitech HD Webcam C510 – tag

    Bearing this text:

    • M/N: V-U0016
    • P/N: 860-000261
    • PID: LZ114SF

    The scrawled C130 doesn’t match up with what lsusb reports:

    Bus 001 Device 010: ID 046d:081d Logitech, Inc. HD Webcam C510
    

    It produces very nice results in many resolutions, using YUYV mode, although I think its native resolution is 1280×720 and that works perfectly on the Pi:

    mjpg_streamer -i "/usr/local/lib/input_uvc.so -r 1280x720 -y" -o "/usr/local/lib/output_http.so -w /usr/local/www"
    

    Video over USB is mysterious…