Turns out Raspberry Pi boards have provision for a Reset switch, but you gotta dig for it. On the Model B+, it’s labeled RUN:
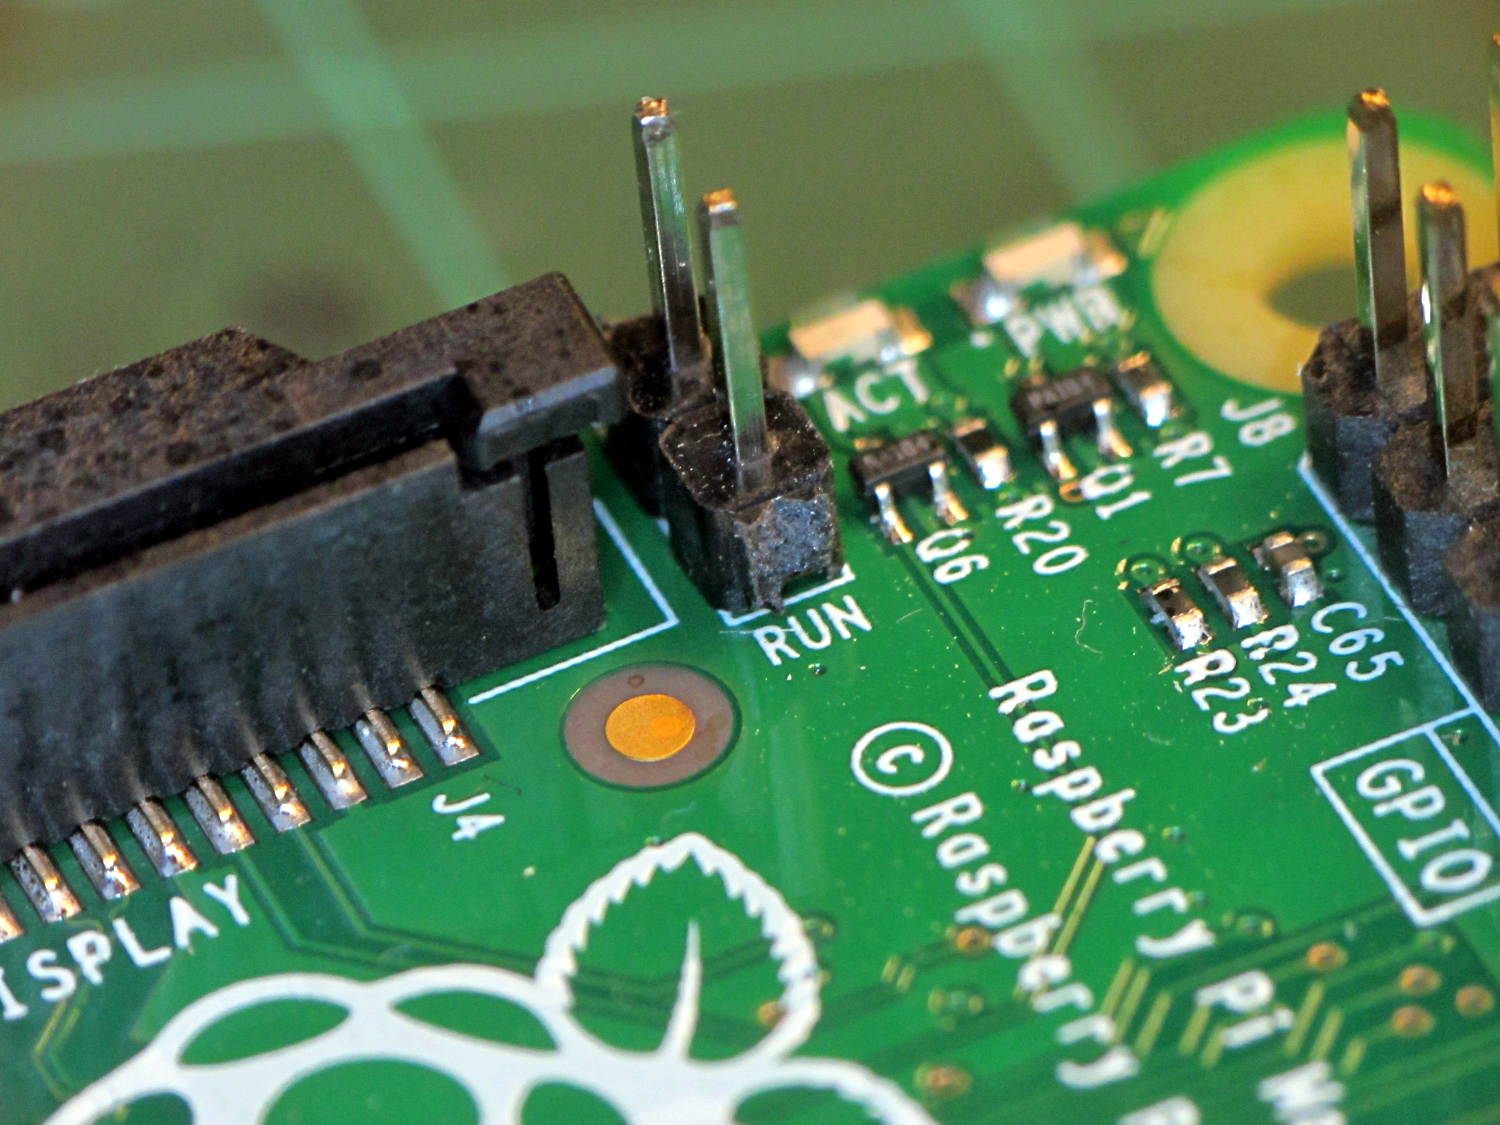
Soldering in that 2-pin header and plugging a pushbutton switch on a short cable will suffice until I get around to thinking of / scrounging a suitable case.
Poking the button forces a power-on reset, which you shouldn’t do with the RPi running, lest you trash the filesystem. After shutting down with sudo halt, however, the switch does exactly what’s needed: restarts the CPU from scratch.
The RPi draws little enough power that there’s no point in actually pulling the plug; stressing that Micro-B connector is definitely a Bad Idea.

Comments
14 responses to “Raspberry Pi Model B+ Reset Connector”
What a coincidence. I just set up a B+ as a repetier server and was just in the process of searching for how to use a GPIO pin to a) reset or, better, b) force a safe shutdown. Still going to go looking for a way to make a safe shutdown, but good to know about the reset traces.
The general ideas seems to involve setting up a background task to monitor a GPIO pin, then have it Do The Right Thing when the pin goes low. The details are out there, somewhere, I know I’ve seen them… [sigh]
I found this: http://www.instructables.com/id/Simple-Raspberry-Pi-Shutdown-Button/step5/Add-the-button/
I’ll let you know how I get on with it.
Looks good!
I’d add an external pullup resistor to augment the internal one, but that’s just crazy talk: go with the flow!
Well, it worked quite well. I dropped a 1k from the 3.3V to pin 4 and simply ground that to force a shutdown. Based on comments, I am hoping the pull-up will keep it robust and there will be no false triggers (especially since the Raspi is running repetier-server, three guesses what an unintended shutdown would do…). If I do get shutdowns/restarts, I’ll invest some time to make it require a 3s push before shutting down or restarting. I’m leery of using the Run pin, but it is exactly what I need to start the thing back up after a shutdown. Decisions, decisions. Leery only because I want to avoid and unintended restart.
The “power switch” on Mary’s sewing machine requires about a second to turn the machine on (while the Arduino goes through the normal bootloader startup) and I added a similar delay to turn it off (because tapping the switch might happen while rearranging a pile of fabric). Works perfectly: highly recommended!
The Model B Rev 2.0 boards have well-armored circuitry behind the RUN header and it should be at least as stable as anything else you’ll do… [grin]
Im more concerned about some spurious noise causing the Rpi to ‘sense’ a nonexistent falling edge. I’m thinking I want the script to only run the shutdown after it has seen 3s of low on the pin. A ‘slow’ switch on the run header, though, that would resolve my fears of accidentally pushing it. Or an appropriately designed case with a recessed switch. Oh jiminy, too many projects.
Nah, look at the schematic: the RUN header looks straight into a 100 nF cap with a solid pullup and over/undervolt clamp diodes. Absent an actual mechanical short, the voltage on that header isn’t going anywhere unexpected.
Don’t worry, be happy…
Adding appropriately sized resistor and capacitor in series with the reset switch should get you the 3s timeout with minimal hassle. It’s not bombproof tough, and you would probably need a bleeder resistor in parallel with the cap but it’s still a very low effort solution :)
Oddly, the USB micro-B connectors are more robust than the mini-B ones. I’m personally fond of the “inverted” ones (wide end down), which have a larger (and hopefully thereby sturdier) mounting surface. I’ve designed one into a project I’m building, only to find there are multiple versions of them and my board is designed for the fully surface mount version, and the parts I got have through-hole posts for additional strength. Oooops.
I keep thinking the PCB should be deep enough inside to have a cutout for the plug in the side wall to restrict the motion, but then you’re pretty much depending on the plug shape and we know that changes arbitrarily. [mutter]
Yes indeed. I vaguely remember another style that’s designed to mount in a cutout in the board so it can attach to both sides. It looked complicated to me, so I avoided it.
[…] the Halt button forcibly halts the RPi, after which you squeeze the Reset button to reboot the thing. There’s no indication that it’s running, other than sound coming […]
[…] Canakit cases require a bit of flush-cutter hackage to accommodate a crude socket atop the RUN header: […]