Ed Nisley's Blog: Shop notes, electronics, firmware, machinery, 3D printing, laser cuttery, and curiosities. Contents: 100% human thinking, 0% AI slop.
Early in the irrigation season, Mary turned on a DripWorks Micro-Flow Valve, only to have the knob + stem pop out and release a stream of water in the wrong place. Mary jammed it back in place until I could chop out the offending valve and install a known-clear replacement.
The knob broke off the stem when I tried to pry it out of the valve body:
Failed Dripworks valve – parts
The lip around the inside of the cap snaps over the top of the body, which is why I wrecked the stem, but the chip broke off the cap while Mary was turning it just before the stem popped out. Her fingers are barely strong enough to turn the valve, which means something had gone wrong before she started turning.
A look straight into the valve body:
Failed Dripworks valve – top view
The stem has swarf left over from drilling out the mold flash last year:
Failed Dripworks valve – stem
All in all, the Dripworks drip irrigation system works well, but their overall attention to QC leaves something to be desired.
The Dell Optiplex 9010 acting as a file server woke up dead after I plugged it in after returning from a road trip. Its ID sticker shows a manufacturing date almost exactly nine years ago and the problem was exactly what you might expect:
Optiplex CR2032
I’d never measured 100 mV on a CR2032 before.
Because the Optiplex runs headless in the basement, diagnosis required hauling it upstairs, booting it with a display & keyboard, whacking the date into the current decade, then resetting a few other vital bits.
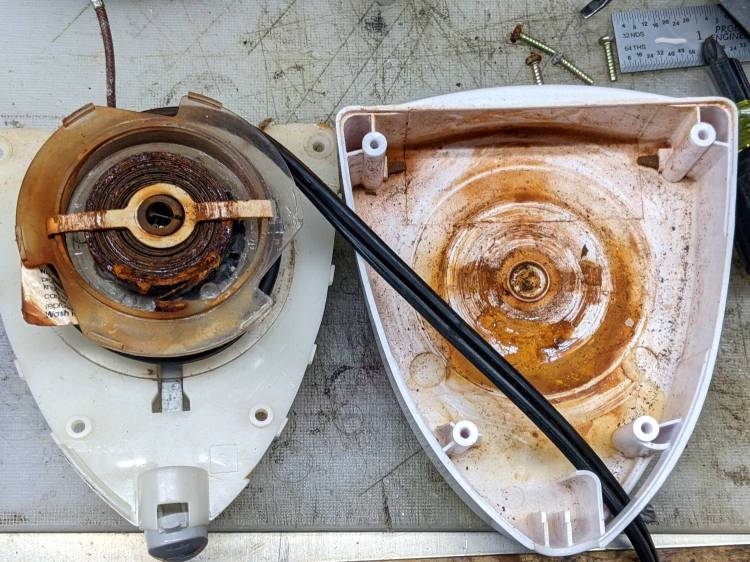
Some weeks ago the Sunbeam clothes iron Mary uses for her quilting projects stopped retracting its cord and a few days ago the entire compartment holding the cord spool simply fell off:
Sunbeam 3035 Iron – detached cord compartment
One plastic stud and two thin plastic tabs held the compartment onto the rest of the iron. How they lasted this long I do not know, but they are neither replaceable nor fixable.
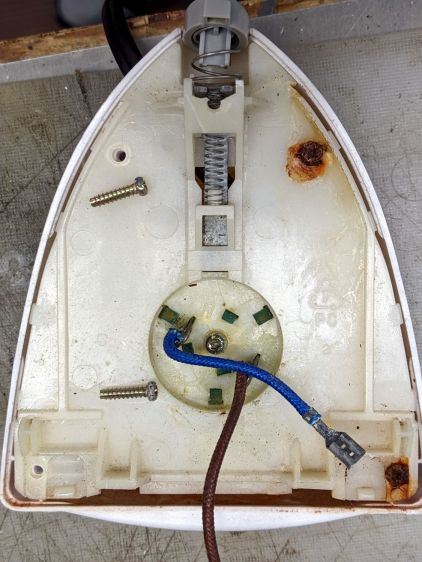
When you see badly rusted screws in an electrical device, you know the story cannot end well:
Sunbeam 3035 Iron – cord connections
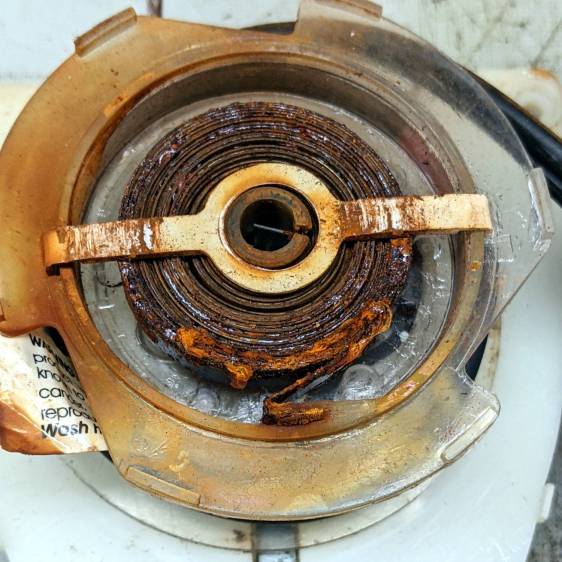
And, indeed, it hasn’t:
Sunbeam 3035 Iron – retraction spring rust
This being a steam iron, it has a water tank that gets filled through an awkward port with a sliding cover. Mary is as conscientious a person as you’ll ever meet, but the occasional spill has certainly happened and it is painfully obvious the iron’s designers anticipated no such events.
The coil spring had rusted into a solid mass:
Sunbeam 3035 Iron – spring rust – detail
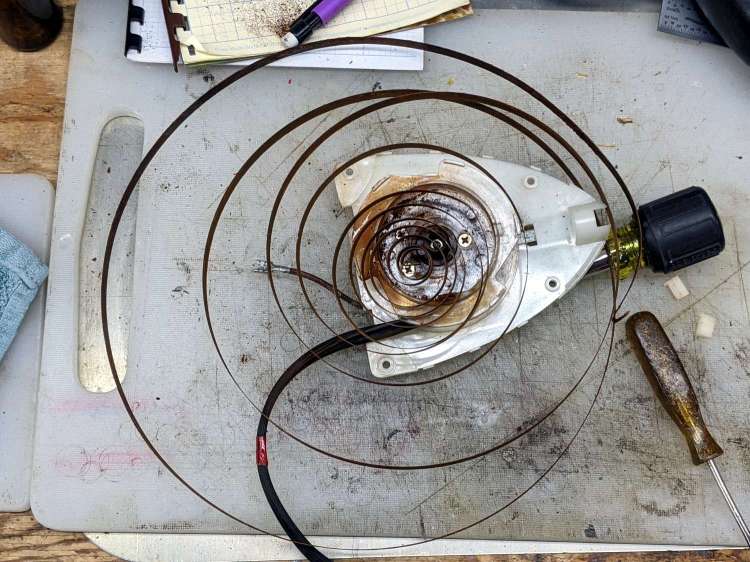
I removed the spring, soaked it in Evapo-Rust for a few hours, then cleaned and oiled it:
Sunbeam 3035 Iron – relaxed spring
Rewinding and reinstalling the spring showed it has lost its mojo and cannot retract more than a few feet of cord.
She’s in the middle of a quilting project and will replace the iron with whatever cheapnified piece of crap might be available these days. Similar irons have reviews reporting they begin spitting rust after a few months, which suggests the plastic tank or stainless steel hardware in this one have been cost-reduced with no regard for fitness-for-use.
The entire control panel of our longsuffering Kenmore gas range became increasingly erratic, eventually reaching the condition where touching the upper right corner would blank the display, touching the lower right corner would restore it, and gently touching the temperature knob might elicit an F2 or F4 error code on the display. Given the symptoms, the old adage “It’s always the connectors” sprang unbidden to mind; I was pretty sure the oven temperature sensor had nothing to do with it.
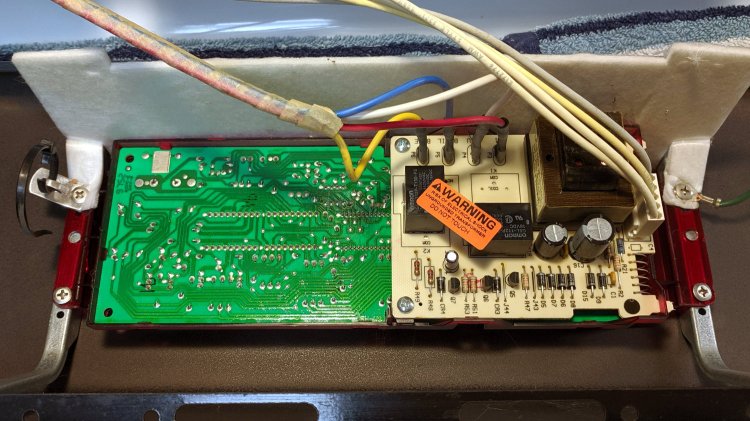
Pulling the thing apart reveals the PCB across the back of the control panel:
Kenmore oven control – PCB overview
Note that all of the external connections arrive on the white power supply PCB attached over the main PCB.
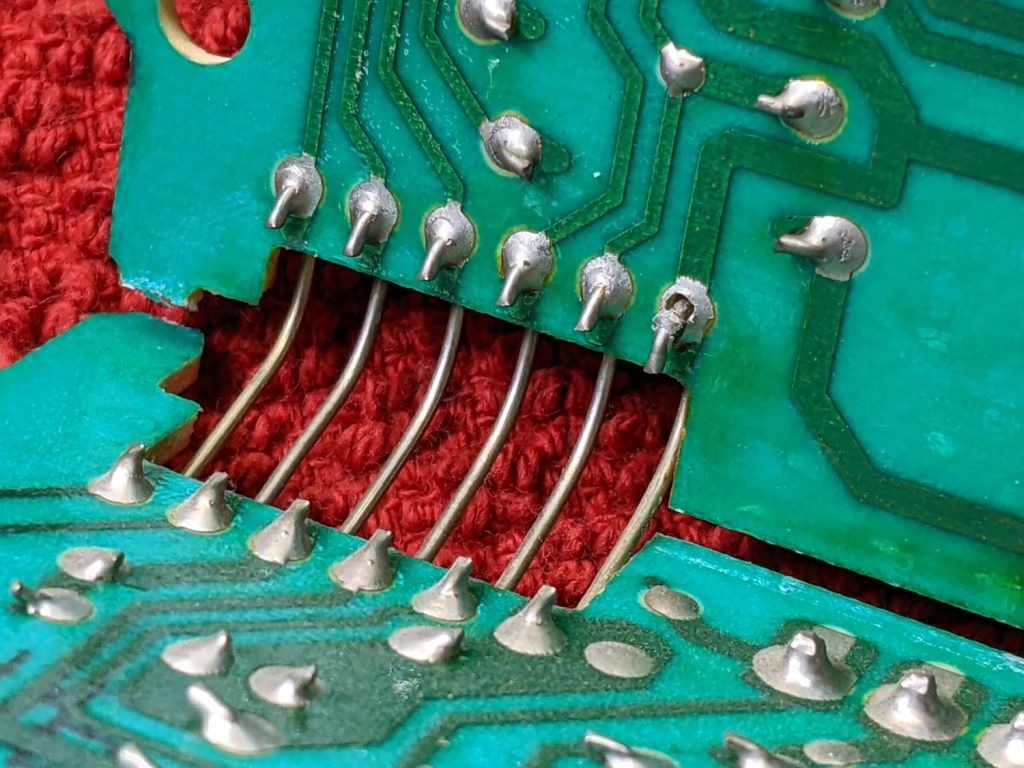
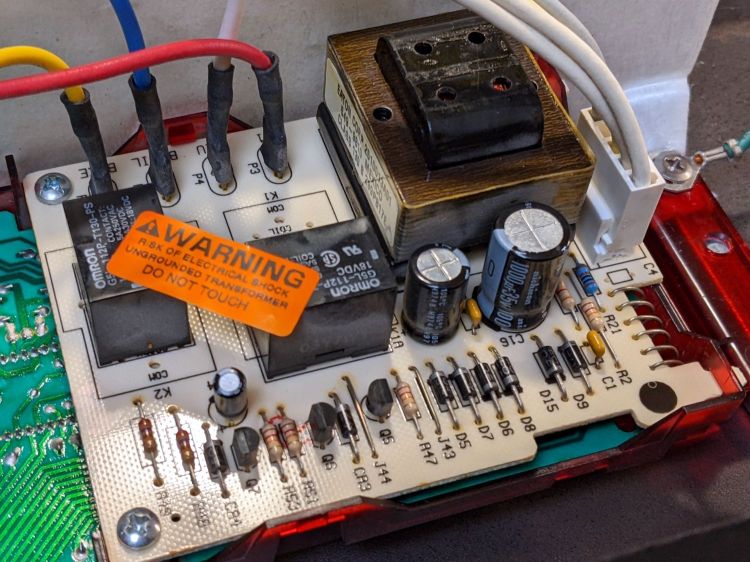
A closer look shows one of the two groups of wire interconnects between the two boards:
Kenmore gas range – rear PCB
There’s a similar group hidden behind the hulking transformer.
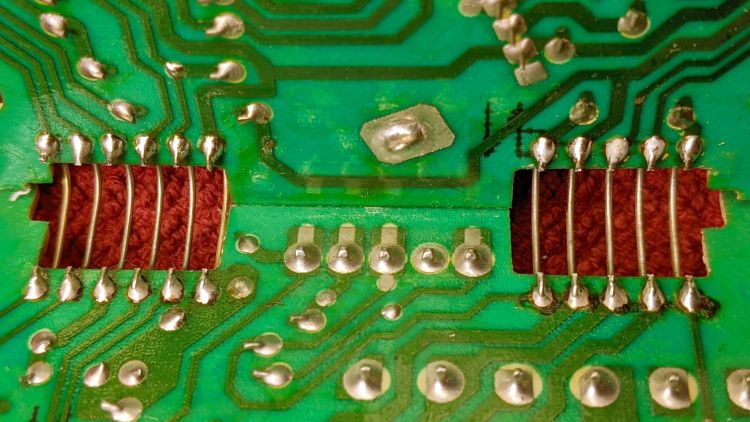
Removing the two obvious screws and easing the PCB out of the red plastic latches made the problem instantly obvious:
Kenmore gas range – failed solder joint
Yeah, that broken solder joint would definitely be touch-sensitive!
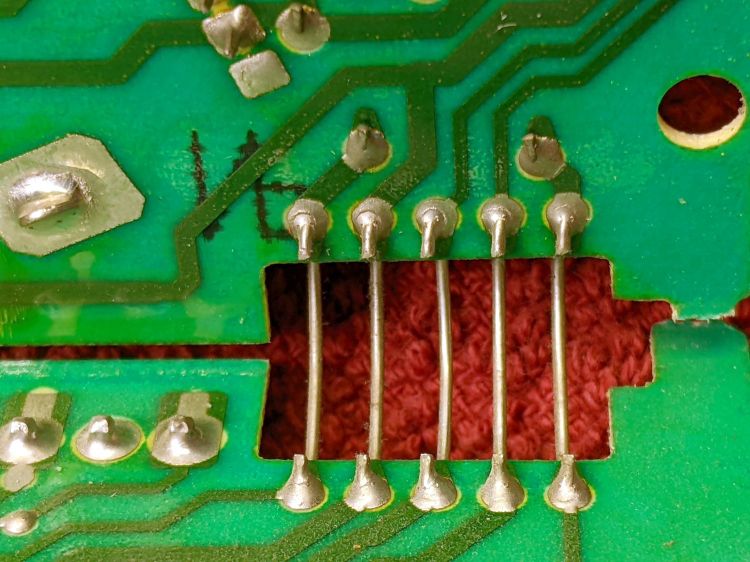
The solder joints in the other group also show signs of fatigue:
Kenmore gas range – broken solder joints
It’s of interest only the upper joints on the power supply PCB have fractured. Perhaps those ends of the wires were hand-soldered separately from the other ends in the main PCB?
Resoldering both ends of all the wires restored perfect operation:
Kenmore gas range – resoldered joints
For the record, the Kapton tape I laid over the entire control panel 2-½ years ago continues to protect the slightly cracked membrane over the pushbutton switches:
Kenmore oven control – Kapton tape cover
Gotta love yet another zero-dollar appliance repair …
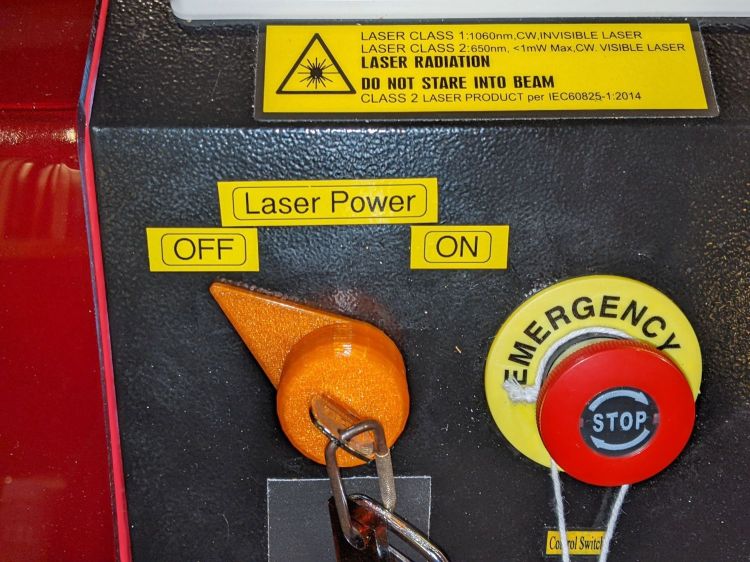
It is in series with the lower switch on the side panel:
OMTech Laser – rocker switch lit
Although I would have labeled those switches differently, the “Control Switch” handles the 120 VAC line voltage to the HV power supply. As you’d expect, when its light is ON, the power supply is also ON and the laser is ready to fire.
Those two pictures show the situation after I turned the laser power on a few days ago: key lock switch OFF, HV laser power supply stubbornly ON.
Whoops.
The “Control Switch” still does what it should, so I can shut the HV supply off when it’s not needed, but the key lock switch has definitely failed ON.
As far as I can tell, the moving contact bar jammed at the bottom of its travel against the terminals. Pulling the switch out of the laser jostled it enough to release the bar and it’s now at the top of its travel:
OMTech Laser – key lock – side view
If it failed once, it’ll fail again.
OMTech’s Customer Support agrees it shouldn’t behave like that; a replacement should arrive in a few days.
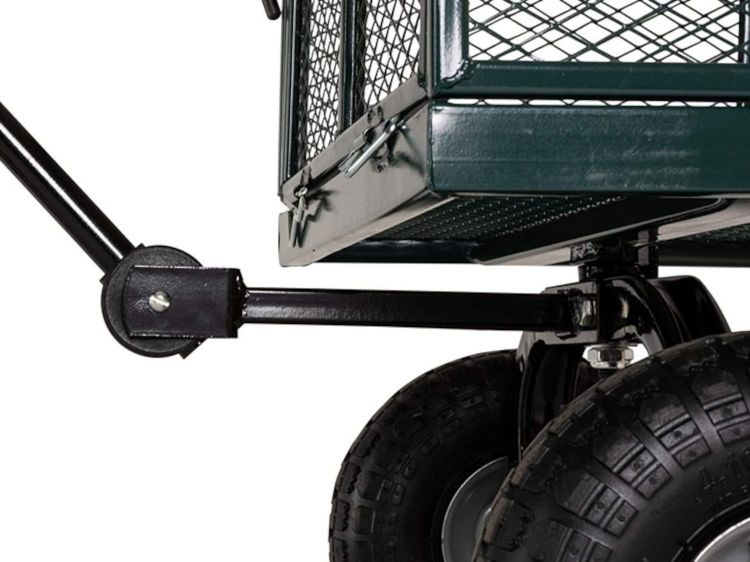
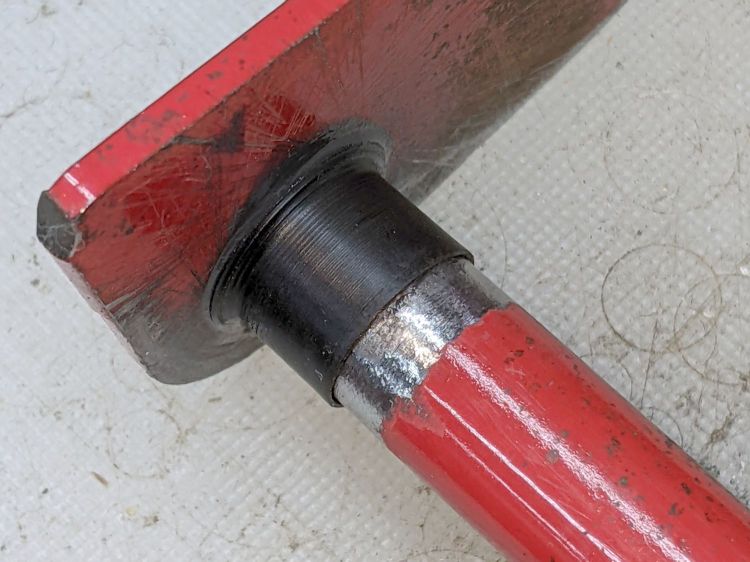
For reasons not relevant here, I was tapped to replace the plastic parts attaching the handle to a garden cart:
Garden Cart – handle attachment
The owner tried to contact the “manufacturer” to no avail; repair parts are simply not available, even if the name painted on the cart had a meaningful relationship to anything else.
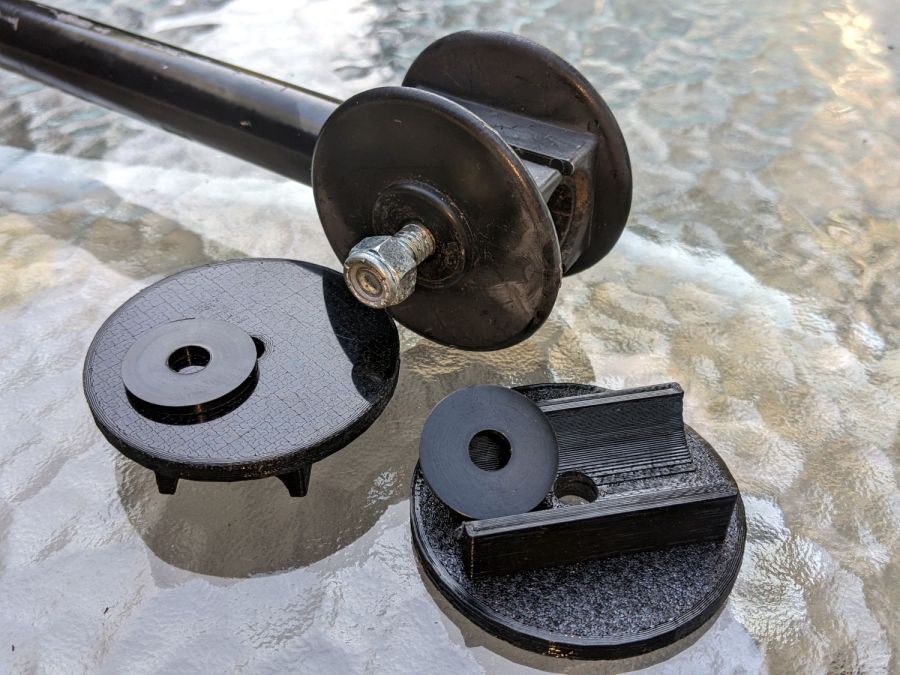
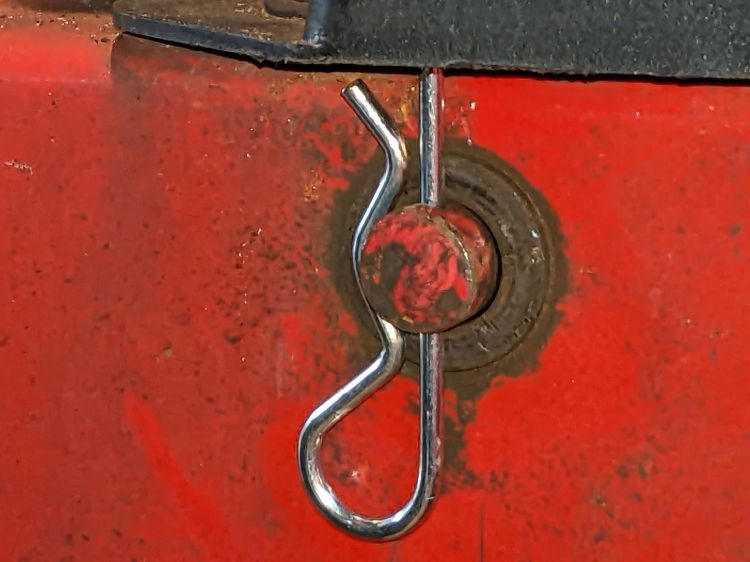
Well, I can fix that:
Garden Cart – handle repair parts
Fortunately, another cart in the fleet provided the missing bits so I could reverse-engineer their measurements.
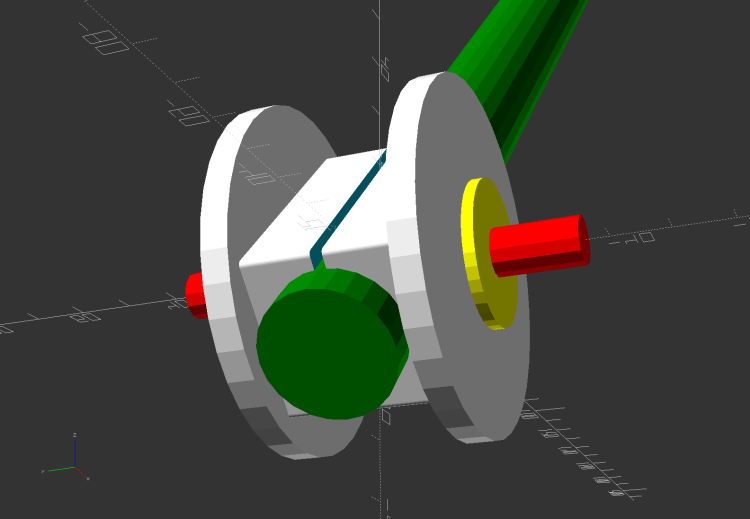
The solid model looks about like you’d expect:
Garden Cart Handle – show view
Printing the two halves with those nice (yellow) bosses in place wasn’t feasible. They were exactly 1 inch in diameter, so I just parted two cookies from the end of a stout acetal rod after drilling a hole for the 2-¼ inch 5/16-18 bolt.
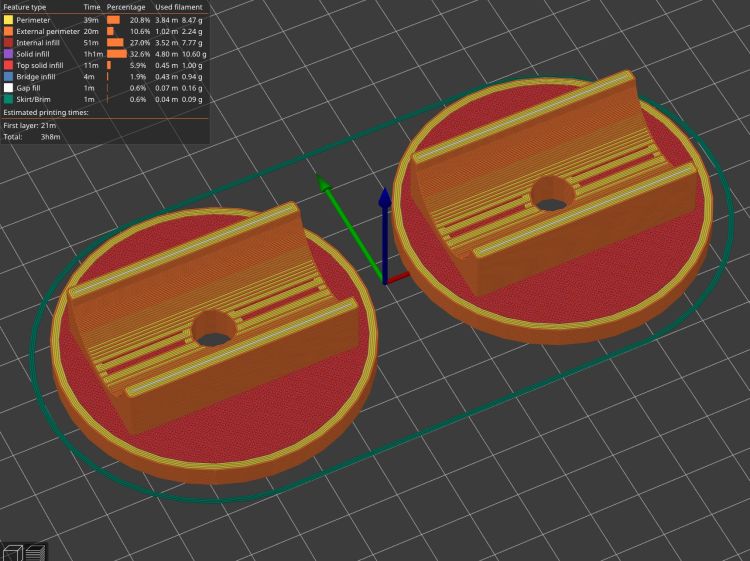
The two pieces took nigh onto three hours with five perimeters and 50% infill:
Garden Cart Handle – slicer preview
While delivering and installing the parts, I got volunteered to haul plants to cars with one of the carts during the upcoming Spring Plant Sale. That’ll teach me to stay in the Basement Shop …
This file contains hidden or bidirectional Unicode text that may be interpreted or compiled differently than what appears below. To review, open the file in an editor that reveals hidden Unicode characters.
Learn more about bidirectional Unicode characters
During the last snowstorm of the season, the venerable MTD snowthrower carved a trench out of the garage and across the driveway, then abruptly stopped moving. The motor roared and the auger turned, but the drive clutch handle had no effect, so I dragged its carcass into the garage and we completed the mission by hand.
Popping the belly plate on the next sunny day revealed the problem: the jam nut (part 34) anchoring the Friction Disk Wheel (part 28) to the Friction Wheel Bracket Assembly (part 32) had gone missing:
MTD Snowblower – page 26 – friction drive parts
Worse, the Wheel’s threaded shaft spent some time rattling around in the Bracket while chewing up its thread:
MTD Snowthrower – friction disk wheel – damaged thread
This would ordinarily be No Big Deal, but what you see of the shaft is all you get: it rotates freely in the bearing embedded in the Wheel with no way to hold it while cleaning up its threads.
Having already promised to replace the Wheel, I installed the new Wheel using a castle nut secured with a generous dollop of red Loctite, then tapped two of its castellations into the shaft’s slot as a mechanical anchor:
MTD Snowthrower – friction disk wheel – castle nut
I really wanted to lay a nice hard roll pin along that slot through the nut, but there’s no convincing way to secure such a thing without a second nut. Maybe next time?
While I had the drive train apart, the sad state of the Wheel Shift Rod Assembly (part 29) became apparent:
MTD Snowthrower – wheel shift rod – worn
I scuffed up the shiny wear mark, turned a suitable acetal bushing, filled the trench with epoxy, and squished the bushing in place:
MTD Snowthrower – wheel shift rod – acetal bushing
The flange might hold it in place against the Frame Shift Bracket (part 18), which snugly contains the rest of the bushing against the epoxy, so the whole affair might outlast the next season’s first snowstorm. We shall see.