Ed Nisley's Blog: Shop notes, electronics, firmware, machinery, 3D printing, laser cuttery, and curiosities. Contents: 100% human thinking, 0% AI slop.
While putting together the PIR sensor, I had occasion to haul out the old HP10525T Logic Probe (a bookend for the Tek logic probe) to figure out why the shift register wasn’t updating; that was easier than hauling the breadboard to the oscilloscope. While it showed the problem (wire tucked into wrong hole, hidden behind a cluster of other wires), it didn’t seem to be blinking quite right. The HP10525T Logic Probe Operating and Service Manual says it should blink at about 10 Hz for any pulse train from about 10 Hz up through 50 MHz (yes, 50 megahertz), with a minimum pulse width of 10 ns (yes, 10 nanoseconds), but it didn’t do that for the PWM going to the RGB LED strip or the shift register clock.
Given a manual printed in February 1975, I’m sure you know where this will end up…
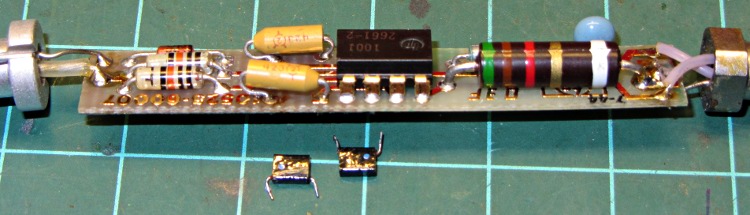
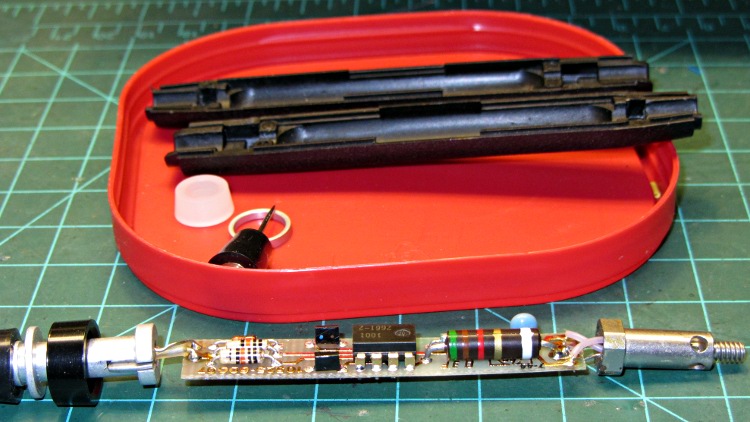
Unlike contemporary gear, the manual tells you how to dismantle the probe, using the needle tip as a tool. Doing so reveals a tidy circuit board with gold plated PCB traces:
HP10525T – original caps
The two tiny black rectangular capacitors just to the left of the 8 pin DIP IC are C1 and C2, rated 10 μF at 2 V (yes, 2 volts). As you might expect, they had ESRs in the 3 to 5 Ω range, rather than around 0.2 Ω. The catch is that the case doesn’t have room for anything much taller, but I did contort some solid tantalum through-hole caps into the space available:
HP10525T – replacement caps
Buttoned it up again and … it works fine. There really isn’t that much else to go wrong, is there?
This picture shows the incandescent lamp glowing half-bright to indicate that the lethally sharp probe tip (on the left here, with its stud on the right in the other pictures) sees a floating input:
HP10525T Logic Probe – glowing
I love happy endings, although I’m sure the accompanying HP10526T Logic Pulser needs recapping, too. When that project comes around, I’ll probably use SMD ceramic caps, because the pulser’s circuit board packs even more parts into the same volume.
Speaking of unhappy endings, HP used to be run by real techies: The Fine Manual’s body starts with Page 0 verso, after the title and two pages of front matter. ‘Nuff said.
Suddenly a resonant thwup-thwup-thwup-thwup fills the house, but no helicoptersfill the skies; in fact, most of the noise seems to be inside the house and … it’s coming from the shop. We look at each other and dash toward the basement door, knowing perfectly well that this is the part of the movie where the audience chants “Don’t open the door!Don’t open the door!”
Come to find out that it’s the pair of old Harman-Kardon powered speakers attached to the PC attached to the Thing-O-Matic; the PC is off, but I left the speakers turned on. Quick diagnostics: turning the volume down doesn’t reduce the motorboating, pulling the audio cable out of the PC doesn’t change anything, the only cure is to turn them off.
Under normal circumstances, they’re pretty good-sounding speakers, at least to my deflicted ears, although I have my doubts about the effectiveness of that reflex port. I plugged in a pair of unpowered speakers as subwoofers down near the floor, just because they were lying around; a pair of 75 mm drivers does not a subwoofer make, fer shure.
Pop quiz: what’s wrong?
Need a hint? Looky here:
HK Powered Speakers – wall wart
Disassembly:
The front cloth grille has four snap mount posts, two secured by hot-melt glue blobs: pry harder than you think necessary
Two screws near the top of the bezel thus revealed hold it to the back
The bottom two screws holding the driver frame in place also hold the bezel to the back
Remove two screws from the grooves in the bottom of the back
Amazingly, the driver has two different size quick-disconnect tabs; the neatly polarized wires slide right off
Cut the audio cable just behind the back panel, then push the two-piece cable clamp outward from the inside:
HK Powered Speakers – cable grommet
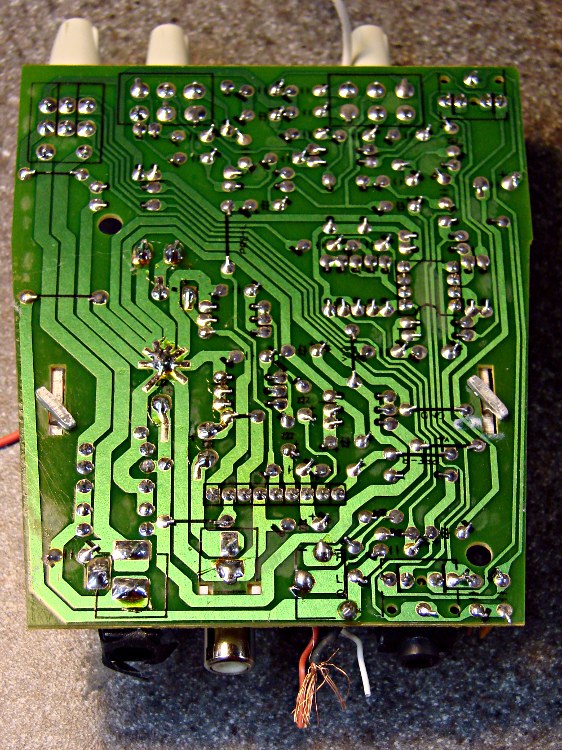
The bottom of the circuit board shows considerable attention to detail. Note the excellent single-point ground at the negative terminal of the big filter capacitor:
HK Powered Speakers – PCB foil side
And, of course, that’s the problem: most of the electrolytic capacitors were dried out. My ESR tester reported the big filter cap (downstream of the bridge rectifiers) as Open and several of the smaller caps were around 10 Ω. Replacing them with similarly sized caps from the heap solved the problem.
The hard-floor brush for our old Samsung VAC-9048R vacuum cleaner began scratching the hardwood floor, which called for some investigation & repair. The Fine Manual doesn’t even mention the hard floor brush, so it’s obvious I’m on my own (as is usually the case). Believe it or not, we actually discussed buying a vacuum cleaner, but the new ones have poor reviews, bulky & awkward plastic widgets on the handle, or suffer from other glaringly obvious faults; although this one is aging poorly, it’s at least workable. Plus, I bought a lifetime supply of bags when it was new and it’s not dead yet.
So, we begin…
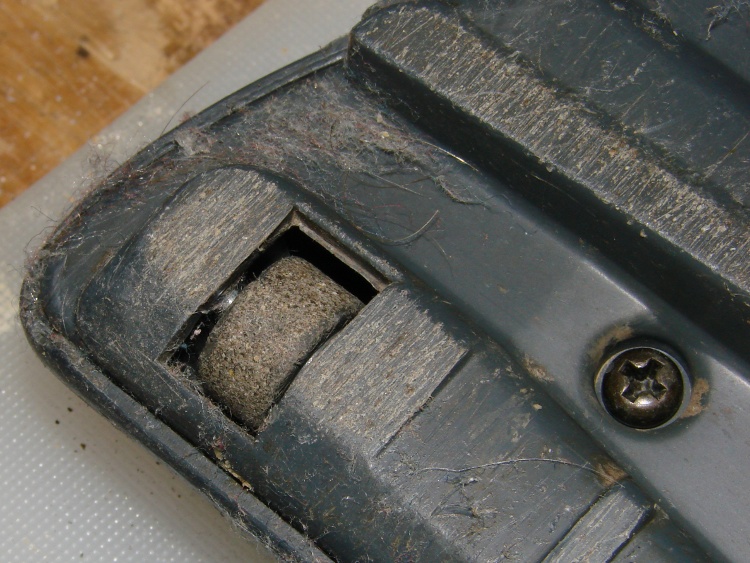
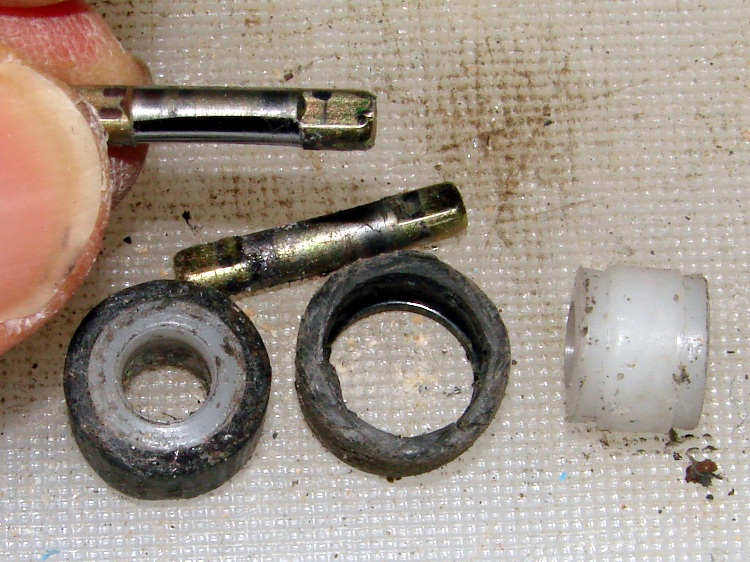
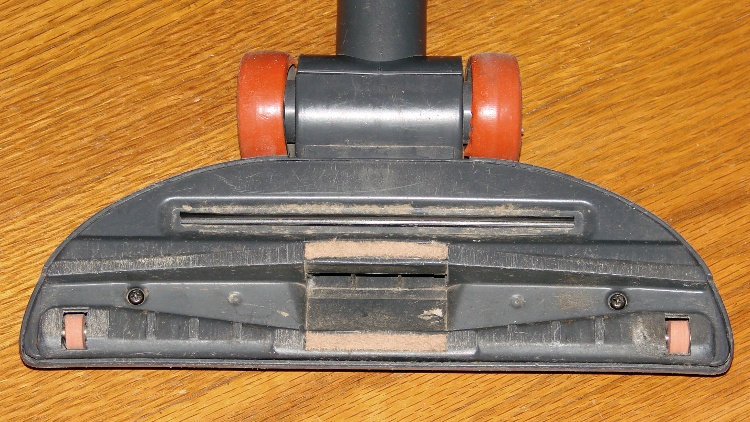
The rollers that used to support the front of the brush have worn down, allowing the bottom cover to erode on the floor. The right side ran through something sticky in the recent past:
Samsung 9048 – worn roller – right
The left side may not be sticky, but it’s in no better shape:
Samsung 9048 – worn roller – left
Remove the two obvious screws, pry the front edge up, and the whole cover plate pops off to reveal the two rollers. They pull straight out of the shaft support brackets molded into the top frame. Even their metal shafts show grievous wear:
Samsung 9048 – worn roller parts
The rollers consist of a hard plastic hub supporting a flexible rubbery tire, turning on a 3 mm steel shaft that’s worn on one side (which was downward, of course). The central holes in the rollers probably used to fit the shafts, but they’re now worn to 4 mm ID. The tires were probably a lot larger in diameter, too, back when they were new.
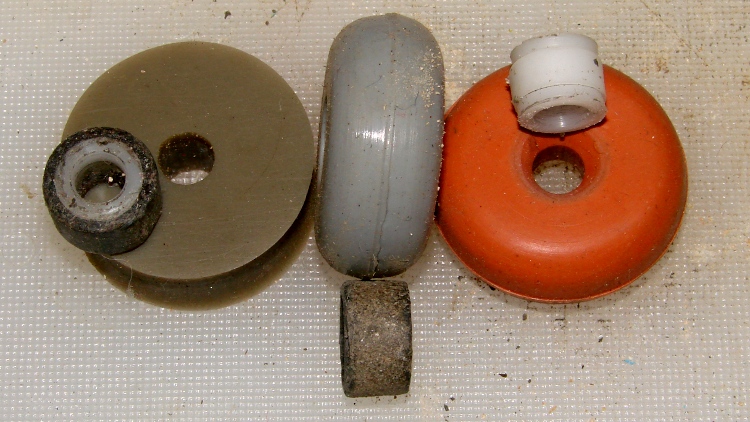
A bit of rummaging in the Basement Laboratory Warehouse Wing produced a bag of vibration isolation bushings that had about the right consistency to become tires:
Samsung 9048 – rollers and surplus vibration isolation bushings
They’re much larger than necessary, but are now, shall we say, fully depreciated and ready for a new, if somewhat downsized, lifestyle.
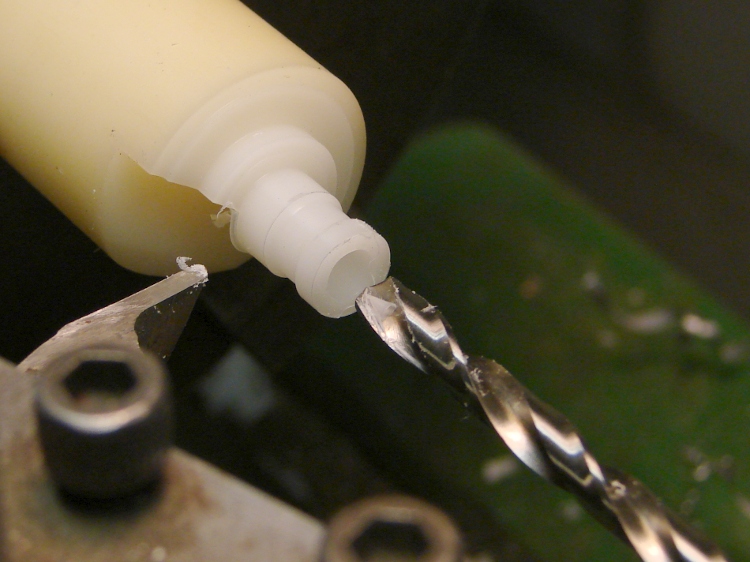
Unfortunately, they don’t fit onto the existing hubs, so I can’t use the hubs as a template. Fortunately, I have a lathe and some random nylon stock (with crosswise notches that didn’t pose much of a problem):
Samsun 9048 – turning roller hub
I came to my senses before converting this into a 3D printer project. If I had to make more than two hubs, it’d be a good idea to solid-model and print them, even if they’re just barely large enough to allow solid infill:
Samsun 9048 – finished roller hub
I’d go for a 3 mm ID to increase the wall width; these have a 4 mm ID to fit the brass bushings described below. There’s no significant overhang and they’d print with no problems. Maybe next time?
The isolation bushings cut easily with a sharp razor knife, so I pared them down to a bit over what I estimated to be the finished roller OD and width:
Samsung 9048 – roller tire before grinding
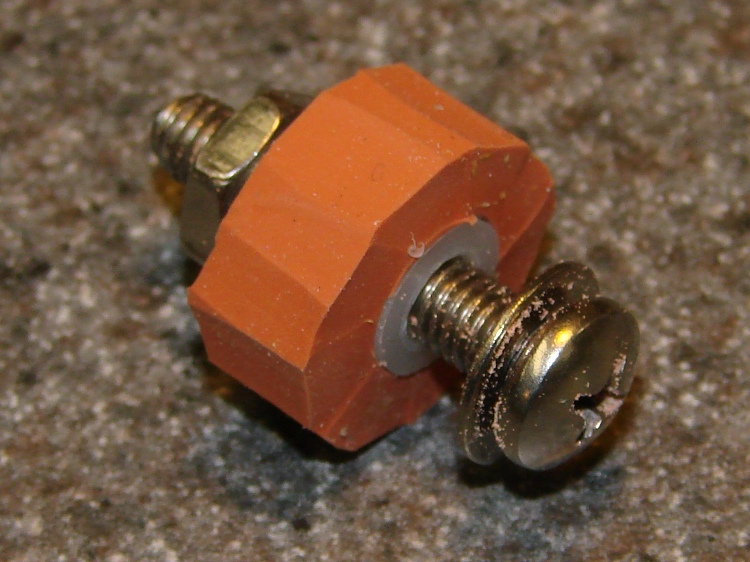
The 10-32 screw in that shiny new hub serves as an arbor in the lathe, where I held a Dremel tool with a sanding drum down on the compound rest, ran the lathe at its slowest back-gear speed, and sanded the bushing down to what seemed to be the right OD for the tire:
Samsung 9048 – grinding roller tire
The white snout in front leads to a shopvac that caught most of the dust. The front of the lathe chuck shows it wasn’t perfectly effective and I should have worn a dust mask; my glasses didn’t collect much dust, so maybe my lungs didn’t, either.
A trial fit in the floor brush body showed that this one was slightly too large and the sides needed tapering. The inside view:
Samsung 9048 – ground roller before side trim
The outside view, with the cover just slightly unable to snap closed:
Samsung 9048 – slightly oversize roller in place
Grinding a bit more off produced a pair of 15.5 mm OD tires which fit nicely. Some careful razor knife work smoothed and tapered the sides:
Samsung 9048 – finished rollers
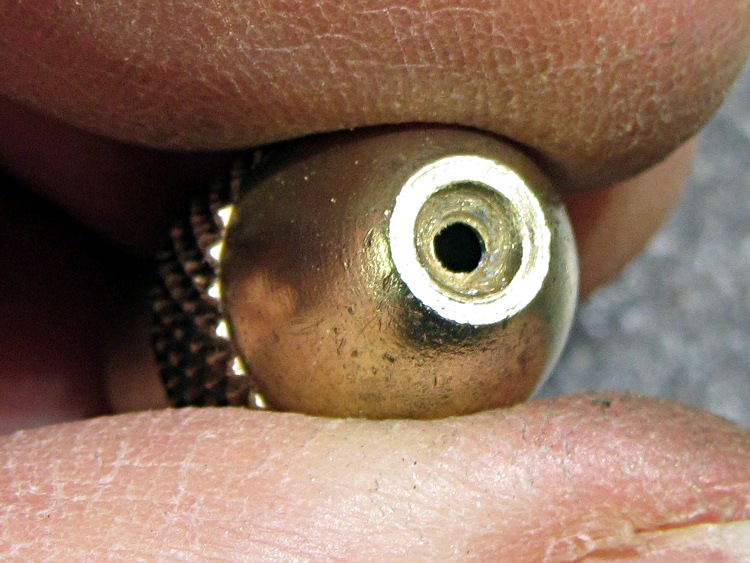
Brass tubes (from the stash of cutoffs) compensate for the flat on the severely worn steel shafts; a fix that turned out to be much easier than building new shafts:
Samsung 9048 – roller shaft bushing hub
Then reassemble in reverse order and it’s all good!
I wrapped a layer of silicone tape around the large and slightly worn hard-plastic rear tires, even though I’m sure that won’t last very long at all:
Samsung 9048 – repaired hard floor brush – bottom
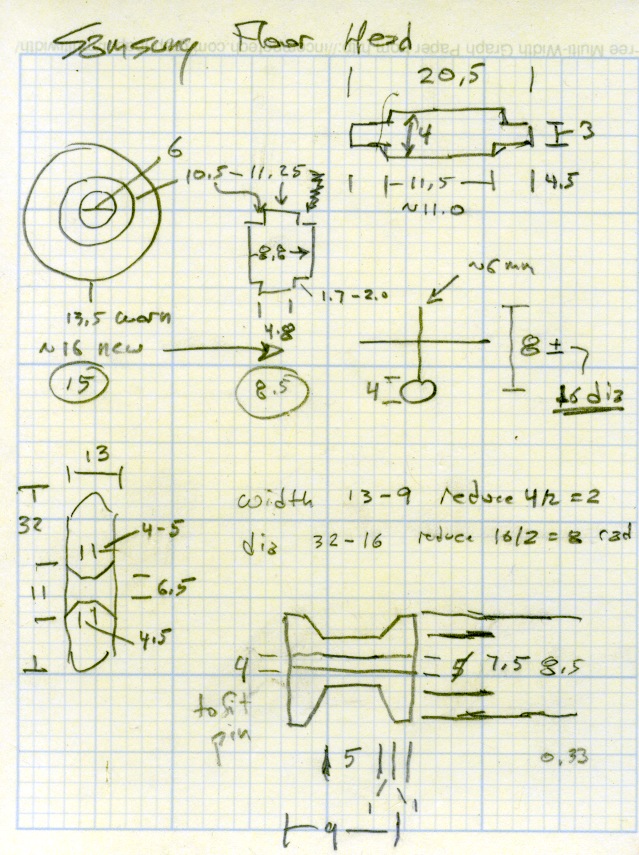
The shop doodle giving all the sizes:
Samsung 9048 – Roller dimension doodles
Now, if that doesn’t count as a gonzo repair, I don’t know what would… [grin]
So I finally got around to spraying some 10% bleach on an inconspicuous section of the roof (*) to see whether it would have any effect on that black fungus / mildew / crud. It’s too soon to tell, but in the process I discovered that the sprayer nozzle didn’t produce the nice, round pattern it used to. I completed the mission and took the nozzle to the basement. The problem was obvious:
Sprayer nozzle – with crud
Soaking it in vinegar didn’t have any effect; whatever made those deposits wasn’t soluble in water or mild acid. A few minutes with an awl and a (manually turned!) Dremel grinding point restored it to good condition:
Sprayer nozzle – cleaned
You’d be more careful cleaning the orifice of a fine spray nozzle, but this is for a hand-pumped garden sprayer: Good Enough.
As soon as the weather clears, we’ll see if the situation up on the roof has improved. If so, I get to spray the rest of it.
(*) The whole north slope over the garage, in case you’re in the market…
A few days of high & gusty winds braided the cords of the aluminum fish school wind chime hanging over the end of the patio:
It’s obviously an old, much-repaired relic.
My Shop Assistant added those blue fins many years ago, quite some time after she and a friend lost one of the fish while using them as digging implements. An unmarked replacement fish, crudely bandsawed from black-coated aluminum, began swimming in stealth mode amid the school.
Although the contacts passing power to the Wouxun HT worked well, they were obviously (in retrospect, as always) in the wrong place. Recently I rode the bike over a major bump and heard the radio reboot (it gives off two low-speed Morse “M” characters), which suggests at least one of the screw heads just barely touches the radio’s spring contacts.
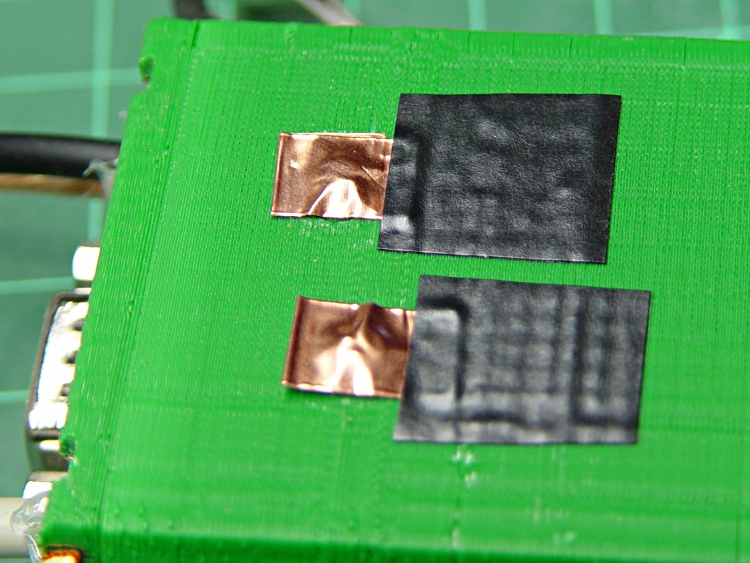
Two folded-under strips of copper tape may work around that problem until I build a whole ‘nother interface:
Copper foil on power contacts
The black tape adds emphasis to the lightly sticky end of the copper tape. The folded-under ends lie to the left in the picture, so there’s a continuous copper sheet connecting the radio battery contacts to the screw heads on the green case. It’s not a huge cross-sectional area, but … it’s better than no area at all.
The last time I tried this fix, I used woven copper mesh tape. This time, the solid copper tape was on top of the TLB (Tape Lookaside Buffer) holding the specialty tapes. Either should work fine.