Ed Nisley's Blog: Shop notes, electronics, firmware, machinery, 3D printing, laser cuttery, and curiosities. Contents: 100% human thinking, 0% AI slop.
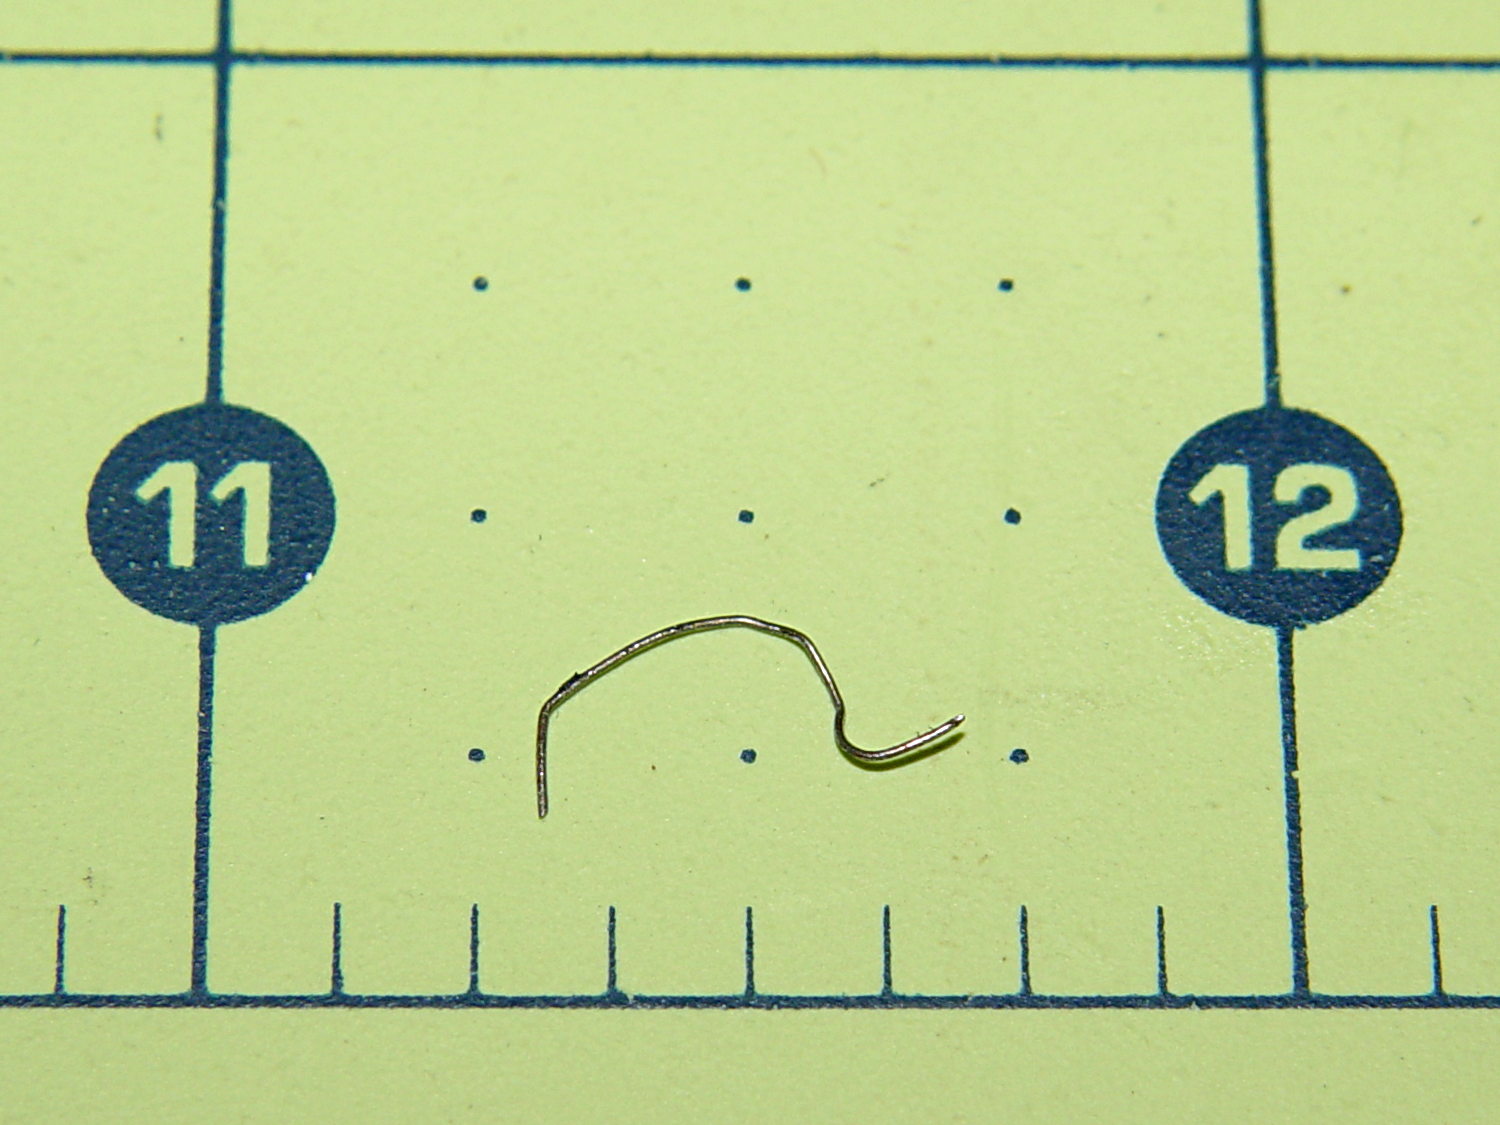
Mary heard a faint sound from the back of her bike that neither she nor I could track down. Standing in the garage, we decided it was slightly louder when the wheel turned backwards, but the sound didn’t correlate with anything.
Eventually, I held my hand over the wheel while turning it, whereupon the problem made itself obvious:
The short hook on the right side embedded itself the in the tread, with the rest sticking out. Turning the wheel backwards dragged the longer arc on the fender, making a slightly louder sound. Of course, the tightest fender-to-tire clearance occurs just behind the seat, where it isn’t easily visible.
We bought a replacement for the CorningWare casserole (that a raccoon broke when I put the rice out on the deck to cool) at a tag sale:
Nouveau Ceramic Pan – assembled
According to the information on the bottom, it’s “Nouveau A Princess House Exclusive” that’s no longer in their listing. Evidently, they’ve gone to metal stovetop cookware these days. Anyhow, it has a separate handle that latches onto a cleverly shaped tab molded into the pan:
Nouveau Ceramic Pan – handle released
Latching the handle in place is simple: put the end of the handle over the tab and squeeze the lever until it snaps into the handle. Well, I managed to latch it quite easily, after which nobody could figure out how to release it. That slotted button cries out to be pushed, but it wasn’t push-able.
That’s a condition I call “being outwitted by inanimate objects”…
After bringing it home, I discovered the secret: the slot must be exactly vertical (equivalently, maximally counter-clockwise) before you can press the button to release the latching handle. Turning the button so the slot is horizontal (maximally clockwise) locks the button out, so that you cannot press it and release the handle:
Nouveau Ceramic Pan – handle locked
The button locks out when the slot is almost imperceptibly clockwise from vertical; if you don’t know what to look for, you’d never notice the difference.
Which makes perfect sense to me. You want the handle to latch securely and require a deliberate action to release, lest the pan fall and release hot stuff all over your front. Any errors should leave the handle securely latched in place.
For reasons having to do with our Larval Engineer needing transportation, we just bought a Subaru Forester for us. While chewing through the 540 page Owners Manual, I discovered that, although the tire pressure monitoring system knows all five pressures, it can’t / won’t display them on the dashboard’s fancy LCD panel.
All four road tires had about the same pressure:
Subaru Forester – as-delivered tire pressure
Yes, I cross-checked two other gauges, Just To Make Sure.
That’s 7 or 8 psi over the spec found on the door frame placard: 30 psi front, 29 psi rear. The tire sidewalls implore you to never inflate them over 40 psi while seating the beads, although the absolute max rating of 51 psi at max load says they’re not really overstuffed.
The doughnut spare tire should have 60 psi and carried 64 psi:
Now, I’ve never had a cold tire gain pressure between checks (other than when the weather heats up), so I tend to run ’em on the high side of the recommended range. In this case, I left the spare alone and vented the road tires to 30 psi to see how it rides. If all goes well, then maybe I’ll puff ’em up a bit.
It’s time to check the fluid levels to see what could possibly go wrong under the hood…
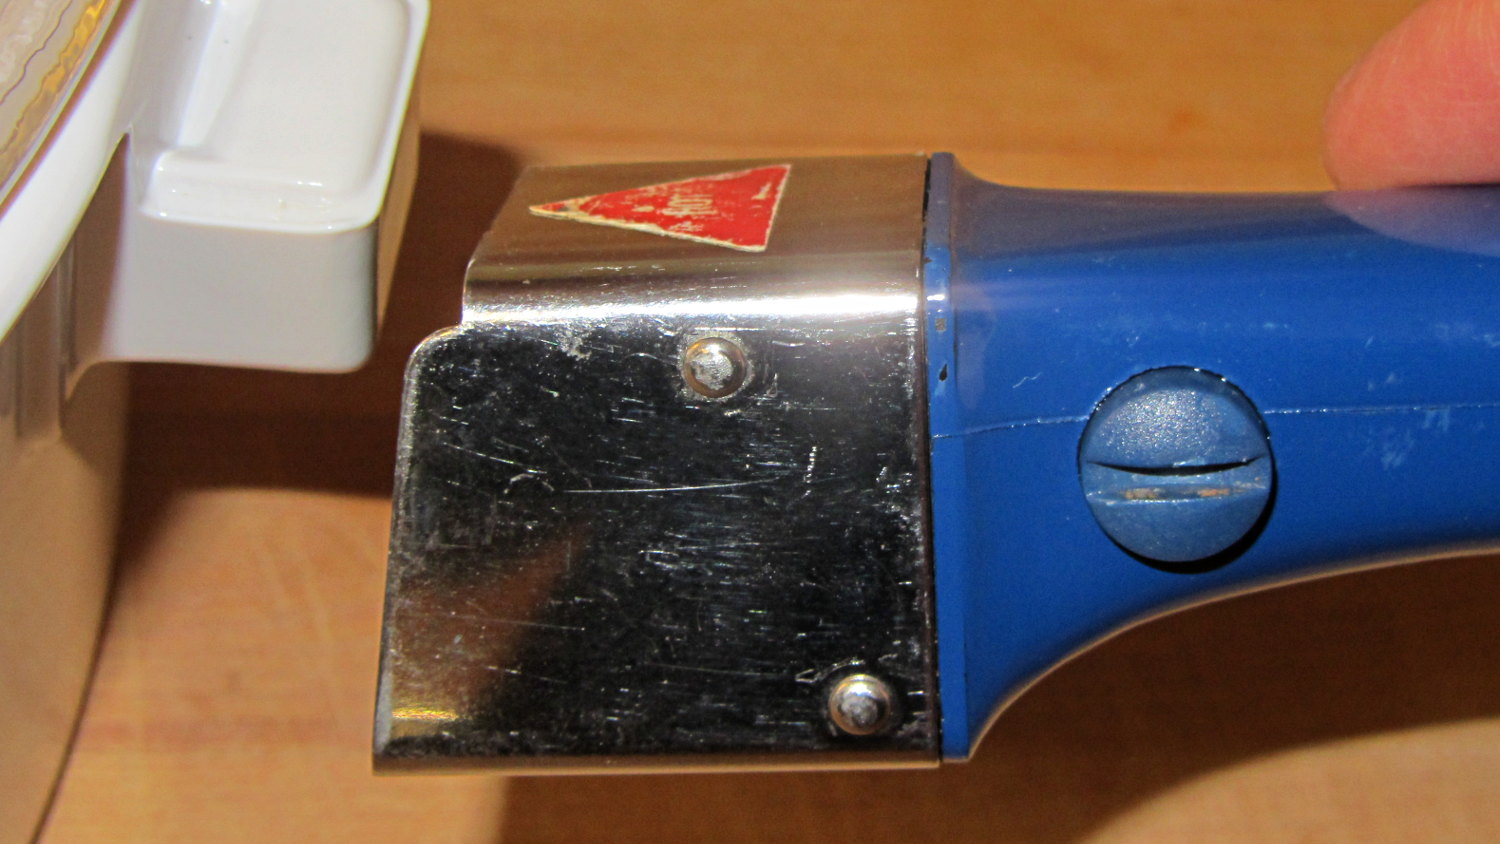
One of my headband magnifiers has a headlight above the brim, an incandescent flashlight bulb powered by a pair of AAA alkaline cells, that hasn’t worked well since the day I bought it. This being a time of finishing small projects, I finally tore it apart and discovered that the cells and contacts were in fine shape (!), the bulb (remember bulbs?) worked, the wiring was OK, but the switch was bad.
Magnifying headband – lamp switch
The switch body seems to be firmly anchored in place, so I pried that red base plate off in situ, un-bent the silver-plated (!) spring-contact-actuator, and reassembled it in reverse order. No pictures, as it took less time to do than to tell, but it now works perfectly… most likely, for the first time ever.
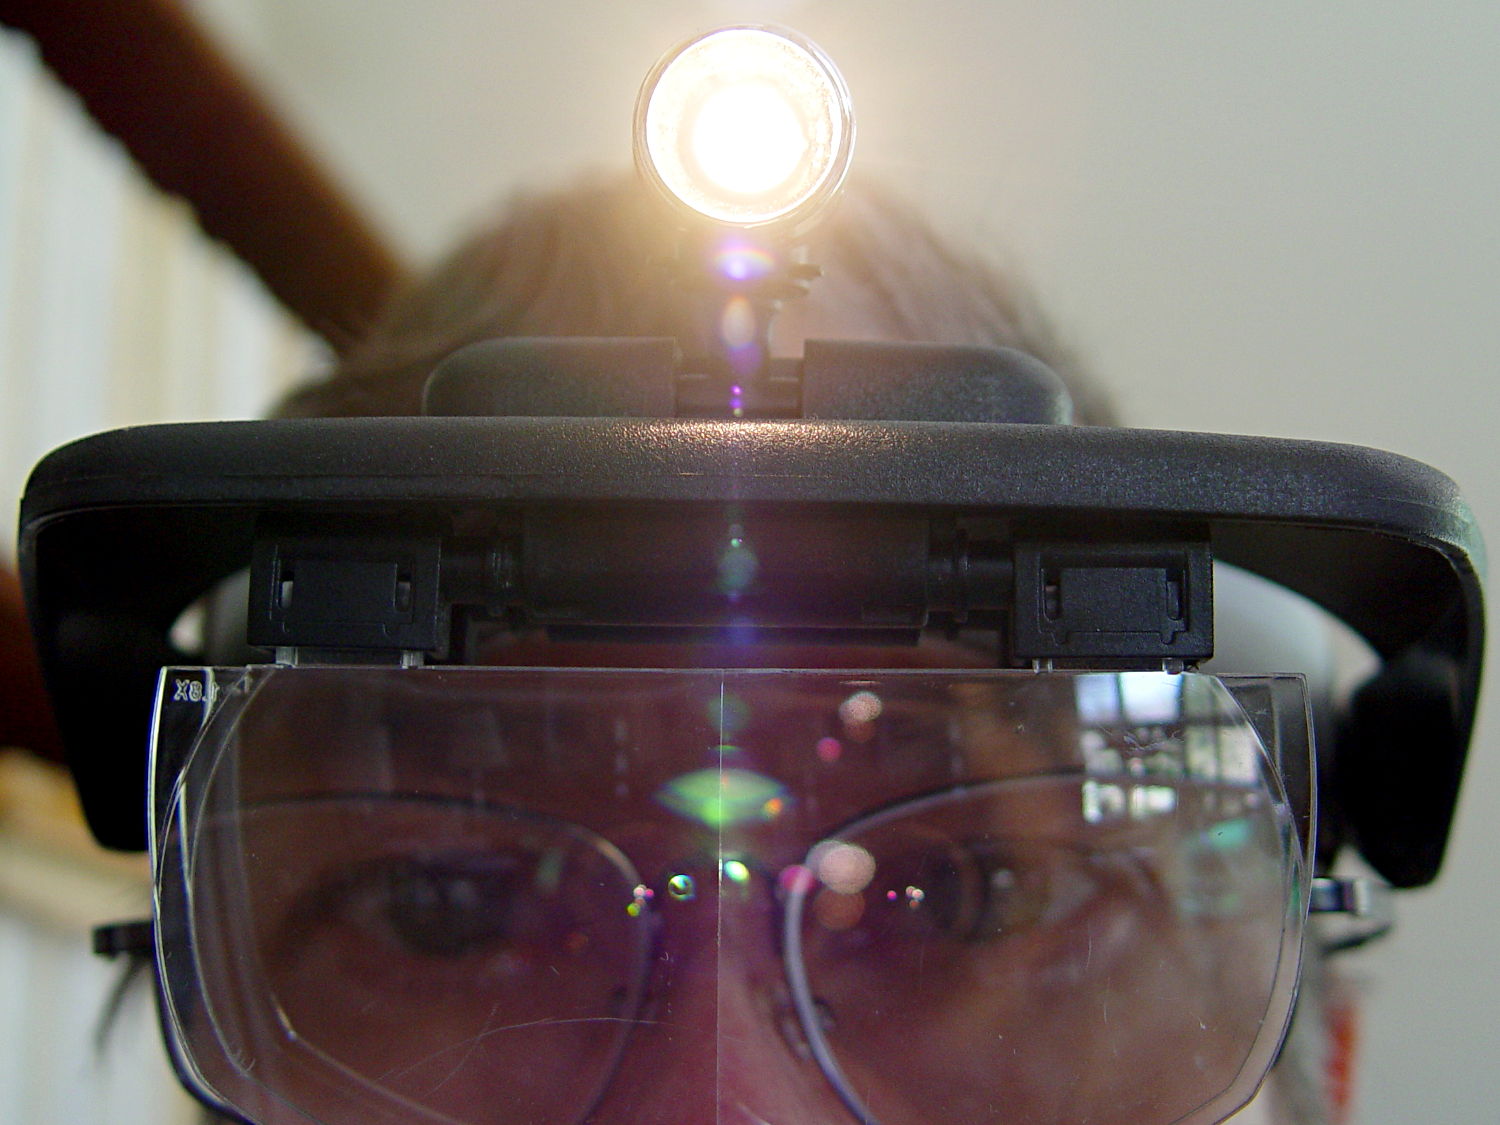
Stop squirming! This can be much more painful…
Magnifying headband – in action
I’m mildly tempted to hotwire the guts of a white LED flashlight into the thing, but that would require either another AA cell or a booster circuit and I’m not ready for that just yet.
My original dimensions for the helmet mirror mount used three sections of the inspection mirror shaft, with a short length of the fattest tube screwed into the azimuth turret:
Mirror shaft – 2-56 stud
Each section has a pair of brass leaf springs applying just enough friction to hold the next-smallest tube in place, with a rolled crimp securing the springs and preventing the smaller section from pulling out. My first version used that short length of the largest section and the next (for Mary’s helmet) used only the two smallest tubes; it’s rapid prototyping at its finest, except that I rarely discard a prototype that actually works.
Late last year I managed to pull the shaft out of the base while adjusting the length and watched those two springs flutter to the ground beside me.
After finding both of them amid the usual roadside clutter, I swore a mighty oath that I’d epoxy the base of the middle tube into the larger one, eliminating one non-functional adjustment point:
Bike helmet mirror mount – epoxied stalk base
The heatstink tubing covers most of the evidence, but you can see a fillet of epoxy around the end.
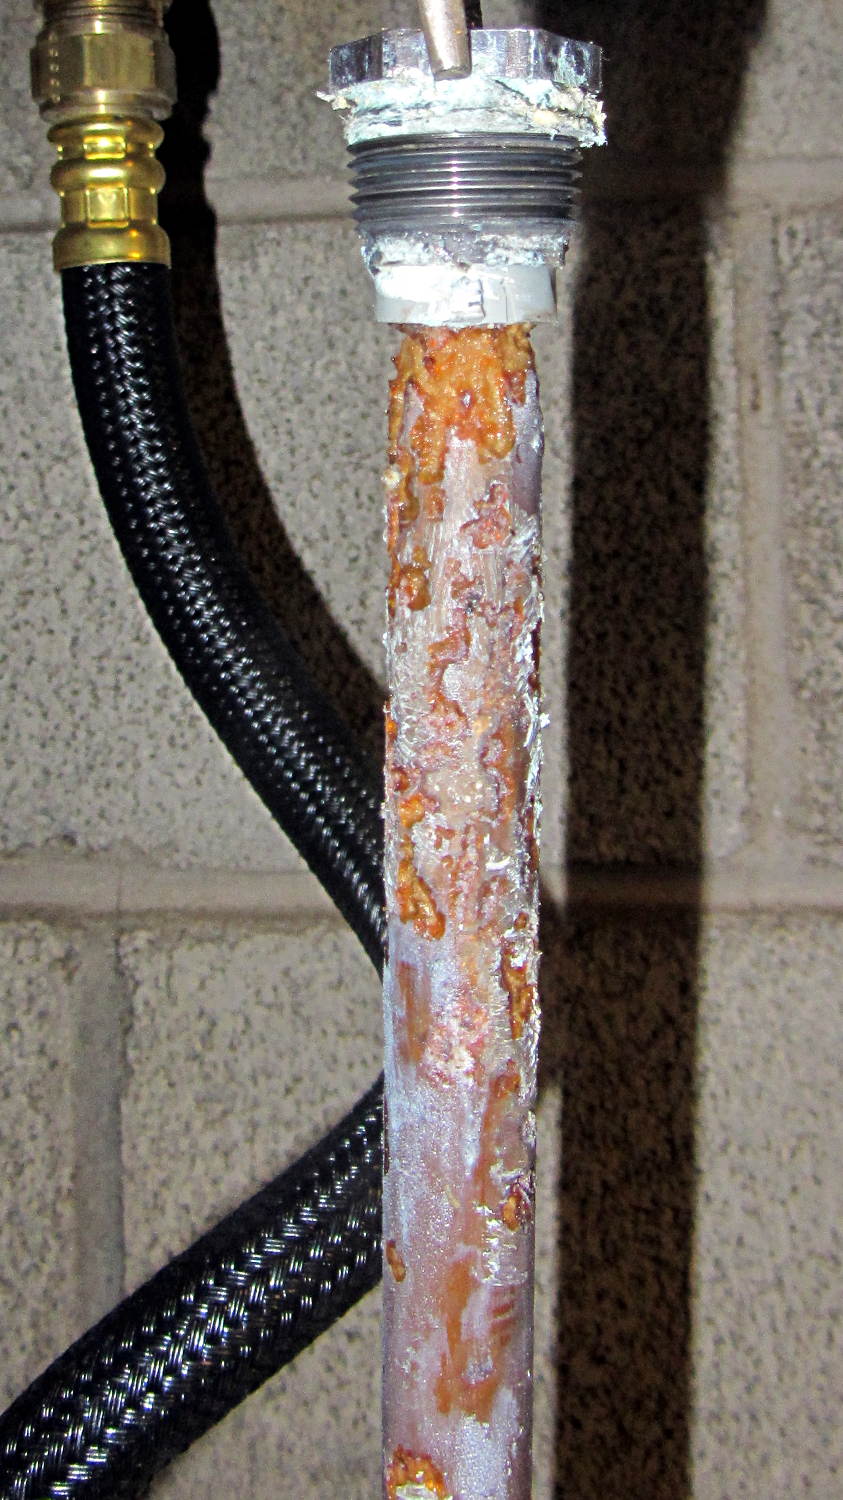
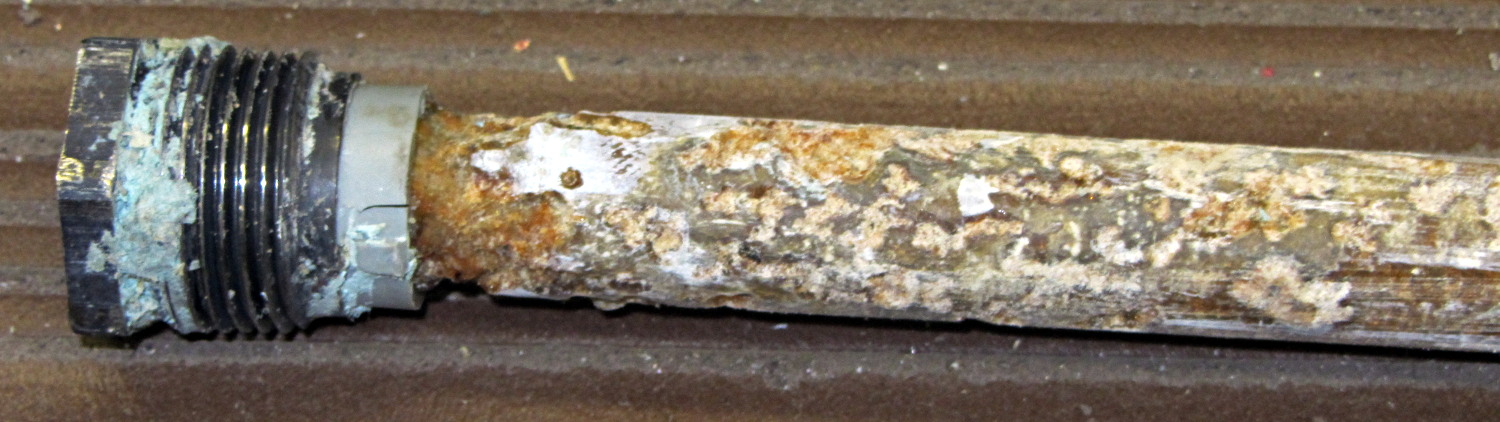
The Whirlpool water heater anode rod is corroding nicely:
Whirlpool anode rod – 2014-04
The new GE water heater anode rod seems to be passivating:
GE anode rod – coated – 2014-04
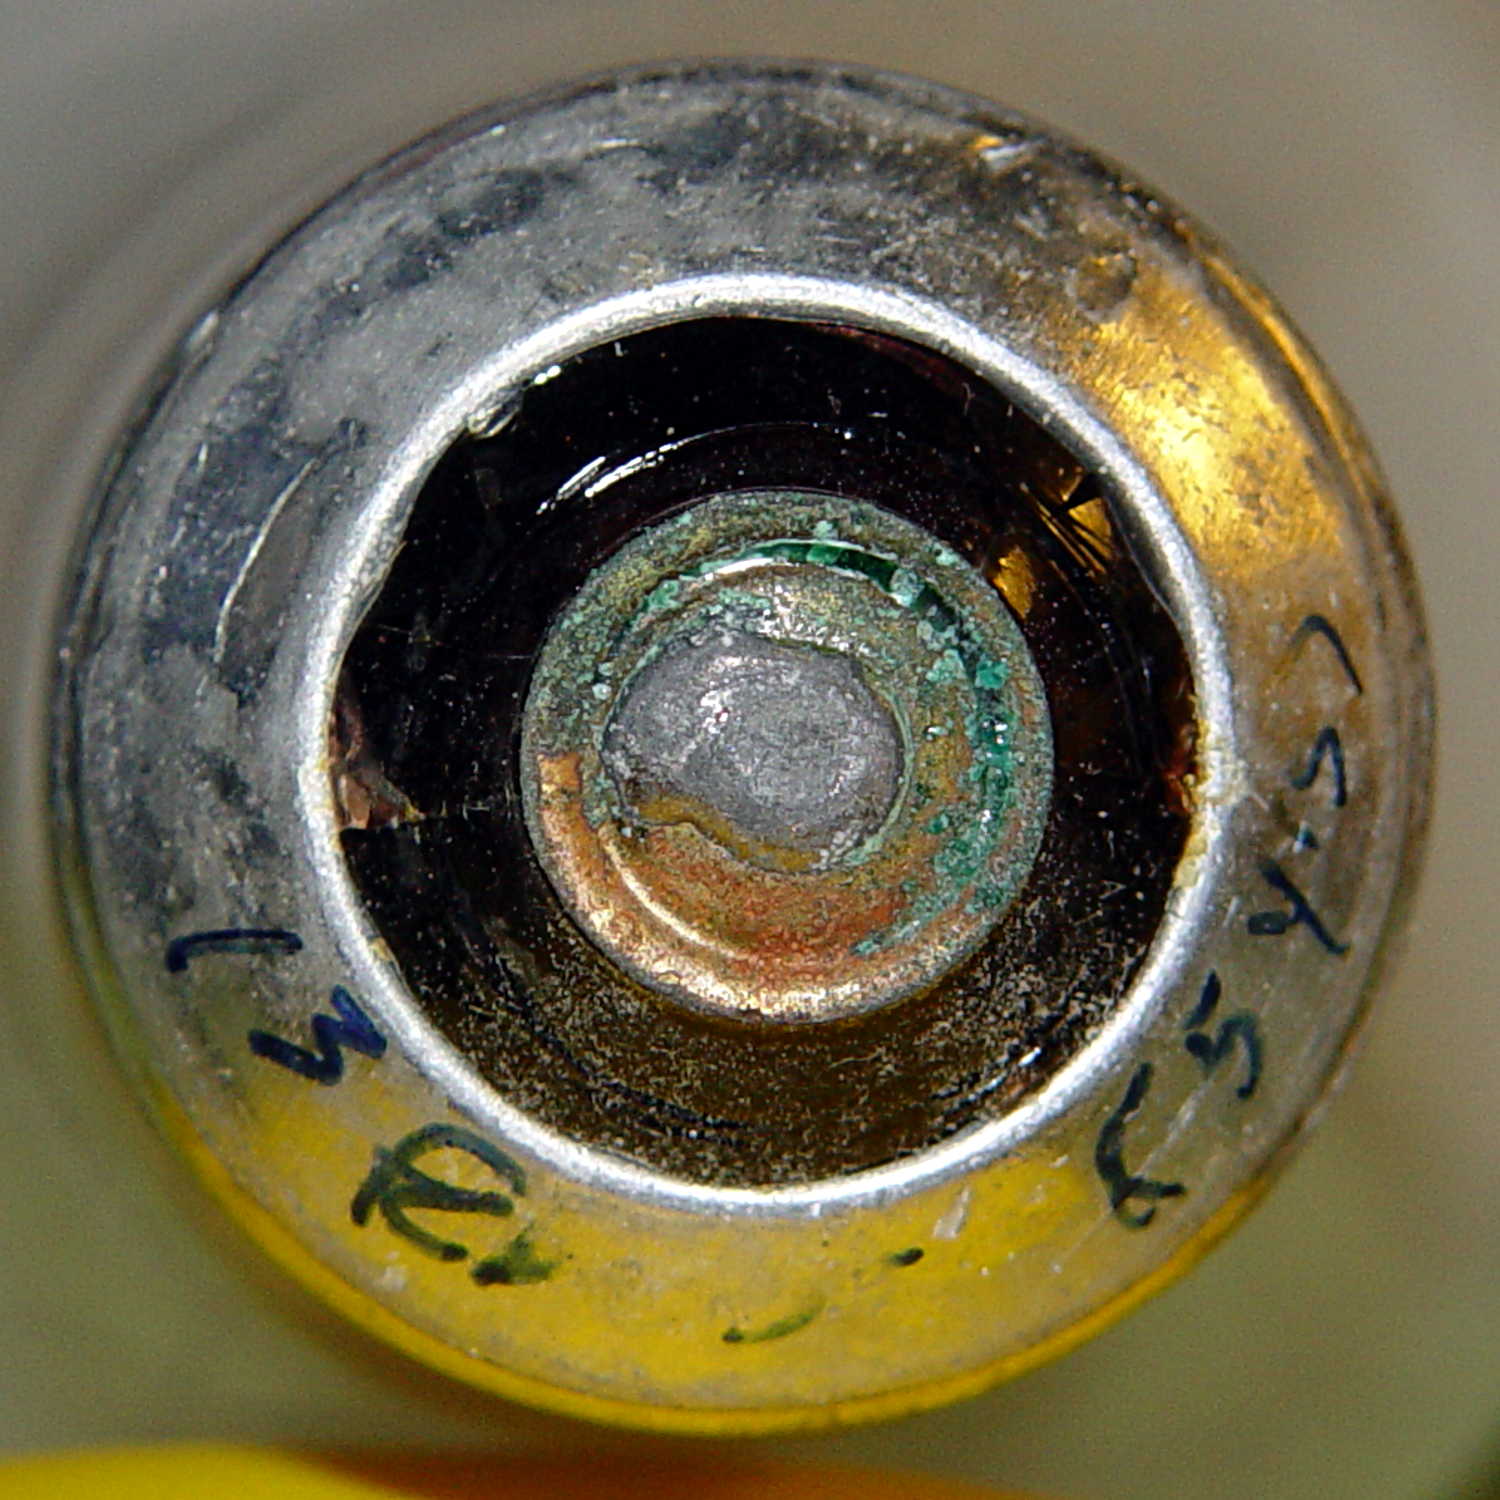
There’s some corrosion up near the bolt head, so it’s not entirely asleep:
GE anode rod – bolt – 2014-04
I hammered the coating off the rod, scuffed the shiny parts with coarse sandpaper, wiped off the dust, and stuck it back in its socket. We’ll see what it looks like next year.
Both tanks flushed nicely without too much sediment.
Two 40 W incandescent bulbs in the front bathroom burned out within a few days of each other. Being that type of guy, I know that I installed this bulb nine years ago:
Bulb base – install date
The date is easier to read with the bulb in hand: 13 Feb 05. The (5 yrs) indicates the previous bulb in that socket lasted five years.
The other bulb date went in during March 09, so it survived only five years; the previous bulb lasted 6 years.
Even though 40 W incandescent bulbs are history, maybe I have enough spares on the shelf that the next owner can replace ’em with cheap LEDs.
This may not be science, but it does have numbers…