The Smell of Molten Projects in the Morning

Ed Nisley's Blog: Shop notes, electronics, firmware, machinery, 3D printing, laser cuttery, and curiosities. Contents: 100% human thinking, 0% AI slop.

Tag: Laser Cutter

  • Laser-Engraved Bentley Snowflakes

    Laser-Engraved Bentley Snowflakes

    Algorithmic snowflakes make for interesting coasters and decorations:

    Snowflake Hangers - frosted
    Snowflake Hangers – frosted

    But they lack the complexity of real snowflakes:

    Wilson Bentley Photomicrograph of Dendrite Star Snowflake No. 842 - SIA-SIA2013-09114 - rescaled
    Wilson Bentley Photomicrograph of Dendrite Star Snowflake No. 842 – SIA-SIA2013-09114 – rescaled

    That’s from the Smithsonian collection of the Wilson Bentley snowflake photos from back in the 1890s, all of which are CC0 = Public Domain images.

    So pick a nice image, say #842, clean it up a bit, and isolate the flake from the background:

    Snowflake No. 842 - SIA-SIA2013-09114 - isolated
    Snowflake No. 842 – SIA-SIA2013-09114 – isolated

    Pick a threshold level to prettify the result:

    Snowflake No. 842 - SIA-SIA2013-09114 - Threshold
    Snowflake No. 842 – SIA-SIA2013-09114 – Threshold

    Then engrave it into the back of an acrylic mirror scrap, so the darkest parts become most transparent:

    Bentley 842 - engraved mirror - white background
    Bentley 842 – engraved mirror – white background

    Which looks better when seen against an illuminated background:

    Bentley 842 - engraved mirror - color background A
    Bentley 842 – engraved mirror – color background A

    Well, I think it does:

    Bentley 842 - engraved mirror - color background B
    Bentley 842 – engraved mirror – color background B

    Maybe four different snowflakes atop those squares?

    Gotta get this ready for the next snow season …

  • Shoulder PT Pulley: Last 10% Manufacturing

    Shoulder PT Pulley: Last 10% Manufacturing

    Mary’s PT requires a Shoulder Pulley, so I got one that seemed better constructed than the cheapest Amazon crap. In particular, this view suggested the pulley ran on a bearing:

    Slim Panda Shoulder Pulley - detail view
    Slim Panda Shoulder Pulley – detail view

    Which turned out to be the case, but, also as expected, the whole thing required a bit of finishing before being put in service.

    It’s intended to hang from a strap trapped between an interior door and its frame. The strap was intended to attach to the block (a.k.a. “Thickened base”) through a breathtakingly awkward pair of low-end carabiners:

    Slim Panda Shoulder Pulley - carabiners
    Slim Panda Shoulder Pulley – carabiners

    Which I immediately replaced with a simple, silent, sufficiently strong black nylon cable tie:

    Shoulder PT Pulley - block hardware
    Shoulder PT Pulley – block hardware

    Rather than let the metal block clunk against the door, it now sports a pair of cork-surfaced bumper plates:

    Shoulder PT Pulley - side plates installed
    Shoulder PT Pulley – side plates installed

    A doodle of the block dimensions:

    Shoulder Pulley - dimension doodle
    Shoulder Pulley – dimension doodle

    Which turned into a simple LightBurn layout:

    Shoulder PT Pulley Side Plates - LB layout
    Shoulder PT Pulley Side Plates – LB layout

    The blue construction lines represent the actual block & pulley, with the red cut lines offset 2 mm to the outside to ensure the metal stays within the bumpers. It’s possible to pick the block up and whack the pulley against the door, so don’t do that.

    Cut out two pieces of 3 mm MDF, two pieces from a cork coaster (covered with blue tape and cut with the paper backing up), peel-n-stick the cork to the MDF, put double-sided foam tape on the block, peel-n-stick the bumpers, then hang on the attic door.

    Now it works the way it should!

    The LightBurn SVG layout as a GitHub Gist:

    Loading
    Sorry, something went wrong. Reload?
    Sorry, we cannot display this file.
    Sorry, this file is invalid so it cannot be displayed.

  • Tailor’s Clapper: CNC Pocketing

    Tailor’s Clapper: CNC Pocketing

    Separating the interior contour of the finger grip from its overall shape let me reduce the woodworking to a simple pocketing operation:

    Ironing Weight Finger Grip
    Ironing Weight Finger Grip

    Start by aligning the finished block to put the joint between the pieces parallel to the X axis, then touch off at the center:

    Ironing Weight - alignment
    Ironing Weight – alignment

    A pair of clamps screwed to the tooling plate act as fixtures to align the block when it’s flipped over to mill the other pocket.

    Just to see how it worked, I set up a GCMC program to produce a trochoidal milling pattern using the sample program:

    Tailors Clapper - Pocket Milling Path
    Tailors Clapper – Pocket Milling Path

    Now, most folks would say the Sherline lacks enough speed and stiffness for trochoidal milling:

    Ironing weight - trochoidal milling
    Ironing weight – trochoidal milling

    Aaaand I would agree with them: chugging along at 24 in/min = 600 mm/min doesn’t put the 10 k RPM spindle speed to good use. Fortunately, oak doesn’t require much in the way of machine stiffness and the trochoid path does ensure good chip clearance, so there’s that.

    If I had to do a lot of trochoid milling, I’d tweak the GCMC sample code to short-cut the return path across the circle diameter, rather than air-cut the last half of every circumference.

    The code starts by emptying a circular pocket so the trochoid path begins in clear air, rather than trenching into solid wood.

    Eventually it finishes the pocket:

    Ironing weight - grip pocket
    Ironing weight – grip pocket

    After the trochoid finishes, one climb-milling pass around the perimeter clears the little ripple between each trochoid orbit.

    Flip it over, clamp it down, touch off the middle, and do it all again.

    The next step is filling those pockets with a pair of comfy grips.

    The GCMC source code as a GitHub Gist:

    // Ironing weight pocketing
    // Ed Nisley KE4ZNU – 2023-01
    //—–
    // Library routines
    include("/opt/gcmc/example/cc_hole.inc.gcmc");
    include("varcs.inc.gcmc");
    include("tracepath_comp.inc.gcmc");
    include("trochoidal.inc.gcmc");
    /*
    include("tracepath.inc.gcmc");
    include("engrave.inc.gcmc");
    */
    //—–
    // Useful constants
    SafeZ = 10.0mm; // above all obstructions
    TravelZ = 2.0mm; // within engraving / milling area
    BlockHome = [0.0mm,0.0mm,TravelZ]; // Origin on surface at center of pocket
    FALSE = 0;
    TRUE = !FALSE;
    //—–
    // Overall values
    Socket = [160.0mm,25.0mm,7.0mm]; // raw grip recess into block
    RoundEnds = TRUE; // TRUE for smooth rounded endcaps
    SocketRadius = RoundEnds ? Socket.y/2 : 10.0mm;
    comment("SocketRadius: ",SocketRadius);
    CutterDia = 6.32mm – 0.15; // actual cutter diameter – windage
    MillStep = 0.25 * CutterDia; // stepover in XY plane
    comment("CutterDia: ",CutterDia," MillStep: ",MillStep);
    MillClean = MillStep/2;
    PlungeSpeed = 150.0mm; // cutter Z plunge into work
    MillSpeed = 600.0mm; // XY speed
    if (CutterDia > SocketRadius) {
    error("Cutter too large for corner radius");
    }
    CornerOC = head(Socket,2) – 2*[SocketRadius,SocketRadius];
    comment("CornerOC: ",CornerOC);
    Corners = RoundEnds ? // rear left CCW around slot
    {-CornerOC/2, CornerOC/2} :
    {[-CornerOC.x,CornerOC.y]/2, [-CornerOC.x,-CornerOC.y]/2, [CornerOC.x,-CornerOC.y]/2, CornerOC/2};
    comment("Corners: ", Corners);
    if (RoundEnds) {
    SlotPerimeter = {[0.0mm,Socket.y/2,-Socket.z]}; // entry point at center rear
    SlotPerimeter += {Corners[0] + [0.0mm,SocketRadius]};
    SlotPerimeter += varc_ccw([-SocketRadius,-SocketRadius],SocketRadius) + SlotPerimeter[-1];
    SlotPerimeter += varc_ccw([+SocketRadius,-SocketRadius],SocketRadius) + (Corners[0] + [-SocketRadius,0.0mm]);
    SlotPerimeter += {Corners[1] + [0.0mm,-SocketRadius]}; // across front
    SlotPerimeter += varc_ccw([+SocketRadius,+SocketRadius],SocketRadius) + SlotPerimeter[-1];
    SlotPerimeter += varc_ccw([-SocketRadius,+SocketRadius],SocketRadius) + (Corners[1] + [+SocketRadius,0.0mm]);
    }
    else {
    SlotPerimeter = {[0.0mm,Socket.y/2,-Socket.z]}; // entry point at center rear
    SlotPerimeter += {Corners[0] + [0.0mm,SocketRadius]};
    SlotPerimeter += varc_ccw([-SocketRadius,-SocketRadius],SocketRadius) + SlotPerimeter[-1];
    SlotPerimeter += {Corners[1] + [-SocketRadius,0.0mm]};
    SlotPerimeter += varc_ccw([+SocketRadius,-SocketRadius],SocketRadius) + SlotPerimeter[-1];
    SlotPerimeter += {Corners[2] + [0.0mm,-SocketRadius]}; // across front
    SlotPerimeter += varc_ccw([SocketRadius,SocketRadius],SocketRadius) + SlotPerimeter[-1];
    SlotPerimeter += {Corners[3] + [SocketRadius,0.0mm]};
    SlotPerimeter += varc_ccw([-SocketRadius,SocketRadius],SocketRadius) + SlotPerimeter[-1];
    }
    //— Begin cutting
    goto([-,-,TravelZ]);
    goto(BlockHome);
    if (!RoundEnds) { // clear corners outward of main pocket
    foreach(Corners; xy) {
    comment("Plunge corner at: ",xy);
    feedrate(PlungeSpeed);
    goto(xy);
    move([-,-,-Socket.z]);
    comment(" pocket");
    feedrate(MillSpeed);
    cc_hole(xy,(SocketRadius – MillClean),CutterDia/2,MillStep,-Socket.z);
    goto([-,-,TravelZ]);
    comment(" done!");
    }
    }
    comment("Open slot");
    TrochRadius = (Socket.y – CutterDia)/2 – MillClean;
    TrochPath = {[-(Socket.x/2 – TrochRadius – CutterDia/2 – MillStep),TrochRadius],
    [ (Socket.x/2 – TrochRadius – CutterDia/2 – MillStep),TrochRadius]};
    comment(" clear landing zone");
    xy = [TrochPath[0].x,0.0mm];
    feedrate(PlungeSpeed);
    goto(xy);
    move([-,-,-Socket.z]);
    feedrate(MillSpeed);
    cc_hole(xy,Socket.y/2 – MillClean,CutterDia/2,MillStep,-Socket.z);
    goto([-,-,TravelZ]);
    comment(" trochoid pocket milling");
    feedrate(MillSpeed);
    trochoid_move(TrochPath[0],TrochPath[1],
    -Socket.z, TrochRadius, MillStep);
    goto([-,-,TravelZ]);
    comment("Clean slot perimeter");
    feedrate(MillSpeed);
    goto([-,-,-Socket.z]);
    tracepath_comp(SlotPerimeter,CutterDia/2,TPC_CLOSED + TPC_LEFT + TPC_ARCIN + TPC_ARCOUT);
    goto([-,-,TravelZ]);
    goto(BlockHome);
    #!/bin/bash
    # Ironing weight finger grip pocketing
    # Ed Nisley KE4ZNU – 2023-01
    Flags='-P 4 –pedantic' # quote to avoid leading hyphen gotcha
    # Set these to match your file layout
    LibPath='/opt/gcmc/library'
    Prolog='prolog.gcmc'
    Epilog='epilog.gcmc'
    #—–
    gcmc $Flags \
    –include "$LibPath" –prologue "$Prolog" –epilogue "$Epilog" \
    "Ironing weight grip pocket.gcmc" > "Grip pocket.ngc"
    view raw pocket.sh hosted with ❤ by GitHub

  • Tailor’s Clapper: Laser-Cut Woodwork
    Tailor’s Clapper: Laser-Cut Woodwork

    Creating the rounded-rectangle shape of a tailor’s clapper in LightBurn, then cutting it out, doesn’t pose much of a challenge:

    Ironing weight - cutting oak plank
    Ironing weight – cutting oak plank

    That was a prototype cut from an oak plank with some fairly obvious splits. It turned out OK, but ¾ inch oak is obviously right at the limit of my 60 W laser’s abilities:

    Ironing weight - laser cut edges
    Ironing weight – laser cut edges

    The “production” clappers came from a nicer plank that was just barely long enough:

    Ironing weight - laser cuts - top
    Ironing weight – laser cuts – top

    The cut, at 2 mm/s and 70% power, just barely penetrates the plank:

    Ironing weight - laser cuts - bottom
    Ironing weight – laser cuts – bottom

    Unlike the top picture, I put the plank on the knife-edge supports, resulting in the small charred lines perpendicular to the cut.

    The edges came out thoroughly charred:

    Ironing weight - laser cuts - edges
    Ironing weight – laser cuts – edges

    Spread yellow wood glue smoothly on one piece, stick another to it, then align and clamp:

    Ironing weight - clamping
    Ironing weight – clamping

    I offset the cut 1 mm outside the nominal shape to allow Mr Belt Sander to remove the char while reducing the block to size. Obviously, there is no real tolerance, other than that it must fit Mary’s hand, and they all came out nice and straight.

    Some of the char seems embedded deep in the wood grain and leaves a dark mark despite removing the extra millimeter:

    Ironing weight - seam ironing B
    Ironing weight – seam ironing B

    Contrary to what I feared, the characteristic wood-stove odor dissipated after a day or two: they’re entirely inoffensive. Which was fortunate, as the slightest odor would cause them to fail incoming inspection.

    The longer weight on the far left came from a plank with a conspicuous knot on one end. The stress from supporting that branch while the tree grew apparently made the wood much denser, as the same 2 mm/s 70% cut setting barely made it halfway through the plank. I finished the job by cutting the outline with Tiny Bandsaw™, which didn’t proceed any faster than the laser and left a much less uniform path for Mr Belt Sander.

    I’d definitely consider making any future tailor’s clappers by laminating three half-inch oak planks that would be much easier to cut, but my woodpile doesn’t have anything like that.

    The wood remains unfinished, as part of its job is to absorb moisture from steam-ironed fabric (which is not happening in the photo). Applying stains / sealers / finishes would definitely improve the wood’s appearance, but wreck its performance. Around here, function always outweighs form.

  • Ironing Weight, a.k.a. Tailor’s Clapper: Overview

    Ironing Weight, a.k.a. Tailor’s Clapper: Overview

    Mary wanted some ironing weights, formally known as tailor’s clappers, to produce flatter seams as she pieced fabric together:

    Ironing weight - flattened seam
    Ironing weight – flattened seam

    The weights are blocks of dense, hard, unfinished wood:

    Ironing weight - seam ironing A
    Ironing weight – seam ironing A

    One can buy commercial versions ranging from cheap Amazon blocks to exotic handmade creations, but a comfortable grip on a block sized to Mary’s hands were important. My lack of woodworking equipment constrained the project, but the picture shows what we settled on.

    The general idea is a rounded wood block with 3D printed grips:

    Ironing Weight Finger Grip
    Ironing Weight Finger Grip

    All other clappers seem to have a simple slot routed along the long sides, presumably using a round-end or ball cutter, which means the cutter determines the shape. This being the age of rapid prototyping, I decided to put the complex geometry in an easy-to-make printed part inserted into a simple CNC-milled pocket.

    The first pass at the grip models:

    Ironing Weight Finger Grip - slicer preview
    Ironing Weight Finger Grip – slicer preview

    Both recesses came from spheres sunk to their equators with their XY radii scaled appropriately, then hulled into the final shape. Customer feedback quickly reported uncomfortably abrupt edges along the top and bottom:

    Ironing Weight - maple prototype
    Ironing Weight – maple prototype

    We also decided the straight-end design didn’t really matter, so all subsequent grips have rounded ends to simplify milling the pocket into the block.

    With the goal in mind, the next few posts will describe the various pieces required to make a nice tailor’s clapper customized to fit the user’s hand.

  • Acrylic Engraving Dust

    Acrylic Engraving Dust

    The MDF signs I made last year disintegrated pretty much on the expected schedule, so it’s time for something more durable:

    Please Close The Gate - acrylic engraving
    Please Close The Gate – acrylic engraving

    The idea is to engrave both sides of a 3 mm orange acrylic sheet, shoot it with rattlecan black paint, and declare victory. The second step awaits warmer weather, but at least I’m doing my part to prepare for the new gardening season.

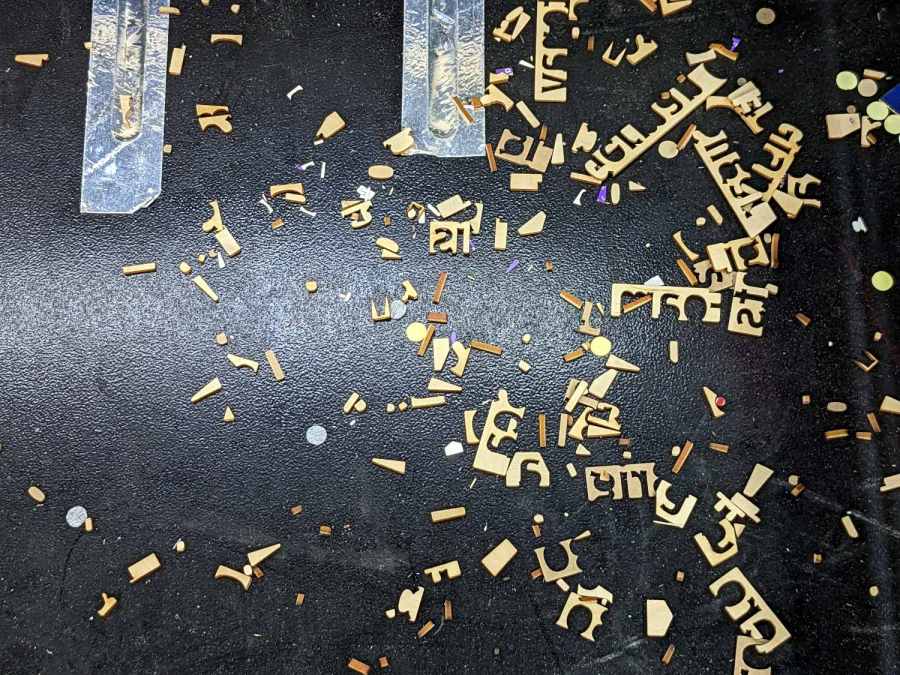
    Vaporizing that much acrylic produces a fair bit of debris:

    Please Close The Gate - acrylic dust on laser head
    Please Close The Gate – acrylic dust on laser head

    Some dust / vapor accumulates / condenses on the honeycomb platform beyond the orange sign, but most of it gets through to the baffle on the exhaust duct:

    Please Close The Gate - acrylic dust on exhaust port
    Please Close The Gate – acrylic dust on exhaust port

    A closer look shows it really does grow out from the perimeter of each hole:

    Please Close The Gate - acrylic dust on exhaust port - detail
    Please Close The Gate – acrylic dust on exhaust port – detail

    Now, if that doesn’t trip your trypophobia, nothing will …

    A few passes with the trusty Electrolux vacuum’s dust brush brought the visible surfaces back to normal.

    By now, the duct fan blades have surely layered on a good coating, too, which shall remain undisturbed until I find a better reason to open the duct.

  • Brick Wall in Z-Scale

    Brick Wall in Z-Scale

    A LightBurn forum discussion about problems making Z-scale (1:220) bricks led me to trying a few ideas on the way to figuring out what was going wrong.

    Each brick is about 1.0×0.5 mm, so an entire wall doesn’t cover much territory:

    Z-scale bricks - assortment
    Z-scale bricks – assortment

    Yes, those are millimeters along the scale.

    The kerf on my 60 W CO₂ laser seems slightly wider than the “mortar” lines should be, so I made a layout with the vertical lines slightly inset from the horizontal ones:

    Z Scale Brick Wall - LB layout
    Z Scale Brick Wall – LB layout

    That let the kerf complete the lines without burning into the adjacent bricks:

    Z Scale Brick Wall - laser lines
    Z Scale Brick Wall – laser lines

    The cuts are obviously too wide (and deep!), but just for fun I colored the chipboard with red marker and rubbed a pinch of flour into the lines:

    Z Scale Brick Wall - color and flour
    Z Scale Brick Wall – color and flour

    Which looks chunky, but not terrible, for what it is. Maybe concrete blocks would look better?

    The next attempt started with a raster bitmap scaled at 254 dpi = 10 pix/mm, so that single-pixel “mortar” lines between 10×5 pixel bricks would be 0.1 mm wide:

    Raster Z-Scale Bricks
    Raster Z-Scale Bricks

    Scanning the image at 100 mm/s makes each pixel 1 ms “wide” and, because the power supply risetime is on the order of 1 ms, the laser won’t quite reach the 10% power level across the vertical lines:

    Raster Z-Scale Bricks - LB layer settings
    Raster Z-Scale Bricks – LB layer settings

    The raster lines come out lighter and (IMO) better looking:

    Z Scale Brick Wall - raster lines
    Z Scale Brick Wall – raster lines

    The horizontal lines are darker because the beam remains on at 10% across their full length, but the overall result seems much closer to the desired result.

    The original poster will use a diode laser and, combining all the ideas we came up with, now has a path toward making good, albeit invisibly small, bricks.

    His modeling (and coloring!) hand is strong!