Ed Nisley's Blog: Shop notes, electronics, firmware, machinery, 3D printing, laser cuttery, and curiosities. Contents: 100% human thinking, 0% AI slop.
Tag: Improvements
Making the world a better place, one piece at a time
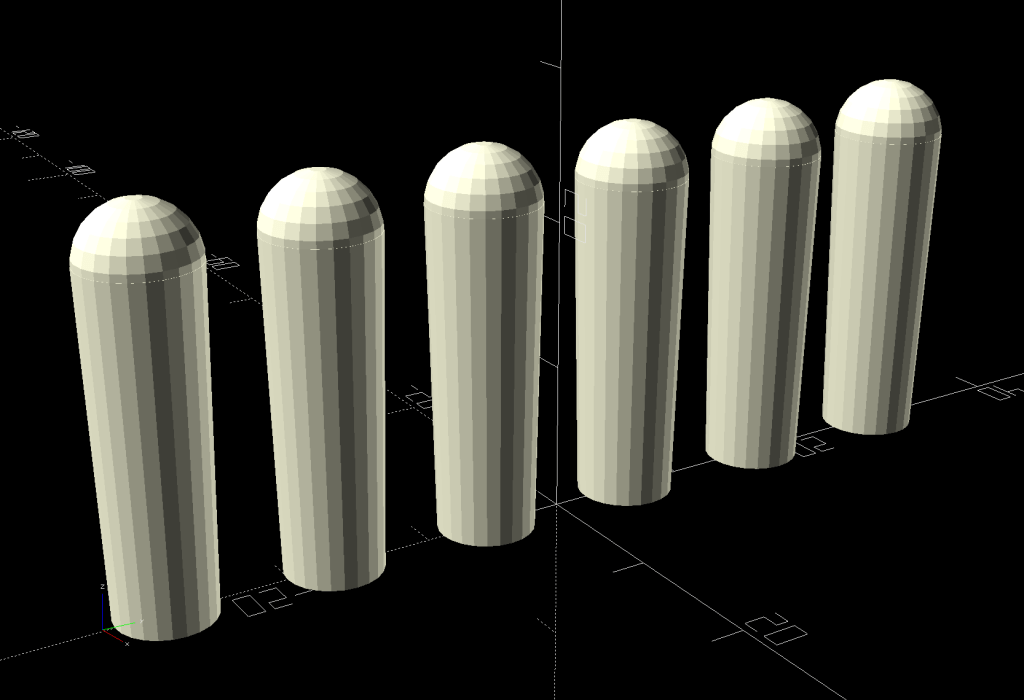
As is all too common with 3D printed replacement parts done remotely, the first Shuttles game pegs didn’t quite fit into the game board’s holes. Fortunately, living in the future means rapid prototyping and quick turnaround:
Shuttles Game pegs – tapered – solid model
They’re slightly smaller, tapered toward the bottom, and take slightly less time to print.
The OpenSCAD code in the GitHub Gist now has has the tweaks.
Given a collection of music files in various subdirectories, find all the mp3 files that aren’t in the target directory and copy them. The only catch: don’t use rsync, because the target directory is on a Google Pixel phone filesystem which doesn’t support various attributes required by rsync.
The trick is remembering the second execdir operation in find happens only if the first succeeds, so the cp runs when the target file doesn’t exist.
All the backslash escaping gets tedious, but it’s the least awful way to get the job done when the directories contain blanks, which is true for the default directory structure inside the Pixel.
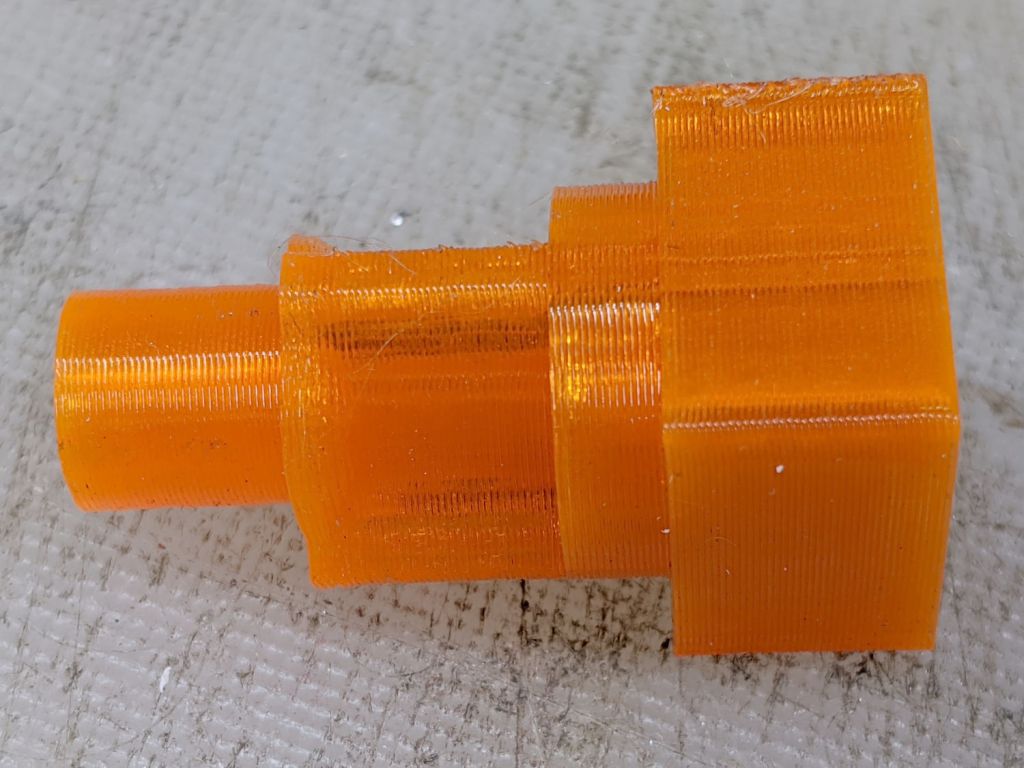
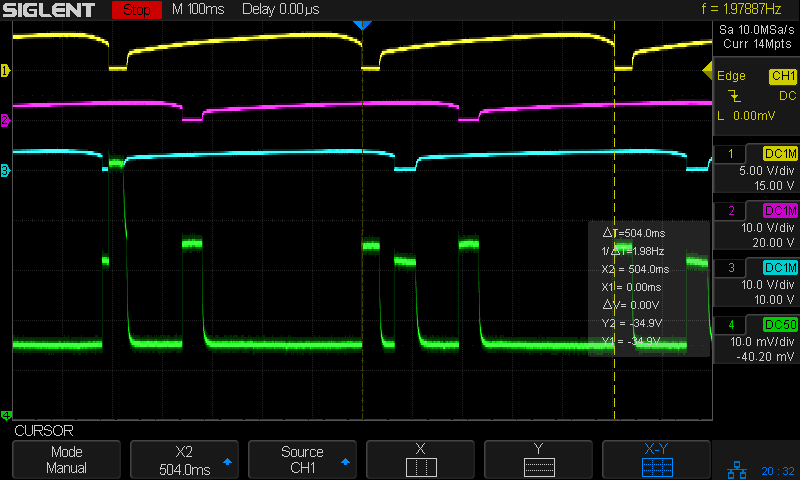
Having just emptied a propane tank while making bacon, I couldn’t find any of the wrench adapters I made to remove the QD adapter from the tank’s POL fitting. With memory of the broken garden valve wrench still fresh, I tweaked the solid model to include a trio of 1 mm music wire reinforcements:
Propane QD Adapter Tool – reinforced – Slic3r
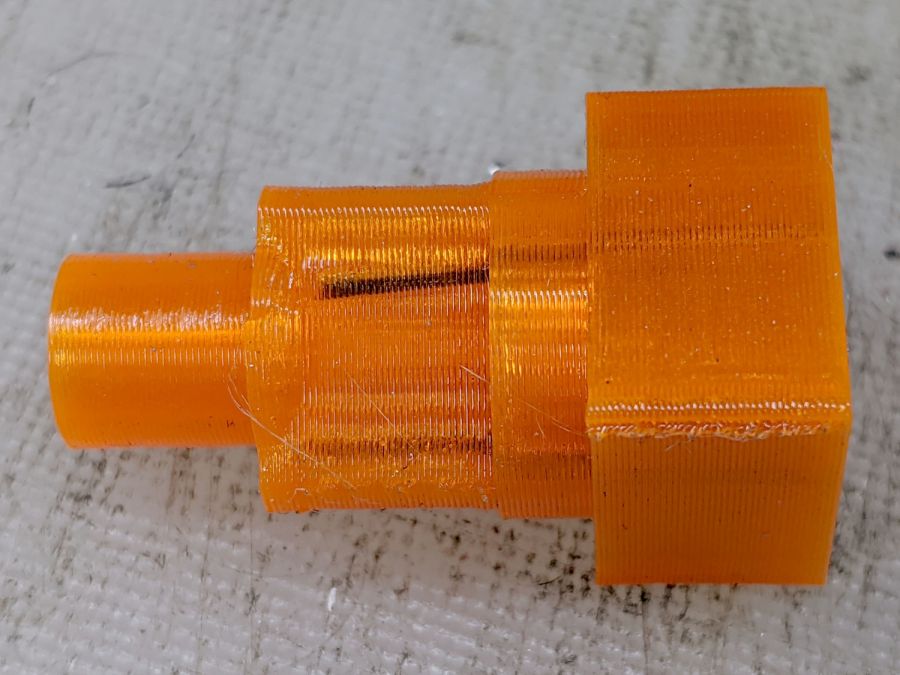
Holes that small require clearing with a 1 mm drill, after which ramming the wires in place poses no problem:
Reinforced QD Adapter Tool – inserting wire
Except for the one that got away:
Reinforced QD Adapter Tool – errant wire
The music wire came from a coil and each snippet required gentle straightening; perhaps that one wasn’t sufficiently bar-straight.
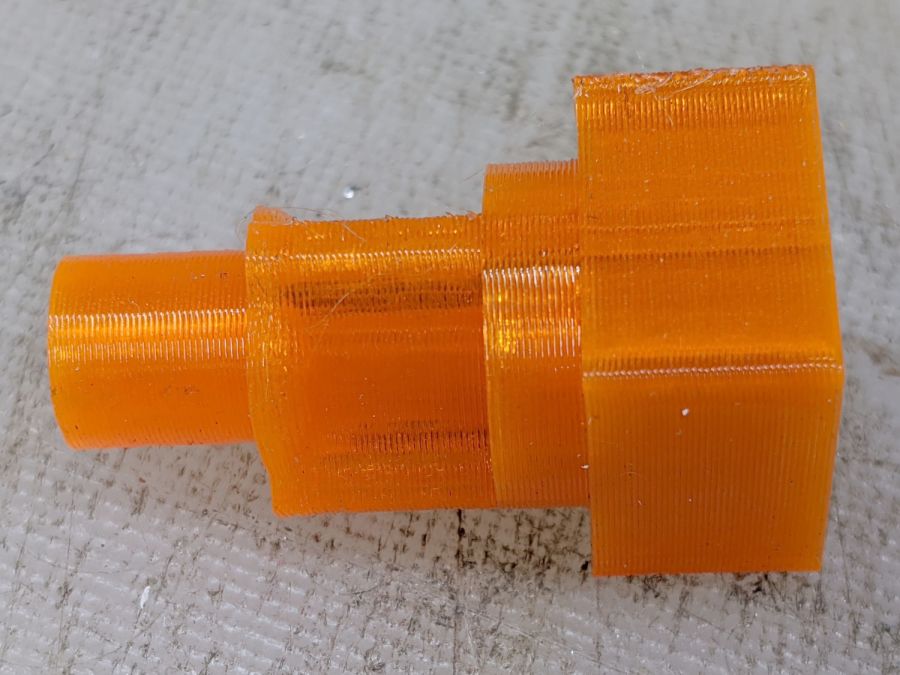
Anyhow, I printed two tools for that very reason:
Reinforced QD Adapter Tool – side view
They’re now where I can’t miss ’em the next time I need them, although that’s not where the previous ones reside.
This file contains hidden or bidirectional Unicode text that may be interpreted or compiled differently than what appears below. To review, open the file in an editor that reveals hidden Unicode characters.
Learn more about bidirectional Unicode characters
Back in the beginning of July, I replaced the NP-BX1 battery in the RGB Piranha astable multivibrator with a 18650 lithium cell and a USB charge controller, then watched it blink for the next two weeks on the first charge:
Astable – 10 11 12 uF tweak – 027
However, the blinks looked … odd and some poking around with a Tek current probe showed the red and blue astables had locked together, so they blinked in quick succession. Alas, I don’t have a scope shot to prove it.
I built all three astables with the same parts, figuring the normal tolerance of electrolytic caps would make the astables run at slightly different rates, which they did at first.
This being a prototype, I just soldered a 1 µF cap onto the blue channel’s existing 10 µF cap:
Astable – 11 uF cap – detail
You can barely make out the top of the additional 2.2 µF cap on the red channel, through the maze of components; now, they definitely have different periods.
Aaaand the scope shot to prove it:
Astable NPN – 10 11 12 uF tweak – 10 mA-div
The bottom trace shows the battery current at 10 mA/div. The first pulse, over on the left, has the red and blue LEDs firing in quick succession with some overlap, but they separate cleanly for their next pulses.
You don’t want to build a battery-powered astable from NPN transistors, because the 8 mA current between blinks is murderously high. In round numbers, each of the three LEDs blinks twice a second for 30 ms at 20 mA, so they average 3.6 mA, less than half the current required to keep the astables running between blinks. Over the course of 14 days, the circuit drew 11.6 mA × 336 hr = 3900 mA·h until the protection circuit shut it down.
I must conjure a holder with contacts for an 18650 cell, support for a trio of 2N7000 MOSFET astables, and some kind of weird spider with the RGB Piranha LED on the top. Even a harvested 18650 cell should last a couple of months with a much longer blink period (500 ms is much too fast), less LED current (this one is shatteringly bright), and a lower average current.
And, yeah, I’ve been misspelling “Piranha” for a while.
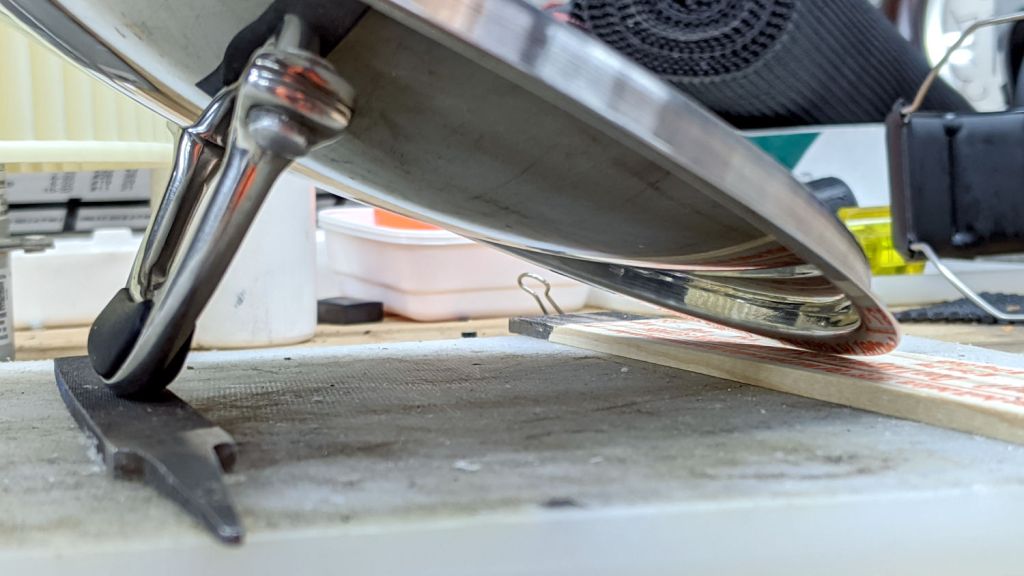
A surprisingly heavy stainless steel pan lid from the local ReStore has only one fault: when placed upside-down on the counter while we’re tending the pan contents, it will rock back and forth for nearly a minute. The lid has a rubberized insert for finger protection:
Pan lid – original handle
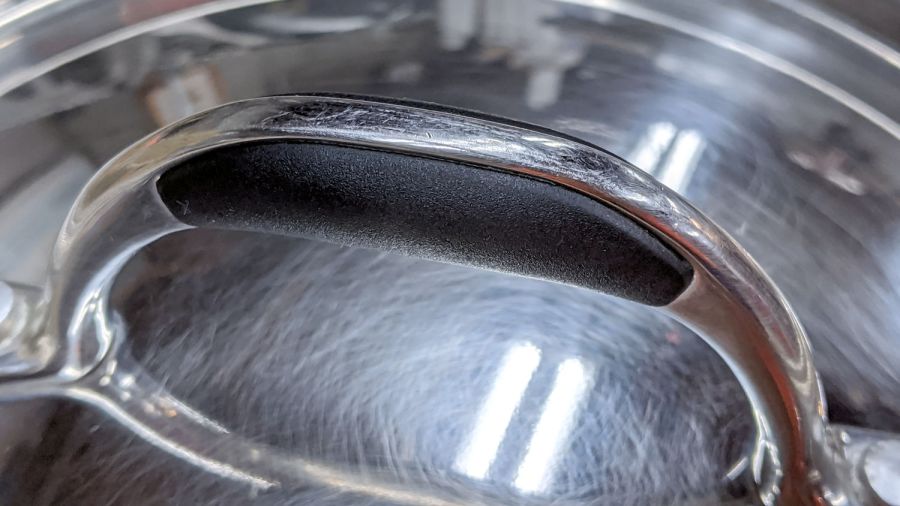
However, the inserts cover only the side of the handle, so the metal arch rests on the counter. Setting it up in the shop let me scuff up the handle contact points:
Pan lid – contact point
Then some Dremel grinding wheel work recessed the handle just barely below the inserts and changed the arch enough to keep it off the counter:
Pan lid – recessed handle crest
The lid now stops rocking after a few seconds and is much quieter while doing so. It may require a bit more grinding, but it’s much better after this small intervention.
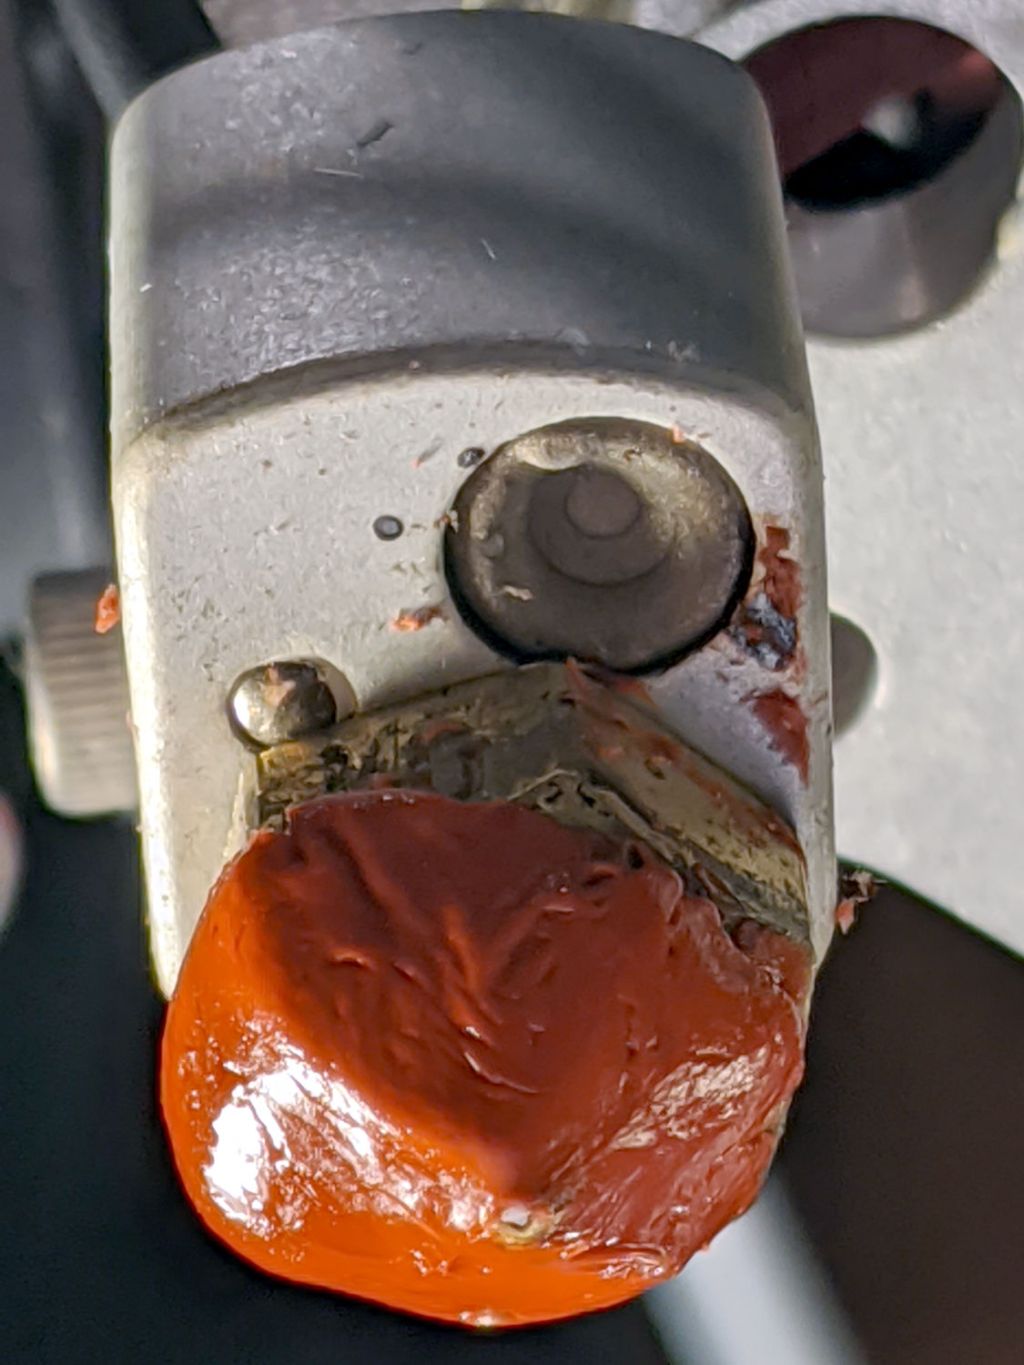
After a year and a half, the silicone coat I’d applied to the M2’s nozzle had pretty much worn away, so I peeled off the remnants, buffed up the brass, and mushed on another coat:
Makergear M2 V4 Nozzle – High-temp silicone coat
The coverage isn’t even, particularly in the direction I can neither see nor reach with the hot end still in the printer, but it’s wayless hassle than recalibrating the Z=0 position. The very thin layer over the brass around the nozzle will vanish immediately on the skirt surrounding the first part.
I should definitely recoat the nozzle more often, because PETG doesn’t stick to silicone nearly as well as it does to brass: a nice new coat makes the PETG burned-snot problem Just Go Away.
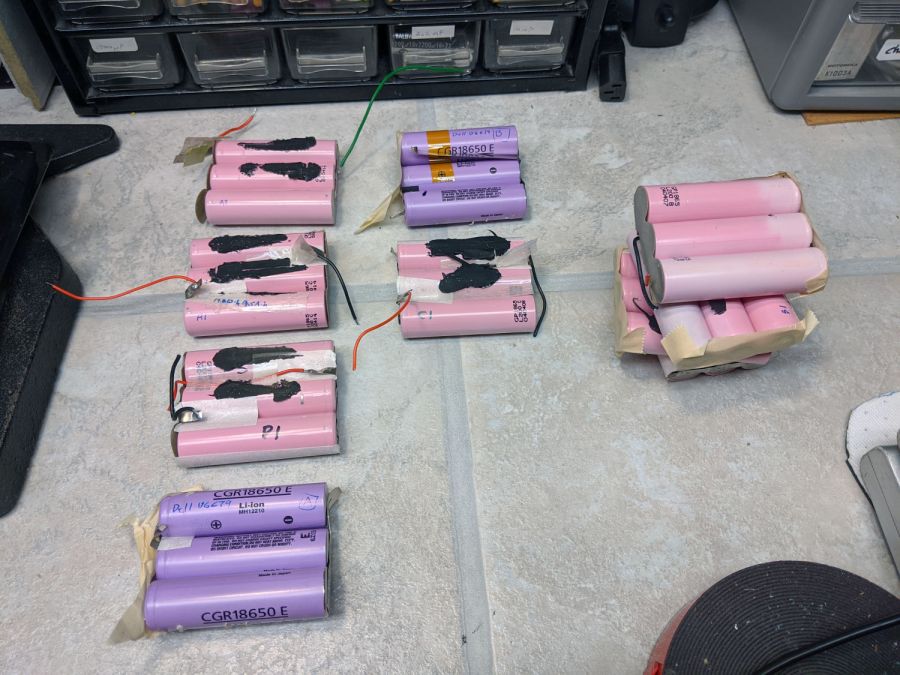
The pile of 18650 3P blocks over on the right are some obviously corroded deaders and the lowest performers from these tests:
Harvested 3P 18650 Packs
I doubt they’ll get recycled, as there’s entirely too much overhead involved in dismantling boxes full of cells like these, but I hope they’ll get a decent burial somewhere.