The library runs courses teaching useful skills:

The classes cover the basics of home finance, cooking, sewing, and suchlike.
I could have used a few Adulting courses, back in the day.
The Smell of Molten Projects in the Morning
Ed Nisley's Blog: Shop notes, electronics, firmware, machinery, 3D printing, laser cuttery, and curiosities. Contents: 100% human thinking, 0% AI slop.
Making the world a better place, one piece at a time
The library runs courses teaching useful skills:
The classes cover the basics of home finance, cooking, sewing, and suchlike.
I could have used a few Adulting courses, back in the day.
A discarded 20 W halogen desk lamp arrived in the Basement Laboratory for rebuilding:

An incandescent bulb doesn’t care about AC or DC, so a simple transformer also serves as a counterweight in the base:
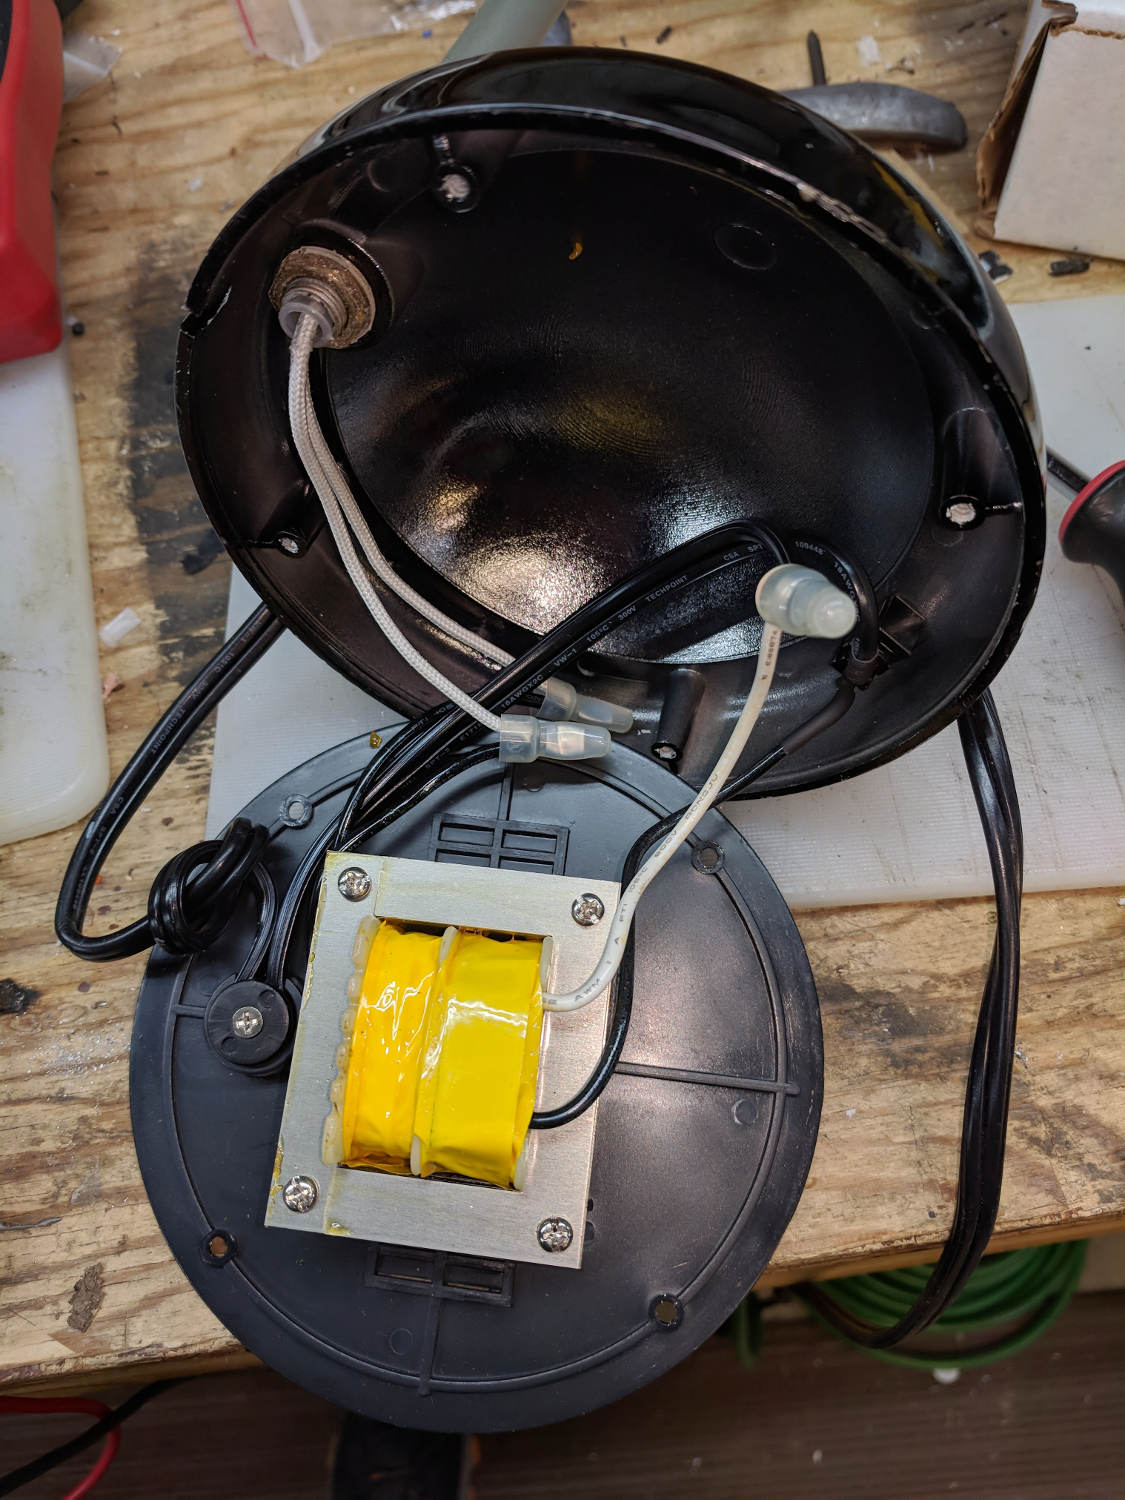
I might replace it with some steel sheets, although I have no immediate need for a bare transformer.
A case adds 19¢ to each 10 W 300 mA LED driver:
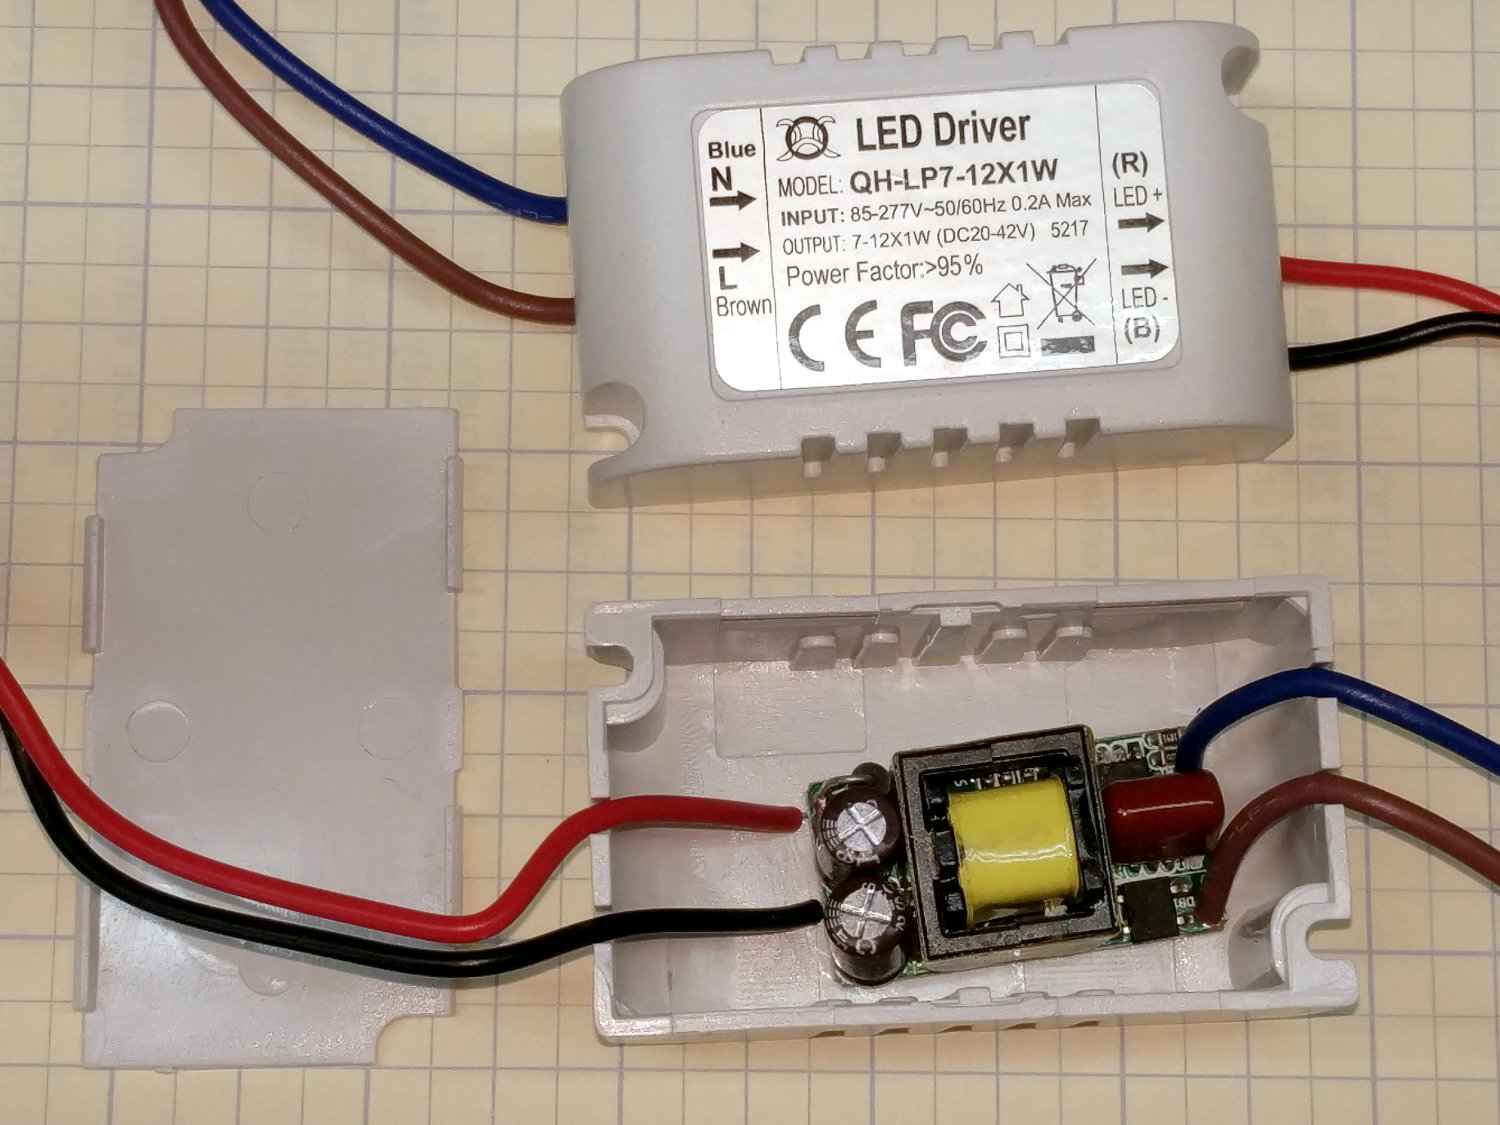
Nice strain relief on those line-voltage wires, eh?
A simple test setup with three 3 W COB LED panels:
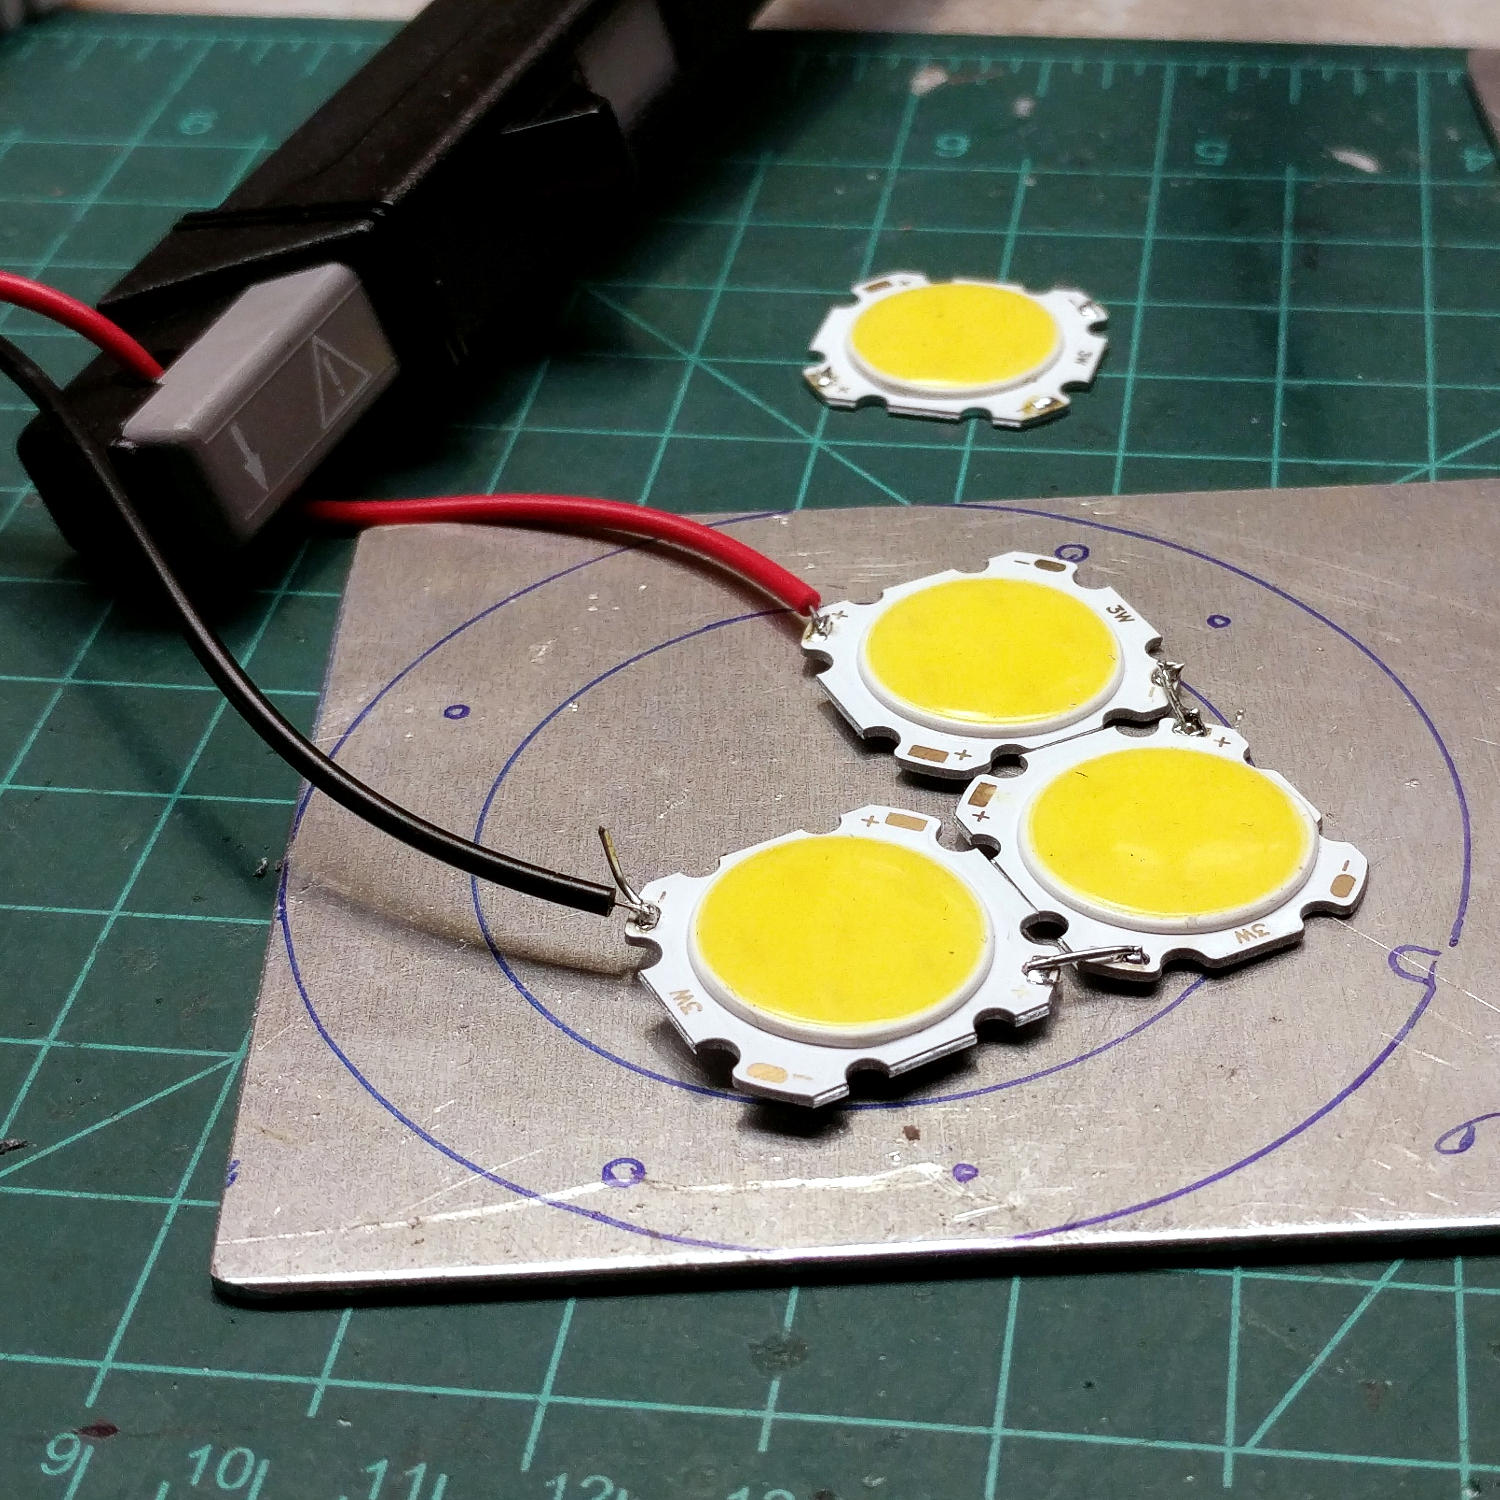
I clamped them to the aluminum sheet for heatsinking before I lit ’em up. The circles traced directly from the lamp’s hardware give some idea of the eventual layout.
I have more-intense LEDs, but spreading the light over a larger area should work better for the intended purpose. These are pleasant warm-white LEDs, too.
The fourth LED raised the forward voltage beyond the supply’s 42 V maximum, causing the supply to blink on and off.
Much to my surprise, the driver has plenty of 60 Hz ripple:
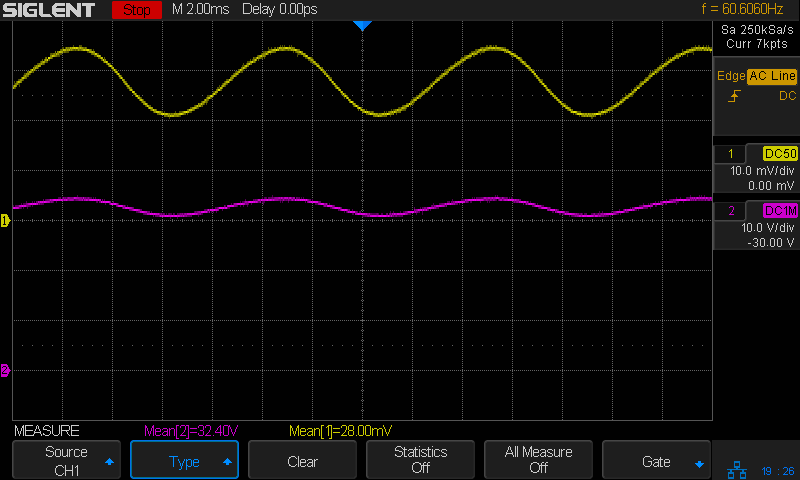
The top trace averages 280 mA and the bottom trace 32 V, so the LEDs run at 9 W = 3 W apiece, as they should.
Now, for some metalworking …
My most recent description of not quite getting killed in front of the NYS DOT Region 8 office evidently did some good. Although I wasn’t informed directly, this happened:
The minimum green time was increased to 10 seconds.
Which is five more seconds more than before, allowing us to get nearly all the way through the intersection before crossing traffic on Rt 55 gets a green light.
As before, the numbers are video frames at 60 fps.
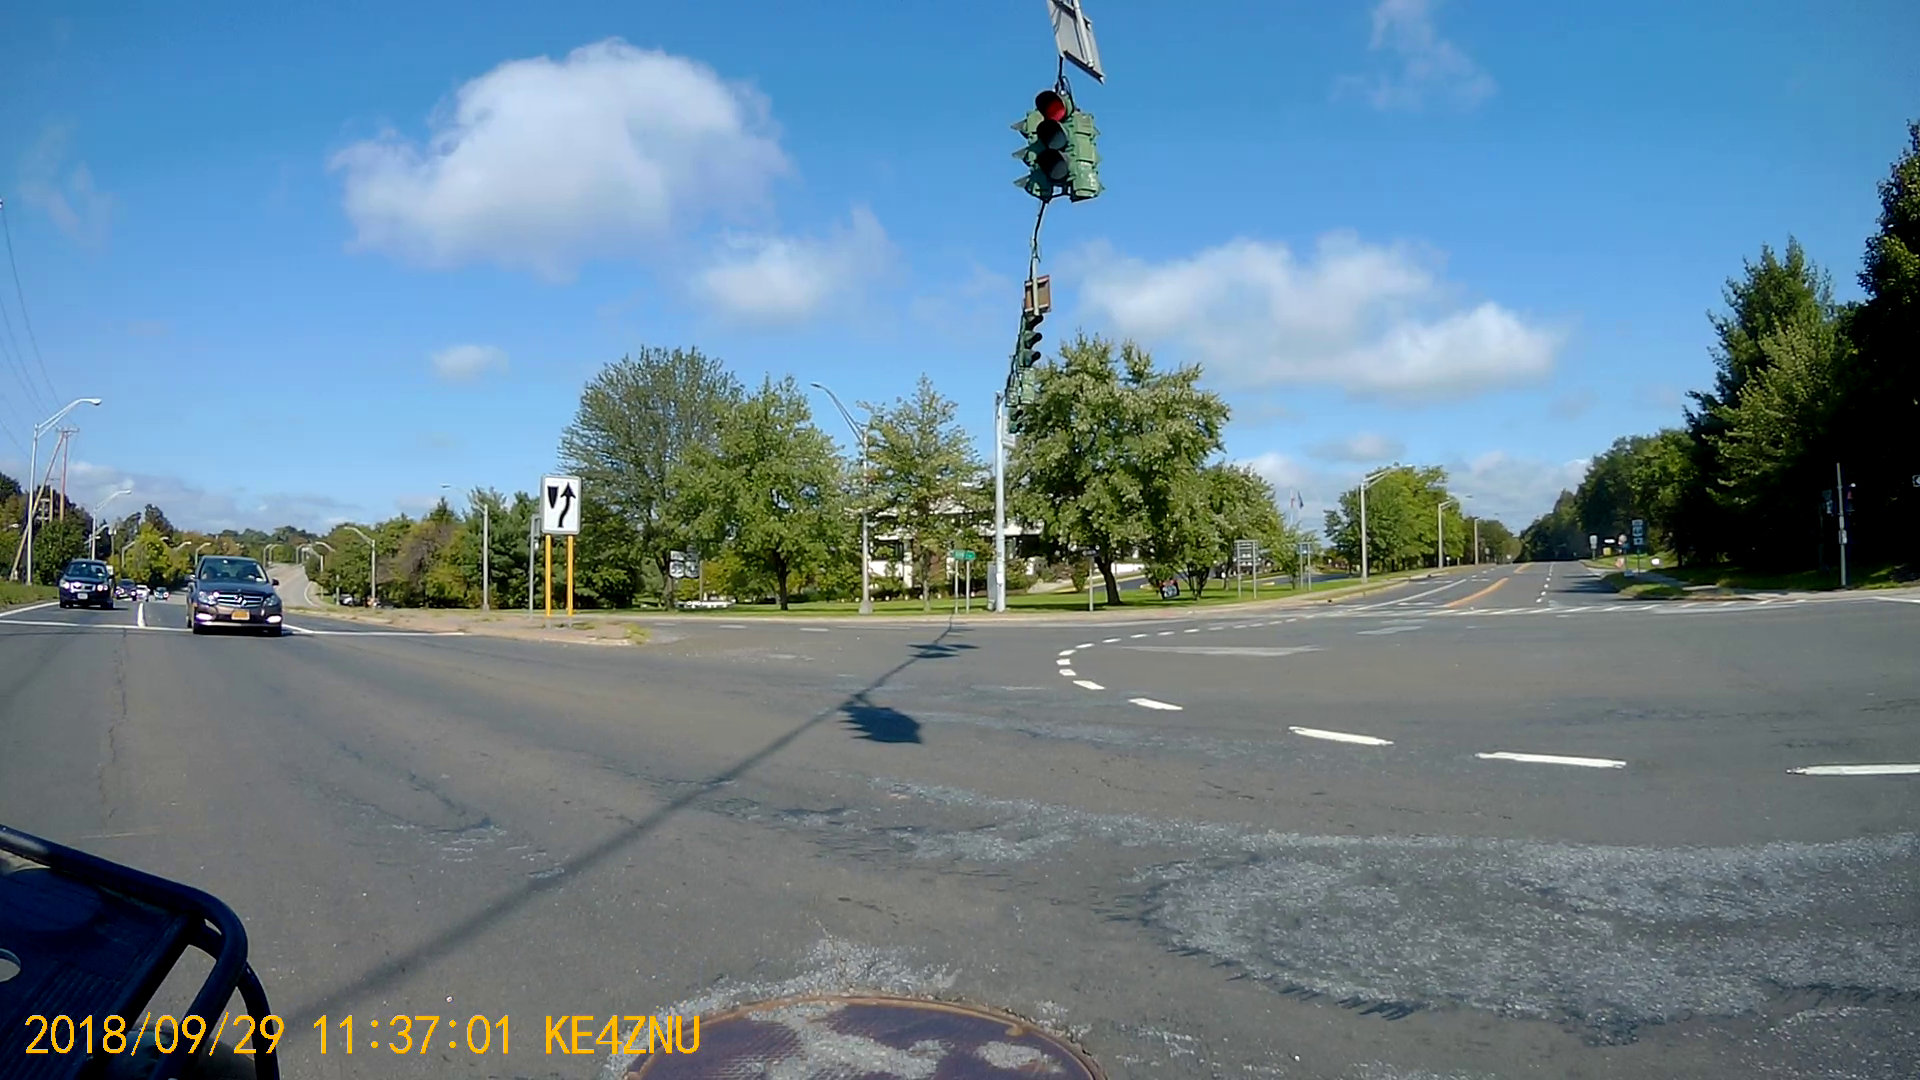
T=0.0 – Burnett signal goes green:
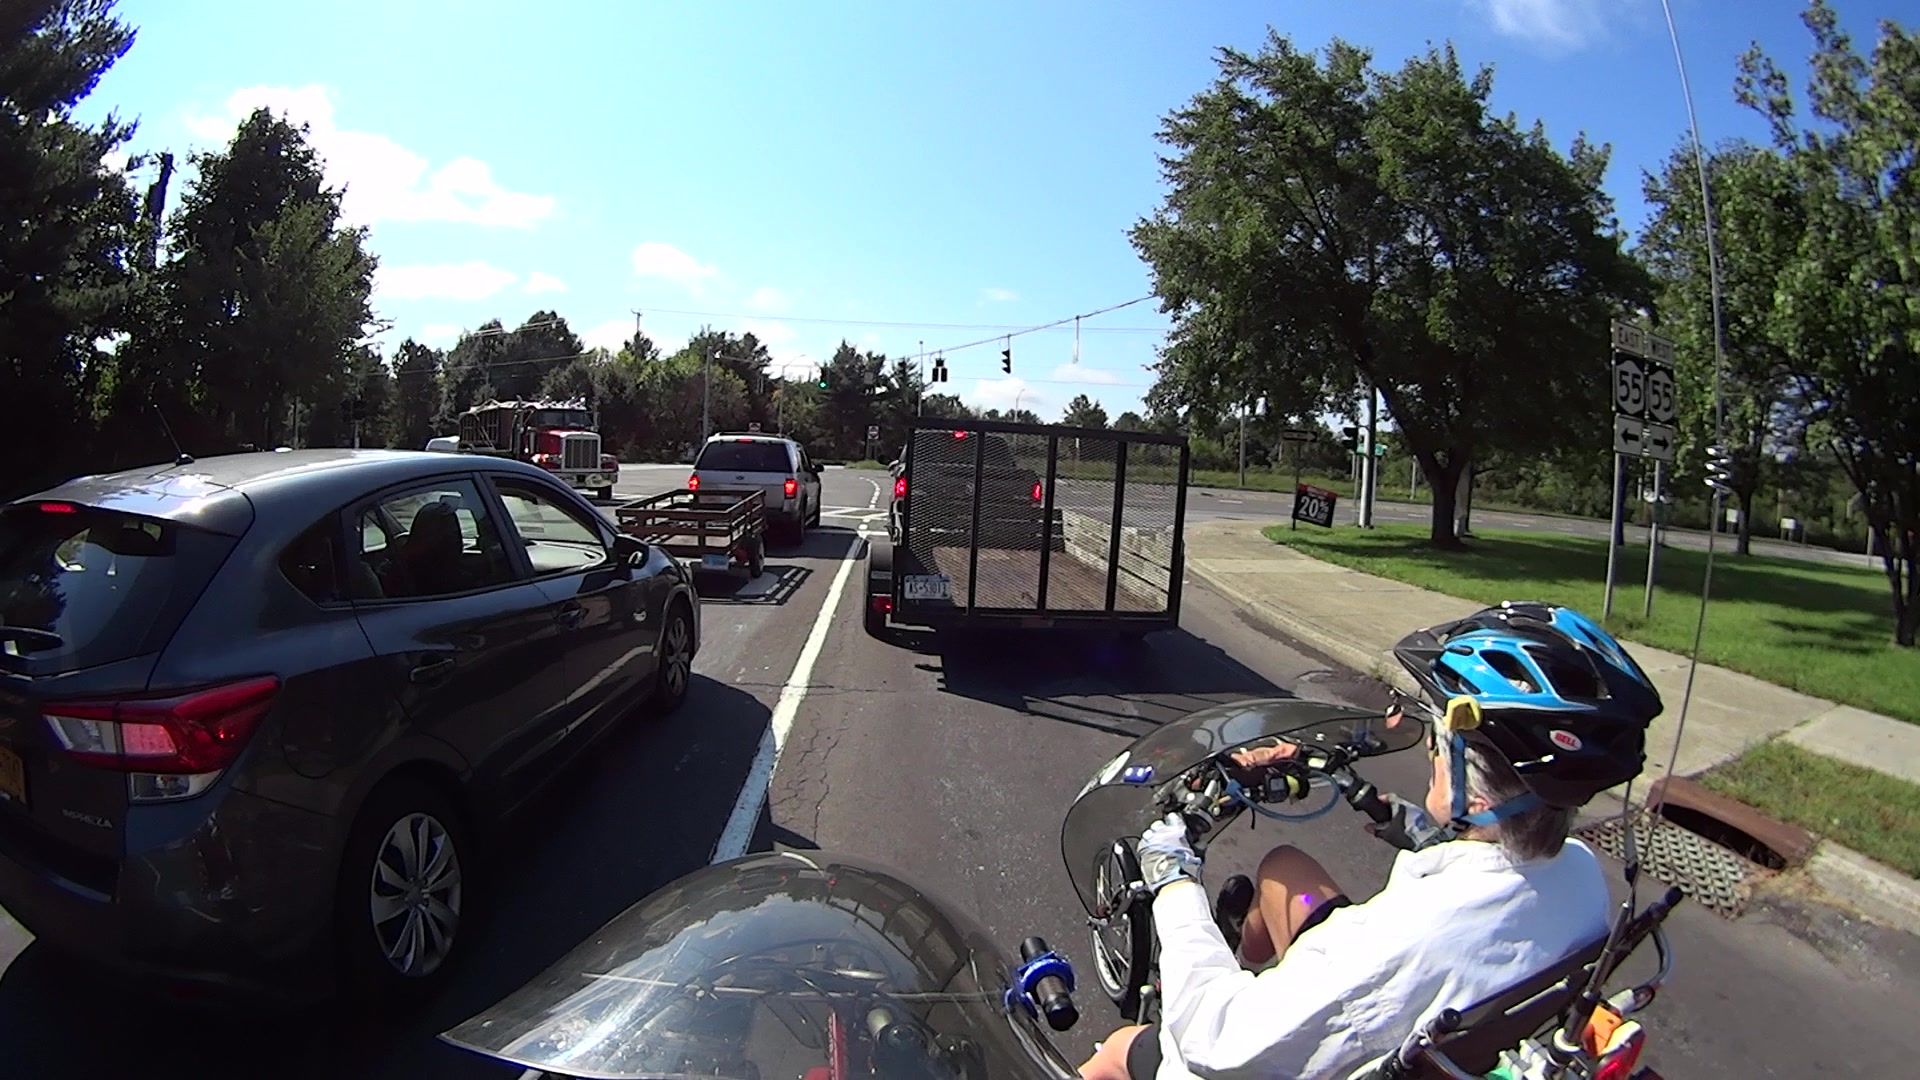
T=2.5 – The trailer ahead of us starts and we’re rolling:

T=8.0 – We reach the Burnett crosswalk. Note the car beside us isn’t making much headway, either:

T=11.93 – Burnett signal goes yellow overhead, so the green phase lasted 12 seconds:
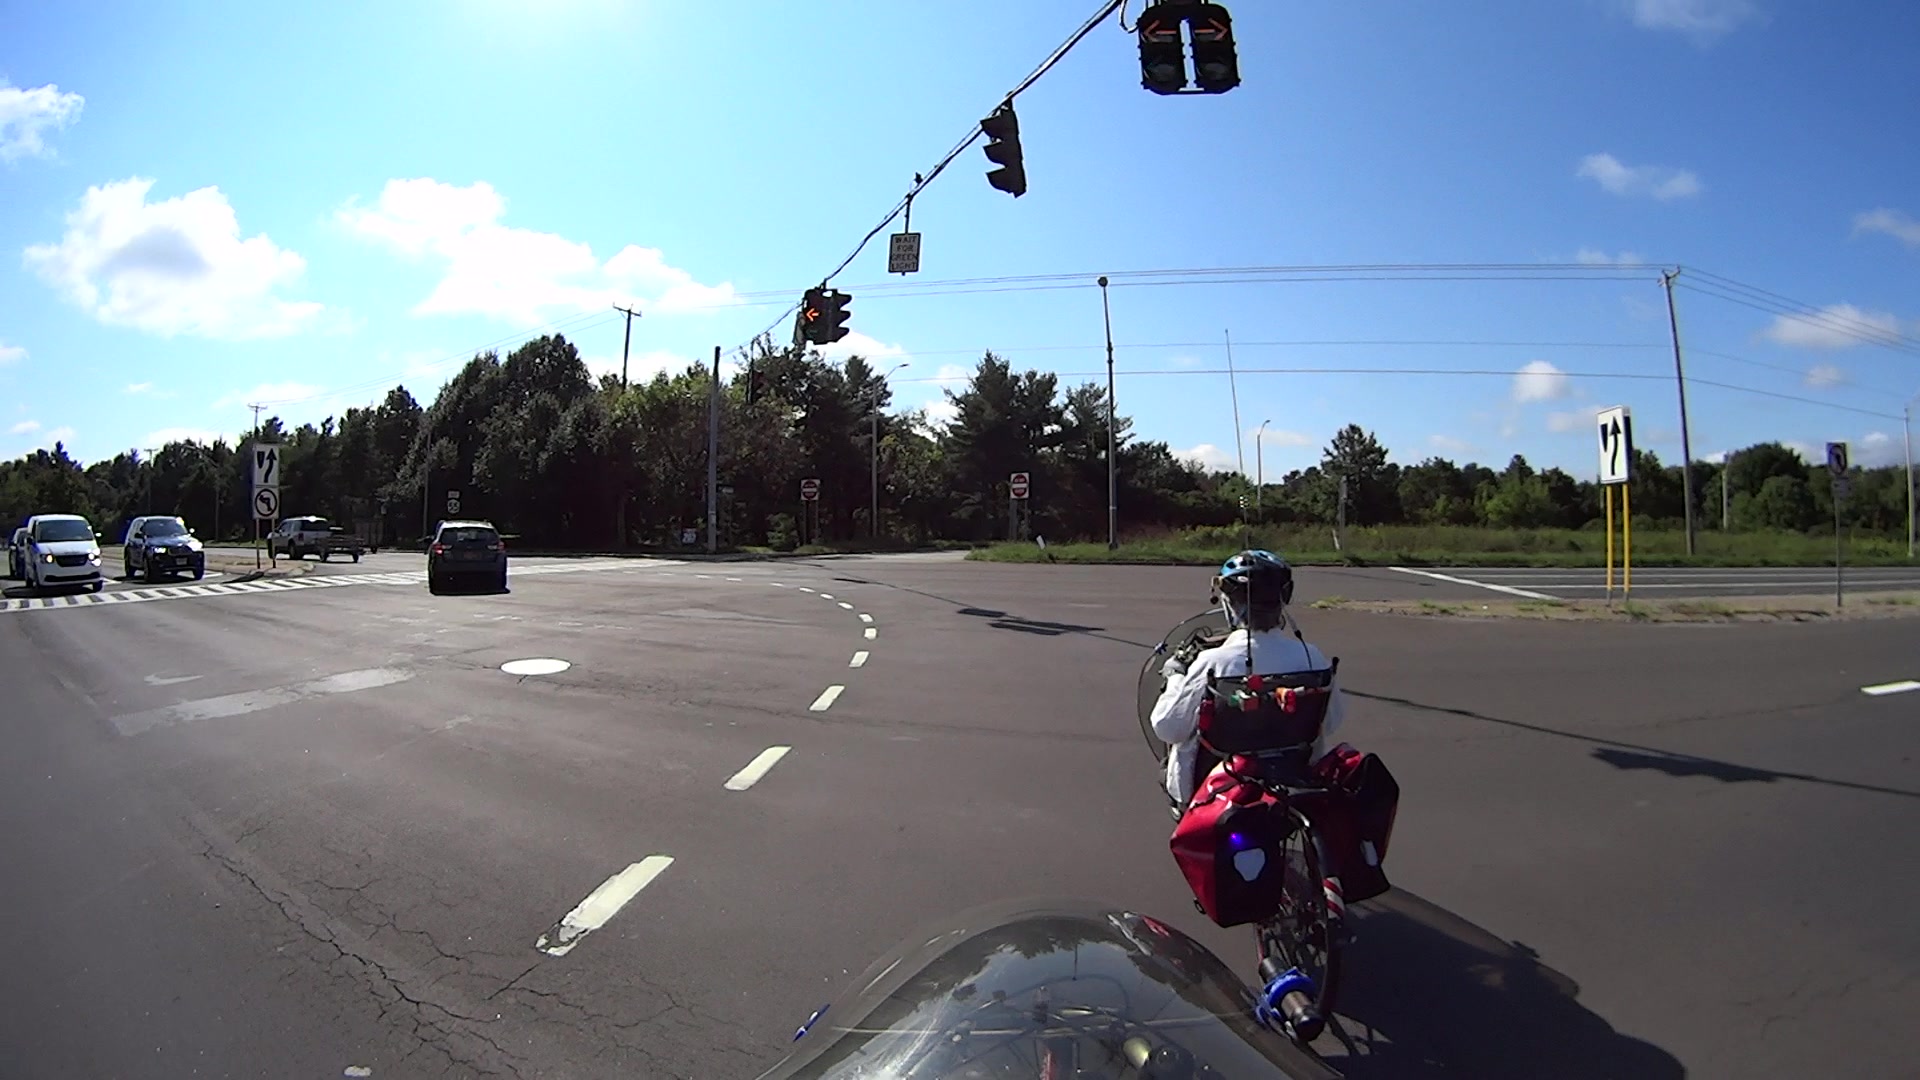
T=16.16 – Rt 55 signal remains red, but will change within a second:

Seen from the rear view camera, the Rt 55 signal went green while we were still in the intersection:
You’ll note the cars on Rt 55 behind us weren’t visible three seconds earlier, so, as far as they can tell, we’re running the red.
Fortunately, we’re almost where we need to be:

The timing still isn’t safe, but after three years, five more seconds counts for a lot!
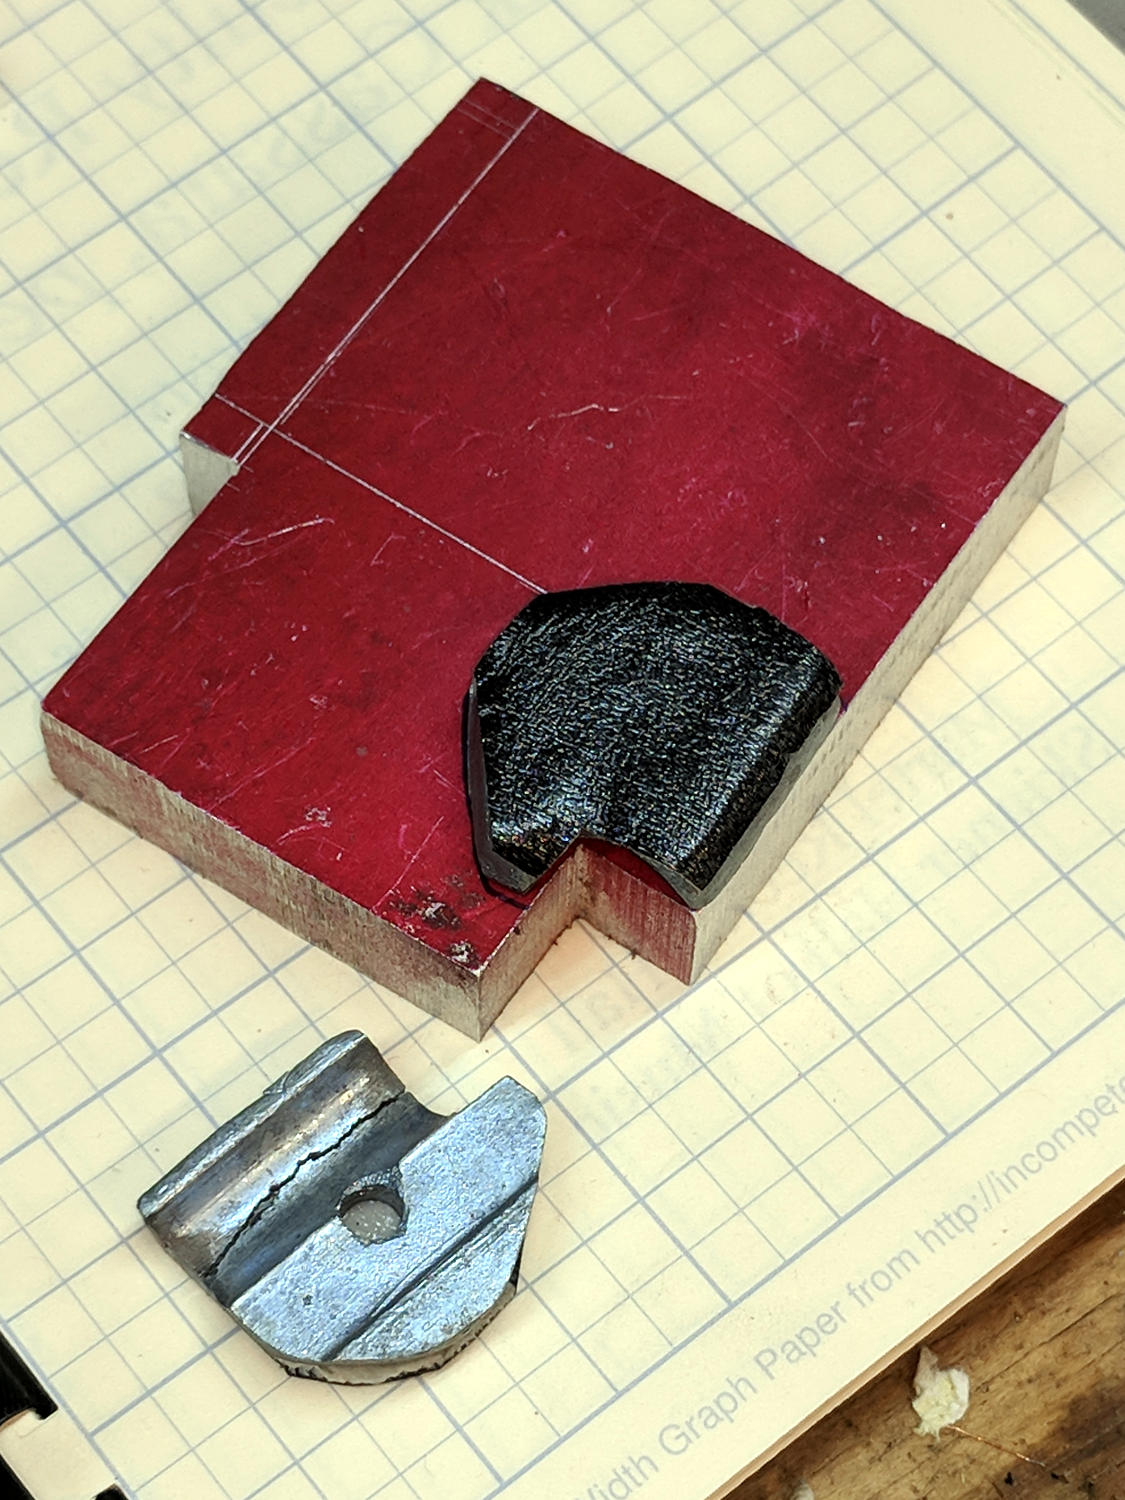
The clamp holding the magnifying lamp (with a fluorescent ring light!) over the Basement Laboratory Desk finally fractured:

Gorilla Tape held the broken parts together well enough to determine how it used to work:

The two parts used to be 11.2 mm thick, but it fit on a random chunk of half-inch aluminium plate so perfectly as to constitute a Good Omen:
I decided the saw kerf would make up the difference, because, sheesh, we’re talking pot metal here.
Lay out the center, use a transfer punch the same diameter as the lamp pivot to get the proper spacing, give it a whack:
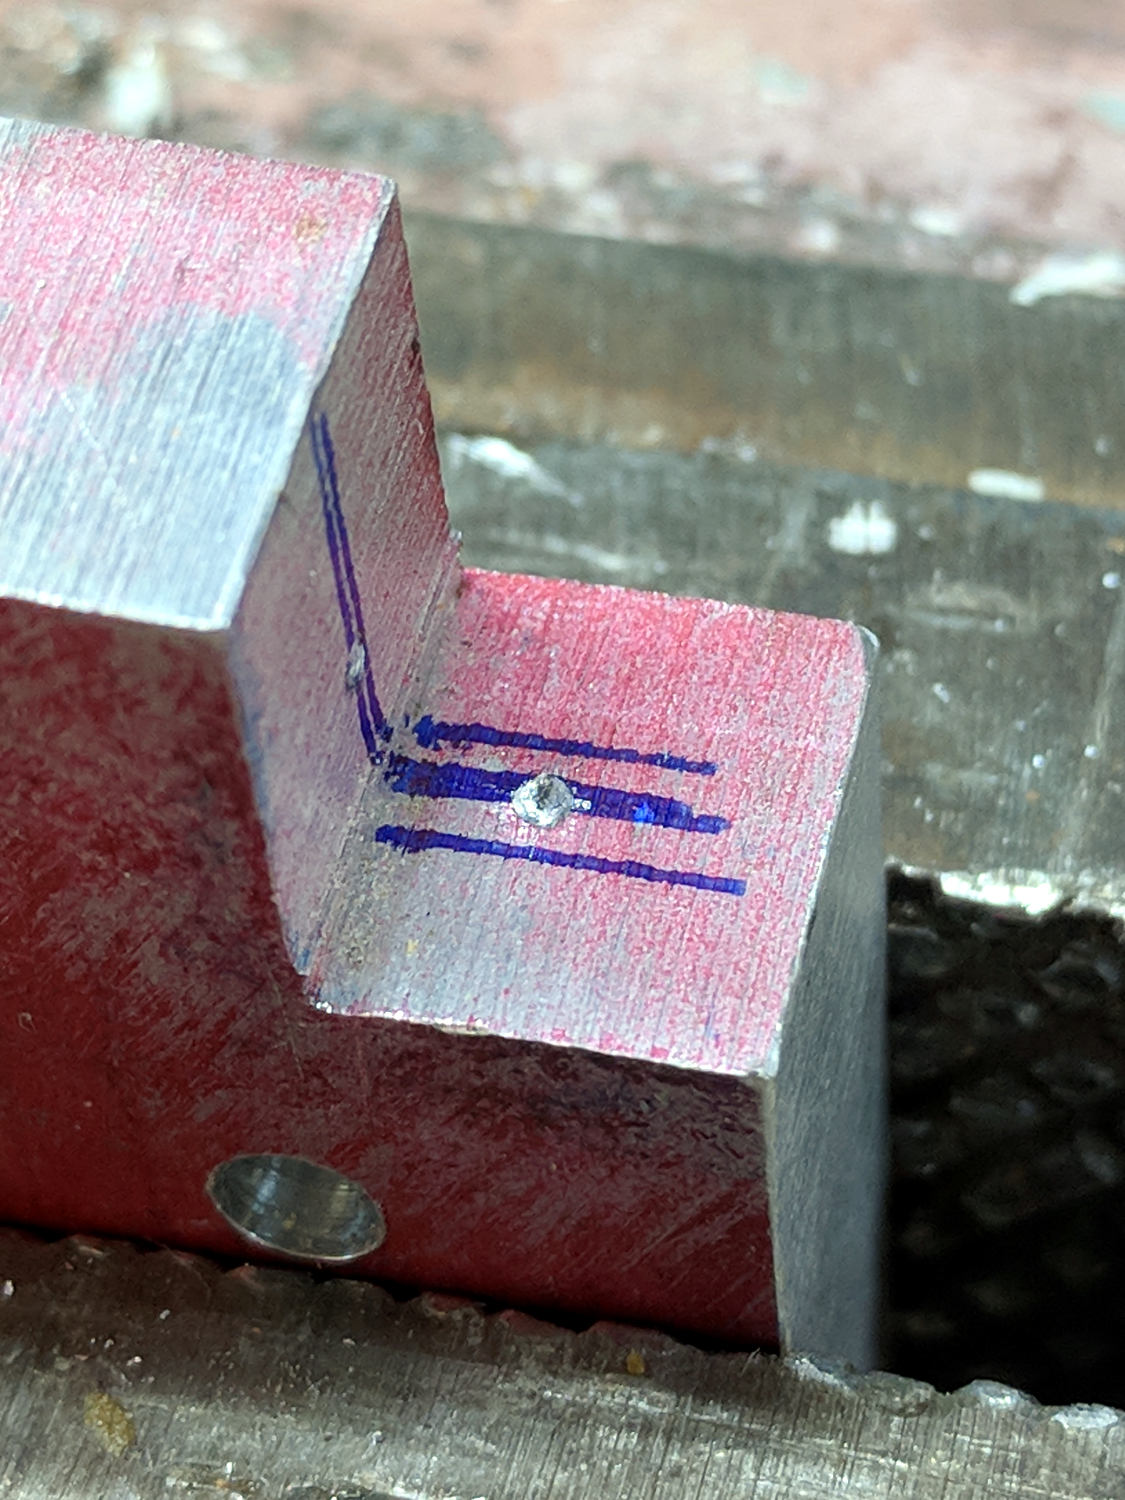
The alert reader will note I came that close to drilling the hole through the wrong side of the angle.
And, yes, extrapolating the vertical edge downward suggests the large hole-to-be will intersect the small hole-in-being. This is deliberate: the clamp screw through the smaller hole fits into a recess around the lamp pivot shaft to keep it from sliding to-and-fro. I had to convince myself, but it really did work out OK.
Pay some attention to clamping it at right angles to the spindle so the big hole goes through more-or-less in the right direction:

The masking tape serves as a depth reminder:

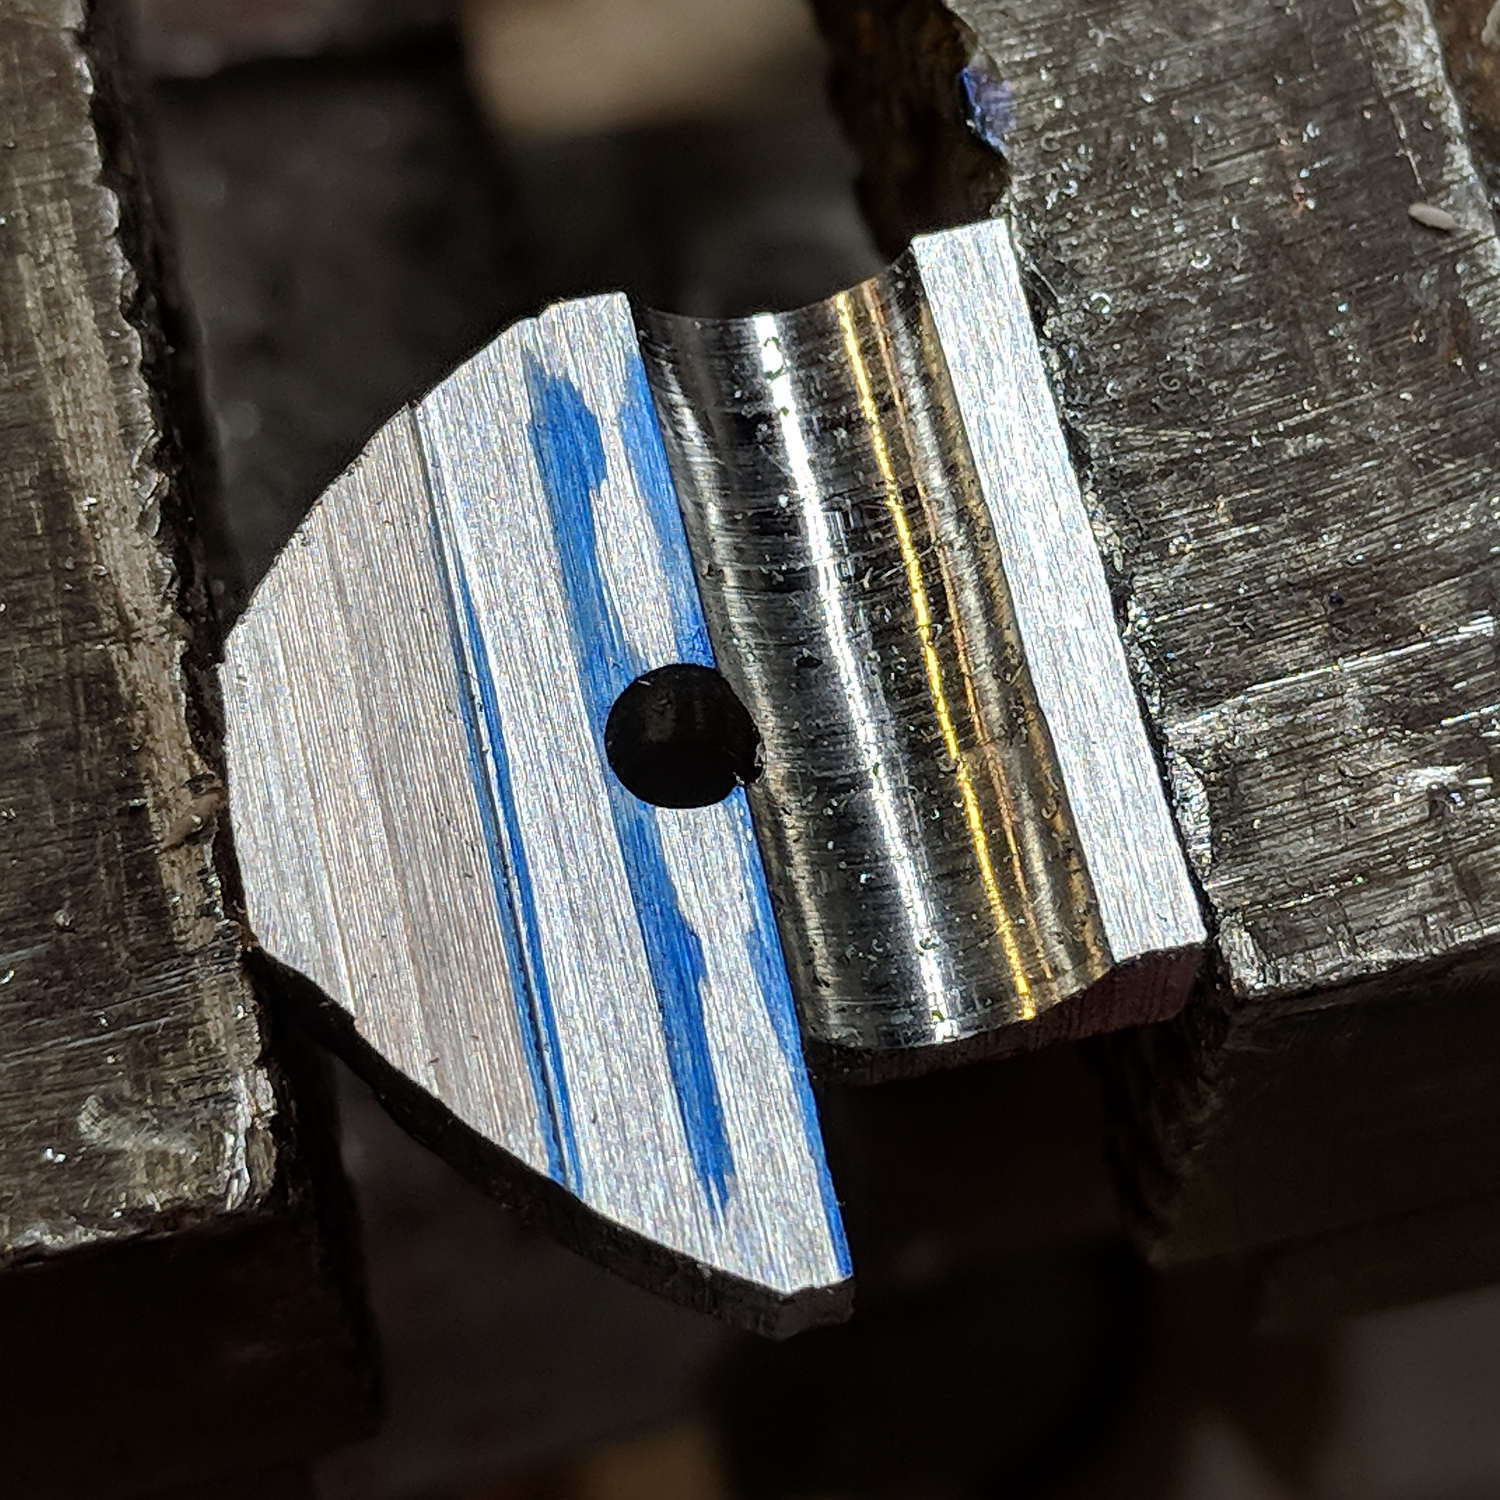
Set it up in a machinist’s clamp, bandsaw in twain, file the kerf reasonably flat, clamp the halves together, then bandsaw the clearance slot:

The clearance kerf wasn’t nearly as on-center as I wanted, which doesn’t really matter, but I filed a bit more diligently on the shallow side while clearing up the slot:
Introducing the new parts to Mr Disk Sander roundified them enough to pass inspection. These angular bits obviously require a bit more attention to detail:

The lamp originally had a fancy knob on the screw which never worked particularly well, so I replaced it with a nylon locking nut to maintain a reasonable amount of pressure:

The far end of the screw has a square shaft fitting into a square hole in the lamp arm, making it easy to torque the nut enough to make the pivot grip the shaft properly; if I ever find my Belleville washer stash again, I’ll add one. I should cut the screw off, too, but that’s definitely in the nature of fine tuning.
A pleasant morning of Quality Shop Time!
The obligatory doodle with dimensions, some of which turned out to be completely incorrect:

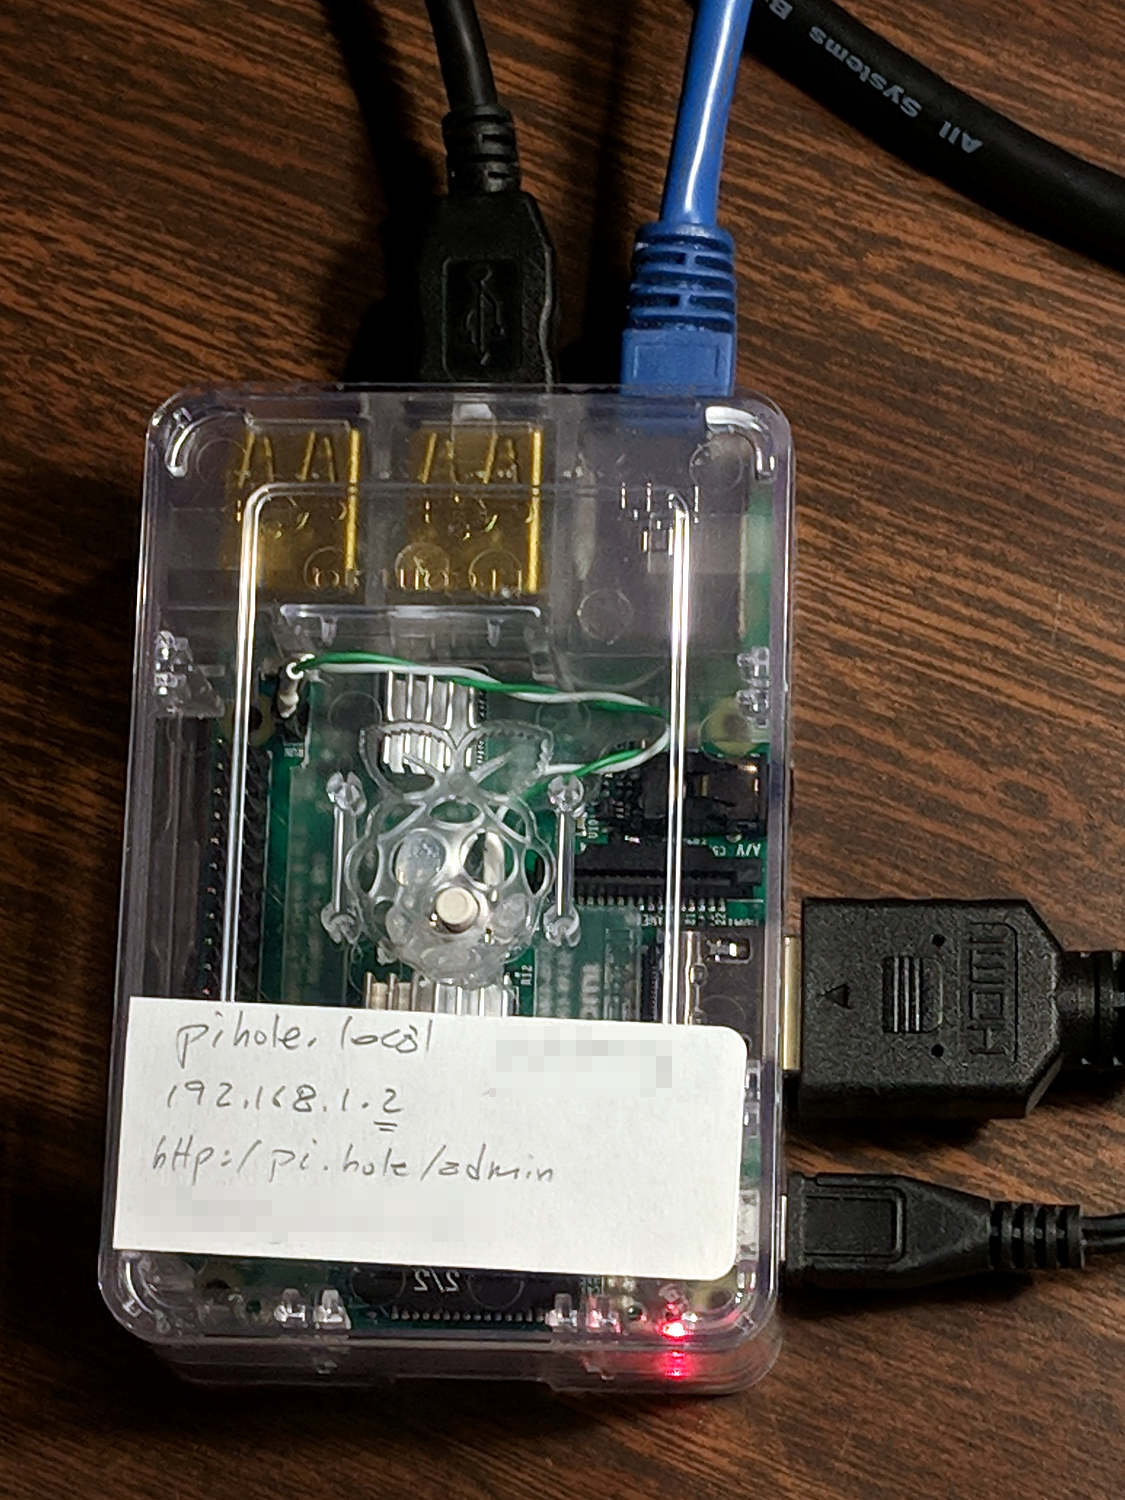
With none other than Troy Hunt recommending Pi-Hole, I got a Round Tuit:
unzip 2018-06-27-raspbian-stretch-lite.zip -d /tmp
sudo dcfldd status=progress bs=1M of=/dev/sde if=/tmp/2018-06-27-raspbian-stretch-lite.img
Raspbian now arrives with ssh disabled, so the first boot requires a keyboard and display:
Then do some configuration required to get a fresh Raspberry Pi ready for remote access:
sudo apt-get update
sudo apt-get upgrade
sudo apt-get install screen iotop
sudo raspi-config   # enable ssh
ssh-keygen -t rsa
cd ~/.ssh
cp -a /my/public/key authorized_keys
chmod go-rwx authorized_keys
cd
sudo nano /etc/ssh/sshd_config  # unusual port, no root login, etc
sudo service ssh restart
As the good folks at Pi-Hole say, “Piping to bash is controversial, as it prevents you from reading code that is about to run on your system.” I took a look, it’s beyond my comprehension, so just get it done:
curl -sSL https://install.pi-hole.net | bash
Configure Pi-Hole:
Configure the router’s DHCP to hand out the Pi-Hole’s IP, with, say, 9.9.9.9 as a backup.
Boot a few random PCs and whatnot to verify it works as expected, which it did the second time around, thus this particular post.
Install the Cloudflare Argo Tunnel dæmon, approximately according to suggestions:
mkdir Downloads
cd Downloads/
wget https://bin.equinox.io/c/VdrWdbjqyF/cloudflared-stable-linux-arm.tgz
tar zxvf cloudflared-stable-linux-arm.tgz
sudo mkdir /opt/cloudflare
sudo cp cloudflared /opt/cloudflare/
Start the daemon from within a screen session, also as suggested:
sudo /opt/cloudflare/cloudflared proxy-dns --port 54 --upstream https://1.1.1.1/.well-known/dns-query --upstream https://1.0.0.1/.well-known/dns-query
INFO[0000] Adding DNS upstream                           url="https://1.1.1.1/.well-known/dns-query"
INFO[0000] Adding DNS upstream                           url="https://1.0.0.1/.well-known/dns-query"
INFO[0000] Starting metrics server                       addr="127.0.0.1:37777"
INFO[0000] Starting DNS over HTTPS proxy server          addr="dns://localhost:54"
Contrary to the suggestions, you can configure Pi-Hole to use the DoH tunnel (or whatever it’s called) by tweaking its upstream DNS configuration:

Then set up systemd to start the daemon automagically:
sudo nano /etc/systemd/system/dnsproxy.service
Because I put the daemon in /opt/cloudflare, that file differs slightly from the suggestion:
[Unit]
Description=CloudFlare DNS over HTTPS Proxy
Wants=network-online.target
After=network.target network-online.target

[Service]
ExecStart=/opt/cloudflare/cloudflared proxy-dns --port 54 --upstream https://1.1.1.1/.well-known/dns-query --upstream https://1.0.0.1/.well-$
Restart=on-abort

[Install]
WantedBy=multi-user.target
And then It Just Worked.
Controversies over the ethics of ad and tracker blocking will go nowhere here, as I’ve cleaned out enough Windows machines to have absolutely no sympathy with the unholy spawn of adtech (not just the company, which I didn’t know existed until just now, but, yeah, them too).
Some recent brush-clearing along our usual bicycle routes:
The bushes with oval leaves are Blackthorn, of which Wikipedia says “The shrub, with its savage thorns, is traditionally used […] to make a cattle-proof hedge.” They’re commonly found along the untamed border of Rt 376, as well as the rail trail.
It’s more effective than expecting my tax dollars to wake up and get to work …
The Wyze Cam is a surprisingly inexpensive camera firmly lashed to the Wyze app, with no provision for ordinary IP camera streaming. It seems to be a generic camera with custom firmware and, unsurprisingly, one can commandeer the bootloader with different firmware from a MicroSD card, thereby adding missing functions and suppressing undesired actions.
Oddly, buying a genuine Wyze Cam directly from Wyze isn’t significantly more expensive than a generic from the usual eBay / Amazon sellers. Bonus: the legit camera arrives next week rather than in a month or two.
I found one of my few remaining 2 GB MicroSD cards, formatted it with a 512 MB (!) FAT32 partition (per the suggestions), set up the “custom firmware” bootloader, and installed it with no issues.
Installing the new firmware requires copying a directory tree, configuring the WiFi SSID and password in the usual wpa_supplicant, and rebooting. Works fine and, yeah, the camera now runs Linux.
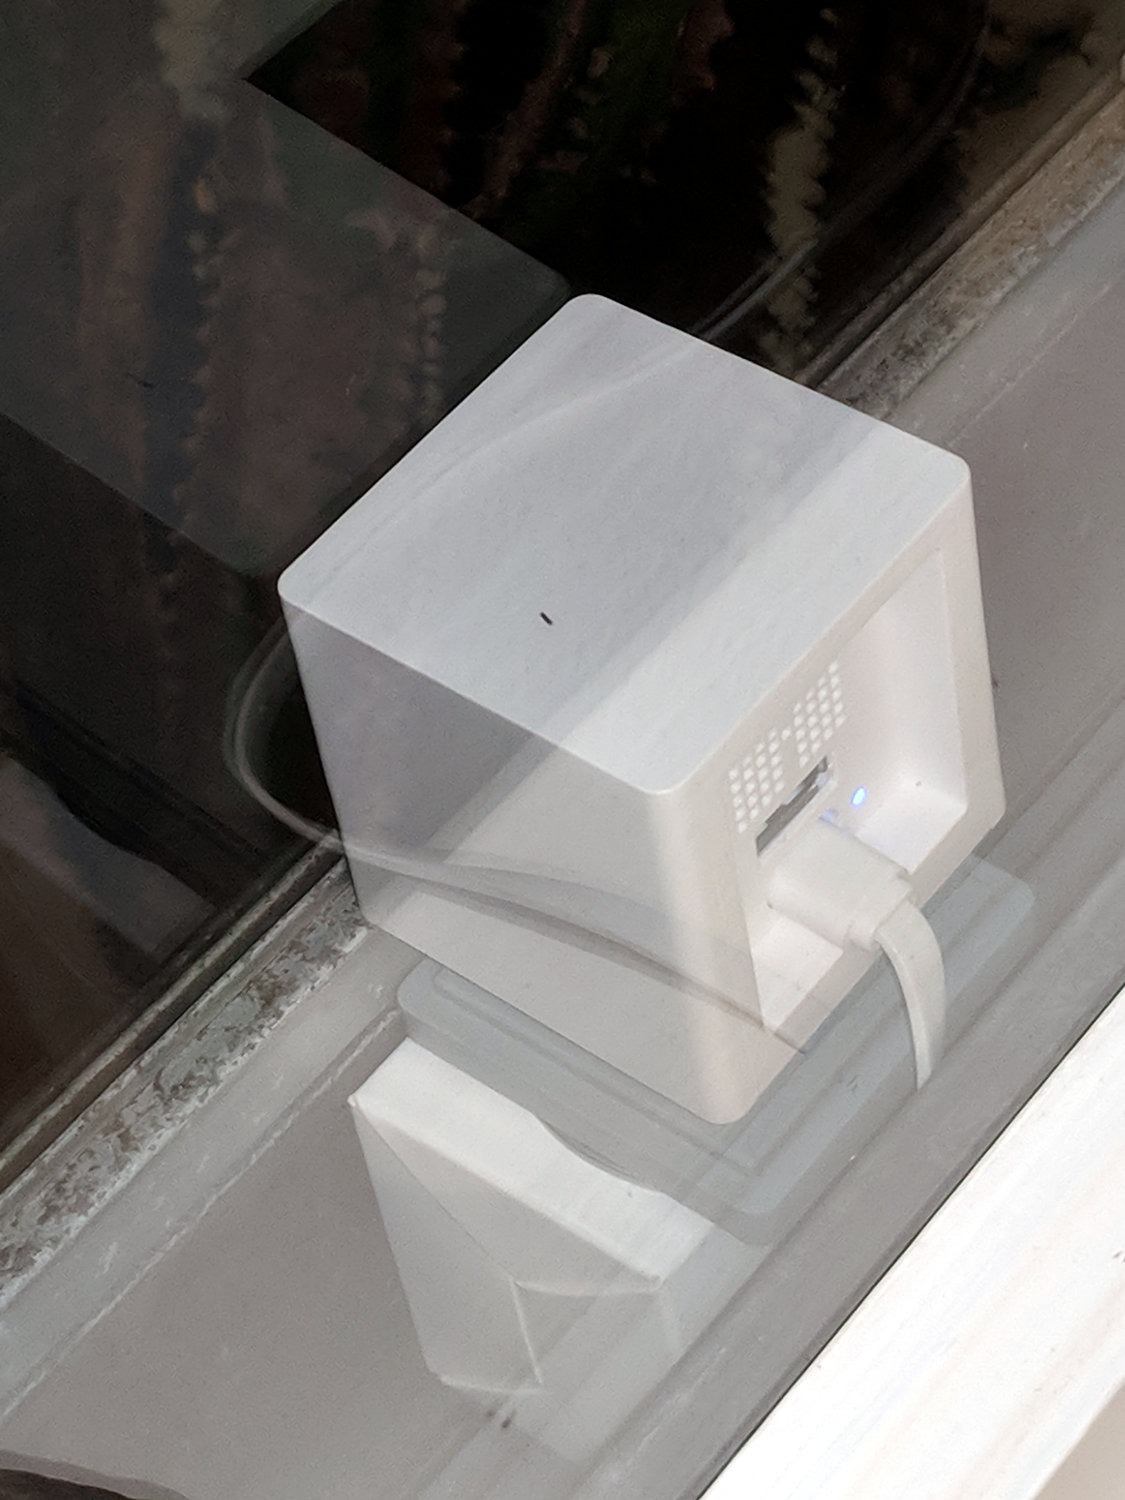
I told the router to assign a known IP address to the camera’s MAC address, set up port forwarding for port 8554 to that IP address, put the camera against the storm window in the kitchen, and rebooted everything to get it working:
Unfortunately, while it works more-or-less well with browsers on the local network, it’s apparently inaccessible from outside. The router manages a DDNS name-to-IP mapping to make itself findable, the port is open, the forwarding seems correct, no image data arrives to browsers outside, and they eventually time out.
Changing to port 8080 doesn’t help, nor does using MJPEG instead of H264 encoding.
Even more unfortunately, the router doesn’t do hairpin connections (inside to outside to inside), so I can’t debug this mess from the Comfy Chair.
This is a placeholder for what I’ve done while I accumulate more knowledge …
