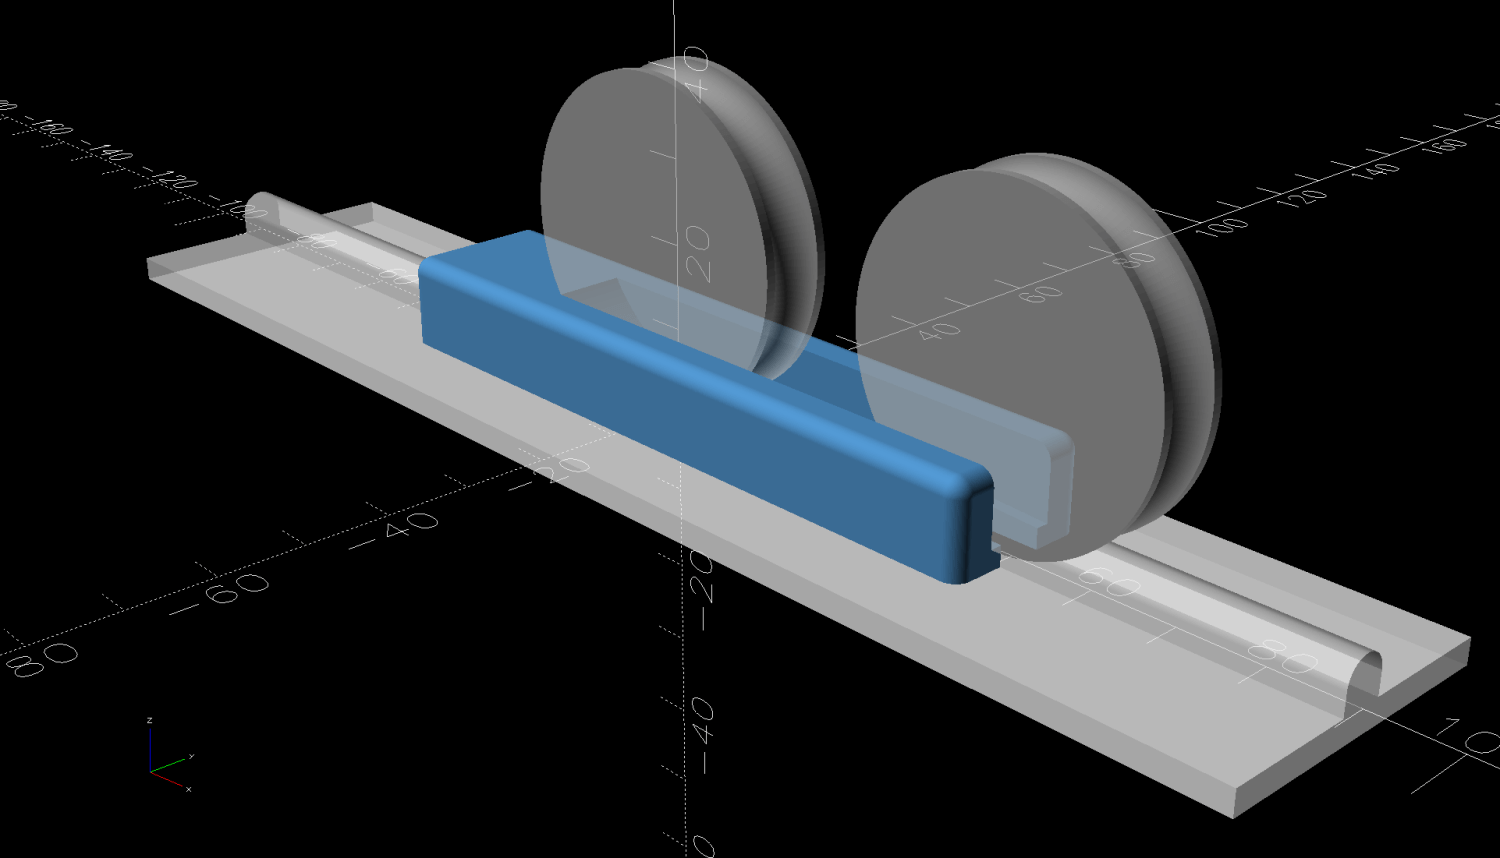
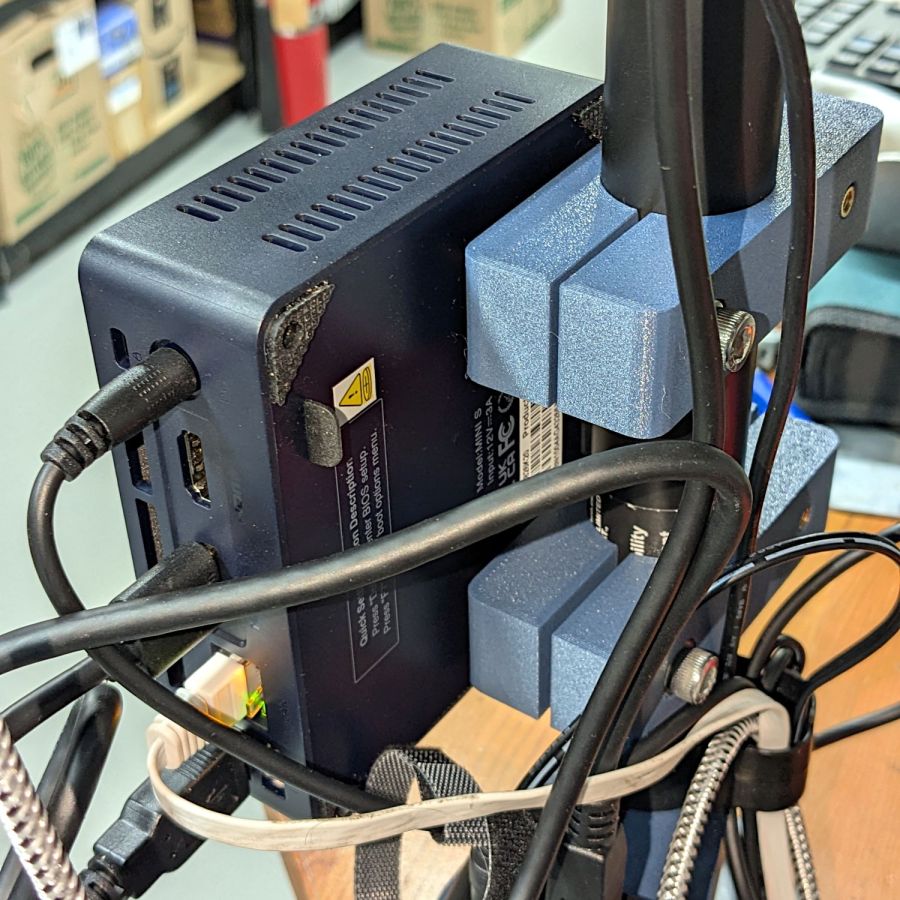
My version of a mount for the HQ Sixteen’s “stylus laser” clamps a 1 inch polypropylene ball between two plates:
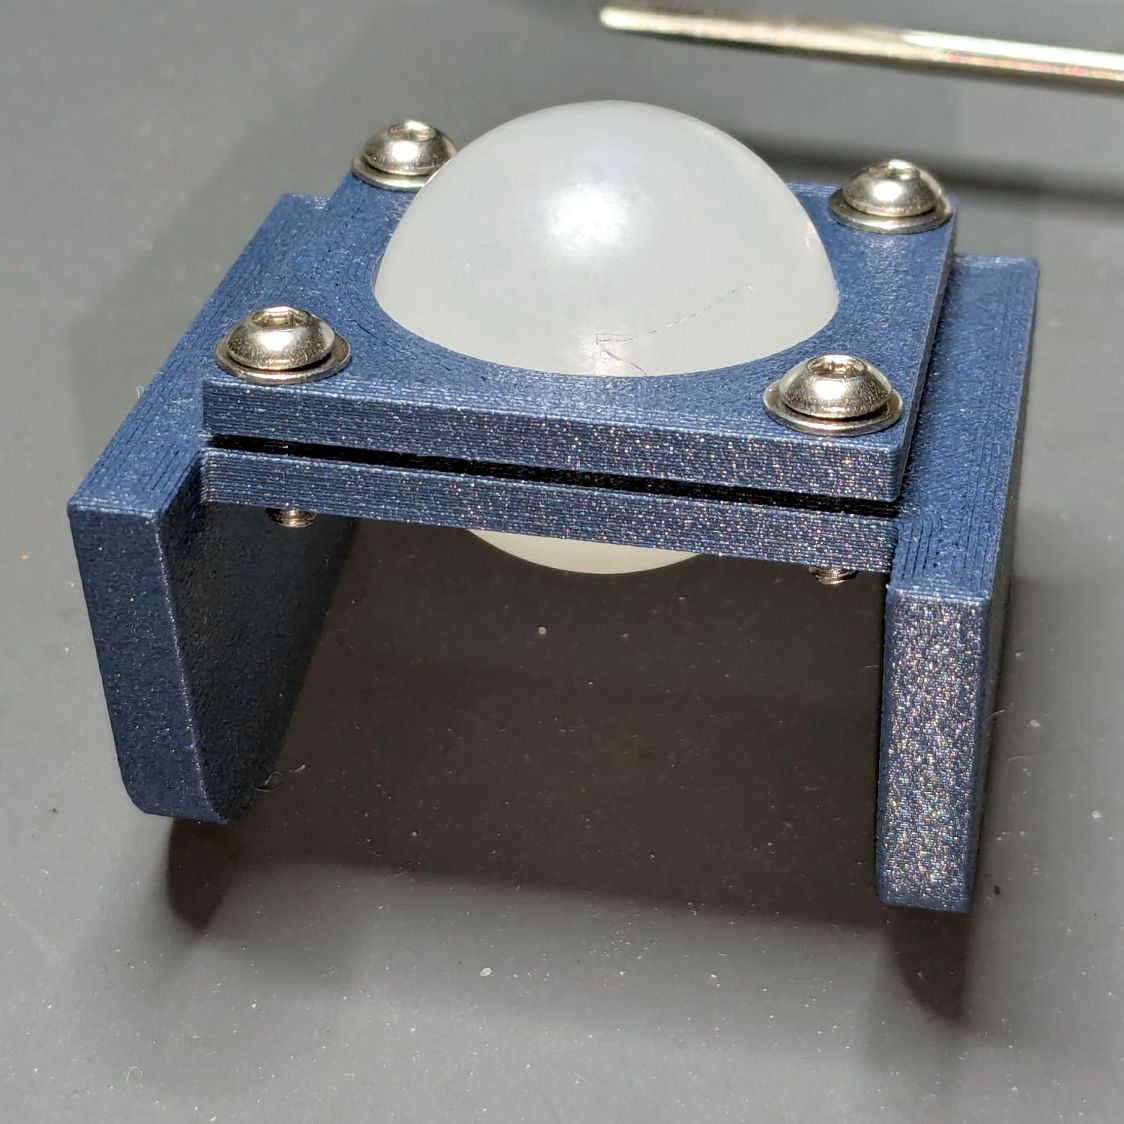
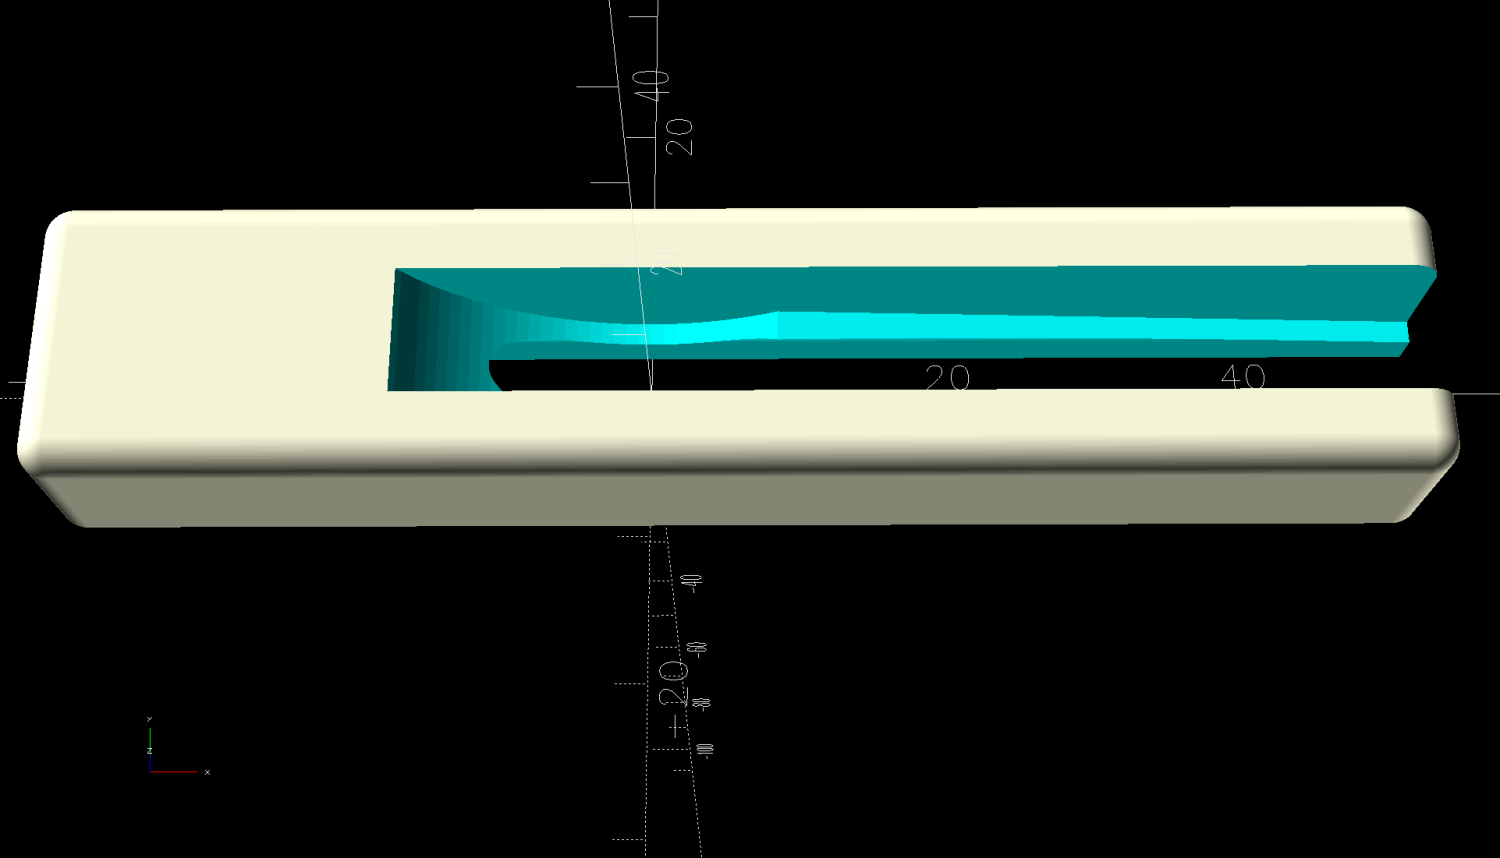
The plates have a sphere subtracted from them and a kerf sliced across the sphere’s equator for clamping room:

Given that this is a relatively low-stress situation, I embedded BOSL2 nuts to produce threads in the plate rather than use brass inserts.
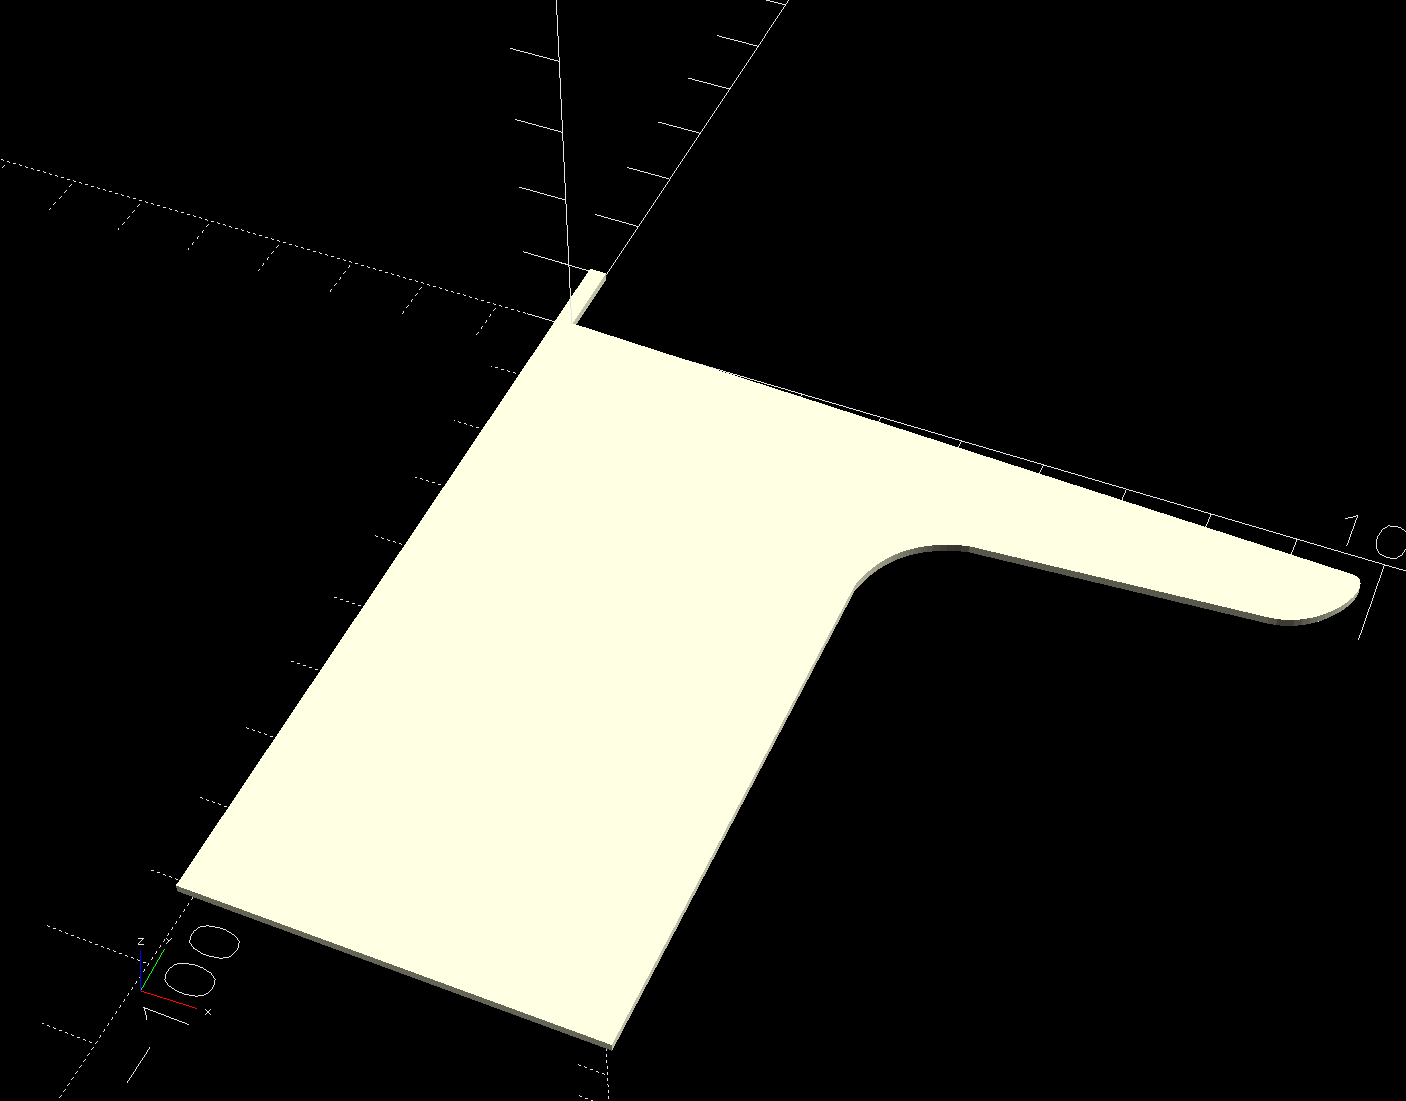
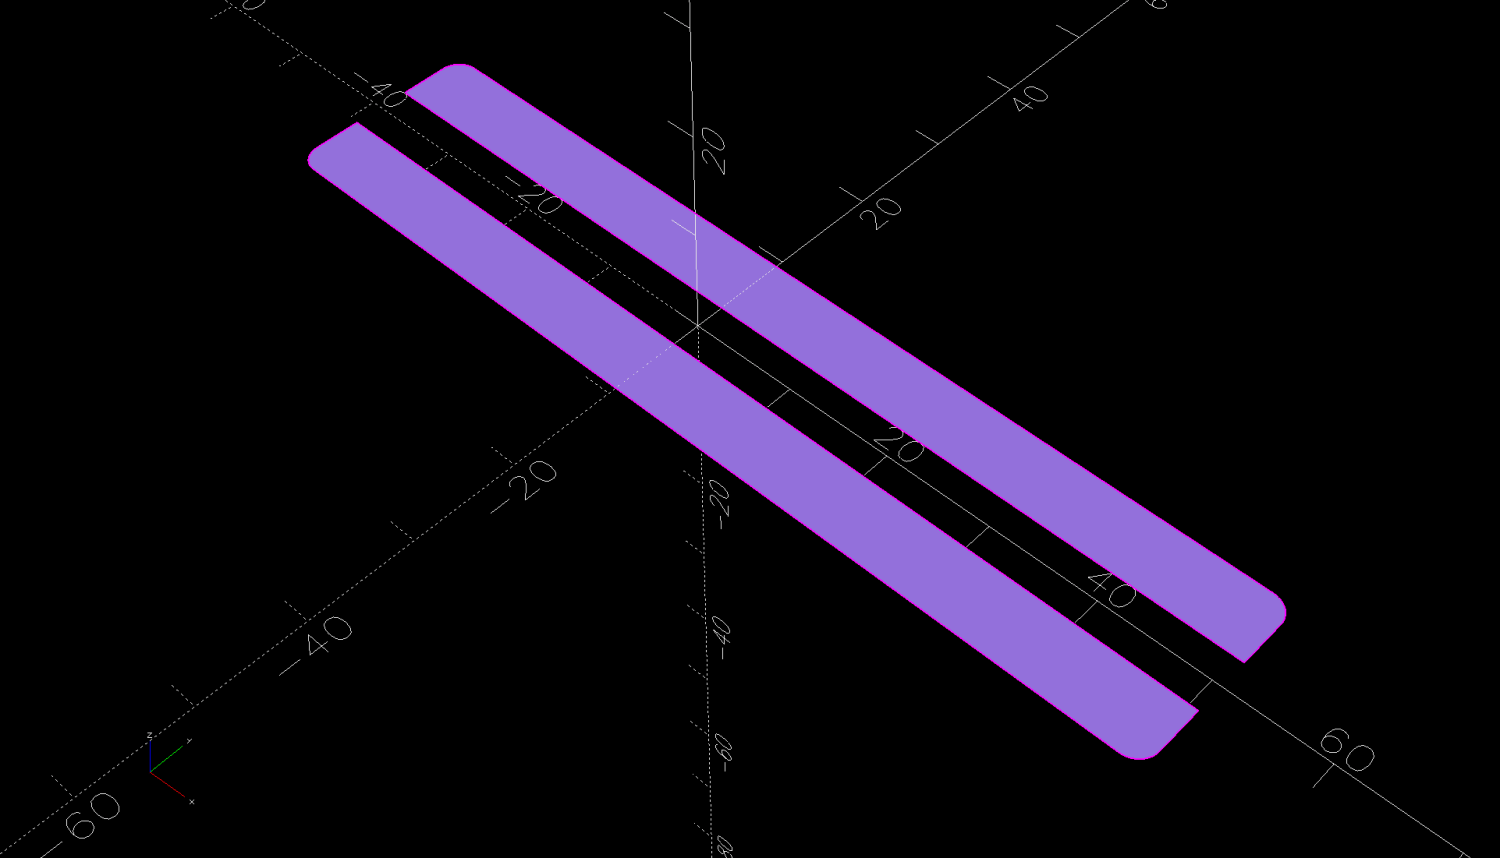
The side plates start as simple rectangles:
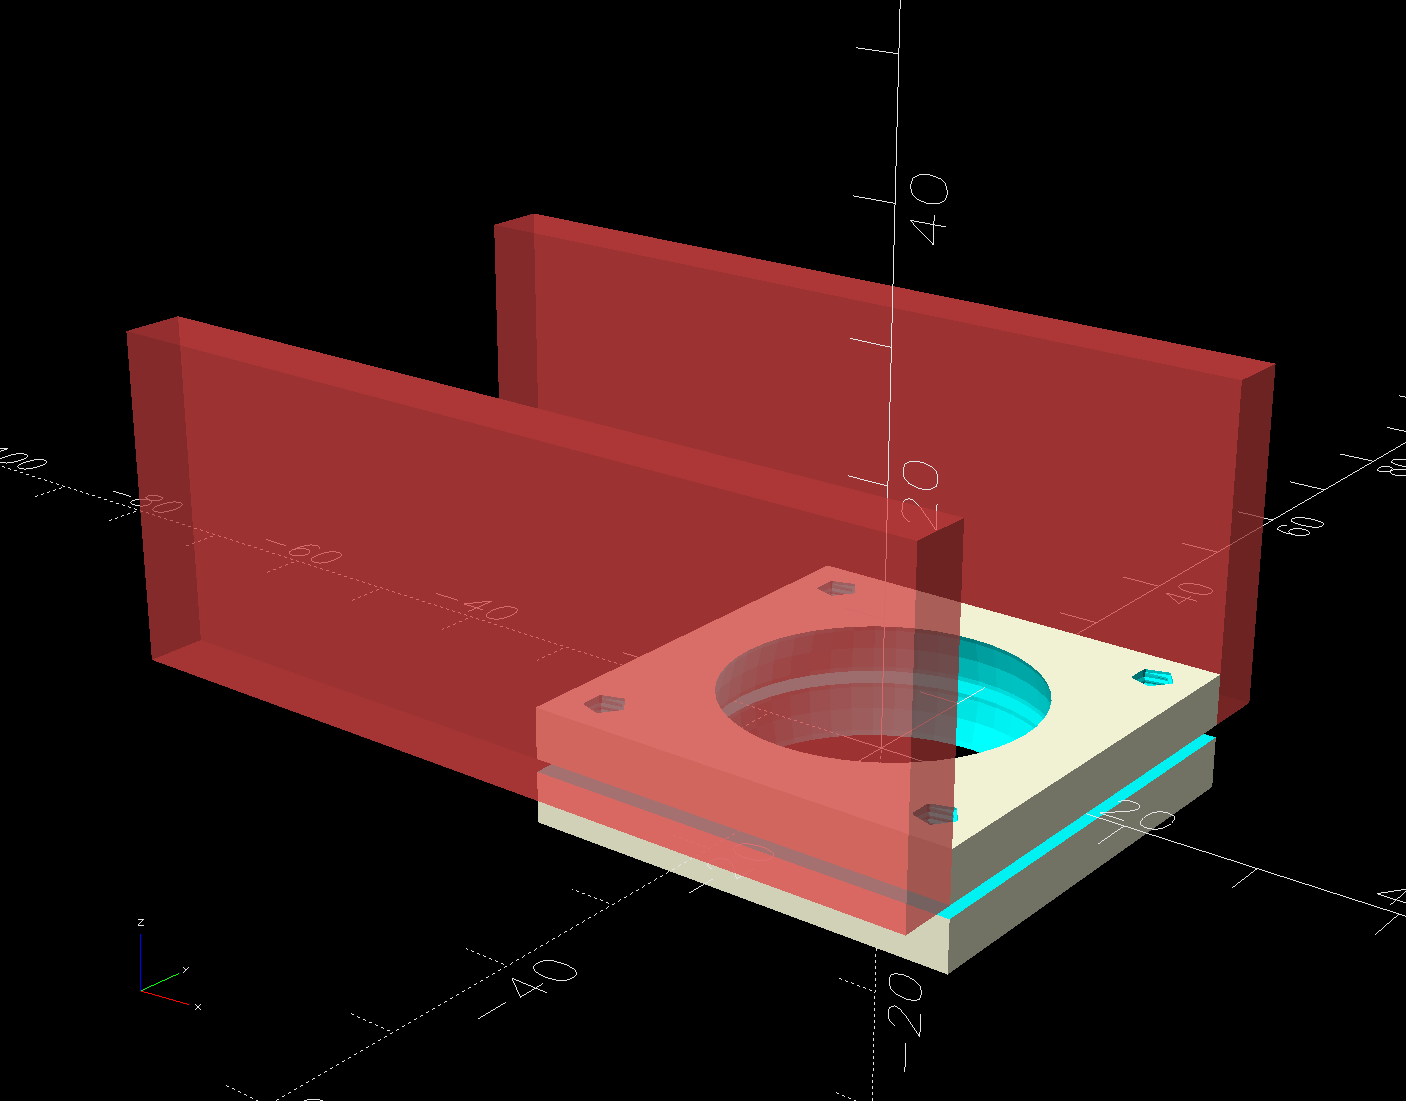
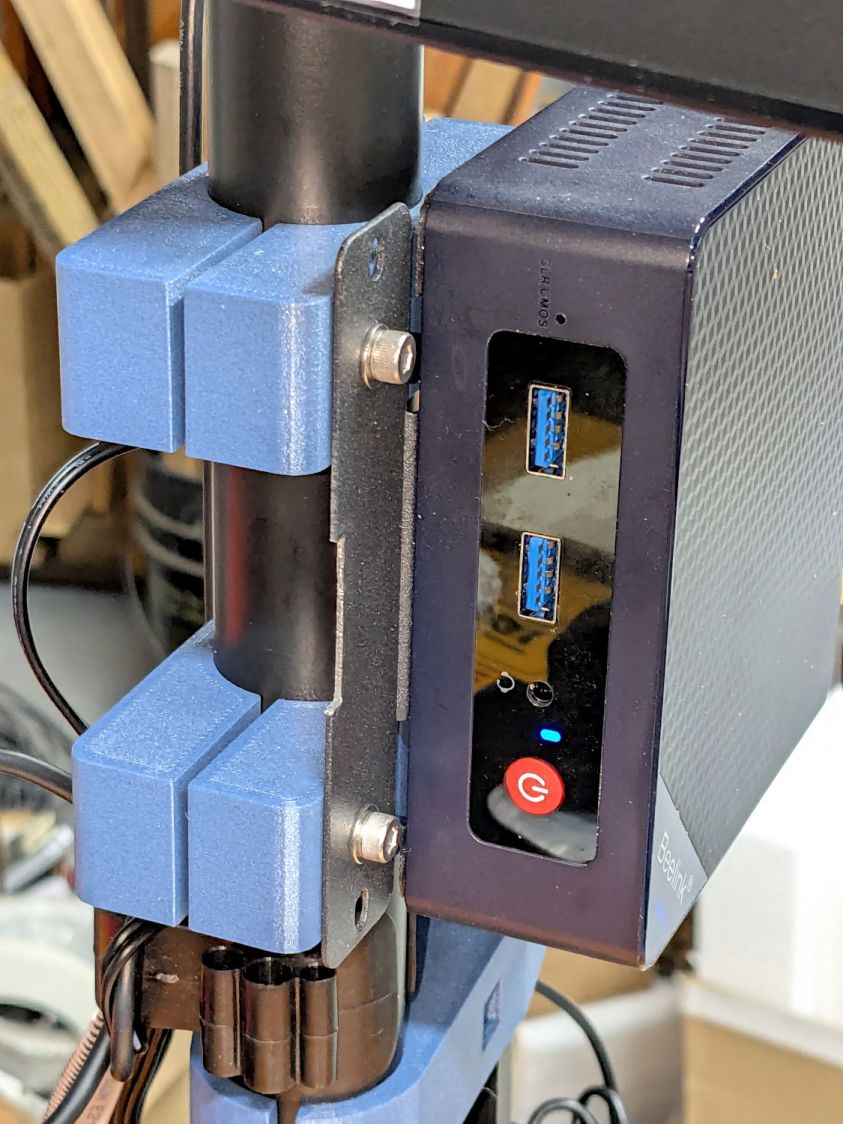
Subtracting the electronics pod shape from those slabs matches them exactly to the curvalicious corner:

The weird angle comes from tilting the mount to aim the laser in roughly the right direction when perpendicular to the plates:
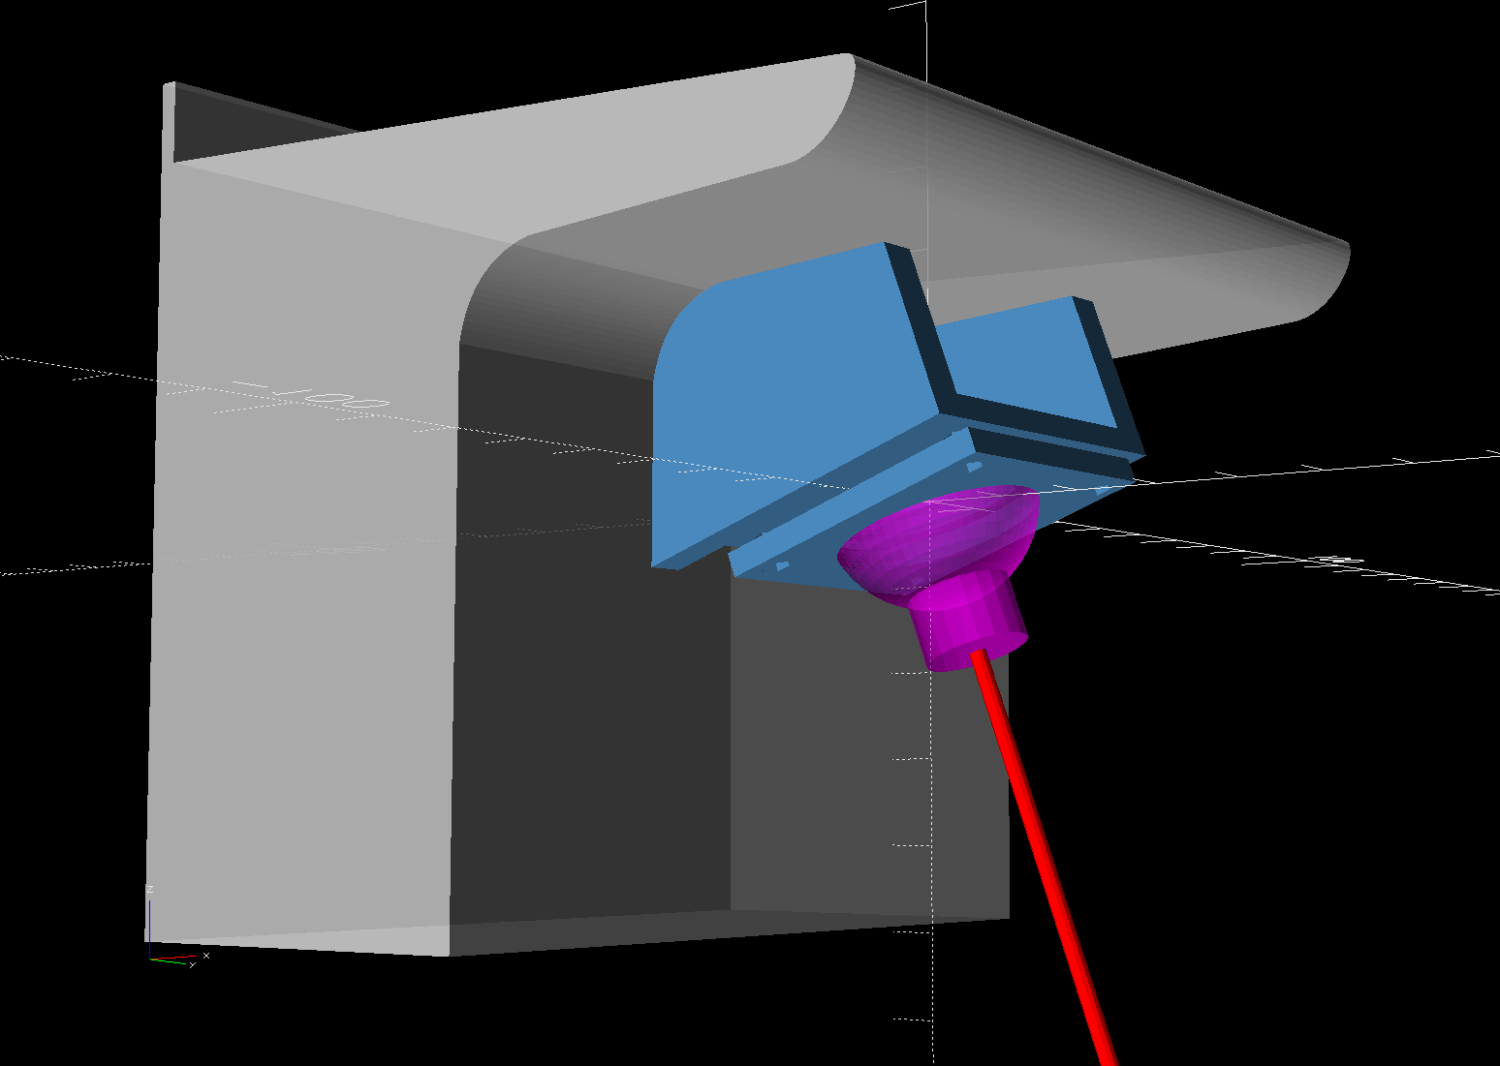
That angle can be 0° to 30°, although 25° seems about right. The slab sides neither stick out the top nor leave gaps in the corner over that range, after some cut-and-try tinkering sizing.
One of the M3 screws just did not want to go into its hole:
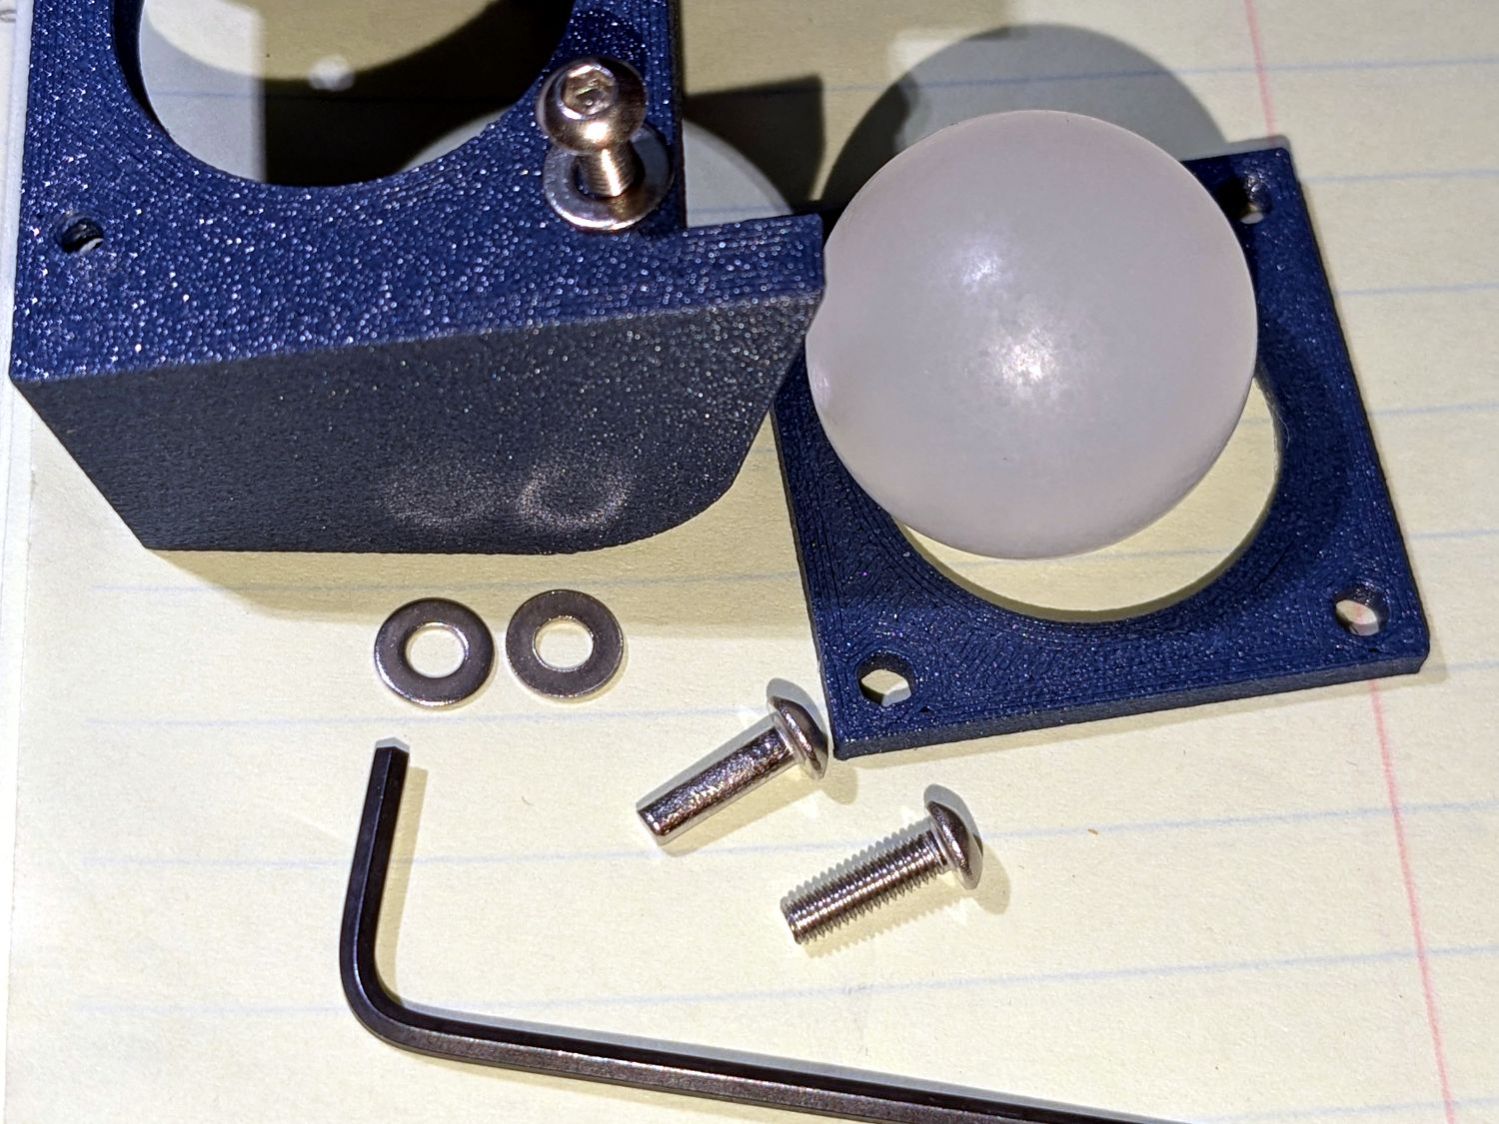
A bad day in the screw factory, I suppose.
The OpenSCAD source code as a GitHub Gist:
| // Handiquilter HQ Sixteen Stylus Laser Mount | |
| // Ed Nisley – KE4ZNU | |
| // 2025-02-23 | |
| include <BOSL2/std.scad> | |
| include <BOSL2/threading.scad> | |
| Layout = "Pod"; // [Show,Build,Pod,Mount] | |
| /* [Hidden] */ | |
| PodWidth = 110.0; // overall width of pod | |
| PodScrewClear = 50.0; // clear distance between pod screws | |
| PodRecenter = [0,0]; // pod trace upper corner to origin if not done in Inkscape | |
| BaseAngle = -25; // laser neutral angle | |
| BallOD = 25.4 + 0.2; // bearing ball + easy fit clearance | |
| BallOffset = [70.0,0,-35.0]; // upper corner to ball center | |
| LaserOD = 12.2; // laser module | |
| LaserLength = 38.0; | |
| Kerf = 1.0; // clamp gap | |
| Plate = [35.0,35.0,8.0 + Kerf]; // basic mount plate | |
| WallThick = 5.0; // upright walls: plate to pod | |
| WasherOD = 7.0; | |
| ScrewPitch = 0.5; | |
| ScrewNomOD = 3.0; | |
| ScrewNomID = ScrewNomOD – ScrewPitch; | |
| ScrewOC = Plate – [WasherOD,WasherOD,0]; | |
| Gap = 5.0; // build spacing | |
| //———- | |
| // HQ Sixteen electronics pod | |
| module Pod() { | |
| xrot(90) | |
| down(PodWidth/2) | |
| linear_extrude(height=PodWidth,convexity=5) | |
| translate(PodRecenter) | |
| import("HQ Sixteeen – pod profile.svg", | |
| layer="Pod Profile"); | |
| } | |
| module LaserPointer() { | |
| cylinder(d=LaserOD,h=LaserLength,center=true); | |
| } | |
| module Ball() { | |
| union() { | |
| sphere(d=BallOD,$fn=4*12); | |
| down(0.25*LaserLength) | |
| LaserPointer(); | |
| } | |
| } | |
| module Mount() { | |
| union() { | |
| difference() { | |
| union() { | |
| cuboid(Plate,anchor=CENTER); | |
| for (j=[-1,1]) | |
| translate([-(BallOffset.x – Plate.x)/2,j*(Plate.y + WallThick)/2,Kerf/2]) | |
| cuboid([BallOffset.x,WallThick,-0.75*BallOffset.z],anchor=BOTTOM); | |
| } | |
| cuboid([4*Plate.x,4*Plate.y,Kerf],anchor=CENTER); | |
| Ball(); | |
| for (i=[-1,1], j=[-1,1]) | |
| translate([i*ScrewOC.x/2,j*ScrewOC.y/2,0]) | |
| cylinder(d=1.2*ScrewNomOD,h=2*Plate.z,anchor=CENTER,$fn=6); | |
| yrot(-BaseAngle) | |
| translate(-BallOffset) | |
| Pod(); | |
| } | |
| for (i=[-1,1], j=[-1,1]) | |
| translate([i*ScrewOC.x/2,j*ScrewOC.y/2,Kerf/2]) | |
| // flat size root dia height pitch | |
| threaded_nut(1.5*ScrewNomOD,ScrewNomID,(Plate.z – Kerf)/2,ScrewPitch,$slop=0.10, | |
| bevel=false,ibevel=false,anchor=BOTTOM); | |
| } | |
| } | |
| //———- | |
| // Build things | |
| if (Layout == "Pod") | |
| Pod(); | |
| if (Layout == "Mount") | |
| Mount(); | |
| if (Layout == "Show") { | |
| yrot(BaseAngle) { | |
| color("SteelBlue") | |
| Mount(); | |
| color("Magenta",0.5) | |
| Ball(); | |
| color("Red") | |
| yrot(180) | |
| cylinder(d=2,h=-2*BallOffset.z,$fn=12); | |
| } | |
| translate(-BallOffset) | |
| color("Silver",0.8) | |
| Pod(); | |
| } | |
| if (Layout == "Build") { | |
| left(Plate.x/2 + Gap/2) | |
| intersection() { | |
| cuboid([4*Plate.x,4*Plate.y,-BallOffset.z],anchor=DOWN); | |
| down(Kerf/2) | |
| Mount(); | |
| } | |
| right(Plate.x/2 + Gap/2) | |
| intersection() { | |
| cuboid([4*Plate.x,4*Plate.y,Plate.z/2],anchor=DOWN); | |
| up(Plate.z/2) | |
| Mount(); | |
| } | |
| } |