Ed Nisley's Blog: Shop notes, electronics, firmware, machinery, 3D printing, laser cuttery, and curiosities. Contents: 100% human thinking, 0% AI slop.
Category: Science
If you measure something often enough, it becomes science
It turns out the camera’s case seal isn’t quite up to the task:
SJCam M50 camera condensation – detail
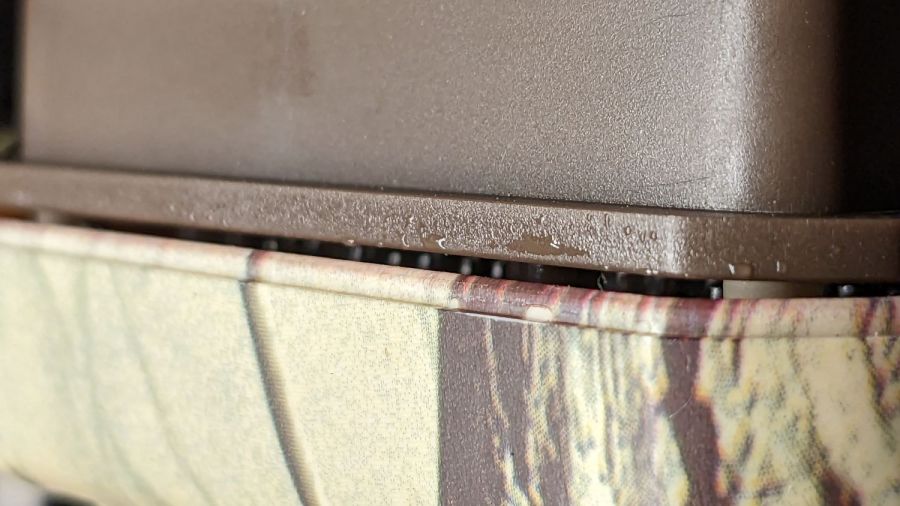
The lip around the front half of the case presses against a rubber gasket around the rear half, which means the water on the electronics chassis is inside the camera case:
SJCam M50 camera condensation – case edge
Fortunately, the water condensed on the inside of the glass lens protector, rather than on the camera itself:
SJCam M50 camera condensation – interior
I let the whole thing dry out on the bench for a few days and all seems right again.
The leak does make me think leaving it out in the rain is a Bad Idea™, which isn’t the sort of thought one should have about a trail camera.
An unfortunate confluence of weather, schedule, and enthusiasm led to mowing all the yard in one session:
Mowing pattern – 2023-05-27
I managed to remember to pause the tracker during a break in the middle, so it’s really just shy of three wall-clock hours from start to finish. It’s amazing how much work you (well, I) can get out of 100 mg of caffeine.
Despite what you see here, the path on what’s euphemistically called “our lawn” show a much more organized solution to the problem of covering our property with non-overlapping foot-and-a-half stripes. As with my leaf-shredding track, I neither venture into the road nor mow the neighboring yards.
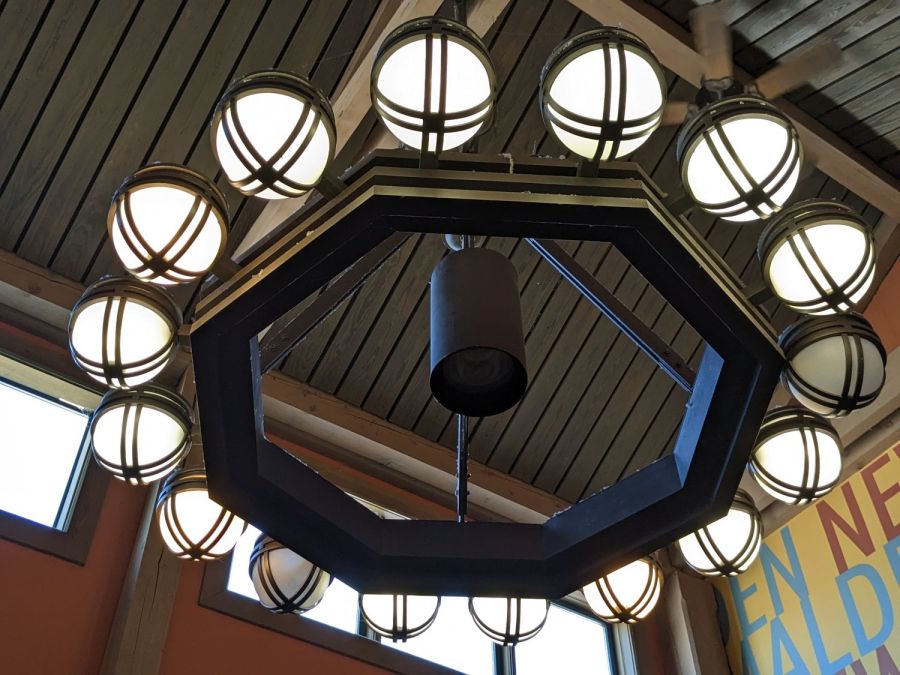
Spotted in a soon-to-be-rebuilt rest area on I-87 north of Kingston NY, a chandelier stuffed with old-school CFL bulbs of various vintages:
NYS I-87 Rest Area – CFL chandelier
The yellowish dome on the far right might still house an incandescent bulb, but I can’t tell from here.
Judging from the high color temperature and even illumination, the chandelier next to it has 16 newish LED bulbs:
NYS I-87 Rest Area – LED chandelier
What’s of interest: both chandeliers have two dead bulbs and, perhaps, the center floodlight of the LED fixture had died, too. We don’t know how long they’ve been in place, other than that the LEDs are certainly more recent, but a 6% failure rate is nothing to brag about.
From what I’ve seen, the reliability of both CFL and LED bulbs is greatly overstated and certainly do not justify preemptive replacement of a working bulb of any vintage.
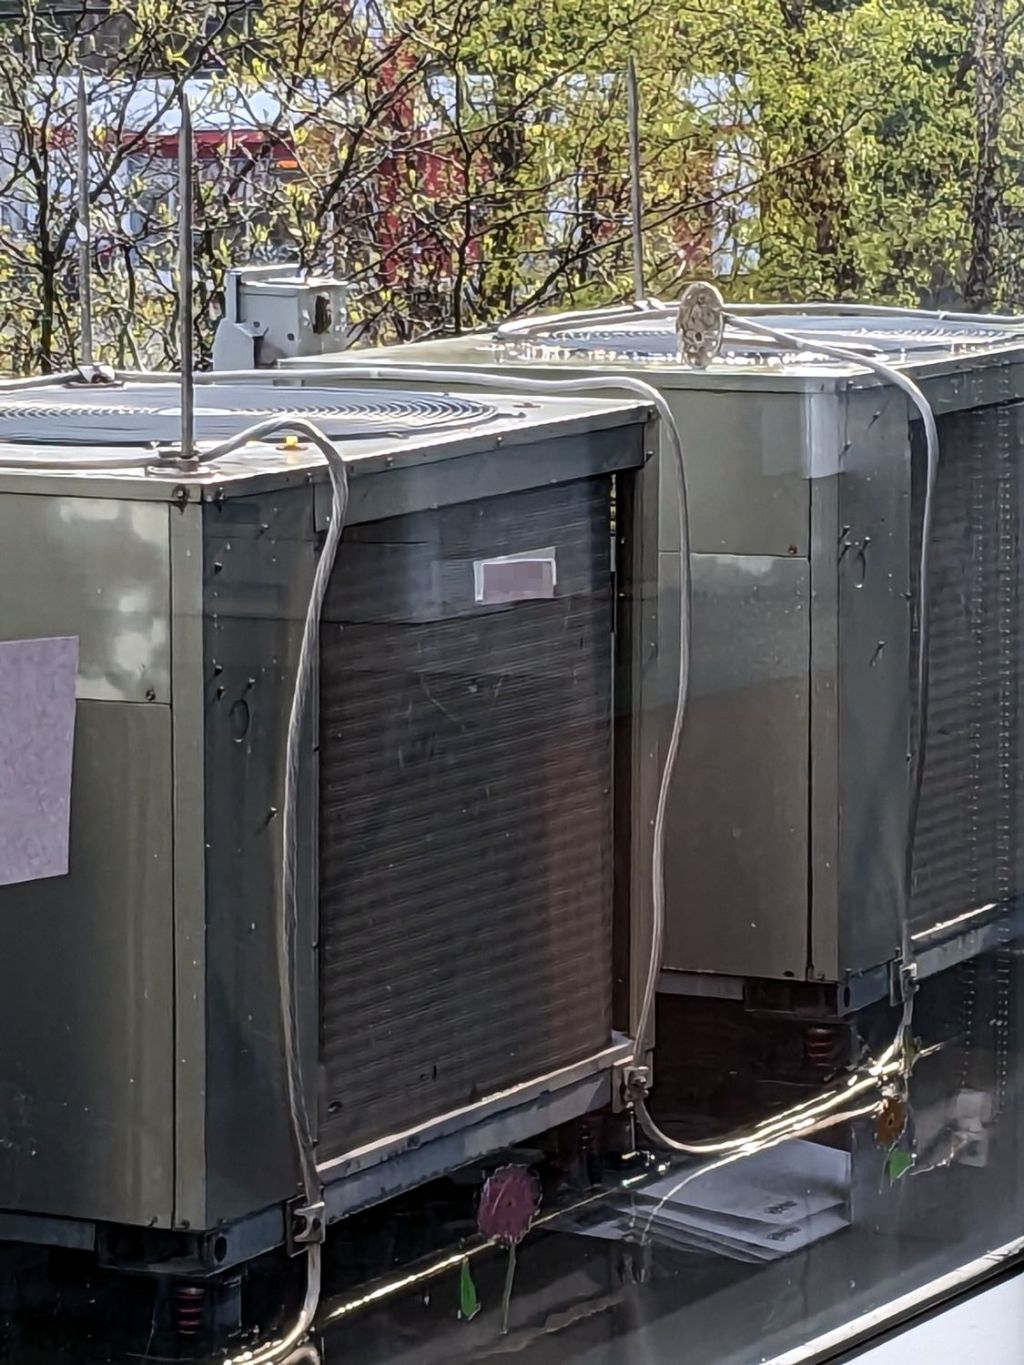
Each air conditioning unit has a pair of lightning rods atop it, with their aluminum grounding cables securely clamped to the steel frame underneath.
The rod reclining on its side caught my eye. Perhaps its fat cable wasn’t relaxed enough during installation, although I thought those wide bases would be firmly screwed to the unit’s steel top. Of course, that could be the only one without screws.
The building extends another three stories upward from that roof, but our experience suggests lightning strikes where it will.
The trail camera uses two parallel banks of four series AA cells to get enough oomph for its IR floodlight. I’m not convinced using bucked lithium AA cells in that configuration is a Good Idea, but it’s worth investigating.
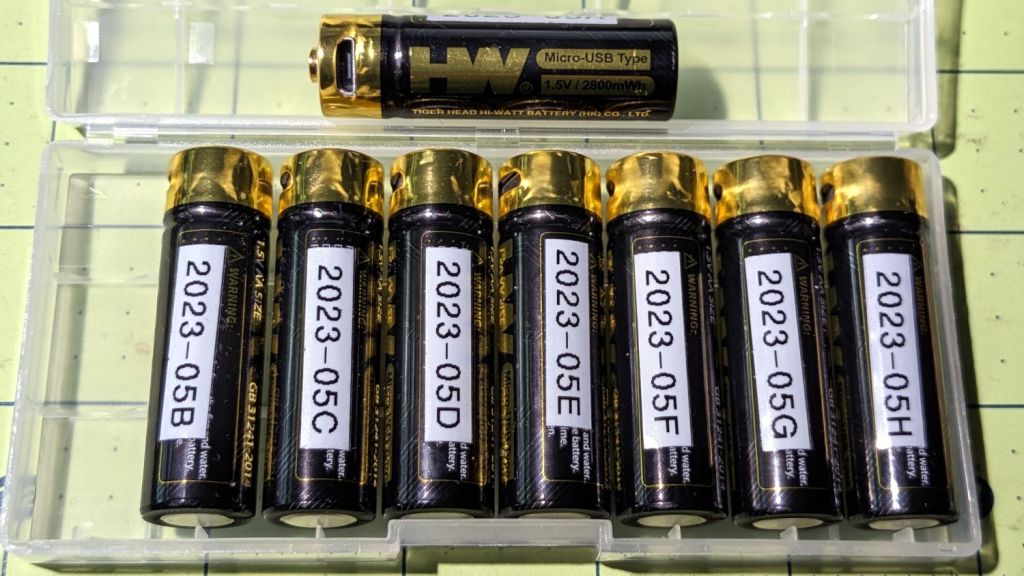
These are labeled HW, rather than Fuvaly, because it seems one cannot swim twice in the same river:
HW bucked Li AA cells
In any event, they come close to their claimed 2.8 W·hr capacity:
HW bucked Li AA – 2023-05
The lower pair of traces (red & black) are single cells at 2.7-ish W·hr, the blue trace is a pair at 5.4 W·hr, and the green trace is a quartet at 9.8 W·hr. Surprisingly close, given some previous results in this field.
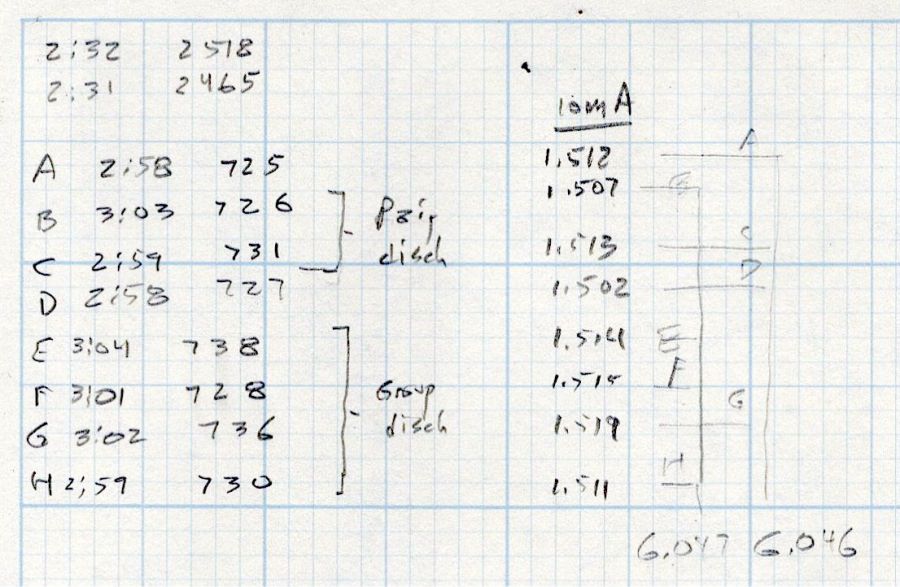
Recharging the cells after those tests shows they all take 3 hours ± a few minutes to soak up 730 mA·hr ± a few mA·hr, so they’re decently matched.
Measuring the terminal voltage with a 10 mA load after that charge lets me match a pair of quartets to 1 mV, which is obviously absurd:
HW bucked Li cells – initial charge 2023-05-05
The numbers in the upper left corner show the initial charge of four cells at a time required the same time within a minute and the same energy within 4%.
Sticking them in the trail camera must await using up the current set of alkaline AA cells.
Bonus: a lithium fire in a trail camera won’t burn down the house.
After all, pictures like this are definitely worth the hassle:
According to the manual, which I have hitherto had no reason to doubt, our non-turbo 2015 Subaru Forester has a 15.9 gallon fuel tank:
Subaru Forester – Fuel Capacity Chart
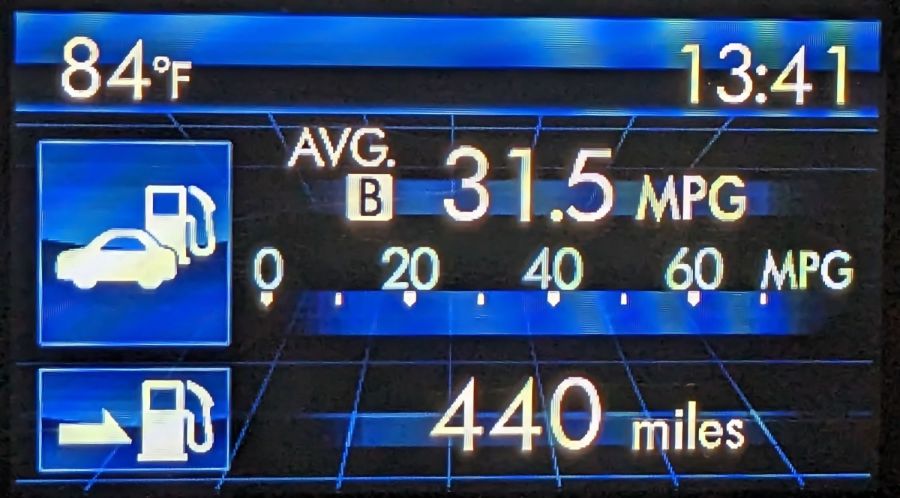
One screen shown on the dashboard’s Multi-Function Display gives the current mileage and estimated range:
Forester – MPG Range
Dividing those two numbers gives you 13.97 gallons, the current fuel level. As you’d expect, should the average miles per gallon change, the range will change accordingly.
The trip odometer says we have driven 72.8 miles since I filled the tank. Dividing that by the average mpg gives 2.3 gallons, so the tank could possibly hold 16.2 gallons, which, given all the averages involved, is reasonably close to the 15.9 gallons shown in the manual.
Being that type of guy, I have a spreadsheet tallying each fillup since the car was new:
8.1 gal average
7.5 gal median
13.9 gal maximum
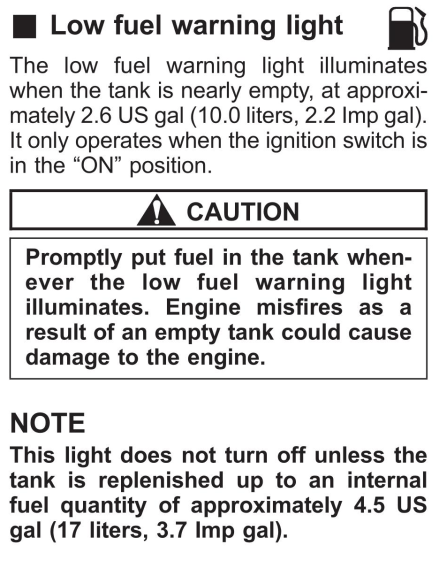
Long ago, my father taught me to fill the tank when the needle got halfway down and I’ve been doing so ever since. As a result, we have only rarely seen the Low Fuel Warning Light:
Subaru Forester – Low Fuel Warning Light info
A concatenation of unavoidable events put us southbound on I-87 when that light went on. Given the estimated range of 70-ish miles, I planned to refuel at the New Baltimore Service Area, about a dozen miles ahead.
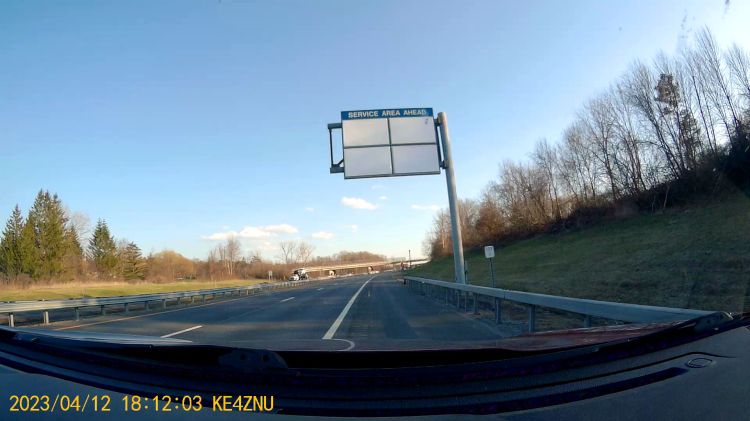
The engine shut down and all the dashboard warning lights lit up with the Service Area Ahead sign in view:
Out of Gas – Service Area Ahead
All the “facilities” are blank because they’re rebuilding the whole place, with the gas station remaining open.
So I slapped the shifter into neutral and we drifted slowly along the shoulder, under the bridge visible ahead, and eventually came to a halt at the beginning of the exit lane.
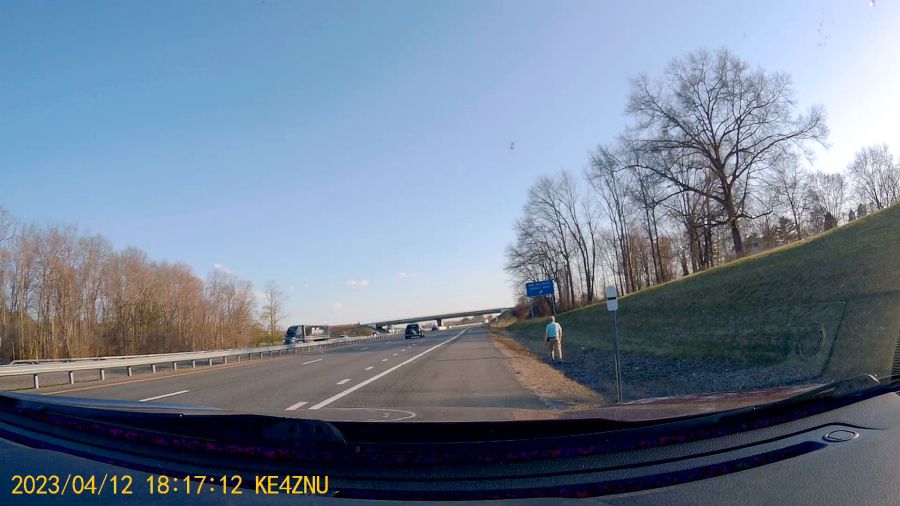
There was only one thing to do:
Out of Gas – Walking On
Some storytelling later:
Out of Gas – Walking Back
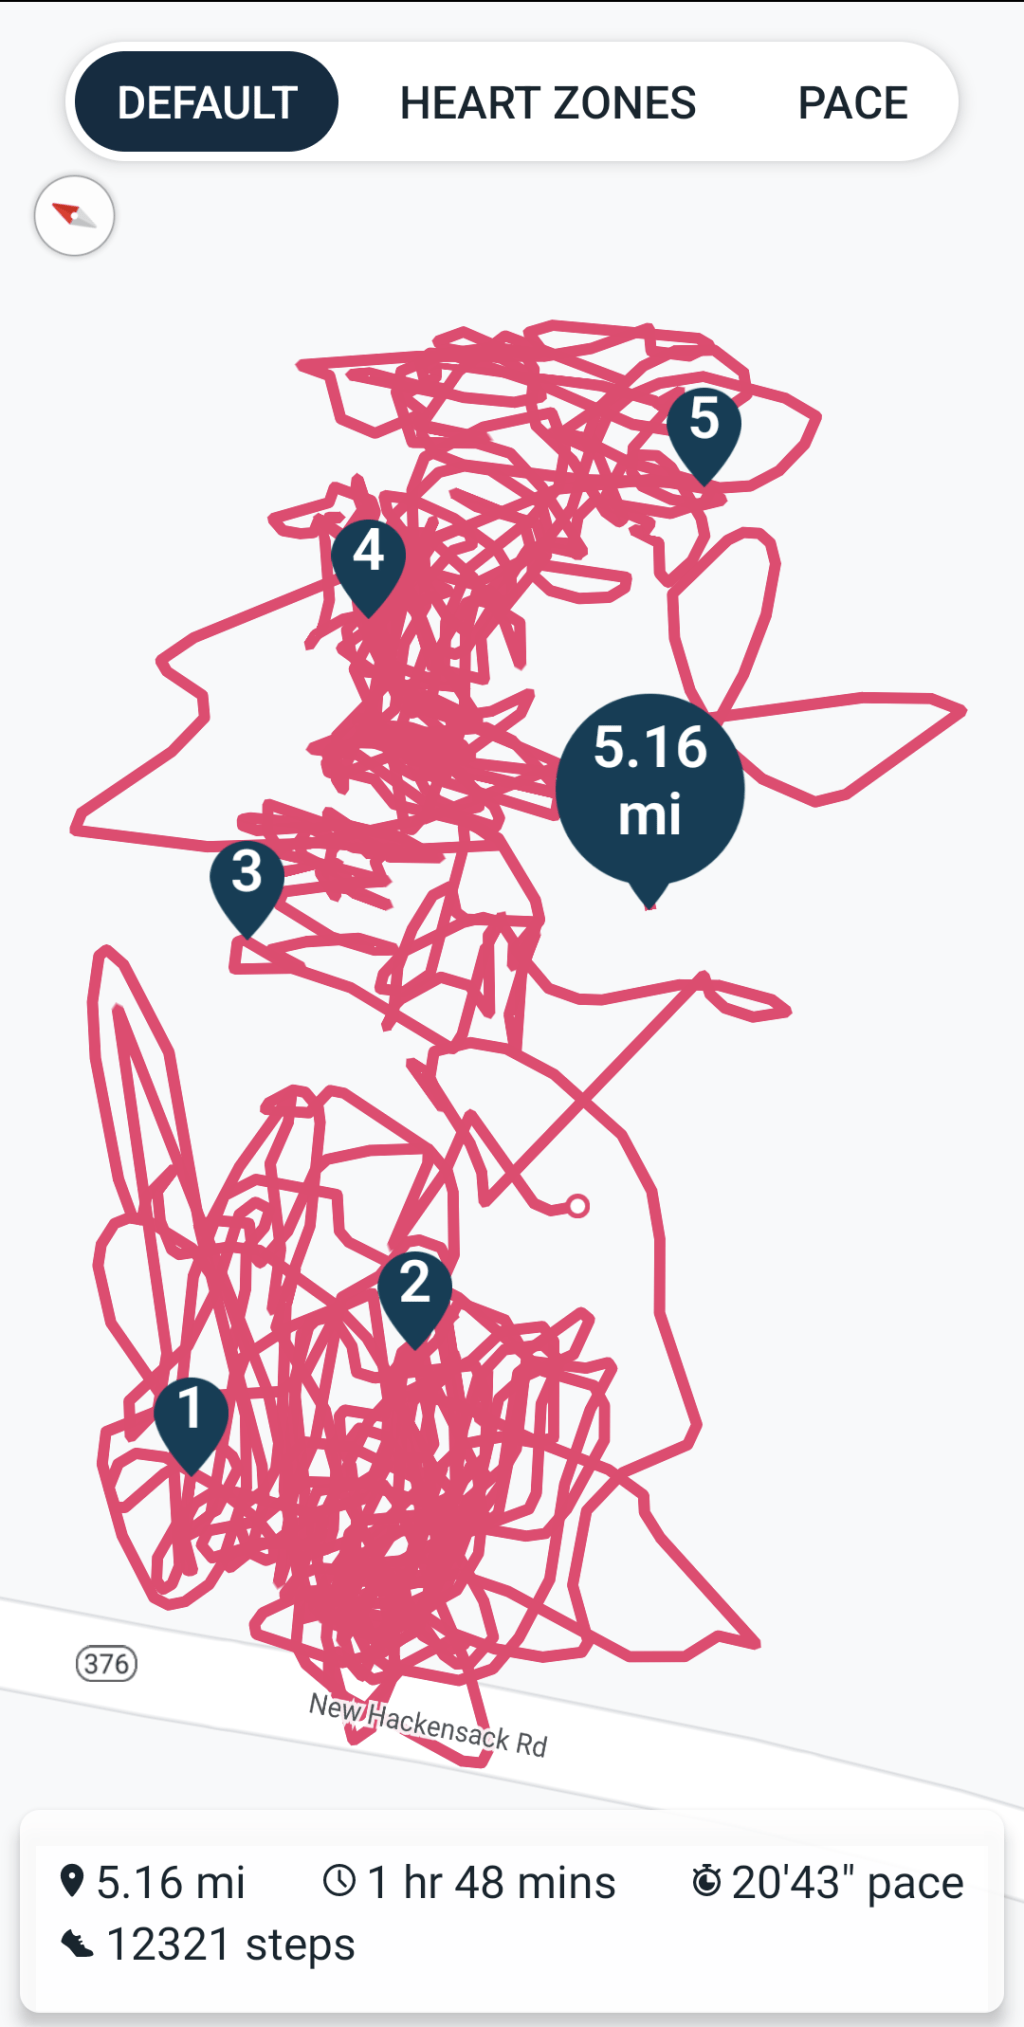
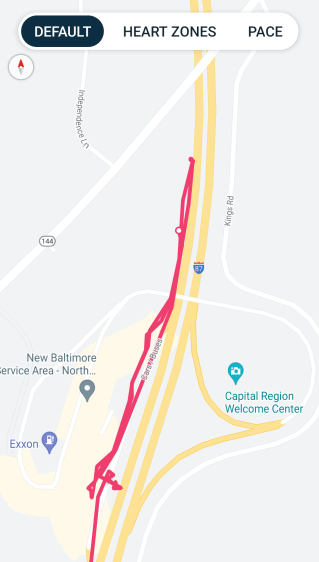
Just because I could:
Refueling – GPS Track
For what are, I trust, understandable reasons, I started the tracker after I began hiking and forgot to turn it off before driving away.
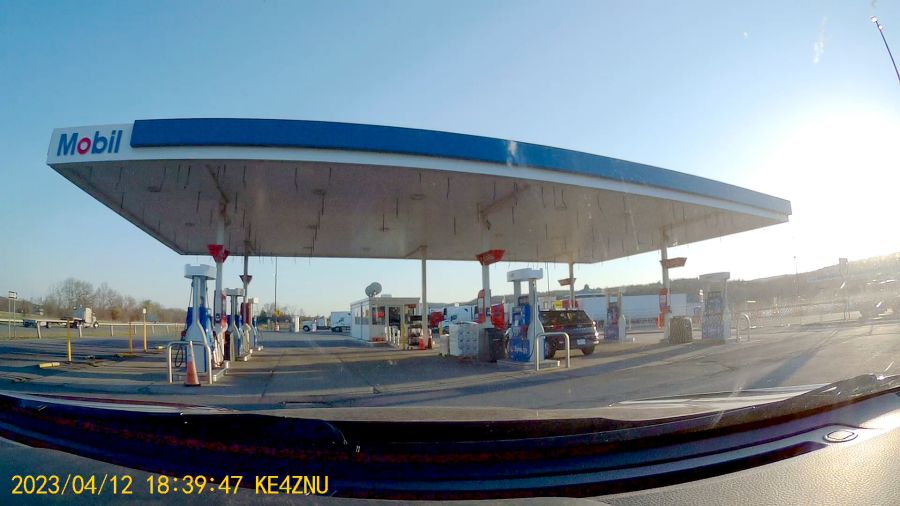
After figuring out the devilishly complex spring-loaded anti-spill spout on the gas can, we drove 1500 feet to the Service Area:
Out of Gas – Service Station
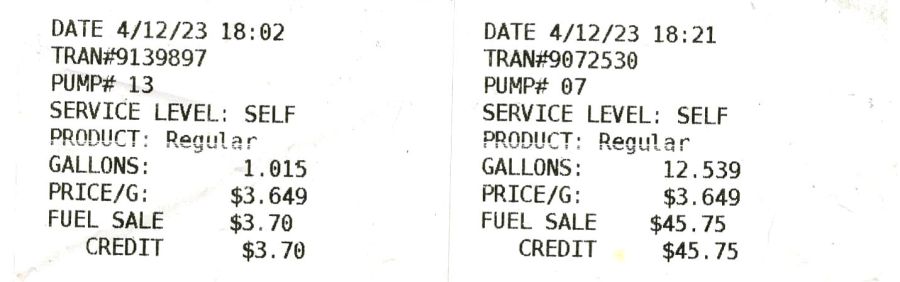
As usual, I filled the tank until the nozzle automatically shut off, for a total of 13.554 gallons in two transactions:
Pump Receipts
Now, it is possible the Forester fuel system has another 2.3 gallons tucked away somewhere, but if that reserve doesn’t make the wheels go around, it’s not doing me the least bit of good.
The fact that I’ve occasionally added just short of 14 gallons suggests the estimated remaining capacity depends strongly on the average mileage up to that point and I have come very very close to running out of gas on several occasions.
As far as I can tell, the usable fuel capacity is a scant 14 gallons and the Low Fuel Light goes on with, at most, a dozen more miles in the tank.
This is the second time in more than half a century of driving I’ve run out of gas.
My father was right and I shall henceforth mend my wayward behavior.