The deal was, if my Shop Assistant repaired my pocket camera, she could have it. She did, which meant I lost the ability to take pix through the microscope. While I was conjuring up a replacement, it occurred to me that I should also build a gadget to hold a close-up lens in front of the camera for tighter macro shots that don’t quite require a microscope’s magnification.
The solid model of the microscope adapter:

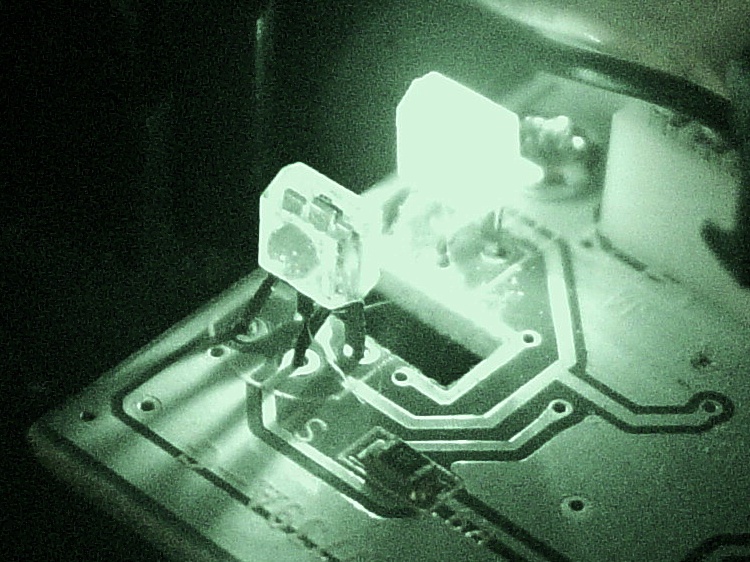
The close-up macro adapter, with an LED ring light around the snout:

They have a common camera mounting plate, with a hex recess for a 1/4-20 nut that mates with a standard tripod screw and some support material sticking up through the hole for the screw that holds the camera to the plate:

The main tube glues into the plate’s cutout and is long enough to accommodate the fully extended lens turret, with four shallow holes for filament snippet locating pins to align the snout:

An exploded view shows how everything fits together, with the stud below the camera representing its tripod mounting screw:

More details on the parts will appear over the next few days, but here’s the view through the macro adapter:

Yeah, some slight vignetting, but overall it’s pretty good.
The OpenSCAD source code that builds both adapters:
// Close-up lens mount & Microscope adapter for Canon SX230HS camera
// Ed Nisley KE4ZNU - Nov 2011

Mount = "Eyepiece";			// End result: LEDRing Eyepiece

Layout = "Show";			// Assembly: Show
							// Parts: Plate Tube LEDRing Camera Eyepiece
							// Build Plates: Build1..4

Gap = 12;					// between "Show" objects

include </home/ed/Thing-O-Matic/lib/MCAD/units.scad>
include </home/ed/Thing-O-Matic/Useful Sizes.scad>
include </home/ed/Thing-O-Matic/lib/visibone_colors.scad>

//-------
//- Extrusion parameters must match reality!
//  Print with +1 shells, 3 solid layers, 0.2 infill

ThreadThick = 0.33;
ThreadWidth = 2.0 * ThreadThick;

HoleFinagle = 0.2;
HoleFudge = 1.02;

function HoleAdjust(Diameter) = HoleFudge*Diameter + HoleFinagle;

Protrusion = 0.1;			// make holes end cleanly

function IntegerMultiple(Size,Unit) = Unit * ceil(Size / Unit);

//-------
// Dimensions

// doublet lens

LensDia = 25.0;
LensRad = LensDia/2;
LensClearance = 0.2;

LensEdge = 6.7;
LensThick = 8.6;
LensRimThick = IntegerMultiple((2.0 + LensThick),ThreadThick);

// LED ring light

LEDRingOD = 50.0;
LEDRingID = 36.0;
LEDBoardThick = 1.5;
LEDThick = 4.0;
LEDRingClearance = 0.5;
LEDWireHoleDia = 3.0;

// microscope eyepiece

EyepieceOD = 30.0;
EyepieceID = 24.0;
EyepieceLength = 25.0;

// camera
// Origin at base of [0] ring, Z+ along lens axis, X+ toward bottom, Y+ toward left

CameraBodyWidth = 2*10.6;							// 2 x center-to-curve edge
CameraBaseWidth = 15.5;								// flat part of bottom front to back
CameraBaseRadius = (CameraBodyWidth - CameraBaseWidth)/2;	// edge rounding
CameraBaseLength = 60.0;							// centered on lens axis
CameraBaseHeight = 55.0;							// main body height
CameraBaseThick = 0.9;								// downward from lens ring

echo(str("Camera base radius: ",CameraBaseRadius));

TripodHoleOffset = -19.0;							// mount screw wrt lens centerline
TripodHoleDia = Clear025_20;						// clearance hole

TripodScrewHeadDia = 14.5;							// recess for screw mounting camera
TripodScrewHeadRad = TripodScrewHeadDia/2;
TripodScrewHeadThick = 3.0;

// main lens tube

TubeDia = 		[53.0,	44.0,	40.0,	37.6];		// lens rings, [0] is fixed to body
TubeLength = 	[8.1,	20.6,	17.6,	12.7];

TubeEndClearance = 2.0;								// camera lens end to tube end
TubeEndThickness = IntegerMultiple(1.5,ThreadThick);
TubeInnerClearance = 0.5;

TubeInnerLength = TubeLength[0] + TubeLength[1] + TubeLength[2] + TubeLength[3] +
				  TubeEndClearance;
TubeOuterLength = TubeInnerLength + TubeEndThickness;

TubeID = TubeDia[0] + TubeInnerClearance;
TubeOD = TubeID + 6*ThreadWidth;
TubeWall = (TubeOD - TubeID)/2;
TubeSides = 48;

echo(str("Main tube outer length: ",TubeOuterLength));
echo(str("          ID: ",TubeID," OD: ",TubeOD," wall: ",TubeWall));

// camera mounting base

BaseWidth = IntegerMultiple((CameraBaseWidth + 2*CameraBaseRadius),ThreadThick);
BaseLength = 60.0;
BaseThick = IntegerMultiple((1.0 + Nut025_20Thick + CameraBaseThick),ThreadThick);

// LED ring mount

LEDBaseThick = IntegerMultiple(2.0,ThreadThick);	// base under lens + LED ring
LEDBaseRimWidth = IntegerMultiple(6.0,ThreadWidth);
LEDBaseRimThick = IntegerMultiple(LensThick,ThreadThick);

LEDBaseOD = max((LEDRingOD + LEDRingClearance + LEDBaseRimWidth),TubeOD);

echo(str("LED Ring OD: ",LEDBaseOD));

// alignment pins between tube and LED ring / microscope eyepiece

AlignPins = 4;
AlignPinOD = 2.9;
AlignPinCircleDia = TubeOD - 2*TubeWall - 2*AlignPinOD;		// 2*PinOD -> more clearance

//-------

module PolyCyl(Dia,Height,ForceSides=0) {			// based on nophead's polyholes

  Sides = (ForceSides != 0) ? ForceSides : (ceil(Dia) + 2);

  FixDia = Dia / cos(180/Sides);

  cylinder(r=HoleAdjust(FixDia)/2,h=Height,$fn=Sides);
}

module ShowPegGrid(Space = 10.0,Size = 1.0) {

  Range = floor(50 / Space);

	for (x=[-Range:Range])
	  for (y=[-Range:Range])
		translate([x*Space,y*Space,Size/2])
		  %cube(Size,center=true);

}

//-------

//- Camera body segment
//	Including lens base and peg for tripod hole access
//	Z=0 at edge of lens base ring, X=0 along lens axis

module CameraBody() {

  translate([0,0,-CameraBaseThick])
	rotate(90)
	  union() {
		translate([0,0,(CameraBaseHeight/2 + CameraBaseRadius)])
		  minkowski() {
			cube([CameraBaseWidth,
				  (CameraBaseLength + 2*Protrusion),
				  CameraBaseHeight],center=true);
			rotate([90,0,0])
			  cylinder(r=CameraBaseRadius,h=Protrusion,$fn=8);
		  }

		translate([0,0,(TubeDia[0]/2 + CameraBaseThick)])
		  rotate([0,90,0])
			rotate(180/TubeSides)
			  cylinder(r=(TubeDia[0]/2 + CameraBaseThick),
					  h=(CameraBodyWidth/2 + Protrusion),
					  $fn=TubeSides);

		translate([CameraBodyWidth/2,0,(TubeDia[0]/2 + CameraBaseThick)])
		  rotate([0,90,0])
			cylinder(r=TubeDia[0]/2,h=TubeLength[0]);

		translate([(TubeLength[0] + CameraBodyWidth/2),
				  0,(TubeDia[0]/2 + CameraBaseThick)])
		  rotate([0,90,0])
			cylinder(r=TubeDia[1]/2,h=TubeLength[1]);

		translate([(TubeLength[0] + TubeLength[1] + CameraBodyWidth/2),
				  0,(TubeDia[0]/2 + CameraBaseThick)])
		  rotate([0,90,0])
			cylinder(r=TubeDia[2]/2,h=TubeLength[2]);

		translate([(TubeLength[0] + TubeLength[1] + TubeLength[2] + CameraBodyWidth/2),
				  0,(TubeDia[0]/2 + CameraBaseThick)])
		  rotate([0,90,0])
			cylinder(r=TubeDia[3]/2,h=TubeLength[3]);

		translate([0,TripodHoleOffset,-BaseThick])
		  PolyCyl(TripodHoleDia,(BaseThick + 2*Protrusion));

	  }
}

//- Main tube

module Tube() {

  difference() {
	cylinder(r=TubeOD/2,h=TubeOuterLength,$fn=TubeSides);

	translate([0,0,TubeEndThickness])
	  PolyCyl(TubeID,(TubeInnerLength + Protrusion),TubeSides);

	translate([0,0,-Protrusion]) {
	  if (Mount == "LEDRing")
		cylinder(r=LensRad,h=(TubeEndThickness + 2*Protrusion));
	  if (Mount == "Eyepiece")
		cylinder(r=EyepieceID/2,h=(TubeEndThickness + 2*Protrusion));
	}

	for (Index = [0:AlignPins-1])
	  rotate(Index*90)
		translate([(AlignPinCircleDia/2),0,-ThreadThick])
		  rotate(180)			// flat sides outward
			PolyCyl(AlignPinOD,TubeEndThickness);
  }

}

//- Base plate

module BasePlate() {

  union() {
	difference() {
		linear_extrude(height=BaseThick)
		  hull() {
			translate([-(BaseLength/2 - BaseWidth/2),0,0])
			  circle(BaseWidth/2);
			translate([ (BaseLength/2 - BaseWidth/2),0,0])
			  circle(BaseWidth/2);
			translate([0,(0.75*BaseLength),0])
			  circle(BaseWidth/2);
		  }

		translate([0,0,BaseThick])
		  CameraBody();

		translate([0,(TubeOuterLength + CameraBodyWidth/2),
				  (BaseThick + TubeDia[0]/2)])
		  rotate([90,0,0])
			PolyCyl(TubeOD,TubeOuterLength,$fn=TubeSides);

		translate([0,0,3*ThreadThick])
		  PolyCyl((Nut025_20Dia*sqrt(3)/2),2*Nut025_20Thick,6);	// dia across hex flats

		translate([0,0,-Protrusion])
		  PolyCyl(Clear025_20,(BaseThick + 2*Protrusion));

		translate([TripodHoleOffset,0,3*ThreadThick])
		  PolyCyl((Nut025_20Dia*sqrt(3)/2),2*Nut025_20Thick,6);	// dia across hex flats

		translate([TripodHoleOffset,0,-Protrusion])
		  PolyCyl(Clear025_20,(BaseThick + 2*Protrusion));

		translate([-TripodHoleOffset,0,-Protrusion])
		  PolyCyl(TripodScrewHeadDia,(TripodScrewHeadThick + Protrusion));

	}

	translate([-TripodHoleOffset,0,0]) {				// support for tripod screw hole
	  for (Index=[0:3])
		rotate(Index*45)
		  translate([-ThreadWidth,-TripodScrewHeadRad,0])
			cube([2*ThreadWidth,TripodScrewHeadDia,TripodScrewHeadThick]);

	  cylinder(r=0.4*TripodScrewHeadRad,h=(BaseThick - CameraBaseThick),$fn=9);
	}
  }
}

//- LED mounting ring

module LEDRing() {

  difference() {
	cylinder(r=LEDBaseOD/2,h=LensRimThick,$fn=48);

	translate([0,0,-Protrusion])
	  PolyCyl((LensDia + LensClearance),
			  (LensRimThick + 2*Protrusion));

	translate([0,0,LEDBaseRimThick])
	  difference() {
		PolyCyl(LEDBaseOD,LensThick);
		PolyCyl(LEDRingID,LensThick);
	  }

	translate([0,0,LEDBaseThick])
	  difference() {
		PolyCyl((LEDRingOD + LEDRingClearance),LensThick);
		cylinder(r1=HoleAdjust(LEDRingID - LEDRingClearance)/2,
				 r2=HoleAdjust(LensDia + LensClearance)/2 + 2*ThreadWidth,
				 h=LensThick);
	  }

	for (Index = [0:AlignPins-1])
	  rotate(Index*90)
		translate([(AlignPinCircleDia/2),0,-ThreadThick])
		  rotate(180)			// flat sides outward
			PolyCyl(AlignPinOD,LEDBaseThick);

	rotate(45)
	  translate([0,LEDRingID/2,(LEDBaseThick + 1.2*LEDWireHoleDia/2)])
		rotate([0,-90,0])			// flat side down
		  rotate([-90,0,0])
			PolyCyl(LEDWireHoleDia,2*LEDBaseRimWidth);
  }

}

//- Microscope eyepiece adapter

module EyepieceMount() {

  difference() {
	cylinder(r1=TubeOD/2,
			 r2=(EyepieceOD + 8*ThreadWidth)/2,
			 h=EyepieceLength,
			 $fn=TubeSides);

	translate([0,0,-Protrusion])
	  PolyCyl(EyepieceOD,(EyepieceLength + 2*Protrusion));

	for (Index = [0:AlignPins-1])
	  rotate(Index*90)
		translate([(AlignPinCircleDia/2),0,-ThreadThick])
		  rotate(180)			// flat sides outward
			PolyCyl(AlignPinOD,6*ThreadThick);
  }

}

//-------
// Build it!

if (Layout != "Show")
  ShowPegGrid();

if (Layout == "Tube")
  Tube();

if (Layout == "LEDRing")
  LEDRing();

if (Layout == "Plate")
  BasePlate();

if (Layout == "Camera")
  CameraBody();

if (Layout == "Eyepiece")
  EyepieceMount();

if (Layout == "Build1")
  translate([0,-BaseLength/3,0])
	BasePlate();

if (Layout == "Build2")
  Tube();

if (Layout == "Build3")
  LEDRing();

if (Layout == "Build4")
  EyepieceMount();

if (Layout == "Show") {
  translate([0,TubeOuterLength,TubeDia[0]/2]) {
	rotate([90,0,0])
	  color(LTC) Tube();
	translate([0,Gap,0])
	  rotate([-90,0,0]) {
		if (Mount == "LEDRing")
		  color(OOR) LEDRing();
		if (Mount == "Eyepiece")
		  color(OOR) EyepieceMount();
	  }
  }

  translate([0,-CameraBodyWidth/2,0])
	color(PG) CameraBody();

  color(PDA)
	render()
	translate([0,-CameraBodyWidth/2,-(BaseThick + Gap)])
	  BasePlate();
}
The original doodles & dimensions: