Ed Nisley's Blog: Shop notes, electronics, firmware, machinery, 3D printing, laser cuttery, and curiosities. Contents: 100% human thinking, 0% AI slop.
Mary’s folks enjoy the daily crossword, but they wanted a slightly larger edition… and, after a bit of procrastination, I conjured up an automated way to make it happen, so her father need not do this manually with The GIMP and Xsane.
The scanner, an old HP Scanjet 3970, dropped off the Windows driver list after Vista, so it now runs only with Linux.
Doing the scan is straightforward, as it’s the default scanner:
The X and Y coordinates set the scan dimensions in millimeters, which should be as small as possible consistent with scanning the whole crossword.
The driver produces output image files in PNM format, which isn’t particularly common these days, or TIFF. ImageMagick knows what to do with both of them; I picked PNM.
Unfortunately, for some unknown reason, the SANE driver produces a severely low-contrast image:
HP3900 Grayscale Scan
ImageMagick can produce a histogram:
convert scan.pnm histogram:hist.png
Which shows the problem:
HP3900 Grayscale Histogram
That’s using the grayscale emulation mode: the driver does a Color scan and converts to Gray mode for the output image. It seems having the driver do the conversion produces better results than scanning directly in Color and then applying ImageMagick, but it’s not my scanner and I don’t have a lot of experience with it.
This being Linux, the best way to print something is with either Postscript or PDF. I used PDF, because then we can look at the results with Reader, a more familiar program than, say, Evince:
Which centers the crossword on the page over a white background with enough margin to keep the printer happy:
Crossword – full page
That PDF goes to the default printer queue, where it’s turned into Postscript and comes out exactly like it should:
lp page.pdf
I gimmicked the default printer instance to use only black ink by creating a separate CUPS printer with the appropriate defaults. Other programs pay no attention to that setting and the printer uses colored inks. There is no explanation I can find for any of this; Linux / CUPS printing is basically a black box operation.
In theory, you could print the composited image file as a PNG or some such, but I cannot make it come out the right size in the right place.
You could do all of that in one line, with one huge ImageMagick invocation kicking off the scan and firing the result to the printer, but leaving some intermediate results lying along the trail isn’t necessarily a Bad Thing. I should probably use random temporary file names, though, in the interest of not polluting the namespace.
All this happened remotely, with me signed on through SSH: hooray for the command line. Had to use SCP a few times to fetch those intermediate files to puzzle over the results, too.
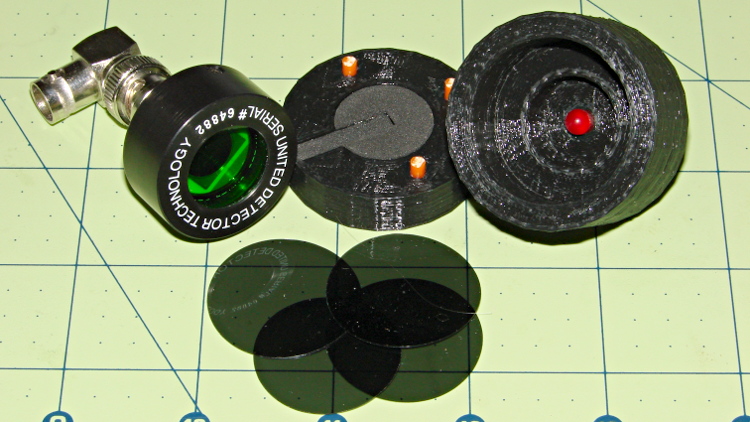
Given that test fixture, the obvious question is whether the PIN-10AP photodiode’s output current varies linearly with light intensity, just like the specs would lead you to believe. I excavated the sheet of 2-stop neutral density filter gel from the Parts Warehouse Wing and cut some 30 mm disks:
LED Photodiode test fixture – ND filter disks
A single filter layer should reduce the light intensity by 2 f/stops = a factor of 4. Each successive layer reduces the intensity by another factor of 4. They’re all at least reasonably clean and free of defects, but they’re definitely not optical lens quality.
Running the LED with a 100 mA pulse at 20% duty cycle and stacking the disks in the fixture, one by one, between the LED and photodiode, produces this data:
Layers
Attenuation
Scale
V
I – uA
Ratio
0
1
1.0000
8.7
87
1
4
0.2500
1.9
19
4.58
2
16
0.0625
0.43
4.3
4.42
3
64
0.0156
0.097
0.97
4.43
4
256
0.0039
0.022
0.22
4.41
The Ratio column divides successive pairs of current values. The first step, from “no filter” to “one filter”, came out a bit larger than the rest, probably because the gel sheet isn’t anti-reflective and some light bounces off the top.
After that, though, it looks just like I’m cheating, doesn’t it?
The ratios should be 4.0, but the actual 4.4 means it’s a 2.1 stop filter. Close enough, methinks.
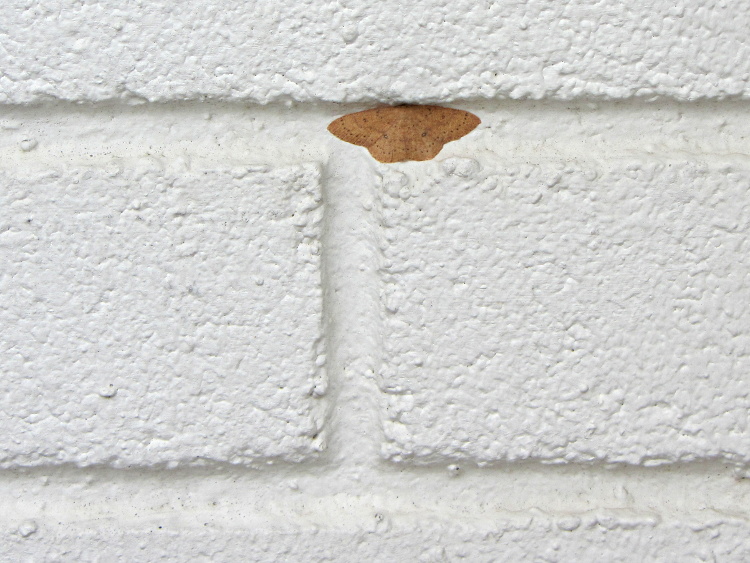
This looked like a wad of chewing gum stuck on the grocery store wall where I leaned my bike:
Moth – on painted brick wall
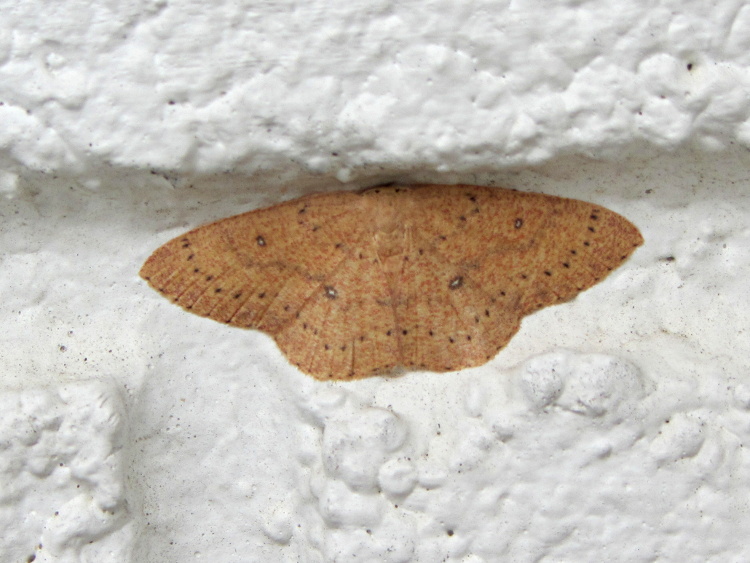
But it’s actually a moth with subtle decorations:
Moth – detail
The poor thing would be much less conspicuous snuggled into a tree, but I suppose it’s doing the best it can with what’s available.
A quick riffle through the RTP Moth Book didn’t reveal any likely candidates, but there are a gazillion little brown moths in there, so I probably missed it.
We often see Turkey Vultures circling high overhead in thermals rising from, in these parts, sun-heated asphalt parking lots and roads, always on the alert for roadkill. A trio paused for a rest in the trees out front and I managed to get one mediocre portrait against an overcast sky:
Turkey Vulture in tree
They’re staggeringly ugly up close and awkward on the ground, but graceful in their natural element…
The sparrows started building a nest in our front-yard box, but progress seems intermittent…
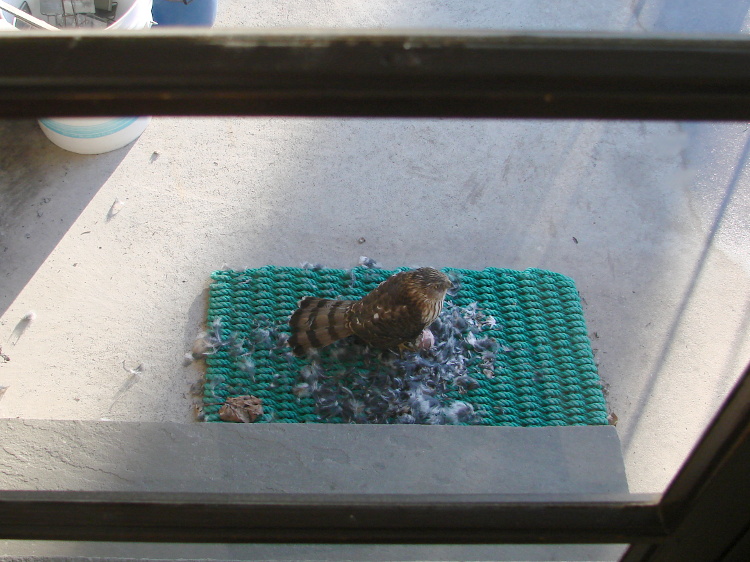
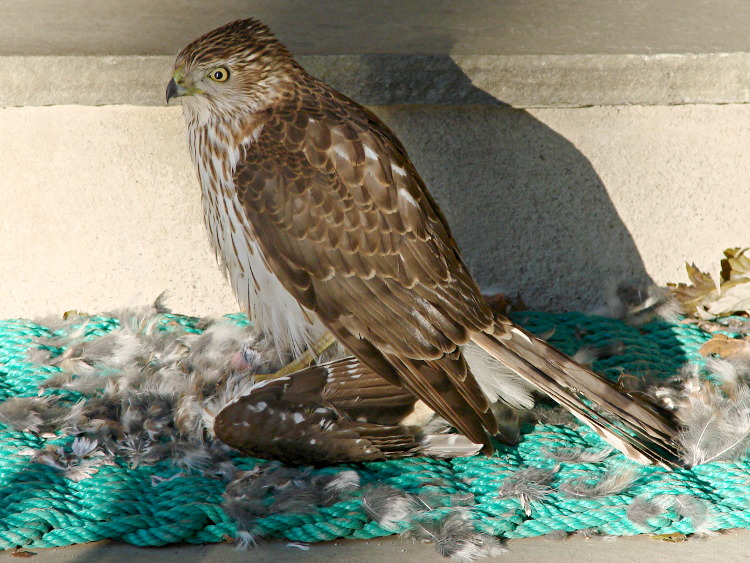
A pair of Cooper’s Hawks have been hauling off rodents and shredding songbirds at a steady pace, so we think they’re nesting nearby.
Taken diagonally through two layers of rather dirty 1955-ish window glass with the Sony DSC-H5 and the 1.7× tele-adapter, so it’s not the best of images… but if I were a rodent, I’d be worried!