Ed Nisley's Blog: Shop notes, electronics, firmware, machinery, 3D printing, laser cuttery, and curiosities. Contents: 100% human thinking, 0% AI slop.
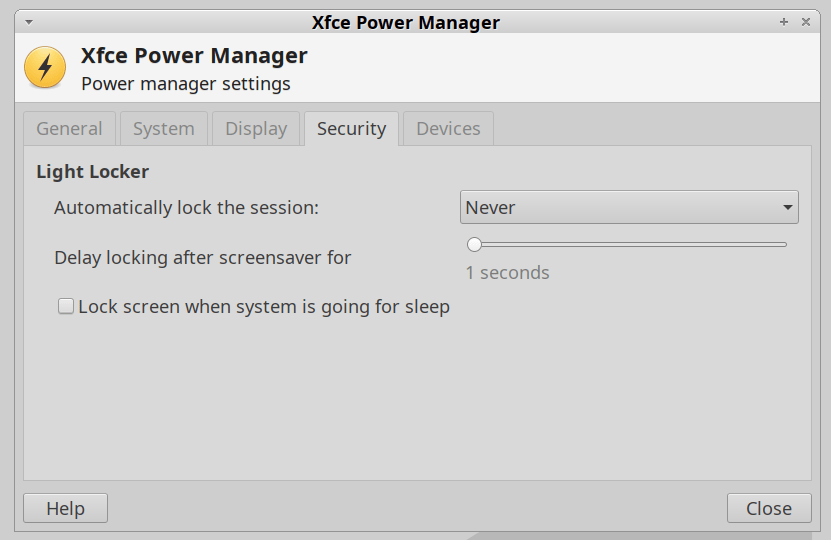
For reasons not relevant here, I was asked to tweak an XFCE 20.04 installation to not ask for a password after the screen power-saver kicks in. There’s no need for a screensaver with an LCD panel, so this should be straightforward, as per the XFCE 18.04 setup:
XFCE Power Manager Light Locker settings 18.04
Which had no effect.
For some reason, perhaps having to do with an upgrade from 18.04 to 20.04, Light Locker wasn’t actually handling the screen locking; some dedicated searching suggested this is a problem of long standing.
So tweak the Lock Screen settings of the screen saver that’s not in use:
XFCE Screensaver Lock Screen Preferences – 20.04
If you’re doing this remotely, adding a stanza to ~/.config/xfce4/xfconf/xfce-perchannel-xml/xfce4-screensaver.xml should suffice:
Given a collection of music files in various subdirectories, find all the mp3 files that aren’t in the target directory and copy them. The only catch: don’t use rsync, because the target directory is on a Google Pixel phone filesystem which doesn’t support various attributes required by rsync.
The trick is remembering the second execdir operation in find happens only if the first succeeds, so the cp runs when the target file doesn’t exist.
All the backslash escaping gets tedious, but it’s the least awful way to get the job done when the directories contain blanks, which is true for the default directory structure inside the Pixel.
I’m not entirely clear what’s being audited in the Manjaro Linux boxes I’ve recently set up, nor what the difference between res=success and res=failed might mean for the x11vnc unit:
That’s the better part of two seconds in the life of the box and, later on, the pace picks up. Casual searching suggests nobody else knows what’s going on, either, apart from the fact than that it obviously has something to do with systemd and, thus, is just the way things are these days.
Add audit=off to the default kernel command-line parameters by editing /etc/default/grub thusly:
All our data files spin around on a nearly full 1 TB drive in a “file server”, a grandiosely overqualified and dirt-cheap off-lease Dell Optiplex desktop sitting in the basement. It’s been running headless and unattended for the last half-dozen years and is badly in need of replacement, so I must copy all its files to a newer, even more overqualified, and equally cheap off-lease Optiplex.
Copying the files from the /mnt/music collection on the existing server to the identically named directory on the new server proceeds thusly:
Mount the existing collection (from the old server) in read-only mode to avoid heartache subsequent to confusion. It could happen.
The first time through, add a -n option for a dry run, then inspect the log file for surprises.
The various --exclude options avoid copying trashed-but-not-yet-deleted files from the various trash directories maintained by various file handlers. In the process of sorting this out, I learned the DigiKam photo manager creates a .dtrash directory holding deleted files for each of its Album listings, appearing down near the bottom of the top-level album wherein you’ve quasi-deleted photos via “Move to Trash”.
The --delete option removes files on the destination (new disk) if they’re not on the source (old disk). I started this migration earlier this year, before the world fell apart, and have moved / consolidated / renamed various directories & files in the interim, so deleting the previous copies from their old locations makes the destination match the source.
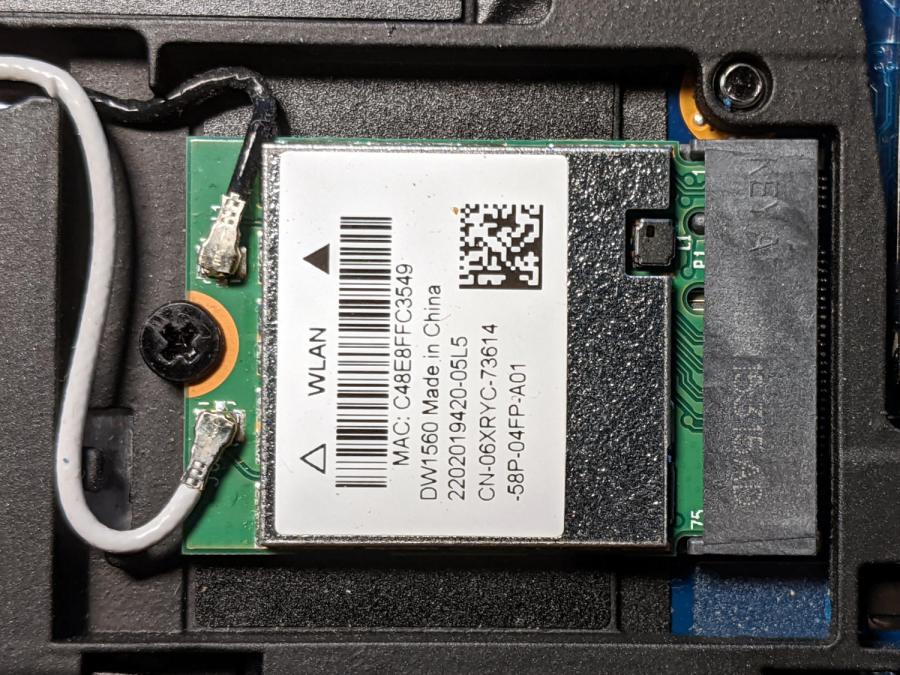
Although the Dell Latitude E7250 allegedly had Bluetooth capability and the Blueman applet tried connecting to my Bluetooth headsets, the connection aways failed and nothing worked. There’s a WLAN module stuck in an M.2 socket inside the laptop providing both WiFi and Bluetooth:
Dell E7250 – DW1560 card in place
A bit of searching suggested the driver wasn’t loading properly, which became obvious after I knew where to look:
dmesg | grep -i blue
… snippage …
[    5.678610] Bluetooth: hci0: BCM20702A1 (001.002.014) build 1572
[    5.678851] bluetooth hci0: Direct firmware load for brcm/BCM20702A1-0a5c-216f.hcd failed with error -2
[    5.678853] Bluetooth: hci0: BCM: Patch brcm/BCM20702A1-0a5c-216f.hcd not found
[   10.854607] Bluetooth: RFCOMM TTY layer initialized
[   10.854613] Bluetooth: RFCOMM socket layer initialized
[   10.854619] Bluetooth: RFCOMM ver 1.11
Without having the proper firmware / patch loaded, the module won’t work, even though the TTY / socket layers know it’s present, which explains why Blueman did everything except actually connect to the headsets.
More searching suggested you must extract the firmware HEX file from the Windows driver. Feeding the Service Tag into the Dell support site, then feeding “Bluetooth” and “Windows 8.1, 64-bit” (preinstalled on the laptop) into the Drivers & Downloads tab gets you the relevant EXE file: Dell Wireless 1550/1560 Wi-Fi and Bluetooth Driver. It turns out to be a self-extracting ZIP file (in Windows, anyway), so unzip it all by yourself:
This produces a blizzard of HEX files in the newly created Drivers/production/Windows8.1-x64 directory. Each firmware HEX file is keyed to the USB Product Code identifying the unique USB gadget, found with lsusb:
lsusb
… snippage …
Bus 002 Device 003: ID 0a5c:216f Broadcom Corp. BCM20702A0 Bluetooth
… snippage …
The DW1560 apparently has a USB RAM interface, with the specific HEX file identified in the CopyList stanza of the INF file corresponding to that USB Product Code:
However, the Linux firmware loader needs a different file format with a different name, mashed together from the HEX file, USB Vendor, and USB Product codes:
The firmware may be in one of the myriad Bluetooth packages not installed by default, so perhaps identifying & installing the proper package would sidestep the hocus-pocus.
Maybe next time?
Now I can wear my Bose Hearphones in Zoom sessions with the E7250, because my Pixel 3a phone heats up almost to the gets-bendy level while thrashing its battery to death.
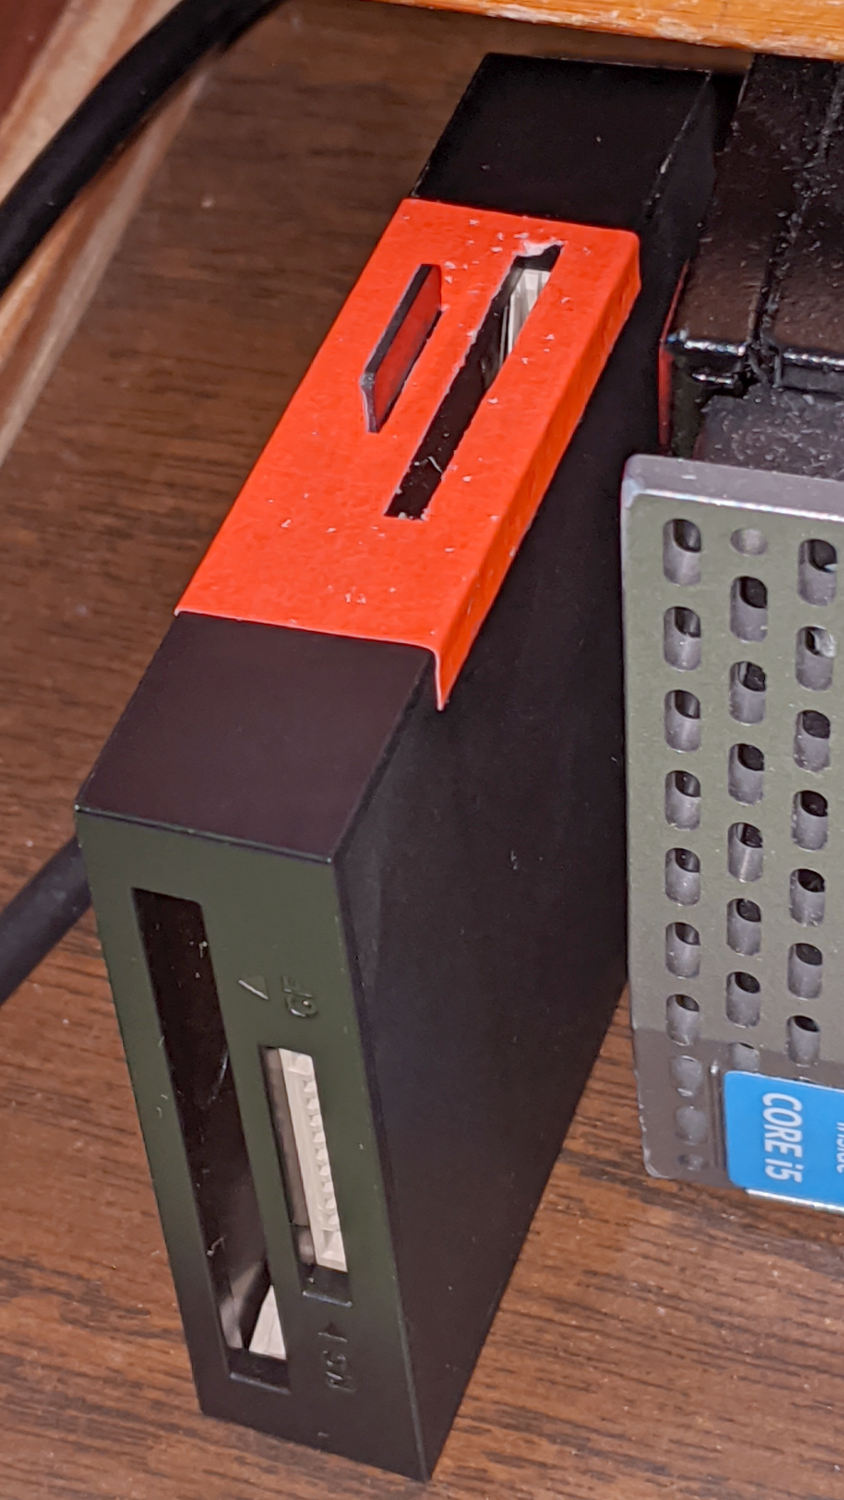
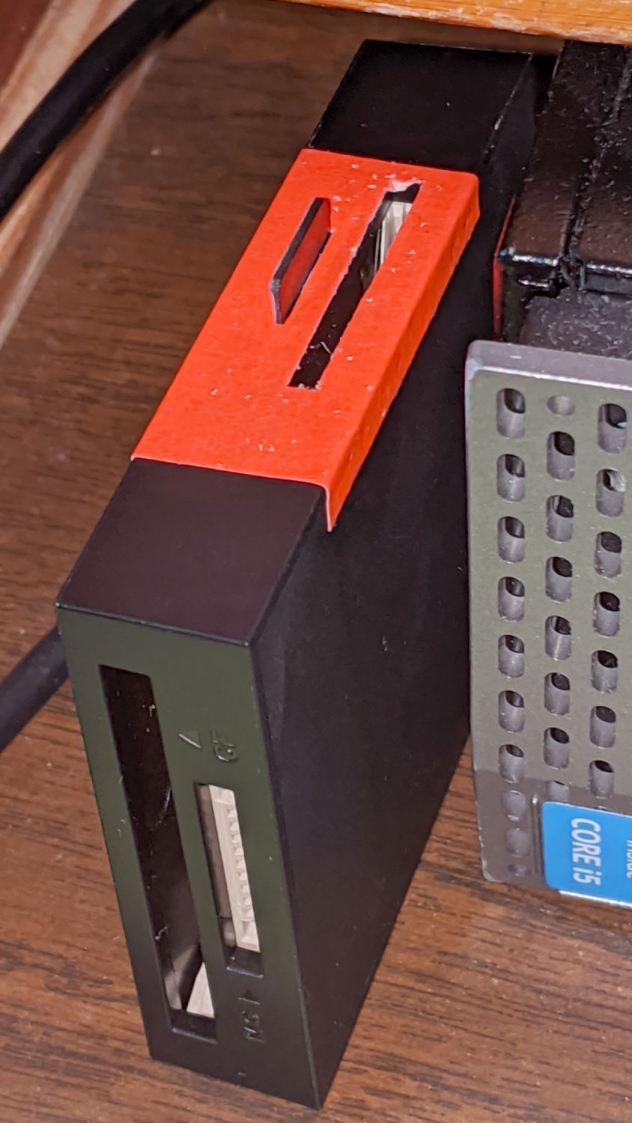
Consumer electronics designers seem to favor low- or no-contrast markings, with this USB reader falling on the vanishing end of the spectrum:
USB card reader – low-contrast slots
I poke the MicroSD card from the AS30V helmet camera into the smaller slot on the top surface, but, contrary to what’s revealed by the camera’s flash, the slot is a black-on-black target.
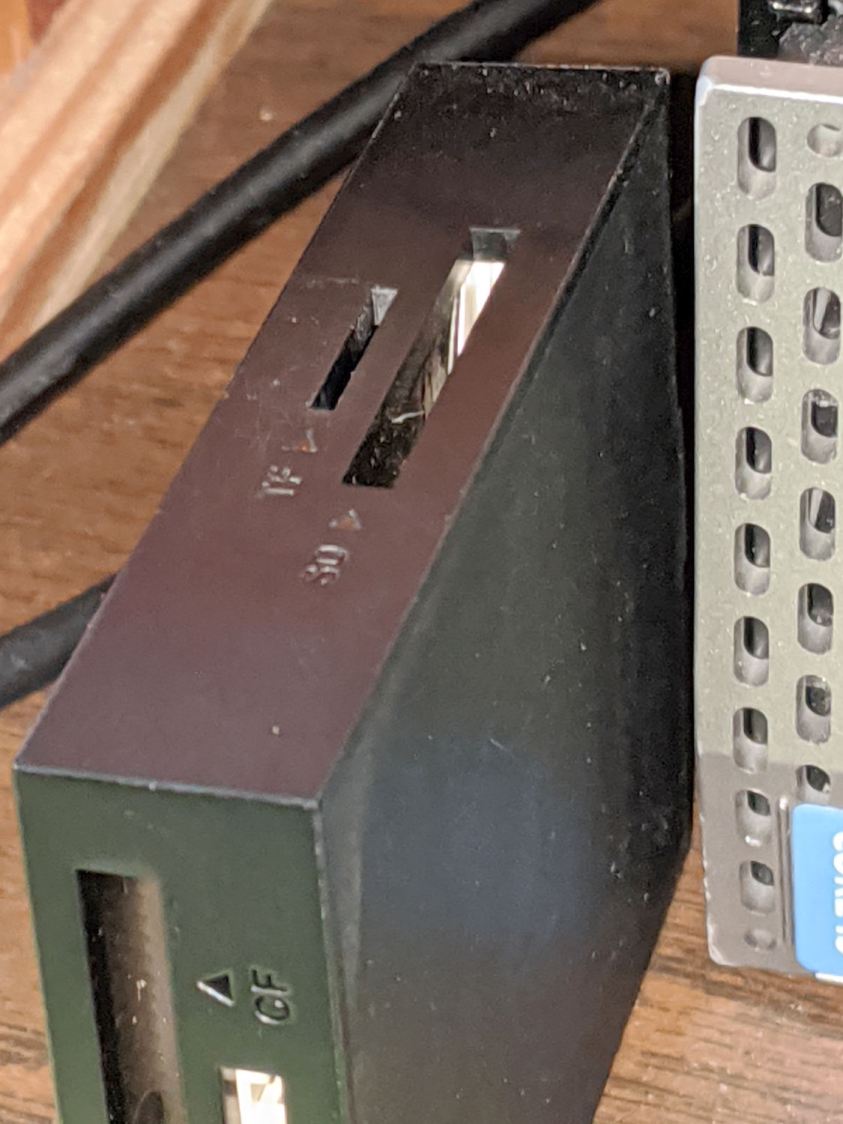
Well, I finally fixed that:
USB card reader – high-contrast slots
Although white tape surely would have sufficed, the roll of fluorescent red came to hand and that’s what it’ll be. The CompactFlash and Memory Stick slots on the front don’t see much traffic and have better access.
I slapped tape on case, trimmed the slots with a razor knife, and declared victory.