I asked for the images from recent X-ray and MRI sessions, whereupon a CD arrived in the mail. Popping it into my desktop Linux box produced this directory listing:
ll /run/media/ed/Feb\ 21\ 2025/
total 146M
dr-xr-xr-x  2 ed   ed    136 Feb 21 13:14 ./
drwxr-x---+ 3 root root   60 Mar  2 13:40 ../
-r--r--r--  1 ed   ed   146M Feb 21 13:14 -NISLEY-DMBG8yMQcf8qXcVj.iso
It seems whoever / whatever produced the CD copied the ISO image to the CD, rather than burning the ISO directly to the CD. As a result, the CD has one file.
Raise your hand if you’ve never done that.
Well, I was going to save the CD as an ISO file anyway, so I just copied it to the file server.
Attempting to mount it produces an odd result:
sudo mount -o loop "-NISLEY-DMBG8yMQcf8qXcVj.iso" /mnt/loop/
[sudo] password for ed: <make up your own>
mount: failed to set target namespace to ISLEY-DMBG8yMQcf8qXcVj.iso: No such file or directory
Oh, right, starting a filename with a leading dash is never a Good Idea™.
Rename it:
mv -NISLEY-DMBG8yMQcf8qXcVj.iso NISLEY-DMBG8yMQcf8qXcVj.iso
mv: invalid option -- 'N'
Try 'mv --help' for more information.
Which is why leading dashes are a Terrible Idea™.
Force the rename to happen:
mv ./-NISLEY-DMBG8yMQcf8qXcVj.iso NISLEY-DMBG8yMQcf8qXcVj.iso
The same syntax works in the mount command, but it’s easier to solve the problem once and be done with it.
Now mount the file:
sudo mount NISLEY-DMBG8yMQcf8qXcVj.iso /mnt/loop
mount: /mnt/loop: WARNING: source write-protected, mounted read-only.
That’s entirely expected, because the whole filesystem is intended for a non-writeable CD.
What’s inside?
ll /mnt/loop/
ls: cannot open directory '/mnt/loop/': Permission denied
Why would that be?
ll /mnt
total 58K
drwxr-xr-x 15 root root 4.0K May 21  2023 ./
drwxr-xr-x 17 root root 4.0K Mar  2 13:43 ../
… omitted …
drwxrwx---  4  496  495 2.0K Feb 21 13:13 loop/
… omitted …
Maybe 496 and 495 are the UID and GID of whatever created the CD?
Force it to my UID:
sudo umount /mnt/loop
[ed@shiitake tmp]$ sudo mount -o uid=ed NISLEY-DMBG8yMQcf8qXcVj.iso /mnt/loop
mount: /mnt/loop: WARNING: source write-protected, mounted read-only.
[ed@shiitake tmp]$ ll /mnt/loop
total 16K
drwxrwx---  4 ed    495 2.0K Feb 21 13:13 ./
drwxr-xr-x 15 root root 4.0K May 21  2023 ../
drwxrwx---  4 ed    495 2.0K Feb 21 13:12 data/
drwxr-xr-x  5 ed    495 2.0K Feb 21 13:13 DICOM/
-rw-rw----  1 ed    495 1.7K Feb 21 13:12 README.txt
-rw-rw----  1 ed    495 3.2K Feb 21 13:12 view-studies.html
Now that’s more like it.
Finally, I can fire up Weasis to look at pretty DICOM images:
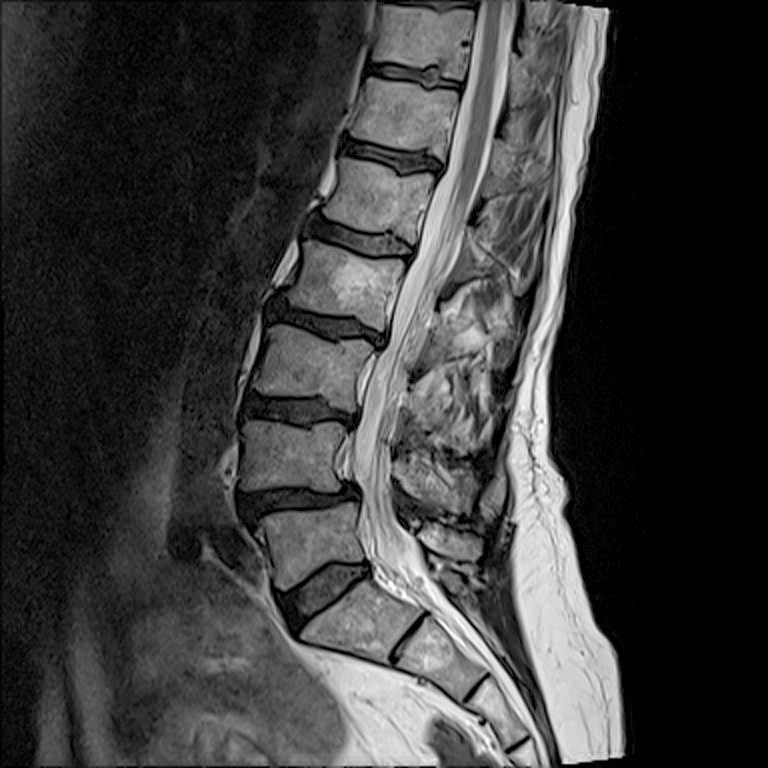
Apparently things looks suspicious around L4.