Ed Nisley's Blog: Shop notes, electronics, firmware, machinery, 3D printing, laser cuttery, and curiosities. Contents: 100% human thinking, 0% AI slop.
These Dirac-delta pulses seem to be a new thing, with one “reader” hitting many posts, rather than many readers hitting a single post. I can’t tell if it’s a new way for search engines to scan pages or an entirely new algorithm doing the scanning.
Should you run across another blog with similar verbiage, you know where it started …
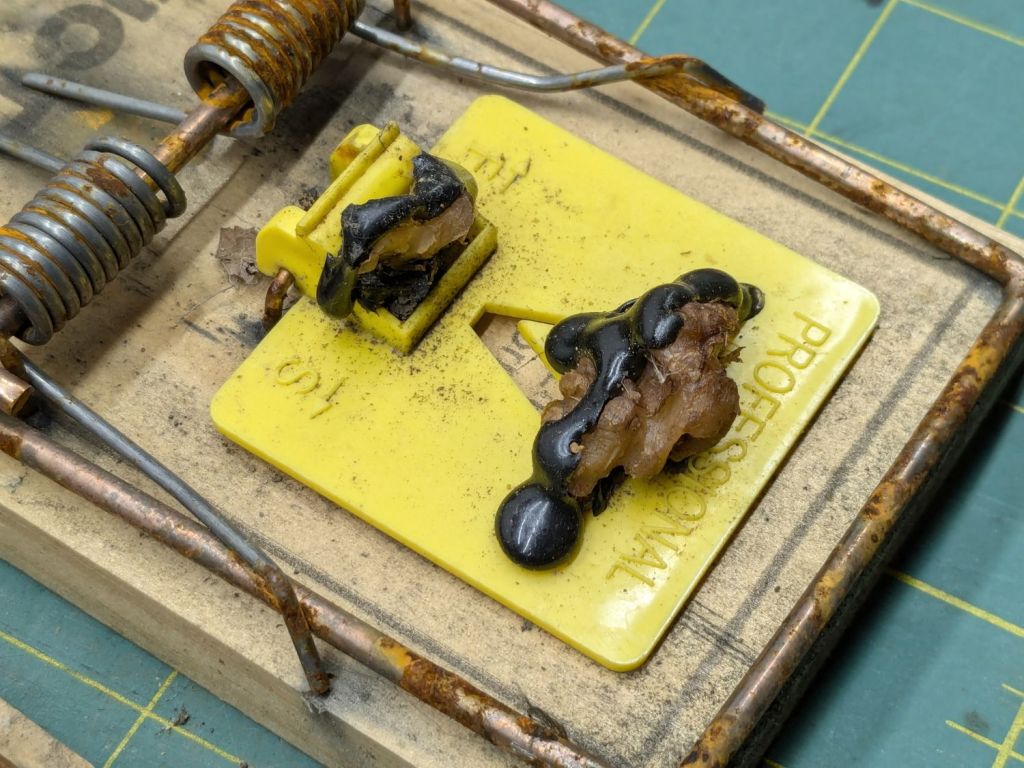
A highly effective way to bait a rat trap for garden voles:
Rat trap – still baited
The trap is a Victor M205 (in a 12-pack as M326) with a big yellow plastic bait pedal. The bait is pieces of walnut, secured to the pedal with generous strands of hot melt glue. The trick involves mechanically capturing the walnut by slobbering glue over & around it, forcing the vole to pull & tug while gnawing the last bit of goodness.
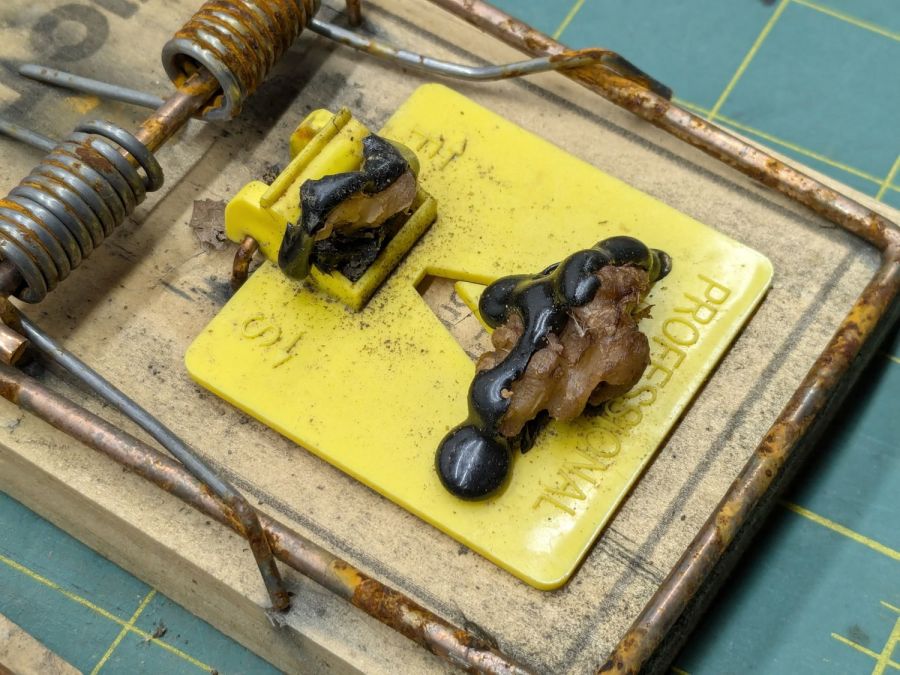
Which generally ends badly:
Rat trap – gnawed bait
I do not begrudge the critters a fancy last meal; it’s gotta be better than their usual diet of carrots / radishes / turnips.
Voles have no qualms about eating the bait from a sprung trap with a dead compadre a few millimeters away:
Rat trap – empty bait
They will sometimes eat the walnuts and their dead compadre.
The plastic pedals work much better than the old-style metal pedals at holding the steel arm wire. The wire slides freely on the plastic, in contrast to the previous high-friction metal-on-metal latch.
Some of the traps were entirely too sensitive and required slightly bending the tip of the arm wire upward to increase the friction on the plastic plate. Always always always handle armed traps by the wooden edges beside the kill bar, so when it accidentally snaps your fingers are nowhere near the business end.
After I figured out how to properly bait the traps and we set out half a dozen traps in the most attractive crops, Mary’s garden produced 54 dead voles over the course of 90 days, sometimes in groups of three or four at a time. While this did not prevent all the crop damage, it definitely reduced the problem.
Next year we’ll start early and probably reach triple digits by midsummer.
The same technique with Victor M035 mouse traps (in 12-packs as M035-12) is brutally effective on house mice.
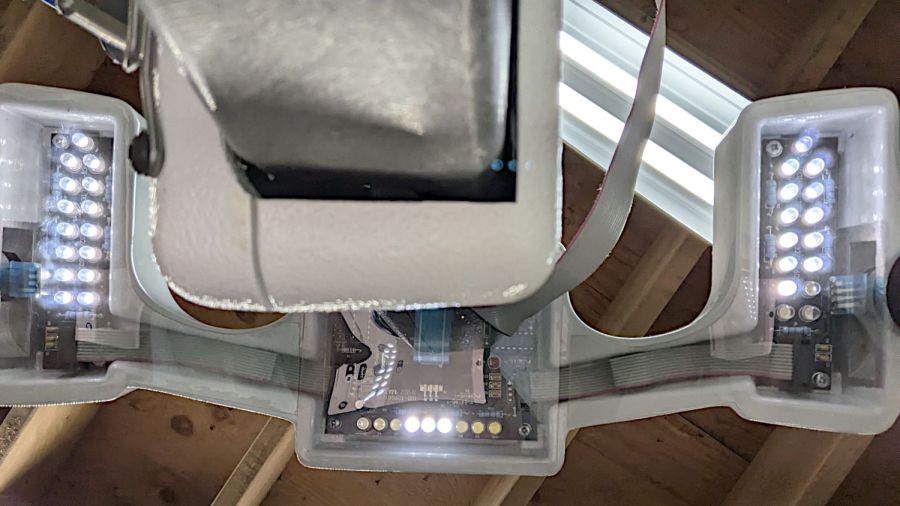
Judging from the dates codes on the ICs inside, Mary’s HandiQuilter Sixteen long-arm machine is about two decades old and many of the white LEDs in the front handlebars have gone dark:
HQ Sixteen – dead handlebar LEDs
The vertiginous view looks upward into the handlebar at the top of the machine (more on this later). The PCBs run strings of three series LEDs from a 16 VDC supply with a 390 Ω ballast resistor (oddly enough, on the ground end of the string), so one failed LED takes down all three.
I decided to replace all the LEDs, on the principle they’re surely dimmer than they used to beand to take advantage of a decade or so of improvement in white LEDs (yes, I have old stock).
After discovering that the HandiQuilter engineers violated the Principle of Least Surprise by orienting adjacent LED strings in opposite directions, I found one of the strings still didn’t light up.
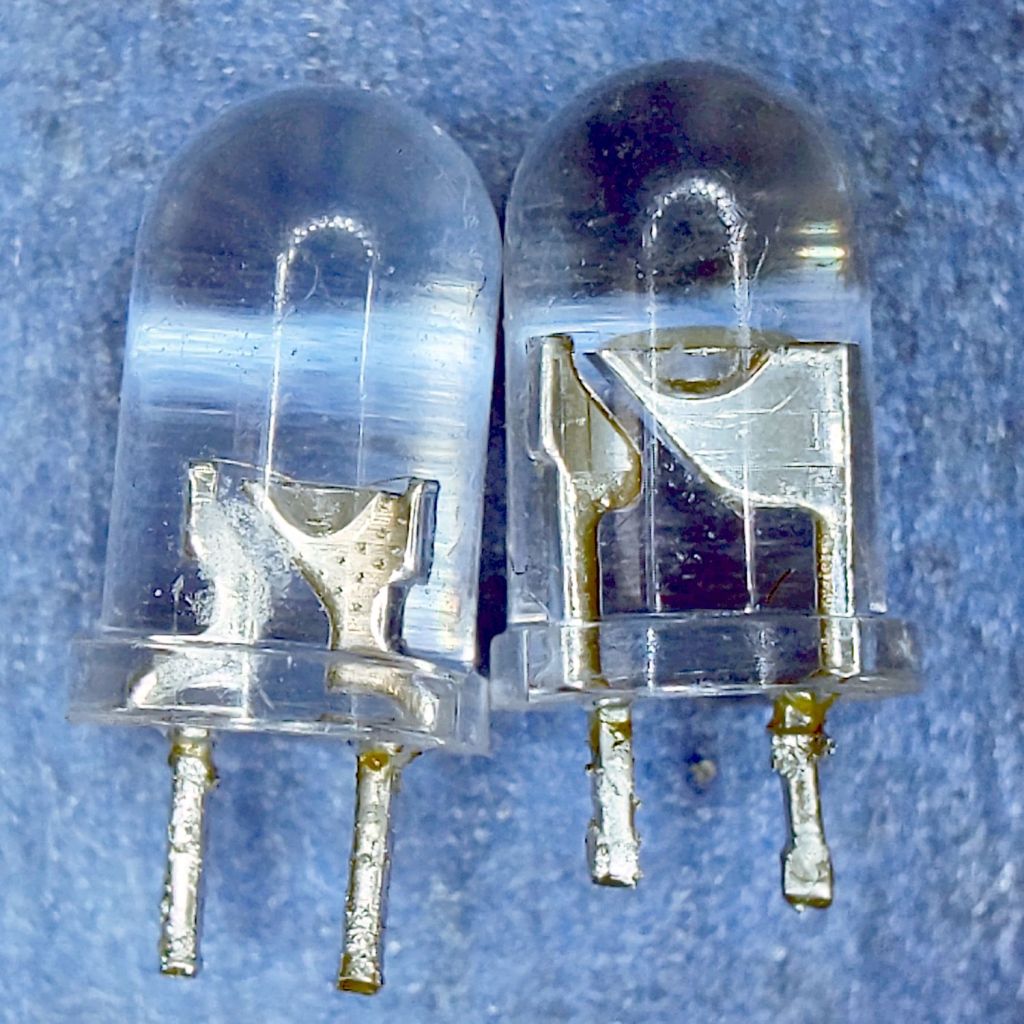
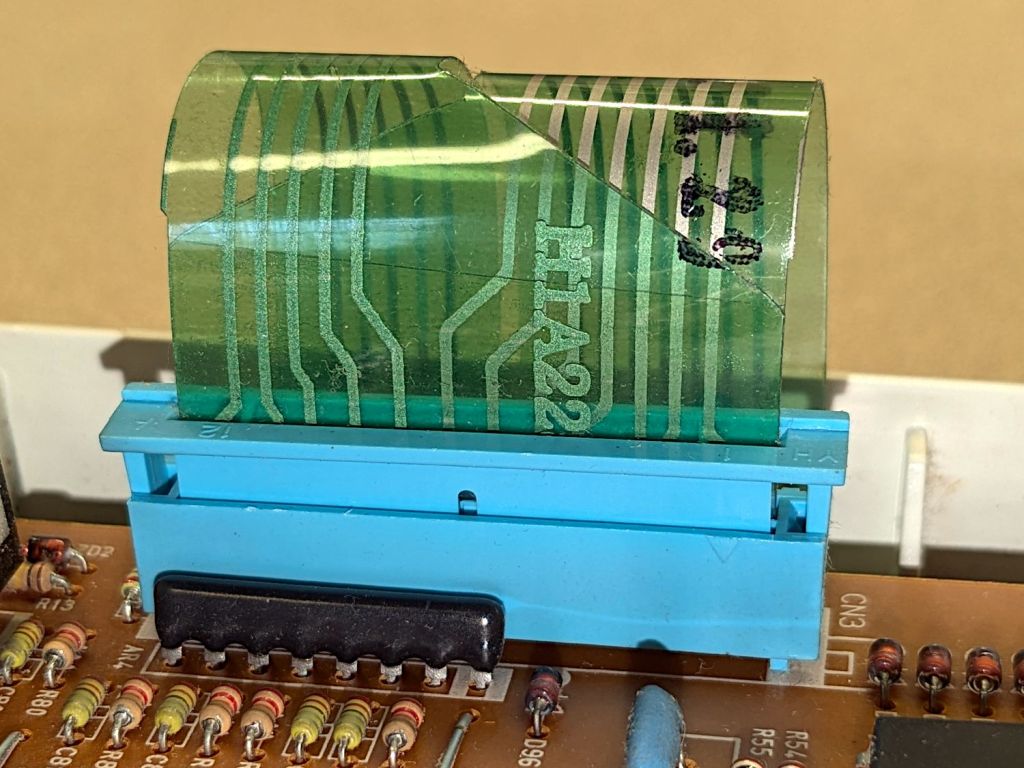
Pop quiz: which one of these LEDs caused the problem?
5 mm LEDs – swapped polarity
To the best of my knowledge, all 5 mm round LED packages mark the cathode lead with a flat edge. It’s easy to remember, as the cathode side of the schematic symbol has a bar: straight bar = straight edge.
Inside, the LED chip’s cathode lead is bonded to the reflective cup, with the anode lead wire-bonded to the top.
Took me a while to see what was wrong, too.
For whatever it’s worth, the backward LED works fine.
Although essentially all kitchens feature a microwave over the stove, essentially all women have difficulty reaching it. As a result, our kitchen has two microwaves: the built-in Samsung over the stove and our trusty Sears Kenmore on the counter.
We’ve had it for a while:
Sears Microwave – data plate
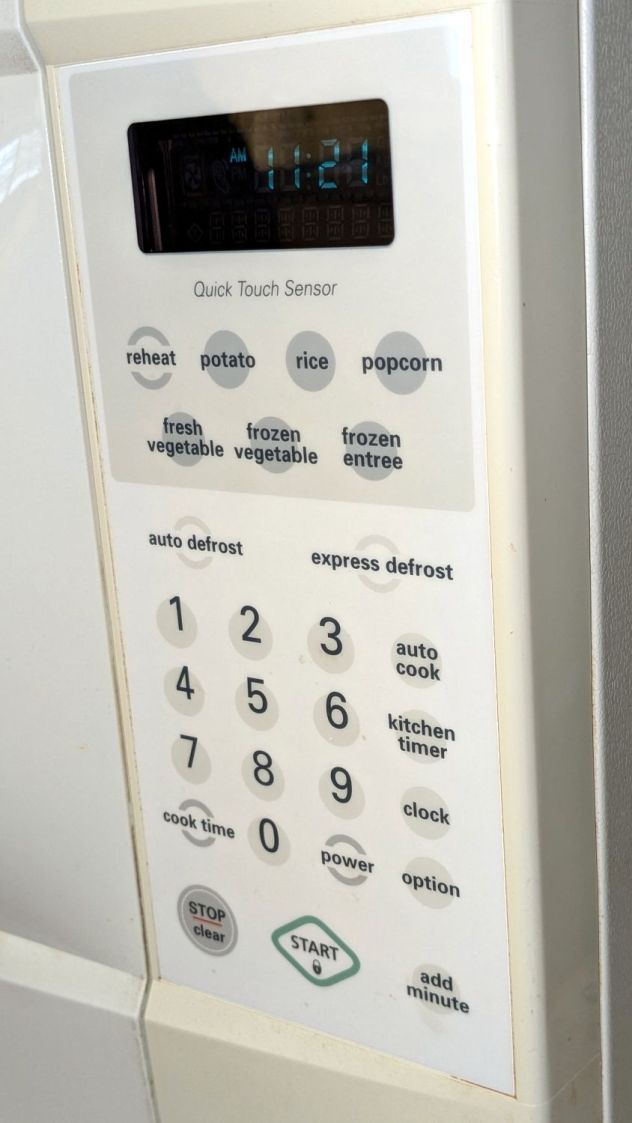
Apart from the turntable rollers, it’s been utterly reliable for the last two decades, until the Start button stopped working:
Sears Microwave – control panel
The membrane switch panel seems to be in good shape, with no cracks in the plastic surface. Only the Start button failed, which suggested the switch contact pad had failed and ruled out broken matrix traces on the flexible circuitry.
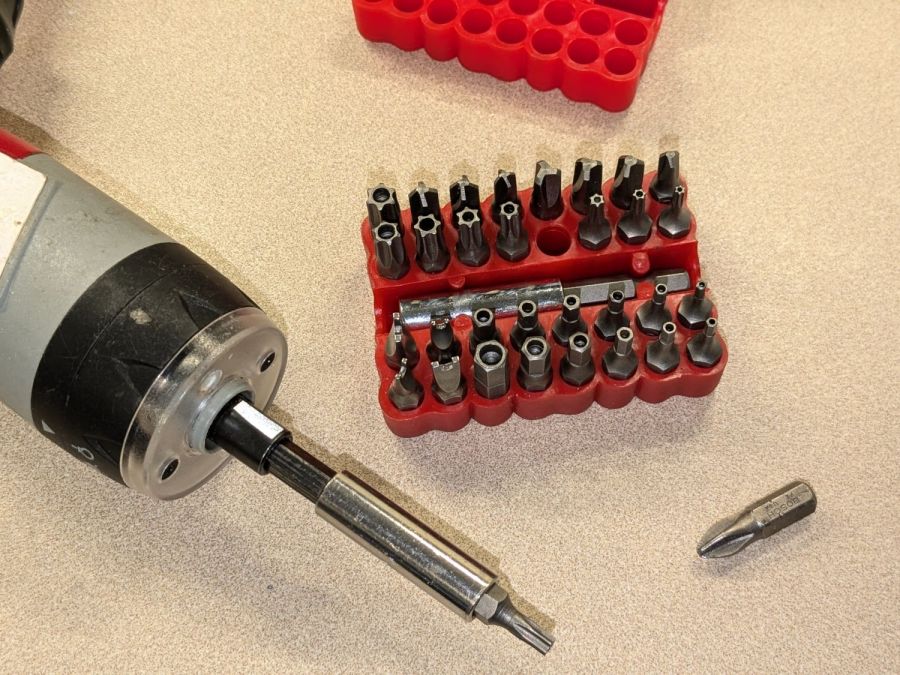
Back in the day, they kept casual tinkerers out of the dangerous interior:
Sears Microwave – Torx security screw
That would not be me:
Sears Microwave – security bit set
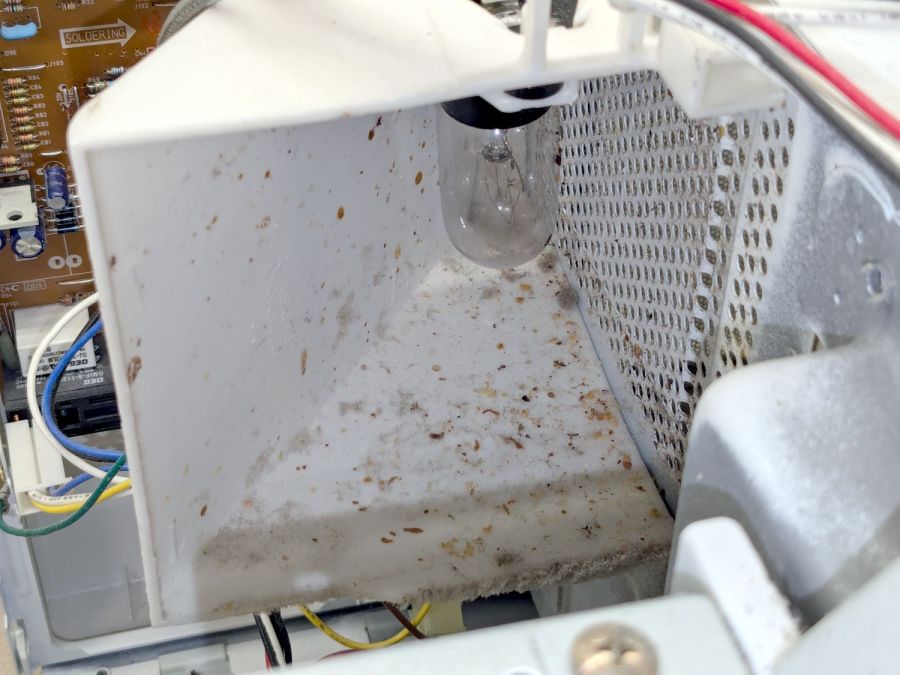
Over the course of two decades, an occasional food explosion produces a surprising amount of debris:
Sears Microwave – exhaust vent spatter
Go ahead, I dare you, show us your microwave exhaust vent.
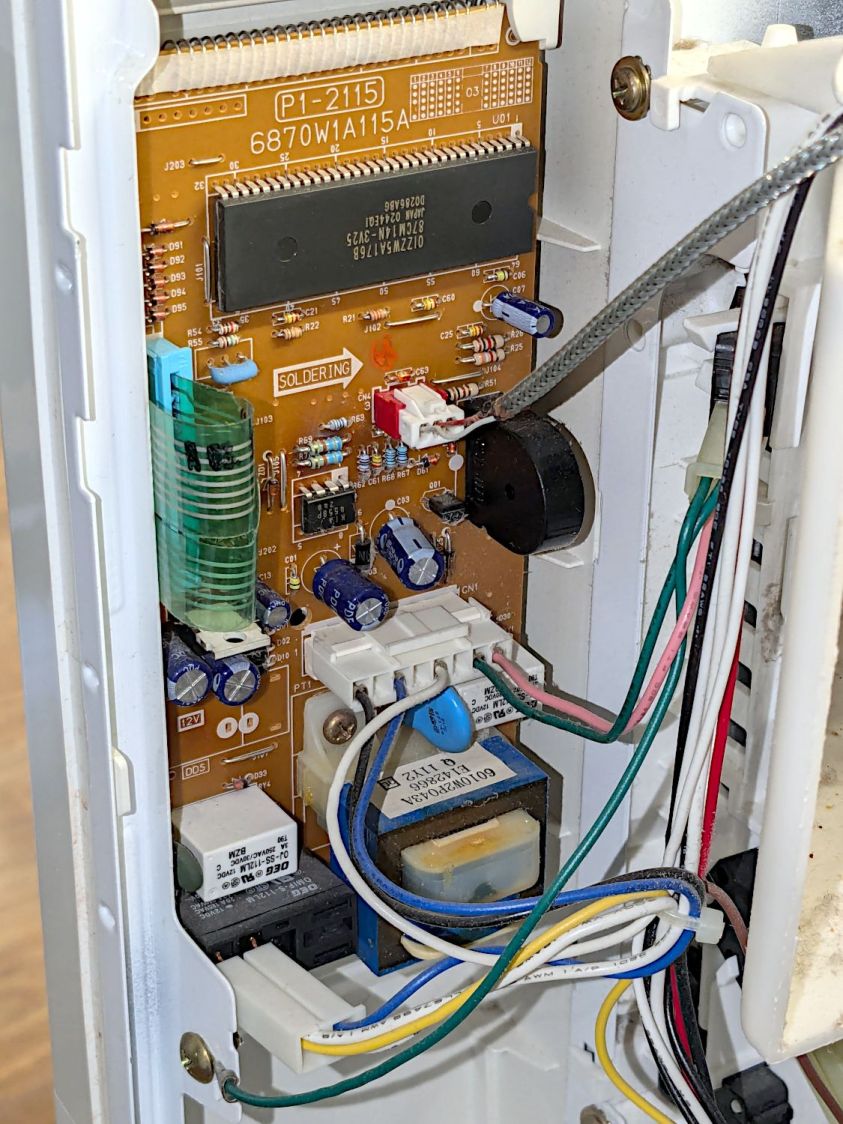
The control panel circuit board & wiring looks like this:
Sears Microwave – control board – in place
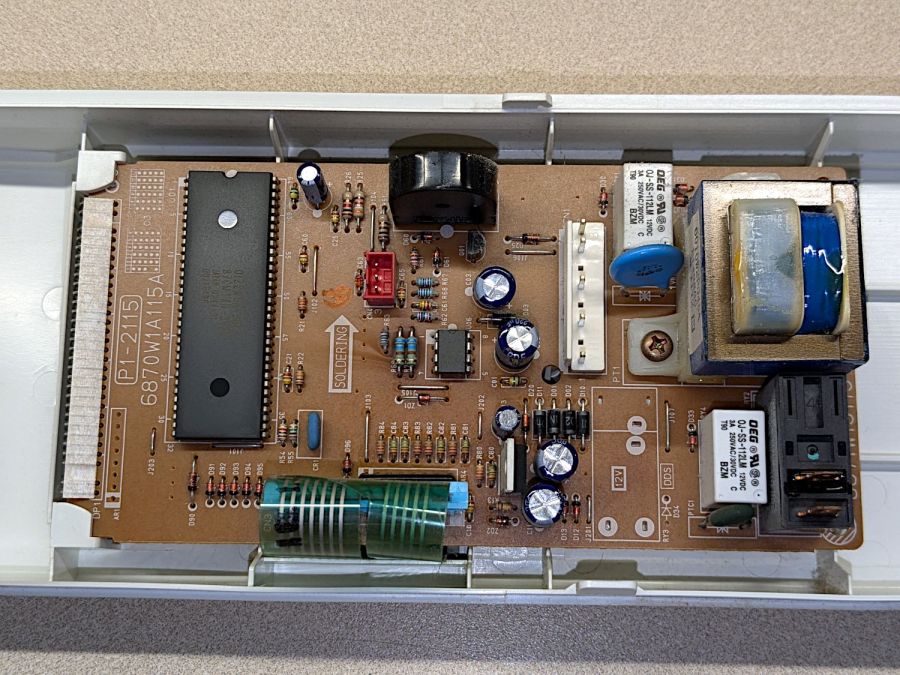
Unplugging all the connectors proceeds as you’d expect, whereupon a single screw (out of sight to the top) releases the control assembly and pulling the whole thing upward gets it out of the cabinet:
Sears Microwave – control board
The capacitors show no signs of The Plague, but those resistors near the optoisolator (?) in the middle have a suspicious thermal plume.
The ribbon cable from the control surface goes into a connector with the usual locking collar:
Sears Microwave – control panel cable connector
The cable also has cutouts latching into tabs molded into the collar:
Sears Microwave – control panel ribbon cable – locking tabs
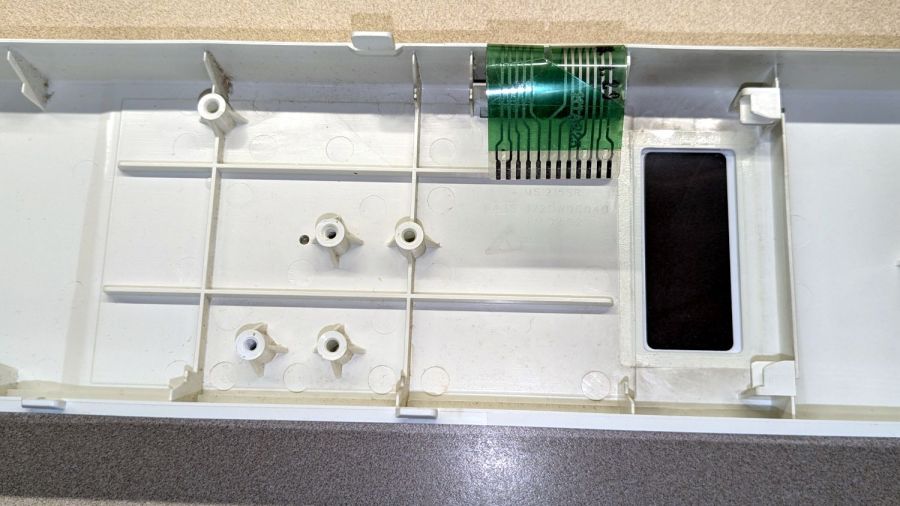
Removing two screws at the transformer releases the PCB:
Sears Microwave – control panel interior
Which promptly slammed the whole repair mission to a dead stop: with the entire membrane switch assembly glued to the front of the plastic shell, there is no way to get to the Start switch. Trying to peel the membrane off will most certainly destroy it.
Because all the other functions still worked, including the Add Minute button, we figured we can eke out a few more years before something else fails or the lack of one button gets intolerably annoying.
I reassembled everything in reverse order, plugged it in, and, while setting the clock, discovered the Start button once again worked perfectly.
It’s a classic laying-on of hands repair: take something apart, replace nothing, reassemble, and it works!
If the Start button is not part of the overall switch matrix, with a separate conductor through the ribbon cable, un- and re- plugging would be enough to restore a flaky contact. We’ll never know the rest of the story, although with this post as a reminder, maybe I can remember to tear the matrix apart when we scrap it out.
A power transmission line (probably 115 or 138 kV) runs along the Casper Creek (f.k.a. Casperkill) and through the Vassar campus beyond our back yard, which accounted for a loud roar one morning:
Helicopter power line inspection
The pilot hovered above each pylon long enough for the inspector seated in the open door to do whatever needed doing:
Helicopter power line inspection – clear view
A casual image search suggests it’s an MD520N (N = NOTAR = “No Tail Rotor”) helicopter. Although the NOTAR back end produces much less noise than an exposed rotor, it was plenty loud enough a few hundred feet away.
Folks who know more than I do about helicopters pointed out the tail rotor I didn’t see. Here’s a tight crop from another image with the rotor in plain view:
An entry from The New Garden Encylopedia, copyright 1936 through 1946, gives recommendations for using arsenical poisons in your garden:
Arsenical poisons
My father always said anybody who talks fondly of The Good Old Days wasn’t alive back then. He was and thought things had definitely improved since then.