Ed Nisley's Blog: Shop notes, electronics, firmware, machinery, 3D printing, laser cuttery, and curiosities. Contents: 100% human thinking, 0% AI slop.
Although we had considerable success trapping voles during the last half of the 2024 gardening season, Mary found a description of what might be a better technique: a box with small entrance holes taking advantage of rodent thigmotaxis: their tendency to follow walls. The writeup shows nicely made wood boxes, but I no longer have machinery capable of cutting arbitrarily large wood slabs into pieces.
I do, however, have a vast pile of cardboard boxes:
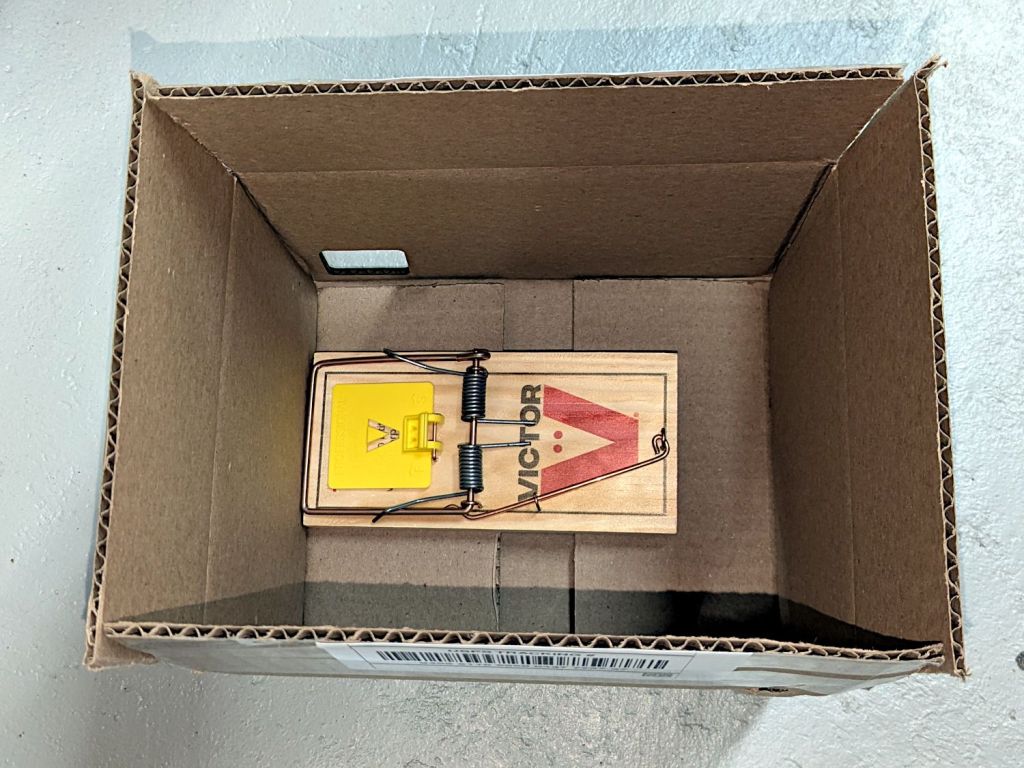
Vole Box – large
That’s a rat-size trap.
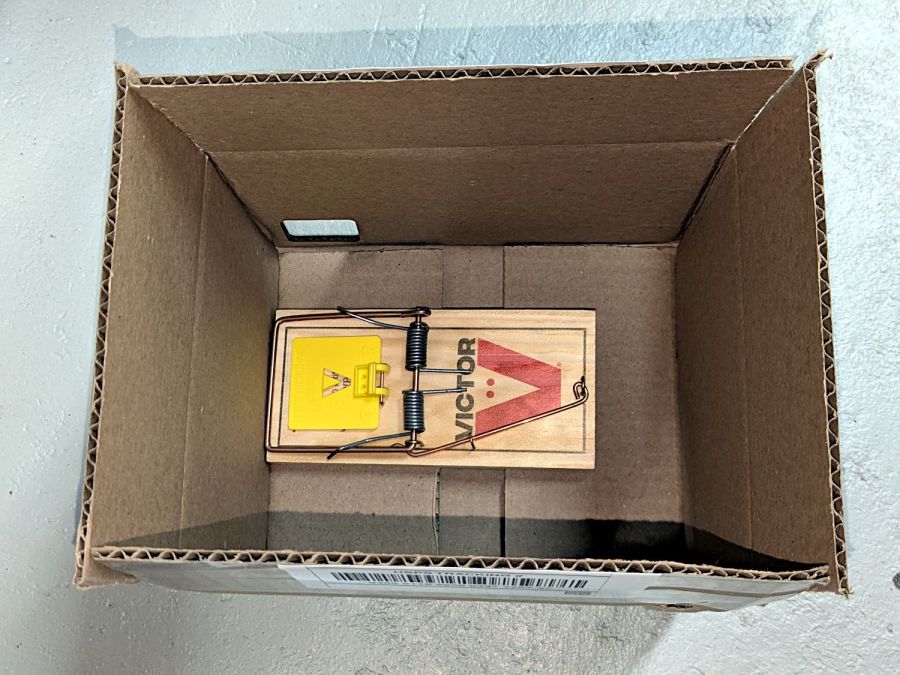
A smaller box has room for two mouse-size traps (one hidden on the left):
Vole Box – small
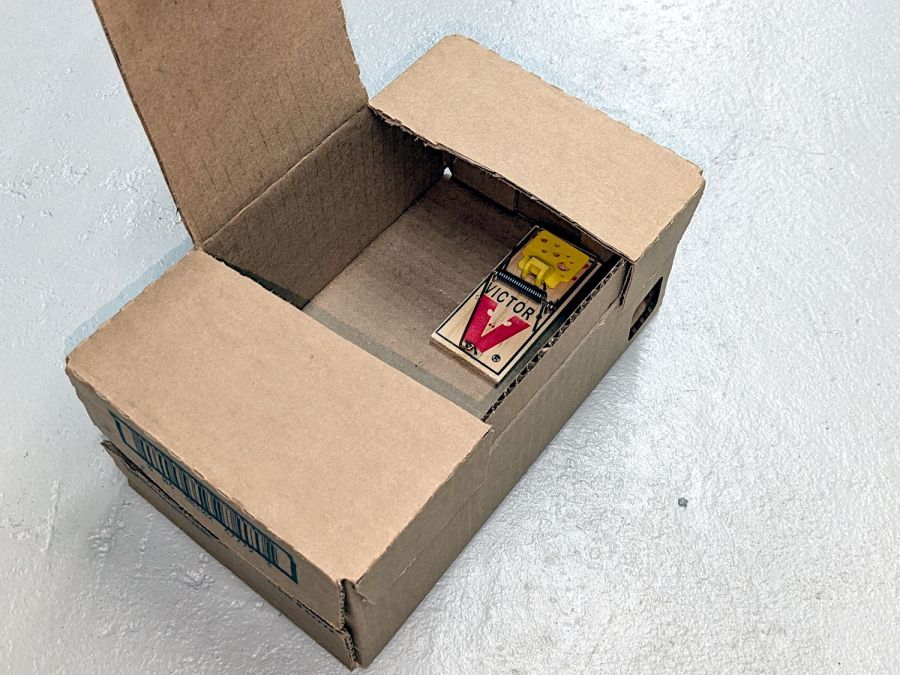
The general idea: plunk the box in a garden plot, arm the trap(s), close the lid, and eventually a vole will venture inside, whereupon wall-following leads to disaster. Apparently bait is optional, as wall-following inevitably takes them over the trap pedal. I won’t begrudge them a walnut or two, should bait become necessary.
Cardboard is obviously the wrong material for a box in an outdoor garden, but I figure they’ll survive long enough to show feasibility and I can deploy a lot of small boxes before having to conjure something more durable.
Yes, those are laser-cut rounded-rectangle holes: 30 mm and 40 mm, assuming voles care about such things.
As the poster says, “Until you spread your wings, you’ll have no idea how far you can walk”:
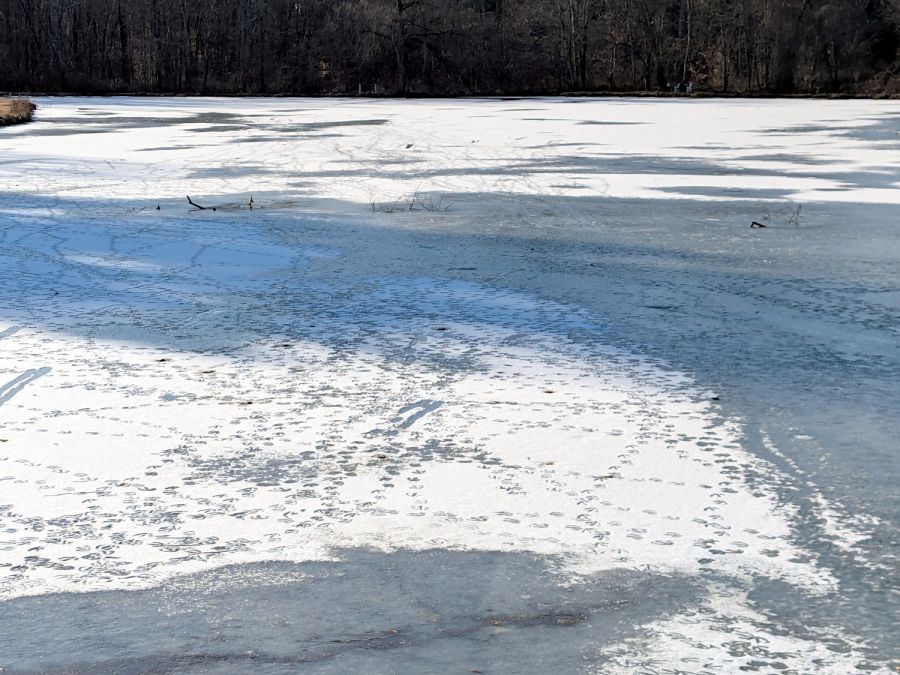
Goose Tracks – Vassar Sunset Lake – A
My feet get chilly just looking:
Goose Tracks – Vassar Sunset Lake – B
We think the flock has a Rules Compliance Officer who gave one miscreant goose an all-around inspection:
Goose Tracks – circling
Just another day at the office …
The WordPress AI generated an excerpt for this post:
The poster emphasizes potential discovery through exploration, while the goose flock exhibits curiosity, hinting at humorous governance among them at Vassar Sunset Lake.
The sediment and carbon filter cartridges in our house call for annual replacement and I wondered what was inside the big cartridge.
Much to my surprise, the white plastic cap unscrews easily after grabbing the filter in the bench vise and applying a strap wrench:
Whole house carbon filter – endcap
Water enters around the perimeter of the cap, flows through the media in the cylindrical cartridge, and emerges near the center at the other end. The filter is upside-down in the vise: the cap is on the bottom of the cartridge when it’s installed in the filter housing.
The brown stuff looks a lot like sand, but is probably KDF-85 media acting as a prefilter for the carbon:
Whole house carbon filter – prefilter
The white fiber pad separates the KDF-85 from the carbon granules filling the rest of the filter:
Whole house carbon filter – carbon
Atypically, I couldn’t think of anything to do with the empty cartridge, so I screwed the lid back on and lowered the whole mess into the trash can.
Spotted on the walking path near the Vassar College golf course:
Sinking Stones – A
They’re everywhere:
Sinking Stones – B
I think the path surface rises as it freezes, then the stones sink into the loosened soil as they warm up. Other parts of the path, generally having more loam / mulch / organic material than mud & pebbles, have an obviously raised / porous / crunchy texture on bitterly cold (by my standards) days.
Surely, someone can pull a PhD thesis from similar observations …
The kitchen came with matched Samsung appliances dating back to 2018 and, on a frigid winter day, we piled the contents of the freezer on the porch and gave it a deep cleaning. While the empty freezer was cooling down from its adventure, I wondered:
Where were the condenser coils were located?
Did they need cleaning?
How does one do that?
The manual is strangely silent about even the existence of the coils, so evidently cleaning them wasn’t of any importance to Samsung.
Rolling the refrigerator away from the wall just enough to get the phone camera down there suggests they exist and are in need of some attention:
Samsung refrigerator coils – first sight
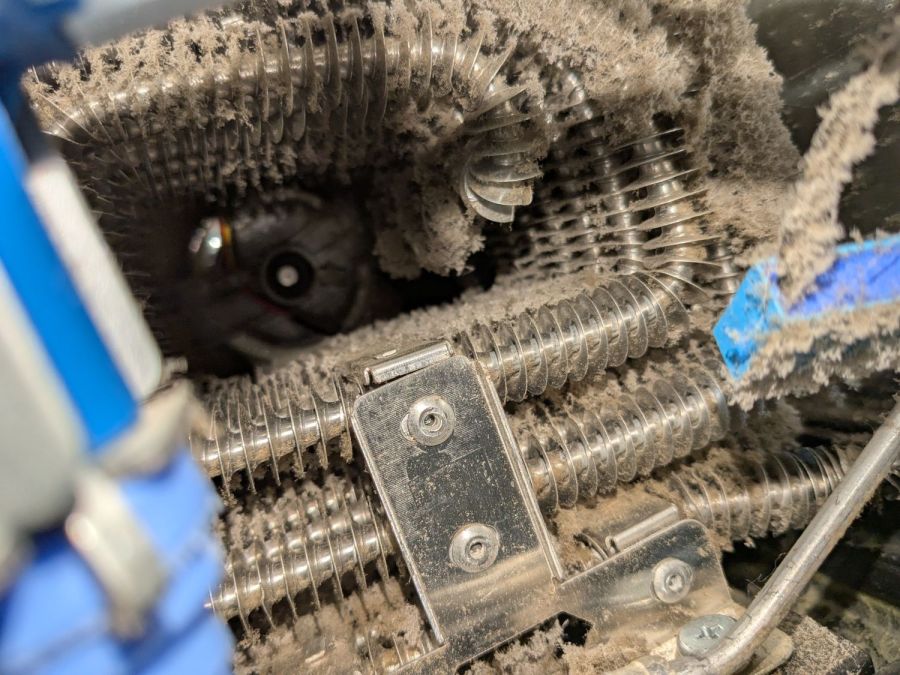
Rolling the refrigerator out until the door handles met the countertop across the way let me climb over the counter and worm myself into the refrigerator-sized hole behind it, bringing along a screwdriver, the vacuum cleaner snout, and a few brushes.
Removing five screws released the back cover:
Samsung refrigerator coils – cover off
Looking into the intake end of those coils (on the right):
Samsung refrigerator coils – first intake view
So, yeah, I’m about to give them their first cleaning ever.
Five minutes of brushing fuzz, mostly into the vacuum, cleared a good bit of the exterior, but the interior needs more attention:
Samsung refrigerator coils – partial clean
Ten minutes later:
Samsung refrigerator coils – victory
Another five minutes:
Samsung refrigerator coils – intake cleaned
Making the coils cleanable and putting them where they could be cleaned were obviously not bullet-item goals for Samsung’s designers.
Although the coils are not perfectly clean, I don’t know how to get them any cleaner, despite knowing even a thin layer of fuzz kills the refrigerator’s much-touted energy efficiency. Perhaps blowing them off with compressed air, then cleaning a thin layer of dust off the entire kitchen, would help.
I think the refrigerator will be happier, at least for a while.
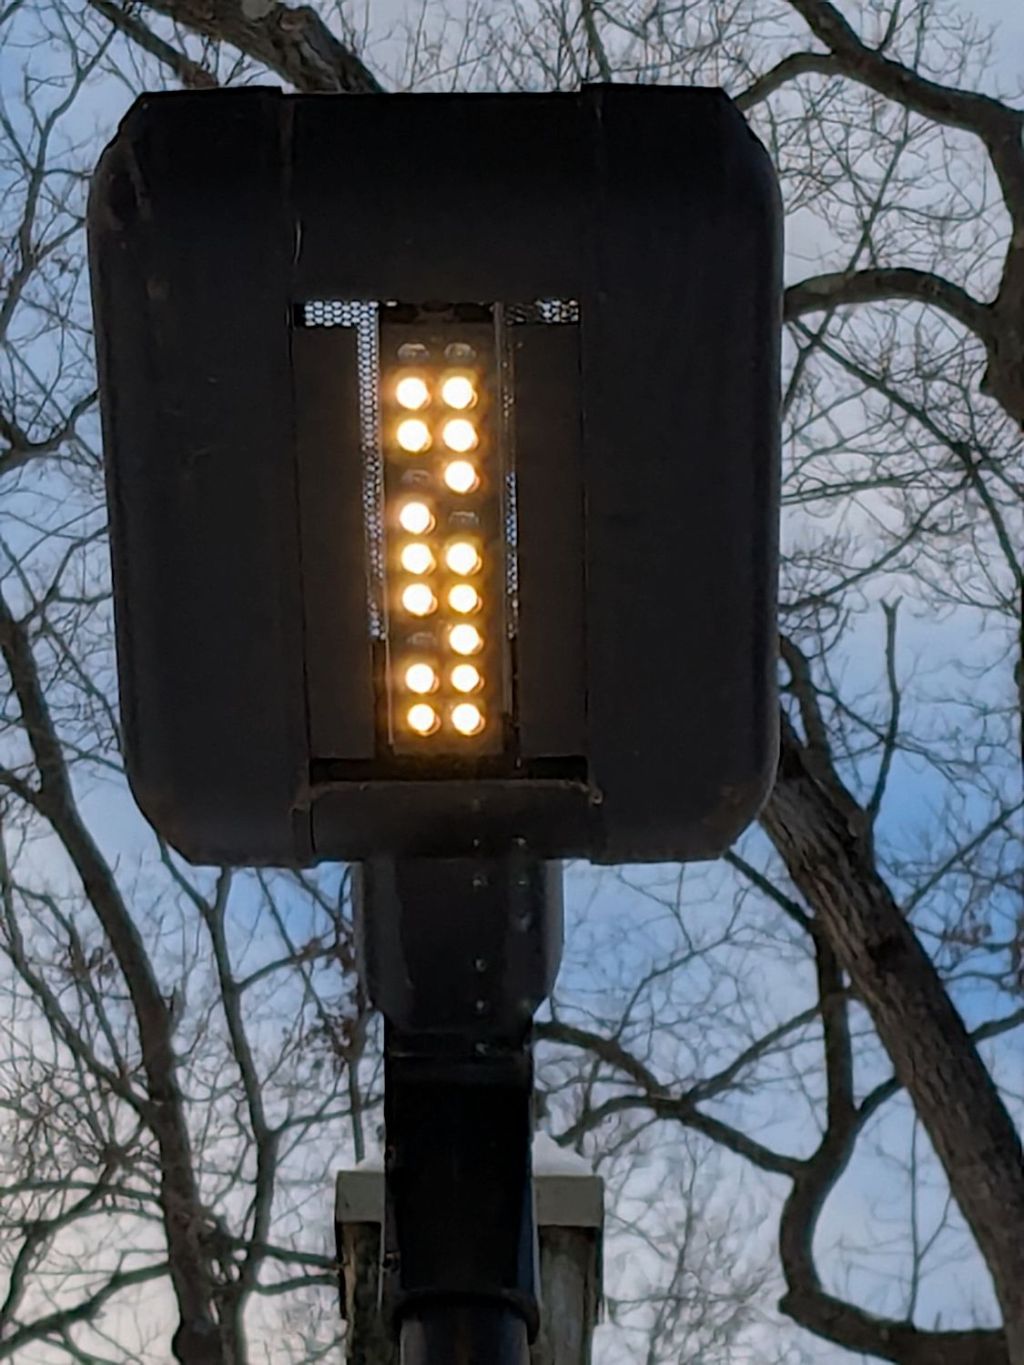
One of our regular walks takes us up the hill on Old Sivermine Place and, being that type of guy, I tend to look at the infrastructure. The LED streetlights along the road sit atop wood poles and are obviously retrofits. Placards on some poles announce “277 V”, which means they’re fed from one leg of a three-phase 480 V wye service, making their casual mid-air wire-nut spliced connections seem … inappropriate.
Anyhow, they’re supposed to look like this:
LED streetlight – D
In reality, having multiple emitters comes in handy:
LED streetlight – C
Typical 12 V systems have parallel strings of three LEDs in series, so you (well, I) often see automobiles with three adjacent dead LEDs. That turned out to be true with the 15 V (-ish) LEDs in the HQ Sixteen machine I’ve been refurbishing.
These streetlights apparently have individual LED drivers, allowing single LEDs to go dark without affecting the rest. This one has five deaders, so the rot is spreading:
LED streetlight – B
There seems no pattern to the failures:
LED streetlight – A
Those fixtures are in order from the top of the hill downward.
Each light has its own photosensor to decide when to turn on. We don’t go walking after dusk, but at least one light will always be glowing brightly in middday; the sensors aren’t doing well, either.