Ed Nisley's Blog: Shop notes, electronics, firmware, machinery, 3D printing, laser cuttery, and curiosities. Contents: 100% human thinking, 0% AI slop.
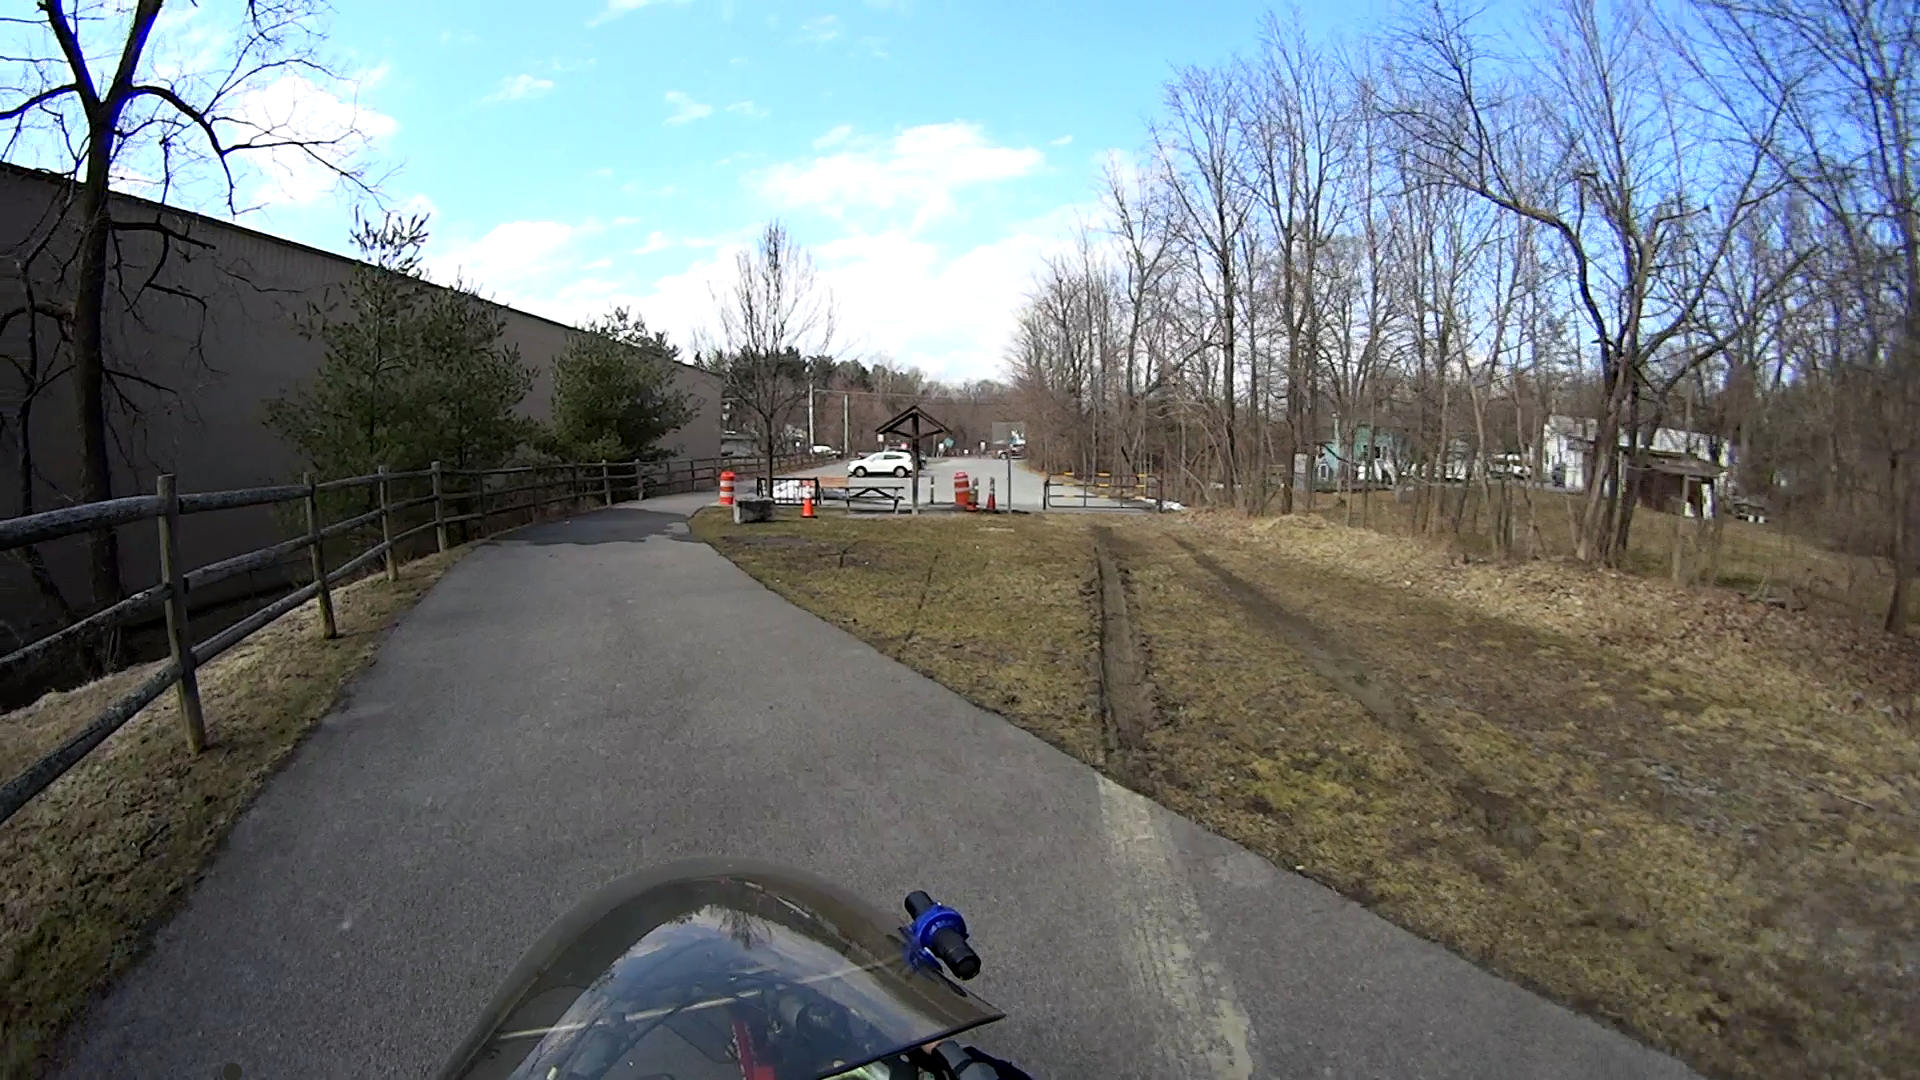
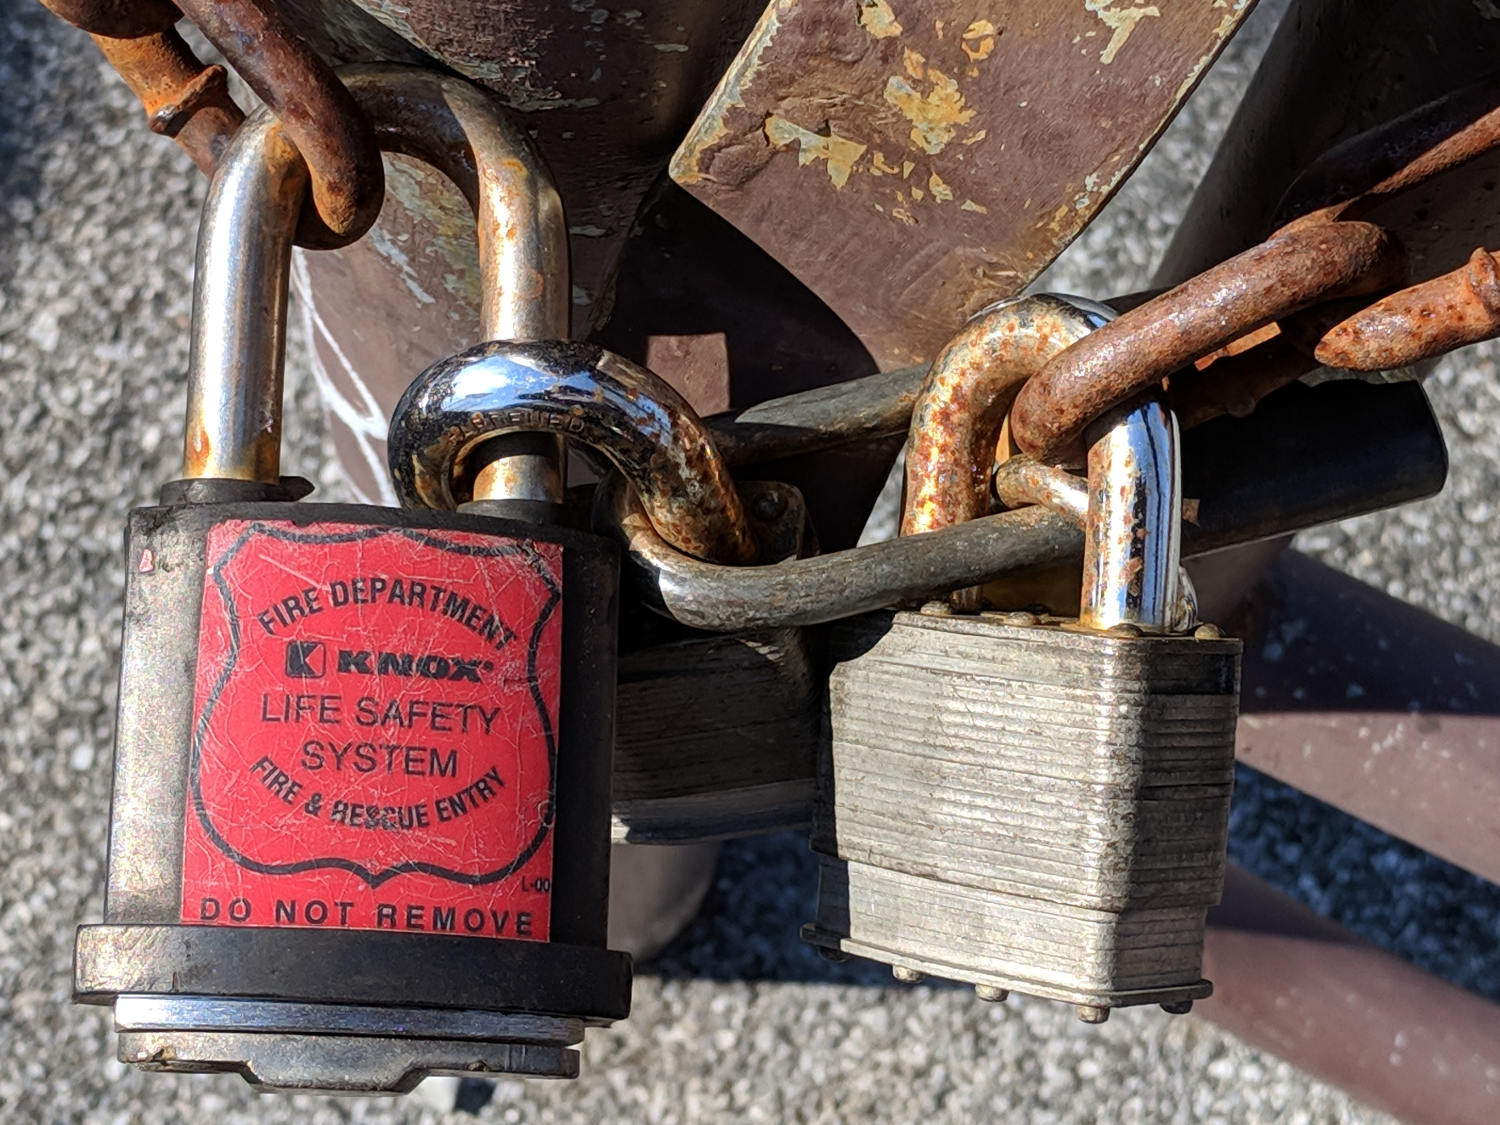
The last time we rode past the Diddel Rd trailhead, there were zero locks on the (unchained) vehicle gate; evidently somebody forgot to relock the gate on the way out.
Hydrant valves attach directly to the water main, far below the frost line, which means the hydrant itself should be dry when it’s not in use; the ice reveals a nasty valve leak. The corroded paint suggests a longstanding leak, but I admit to not noticing anything before now.
I uploaded the picture so I could include the URL in an email to the local fire department. I’ll take a look the next time we walk by to see what’s happened.
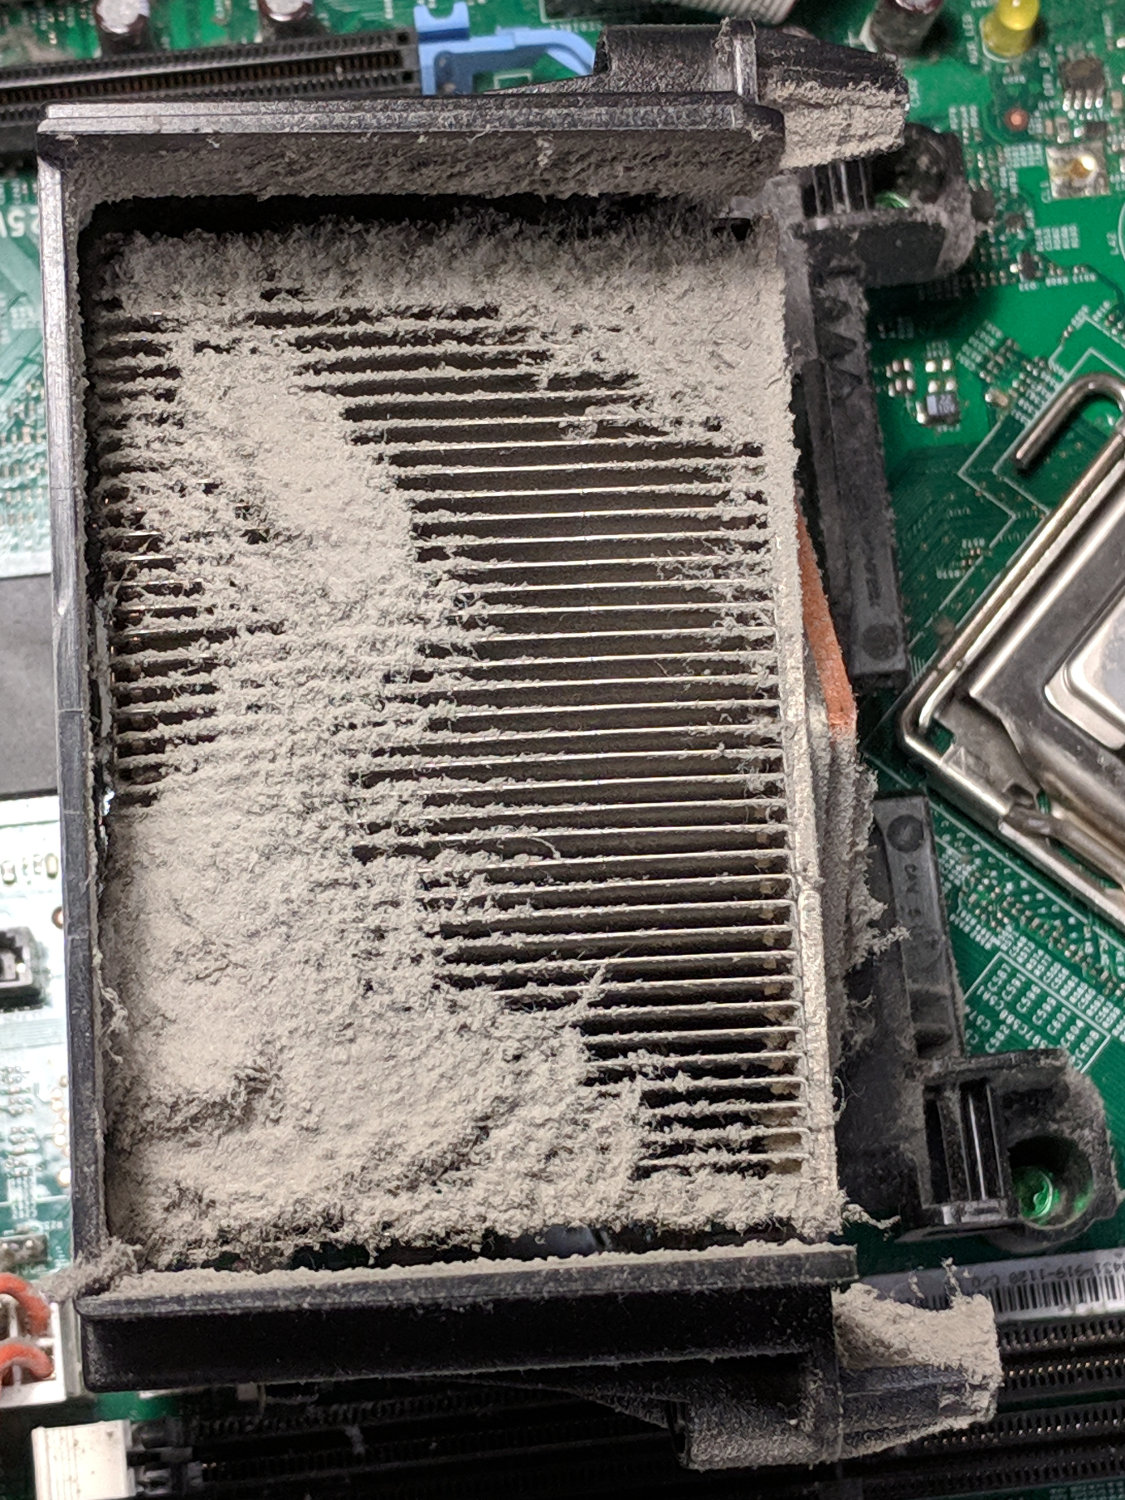
This appeared while harvesting heatsinks and suchlike from a defunct Dell Optiplex:
Clogged CPU heatsink
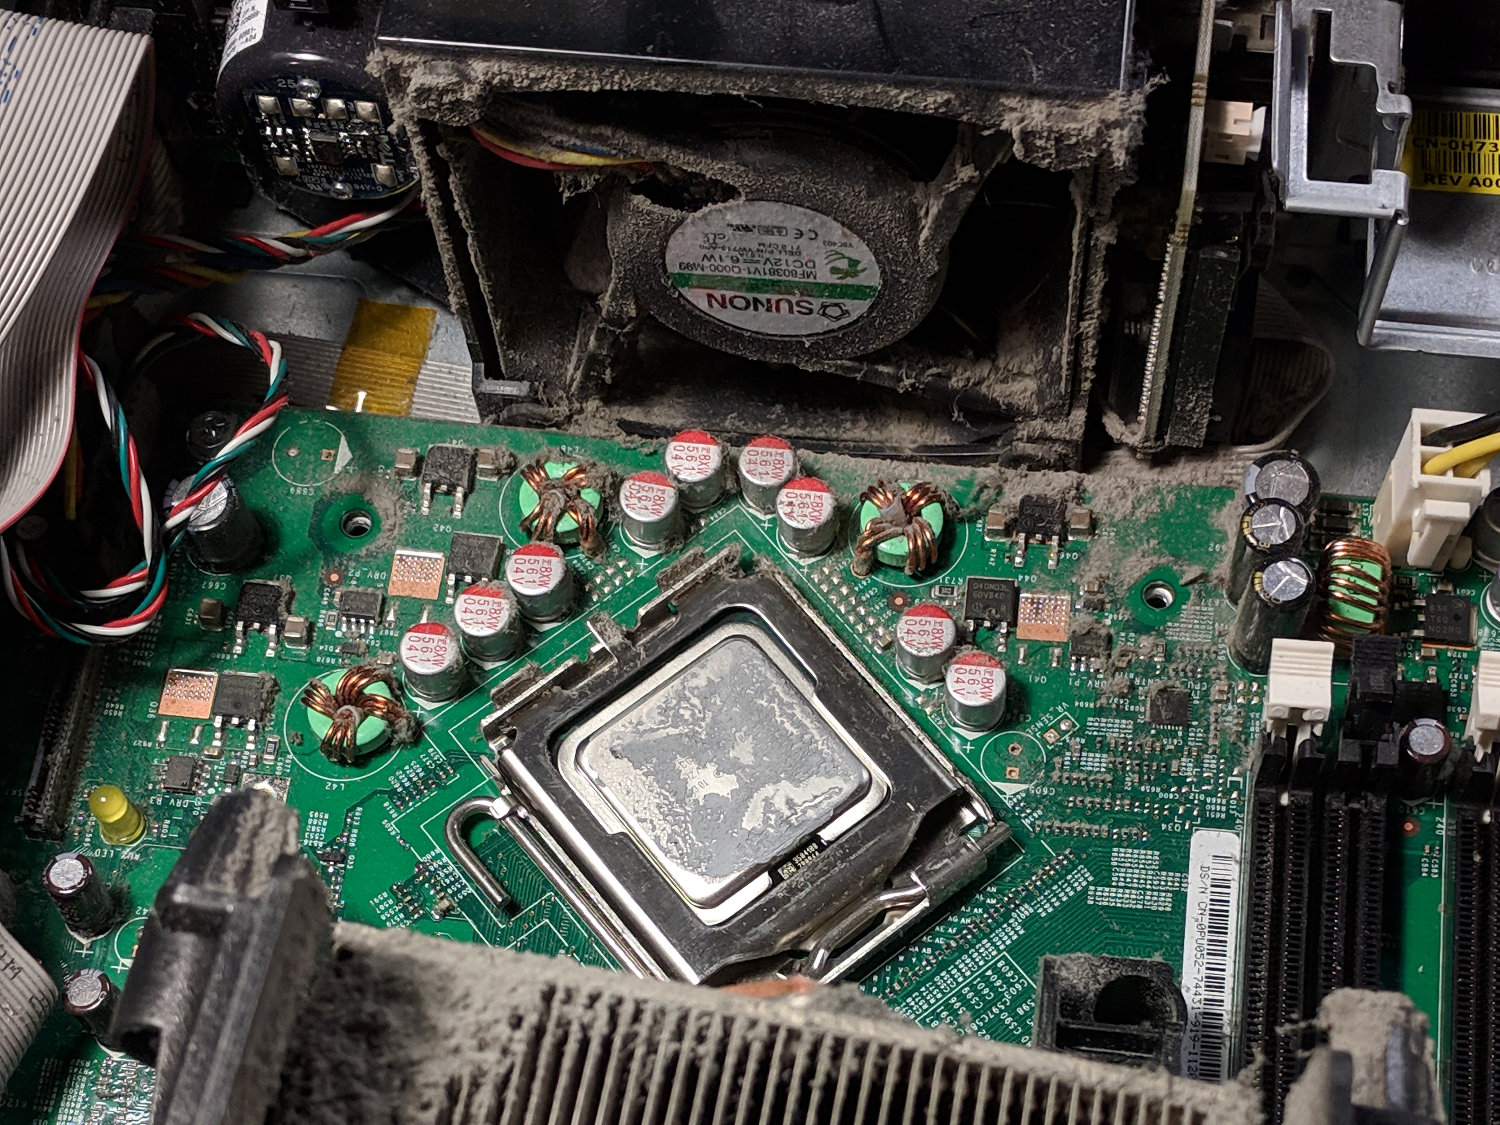
The only way to get access to that end of the heatsink is to break the heatsink’s thermal bond to the CPU, which seems like a Bad Idea if you intend to continue using the thing:
You just never noticed the blinkiness before … [grin]
Because the extruder heater is still running, the firmware hasn’t detected a (possibly bogus) thermal runaway or any other fatal problem. It’s just waiting for the next line of G-Code, but Octopi isn’t sending it.
Look at the Octopi Terminal log to see if the conversation just before the failure matches those descriptions.
Assuming you haven’t updated the printer firmware or anything on the Octopi, then something physical has gone wrong.
First and least obviously, the Pi’s MicroSD card has probably started to fail: they’re not particularly durable when used as a mass storage device and “the last couple of years” is more than you should expect. Download a fresh Octopi image, put it on a shiny-new, good-quality card (*), and see if the situation improves.
Then I’d suspect the Pi’s power supply, even though you’re using the “official rpi power supply”. All of those things contain the cheapest possible electrolytic capacitors, running right on the edge of madness, and produce bizarre errors when they begin to go bad. Get a good-quality wall wart (**), ideally with a UL rating, and see if the situation improves.
While you’re buying stuff, get a good-quality USB cable (***) to replace the one that (assuming you’re like me) you’ve been saving for the last decade Just In Case™. Use the shortest cable possible, because longer does not equal better.
After that, the problems get truly weird. Apply some tweakage and report back.
(*) This is harder to do than you might think. You may safely assume all cards available on eBay and all “Sold by X, Fulfilled by Amazon” cards will be counterfeit crap. I’ve been using Samsung EVO / EVO+ cards (direct from Samsung) with reasonable success:
The intent was to wire the “5 W” COB LED to the 12 VDC supply grafted on the Juki TL-2010Q, through a suitable resistor around 18 Ω. Unfortunately, the next morning I managed to run 12 V directly to the LEDs, which produced an astonishingly bright flash of blue-white light and an opportunity for some post-mortem analysis.
A sharp tap with a chisel popped the COB LED PCB off its heatsink:
Destroyed COB LED – epoxy bond
That’s a pretty nice thermal joint and ought to transfer as much heat as reaches the back surface. Mechanically, it yanked one of the nickel tabs right off the solder pads; obviously, I must now level up my soldering game.
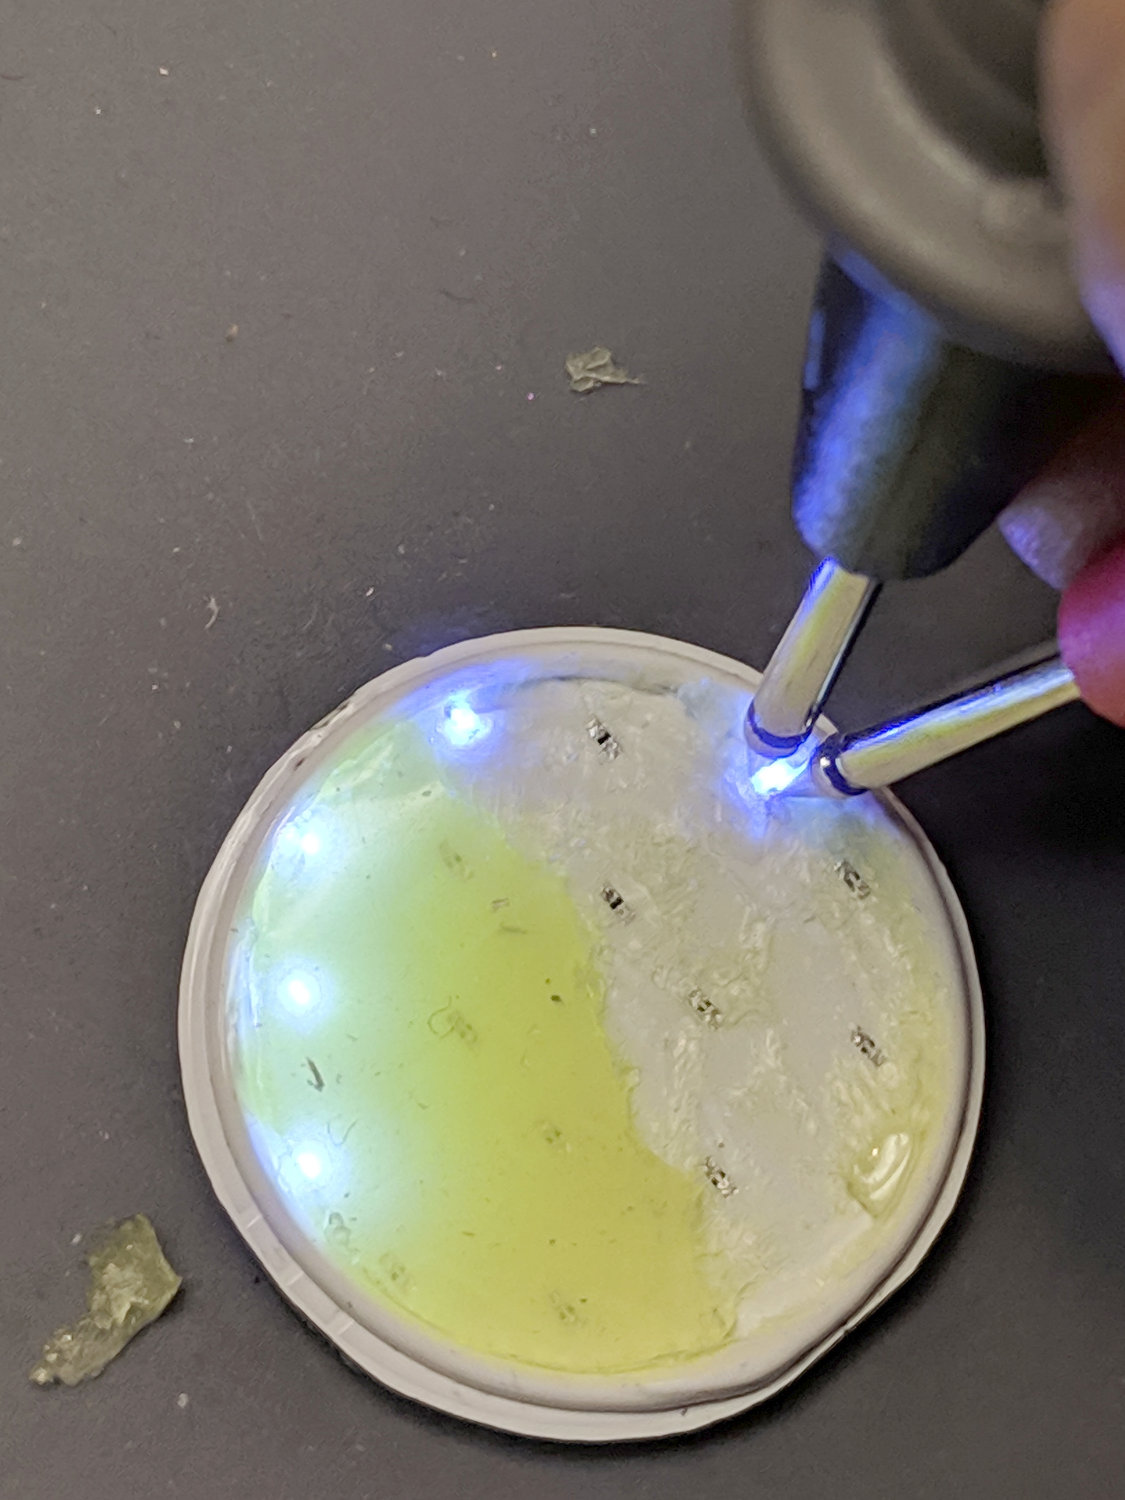
Scraping the yellow silicone filter off the PCB reveals the minuscule LEDs:
Destroyed COB LED – excavated yellow silicone
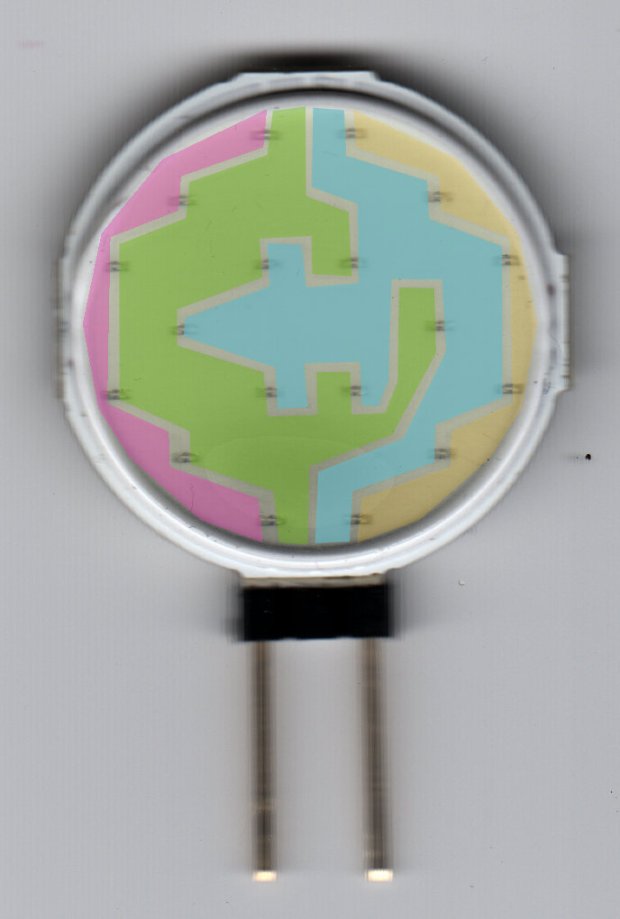
You’ll recall they’re arranged in three series sets of six:
Circular 12V COB 18 LED panel – copper layout
Some probing revealed five of six LEDs in one set was still functional:
Although a few other LEDs across the PCB survived, that’s not the way to bet when you run so much current through the poor things.
Ah, well, that’s why I always buy a few more parts than I really need …
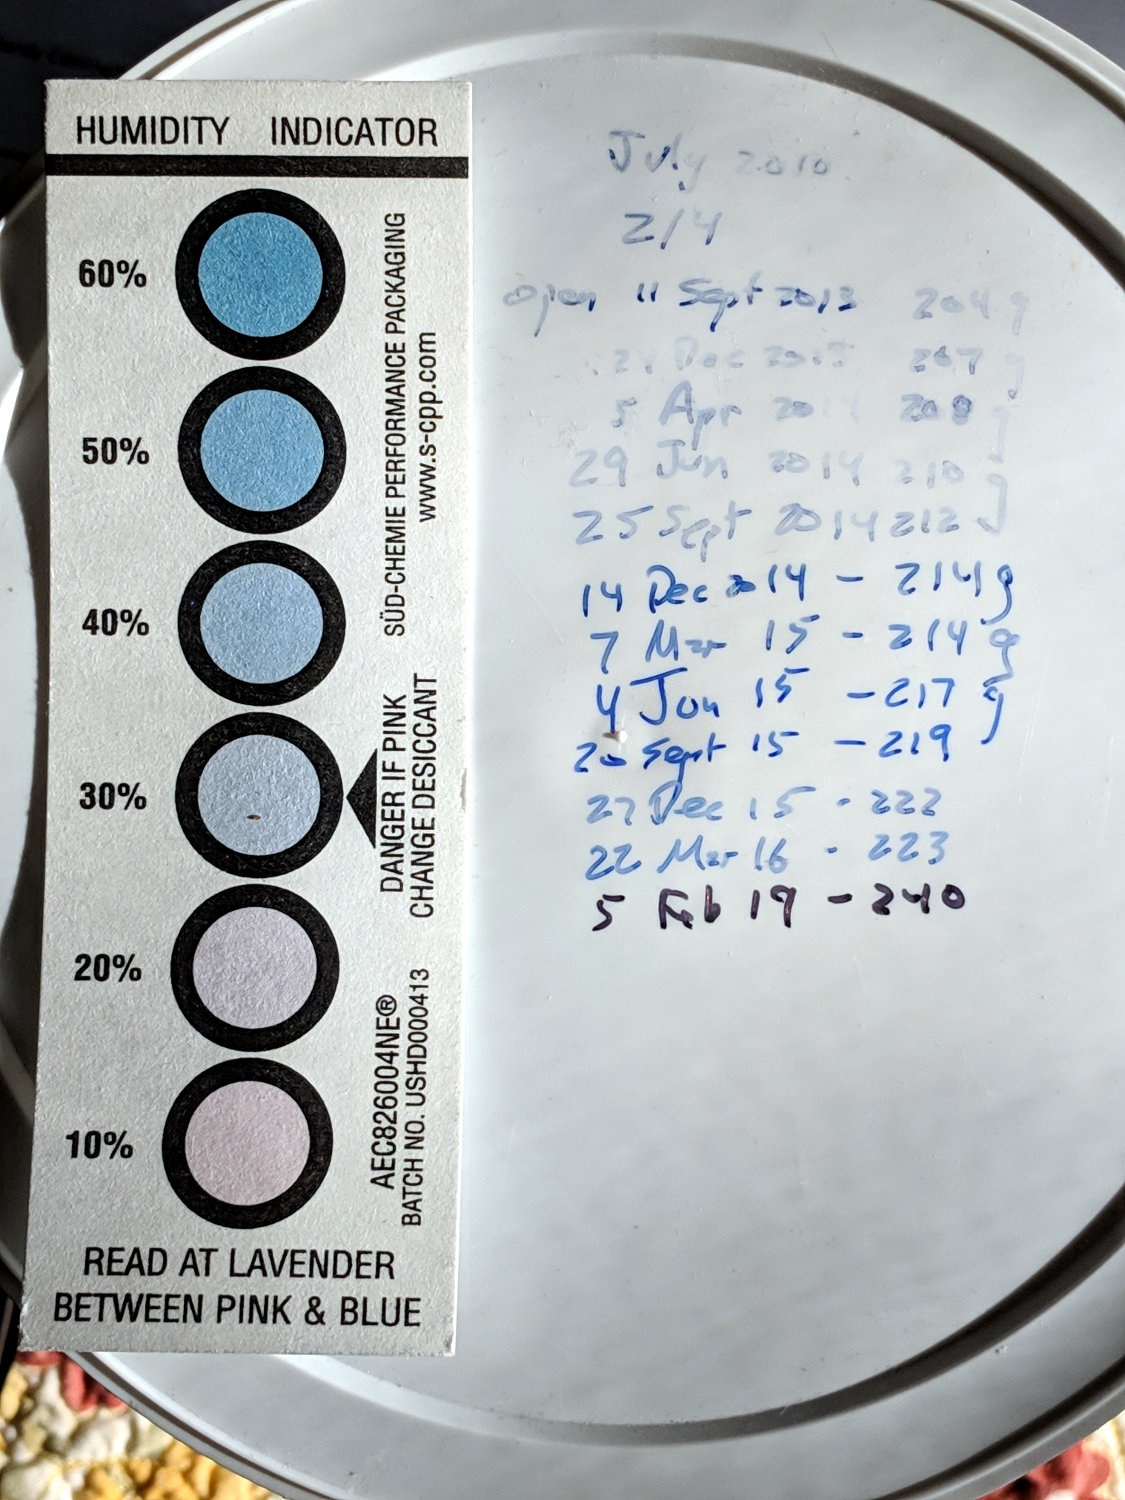
Being that type of guy, I tucked a bag of silica gel desiccant and a humidity indicator card into a #10 can of baking powder, then recorded the bag weight whenever I refilled the kitchen container:
Baking Powder Can with Data
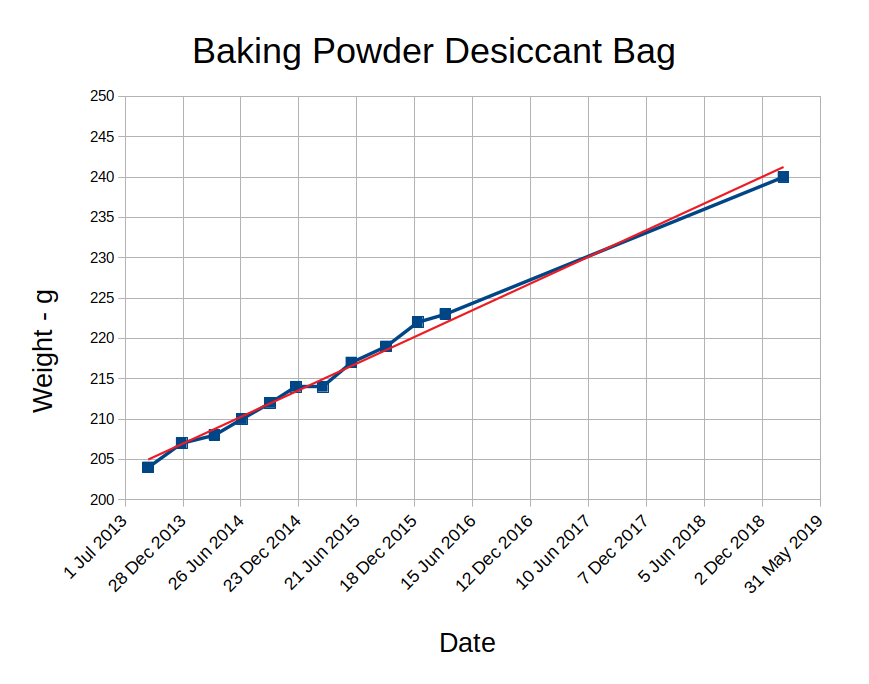
For reasons not relevant here, we pretty much stopped using baking powder a couple of years ago, so there’s a protracted silence between the last two data points:
That last point emptied the can and, after a few days in the 60% RH basement, the bag weighed 243 g. The slope of the line suggests it’s been near 240 g for a while, although the humidity card showed the air was reasonably dry in there.
At our current rate, we’ll open the next can in a year or so …