Ed Nisley's Blog: Shop notes, electronics, firmware, machinery, 3D printing, laser cuttery, and curiosities. Contents: 100% human thinking, 0% AI slop.
For reasons that will become relevant later on, I must clear the magazines from about ten feet of shelf space (and a stack of boxes), including this assortment:
To the best of my knowledge and belief, each collection is complete within those dates, although I’m equally sure an issue or two went walkabout over the course of four decades.
Having written columns for Digital Machinist, DDJ, and Circuit Cellar, I (still!) have multiple “author’s copies” of those, although I haven’t dug through the boxes for the specifics.
Here’s the deal:
You must take all of any set
Any offer ≥ $0.00 is acceptable
Shipping from ZIP 12603 is your problem
N.B.: Shipping Is Not My Problem (*)
Best offer on or before 30 November 2023 takes any or all.
Whatever remains becomes mulch in December 2023.
(*) A USPS Medium Flat Rate box (11×8.5×5.5 inch) costs $17 within the continental US and holds two or three dozen issues. Obviously, that’s the wrong way to ship an entire shelf of magazines, but gives you an idea of the scale.
If you want to pick ’em up in person, I’ll help heave ’em into your trunk.
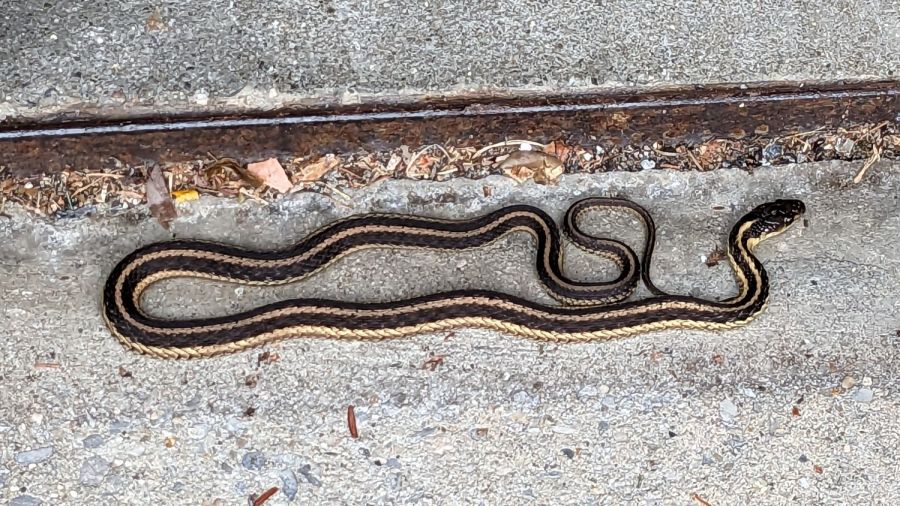
It was a cool morning and the snake hadn’t yet reached operating temperature, but it eventually flowed off into the garage and we went on our way.
A few hours later we returned:
Garter snake under garage door seal – B
Apparently that was the best place for a snake.
Mary lined up a four-cell seedling pot ahead of the critter, encouraged it to flow forward, and much to our surprise it tucked neatly into one of the cells:
Garter snake under garage door seal – C
We carried it to the herb garden, wished it well, and a few hours later it had uncoiled and gone about its business.
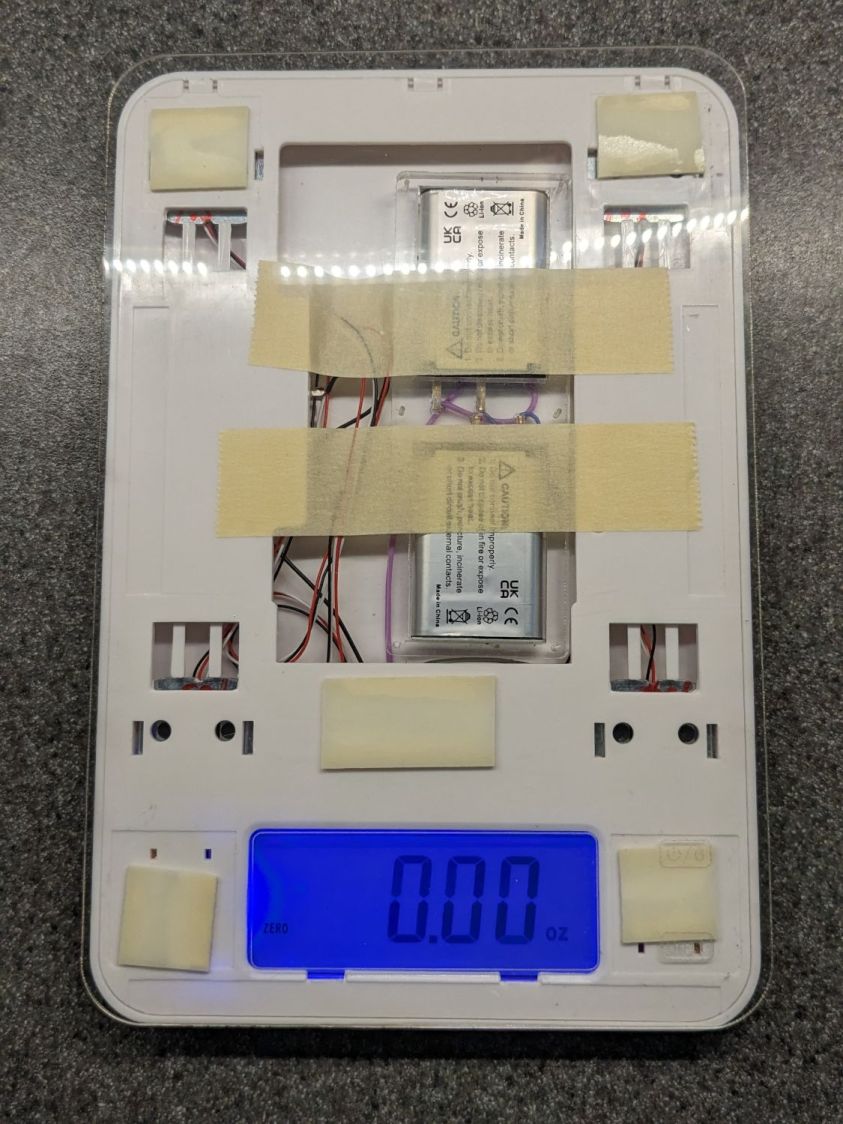
While pondering what to do with the shattered kitchen scale, I got a bottom-dollar replacement touting its rechargeable lithium battery. After giving it the obligatory charge-before-using, I put it in service. Five days later, its battery was dead flat discharged.
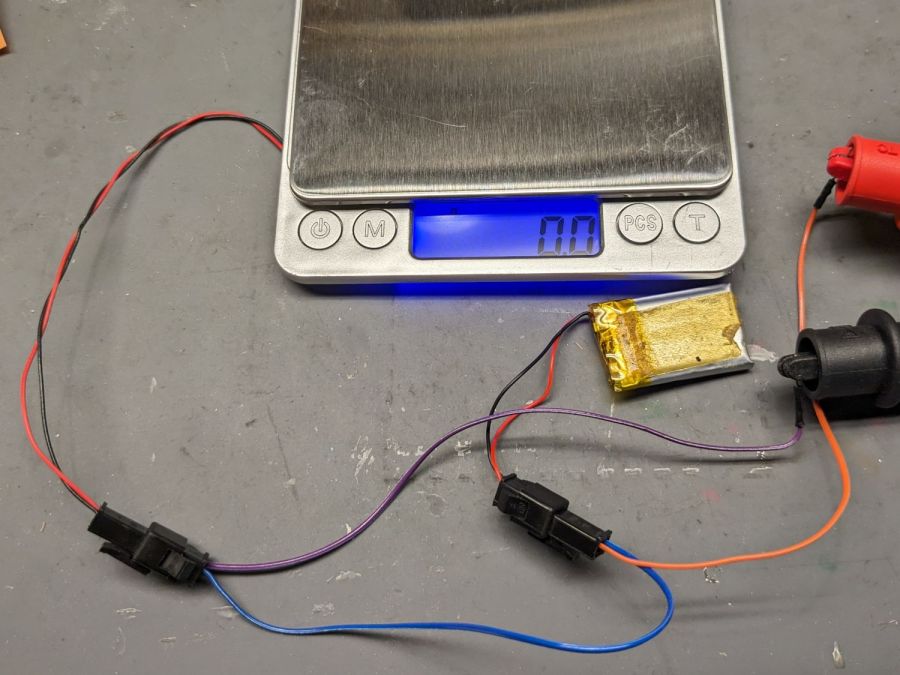
So I gutted it to extract the battery:
Cheap digital scale – lithium cell
It’s a cute little thing, isn’t it?
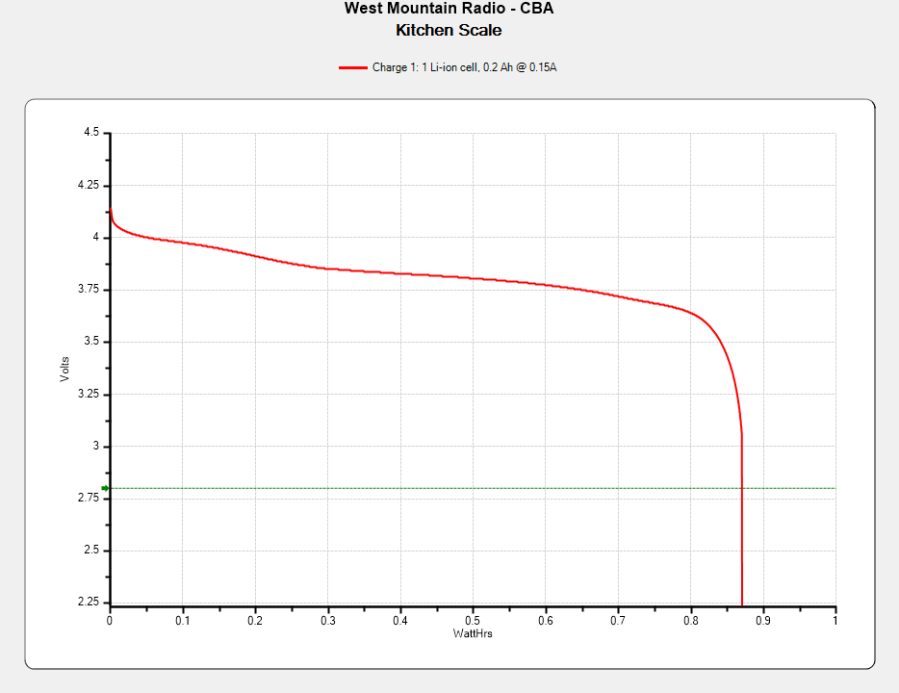
Much to my surprise, the obligatory battery rundown test showed it matches its 0.74 W·hr label:
Kitchen Scale – Charge1
We all know where this is going, right?
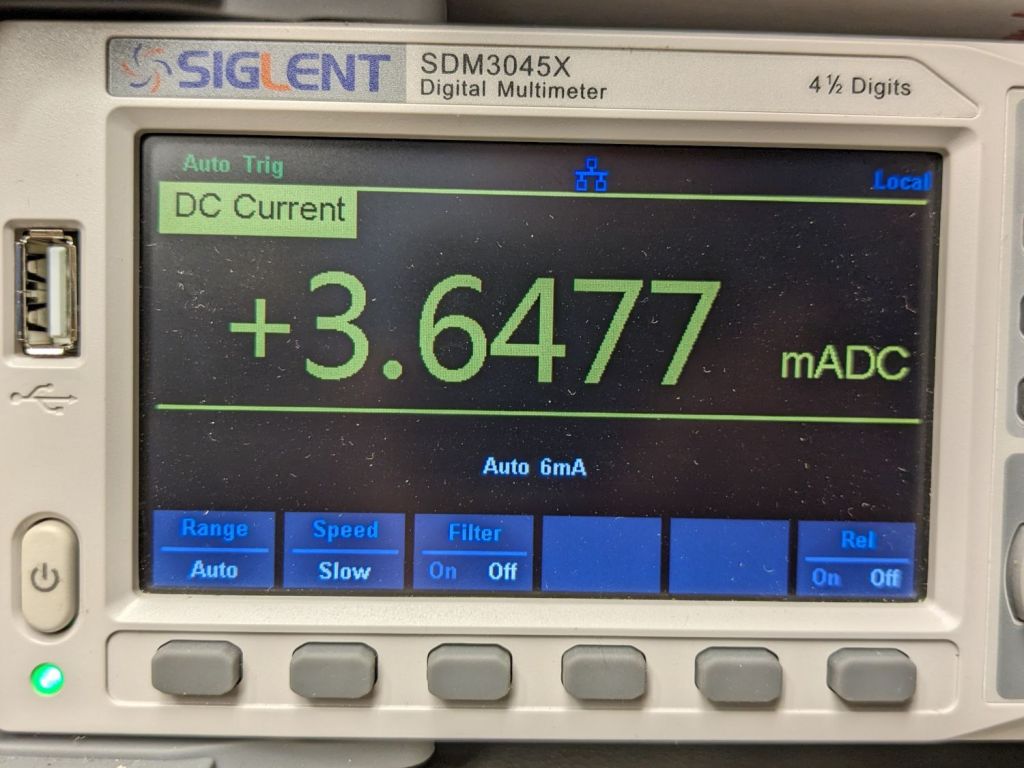
Crunche a connector on the battery, another on the scale, and make up a suitable current tap for a meter:
Cheap digital scale – current measurement setup
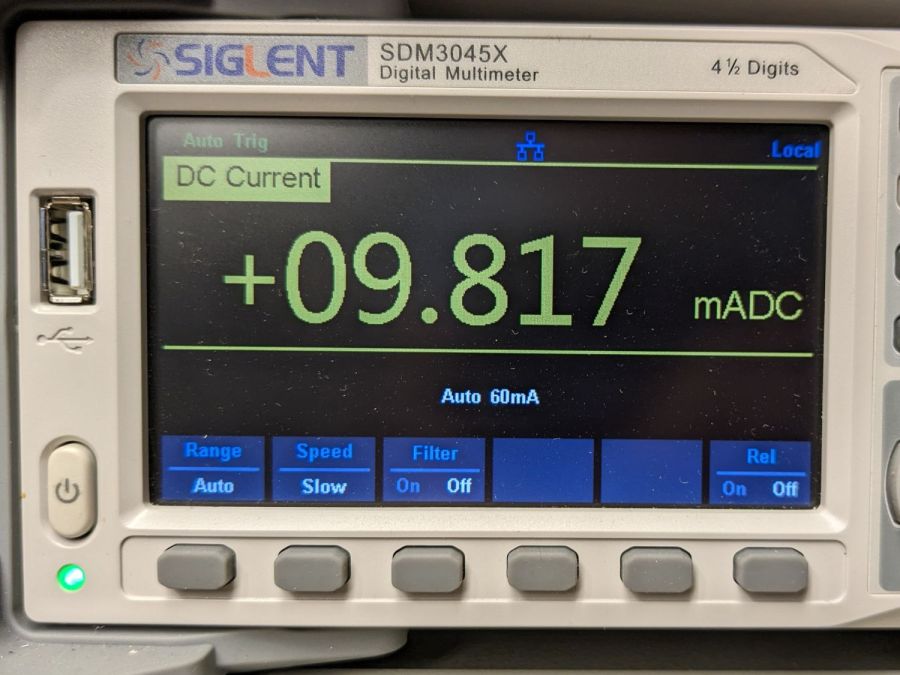
Which looked like this:
Cheap digital scale – active current
That’s about what I found for the craptastic scale running from a pair of CR2032 primary cells, so it’s not out of line.
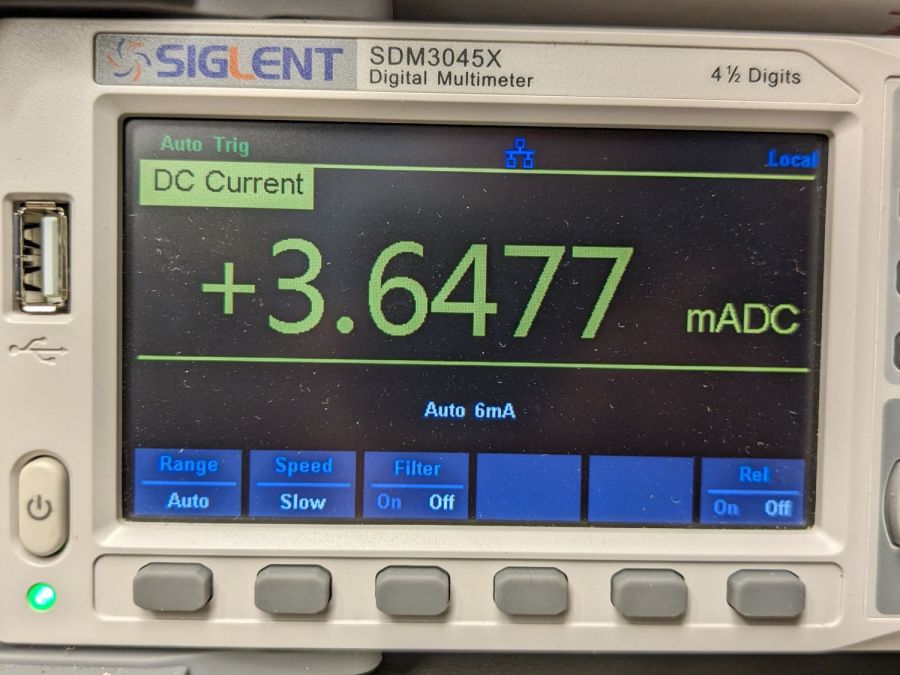
Turn off the scale and measure the idle current:
Cheap digital scale – inactive current
Do you think I got a dud?
For all I know, the little microcontroller under the epoxy blob is running a continuous attack on my WiFi network, with the intent of siphoning off all my sensitive bits. Ya never know.
Dividing the battery’s 200 mA·hr rating by 4 mA says it really should be dead in 50 hours, which is close enough to five days: diagnosis confirmed!
Rather than fight, I switched to a battery with more capacity:
Cheap digital scale – NP-BX1 replacement
It’s long past its prime, but ought to last for a month, which is about as long as the shattered scale survived on a similar battery.
If that isn’t a smug smile, I don’t know what one might look like.
When she related this tale at a Master Gardener meeting, one of her cronies said a similar frog commandeered a shoe and refused all offers of a new home, so apparently tree frogs and shoes just go together.
Anybody that persistent deserves whatever it wants; Mary will get a new pair of shoes and keep them indoors.
Being a guy of a certain age with a diagnosis of Low Bone Density, I must increase my calcium intake. Rather than add a few hundred calories a day of calcium-rich food that my waistline does not need, I’ll see what adding 600 mg of calcium citrate can do.
Being a guy of a certain type, I prefer to fill my own capsules, which of course involves Quality Shop Time:
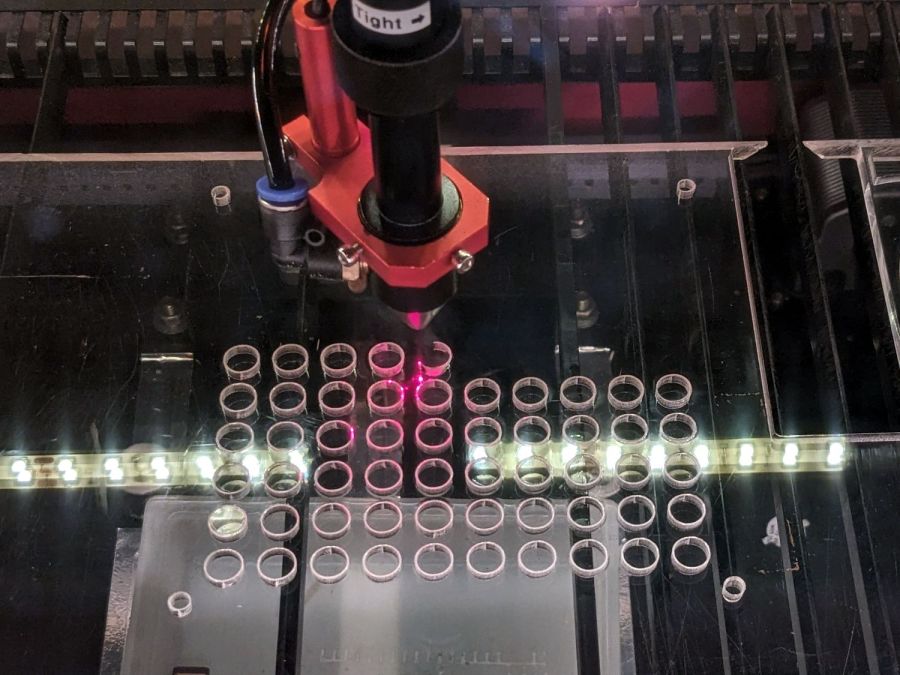
Gelatin 000 Capsule Fill Plate – cutting
Quite some years ago, for reasons not relevant here, I acquired several of what were called “manual capsule filling machines” from the usual online sources. During the ensuing years, such devices have fallen under the purview of the DEA and vanished from the import market, leaving (AFAICT) one USA-ian supplier.
The key difference between “machines” for different capsule sizes is the plate holding the capsule bodies:
Gelatin 000 Capsule Fill Plate – installed
A complete machine includes three other capsule-size-related parts:
A plate holding the caps
A plate with conical holes used to shake caps & bodies into their respective plates
A guide plate helping mate caps with bodies
In normal use, you put the “shake plate” on the body or cap plate, dump a pile into it, and shake until most of the caps / bodies fall into the holes. Then you manually insert the rest, invert any that fell in backwards, and generally mess around until they’re all properly oriented in their sockets. After filling the capsules, you put the cap + guide plates atop the bodies, press down firmly, and (ideally) produce 100 filled and sealed capsules.
It turns out Size 000 capsules are sufficiently chonky that I have no trouble capping the bodies by hand without those other parts, so making just the body plate seemed Good Enough™. The story might be different for Size 1 capsules.
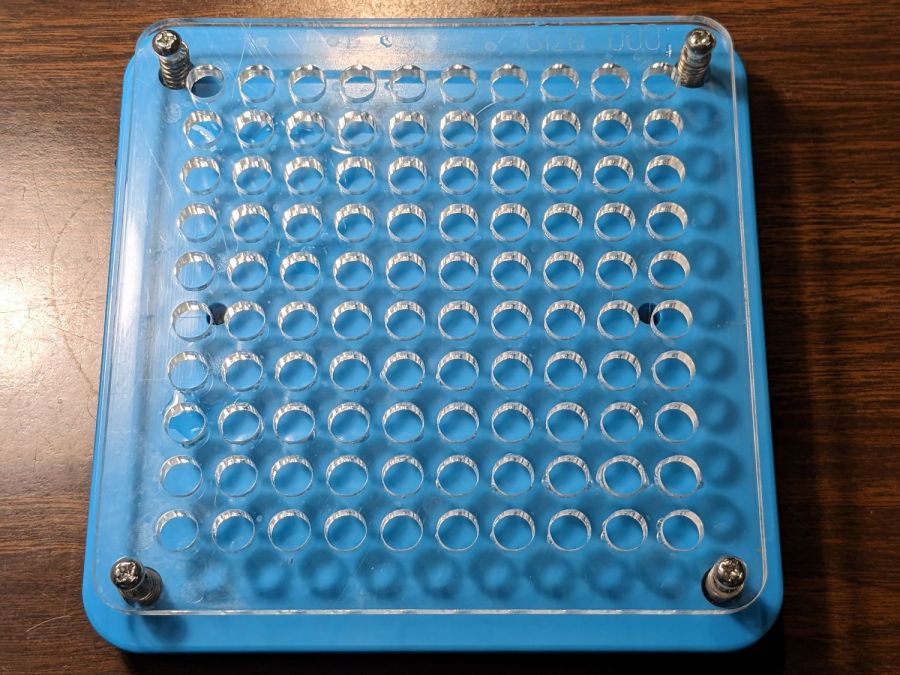
The external dimensions and screw holes match the original plate, so this one fits the same base:
Gelatin 000 capsule plate – LB layout
Make one plate and four spacing clips from 6 (-ish) mm acrylic.
If you can think of anything to do with 100 3/8 inch cylinders of 1/4 inch acrylic, clue me in.
Size 000 bodies are close enough to 3/8 inch that I cleaned up the holes with a step drill for a nicer fit. Perhaps making the plate from 3 mm acrylic would produce better results.
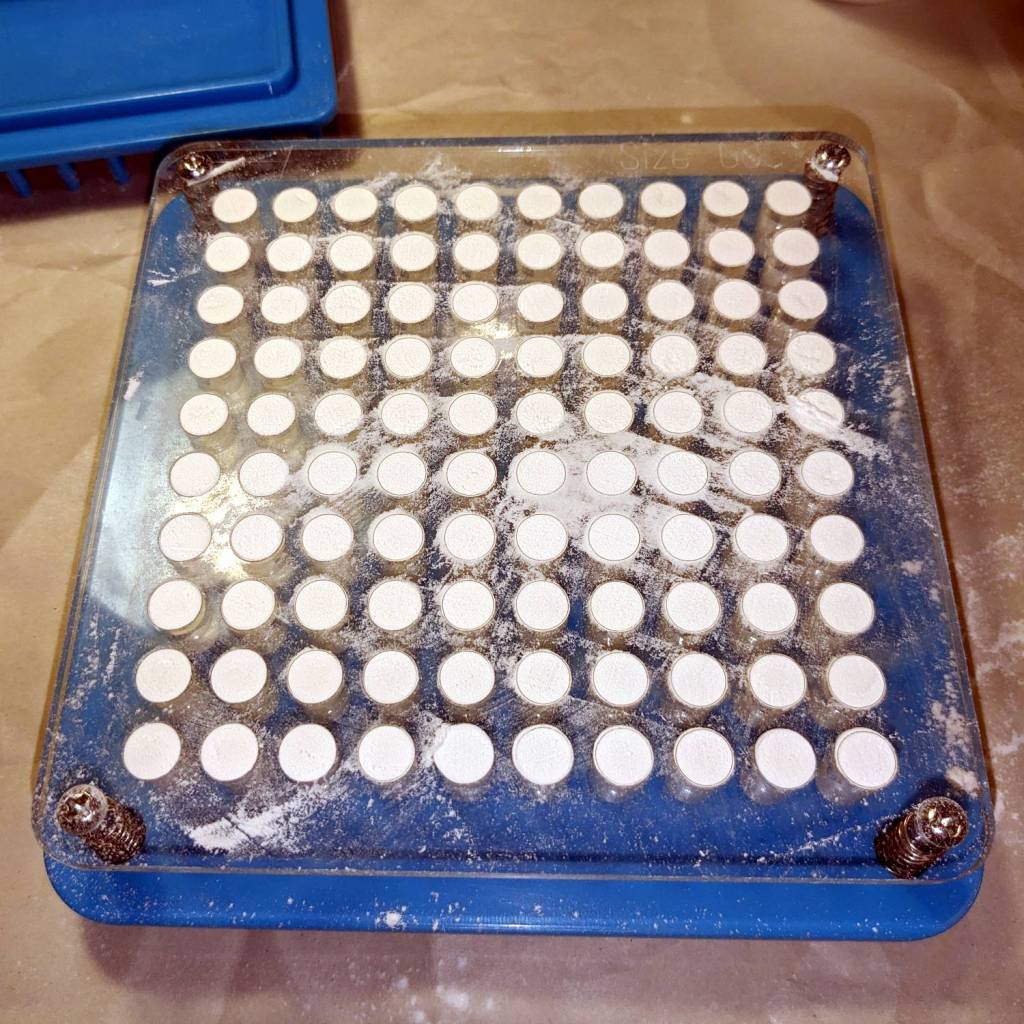
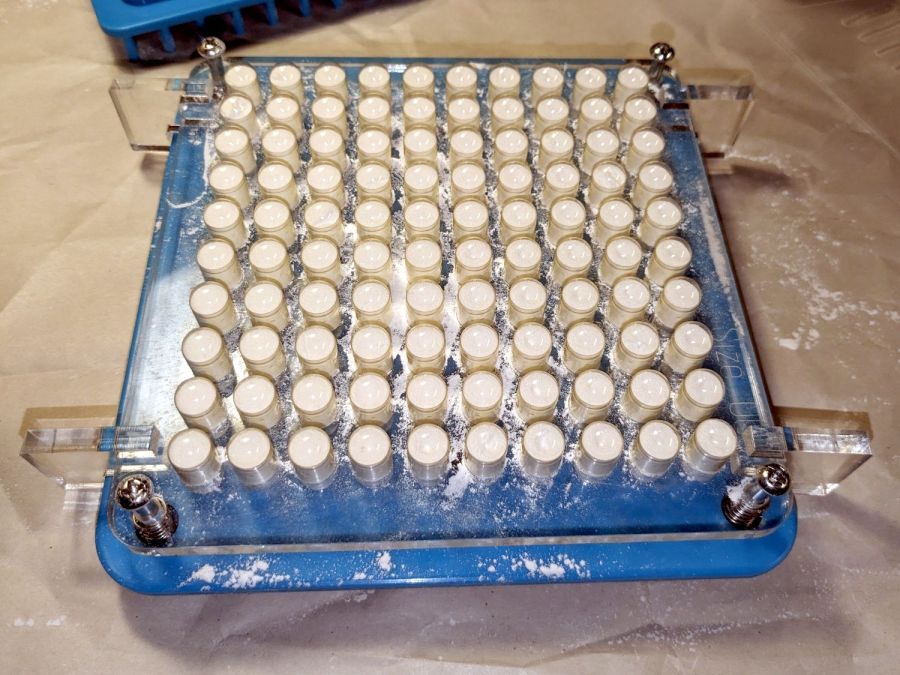
Four springs around the screws in the corners support the plate to allow pressing the caps in place. I adjusted the screws to put the top of the plate at exactly the height of the bodies above the blue base place, producing a smooth surface for scraping suspicious white powder into the bodies:
Gelatin 000 Capsule Fill Plate – filled
Iterate filling and tamping until the capsule contents are firm-but-not-overstuffed, then press the plate downward and secure it with the spacer clips:
Gelatin 000 Capsule Fill Plate – capped
The clips hold the plate at the proper distance to let the caps slip over the bodies and lock in place. This is tedious, but much faster than doing the entire process on individual capsules one-by-one.
With the caps locked in place, flip the whole thing above a bowl, remove the clips, press the plate against the base, and 100 finished capsules shower into the bowl.
You could build a complete filler without having the blue base plate & springs, but I’ll leave that project to your imagination.
That’s after an inadvertent drop edgewise onto the concrete patio.
Stipulated: given what I’ve already done to / for the thing, the usual warranties do not apply.
The frame around the NP-BX1 lithium batteries held the glass fragments together surprisingly well:
Kitchen scale – shattered glass – detail
Of course, harvesting the good stuff resulted in a pile of fragments, but the carcass cleaned up nicely and, after grafting a temporary top made from scrap acrylic it still worked:
Kitchen scale – temporary surface
I expected to just cut a slab of 6 mm acrylic to match the original 5 mm glass, but for reasons probably related to dielectric constants, the touch controls do not work through that much acrylic. In fact, they don’t work through anything other than the 1.5 mm acrylic shown above, which seems a bit too flimsy for normal use.
The original glass had a design screened on the back surface and covered with paint, which I can certainly mimic, but right now I’m unsure how much effort to put into the thing.
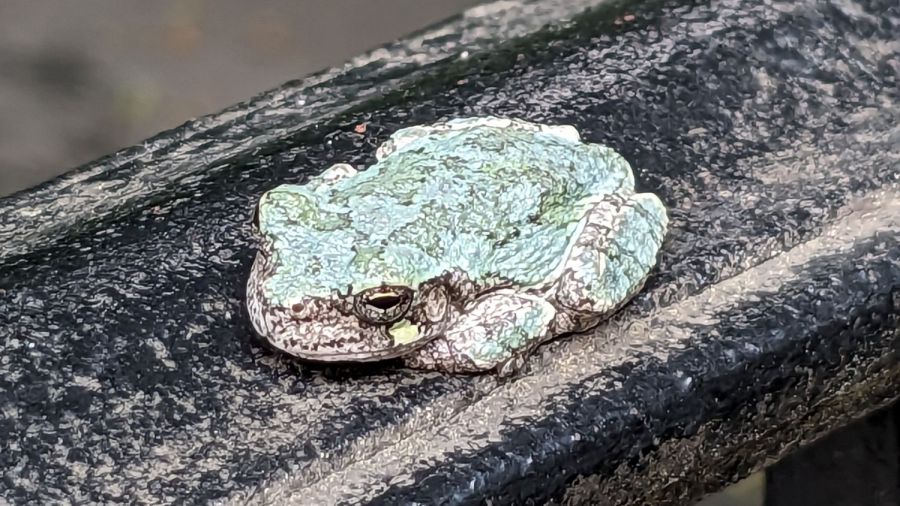
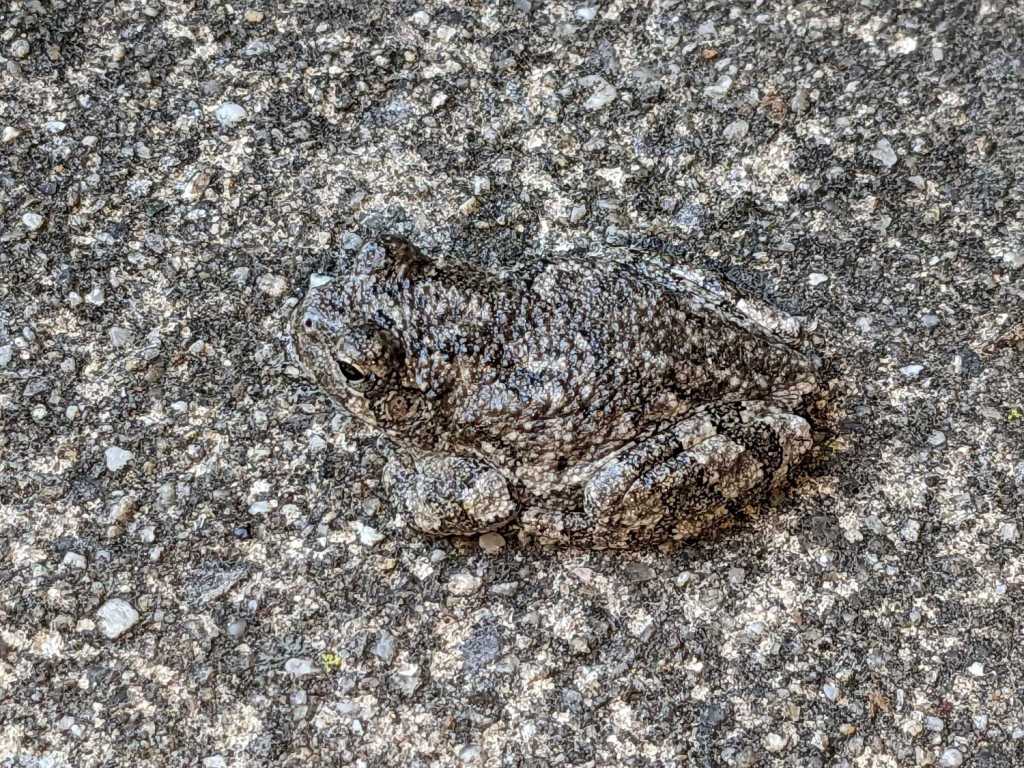
If I hadn’t seen it with my own eyes, I wouldn’t have believed it:
Gray Tree Frog on concrete
In point of fact, I almost didn’t see it.
This was the fourth time Mary deported the critter from her gardening shoe, whereupon it hopped out of her hands onto the concrete patio. She hauled it to the far end of our lot and wished it well; so far it has not returned.
We are reliably informed it’s a gray tree frog, not a toad as we originally thought.


