Ed Nisley's Blog: Shop notes, electronics, firmware, machinery, 3D printing, laser cuttery, and curiosities. Contents: 100% human thinking, 0% AI slop.
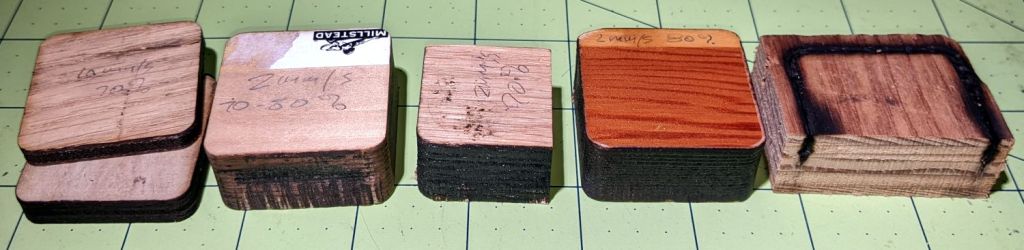
I thought a pine plank would cut faster than oak, but they’re equally stubborn.
Maple requires slightly more power, with the glued butt joints between the slabs putting up a stiff resistance.
A sheet of 3 mm MDF cuts well at 20 mm/s 60% and I expect 3 mm plywood might need similar numbers.
A pervasive odor of burned wood seems to be the only downside; if you think a wood stove is a good idea, you’ll love laser cutting the stuff. Sanding the blackened perimeter and sealing the surface surely helps, but it’s feasible only for the kind of simple convex shapes you don’t really need a laser to cut.
The fuzzy edges engraved on the acrylic test sample showed the need for scan offset adjustment:
Please Close The Gate – acrylic test piece
The problem arises from the finite delay between the controller turning the laser beam on and the rise time of the death ray energy at the focal point.
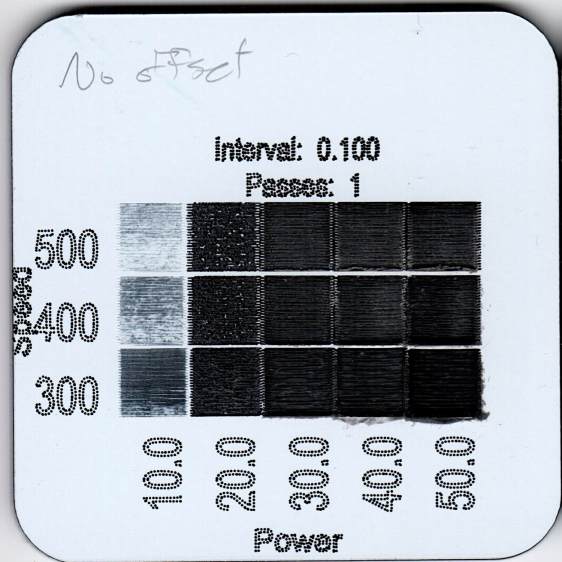
LightBurn can produce a calibration coupon (on Trolase laminated acrylic) to help explore the multidimensional parameter space:
Offset cal – zero offset – overview
The “Interval” value is the vertical (Y-axis) scan line spacing. The laser spot diameter is, at absolute best, about 0.2 mm on the focal plane, with the actual engraved line being smaller due to the energy distribution across the beamwidth and the power required to visibly damage the material, so a 0.1 mm interval should result a little bit of overlap between adjacent scan lines.
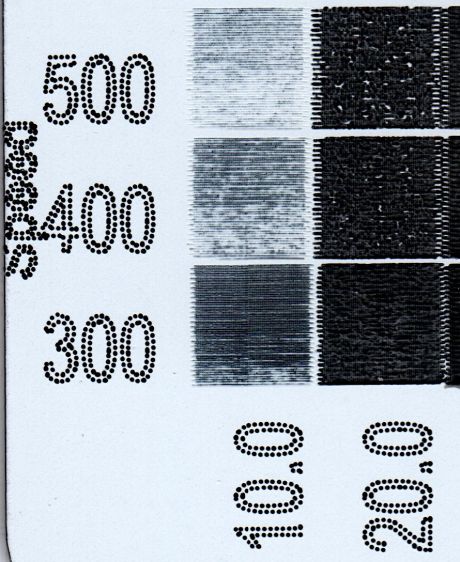
A closer look shows the serrated edges on the left and right sides of the engraved squares:
Offset cal – zero offset – detail
Peering at it through a measuring magnifier suggests the offset is a bit over 0.2 mm at 400 mm/s, corresponding to a 500 µs delay between laser turn-on in the rightward direction and turn-off in the leftward direction.
The LightBurn Scanning Offset Adjustment is half the measured distance, with an Initial Offset parameter to adjust the starting point of the first scan line. You measure the distance at each speed and fill in the table accordingly.
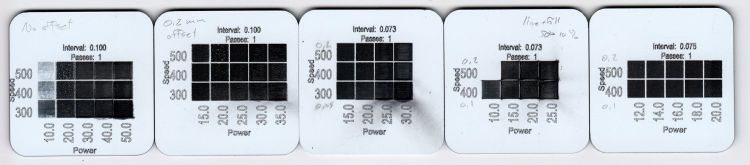
Iterating through offsets, speeds, powers, and intervals produces a series of test coupons slicing through the parameter space:
Offset cal – iteration
All in all, a 0.1 mm offset at 400 mm/s with 14% power (about 8 W) and 0.075 mm interval looks pretty good:
Offset cal – final offset – detail
Engraving various fonts:
Offset cal – text – overview
A closer look (left coupon on the top):
Offset cal – text detail
LightBurn linearly interpolates between table entries of offset values at specific speeds, so you must fill in several lines to give it something to munch on. The top text came from an offset table with two entries at 400 and 500 mm/s, which obviously wasn’t quite sufficient. The bottom text comes from a three-entry table:
LightBurn scan offset table
Which produces a better result, even at 500 mm/s and 20% power (12 W) on scrap acrylic:
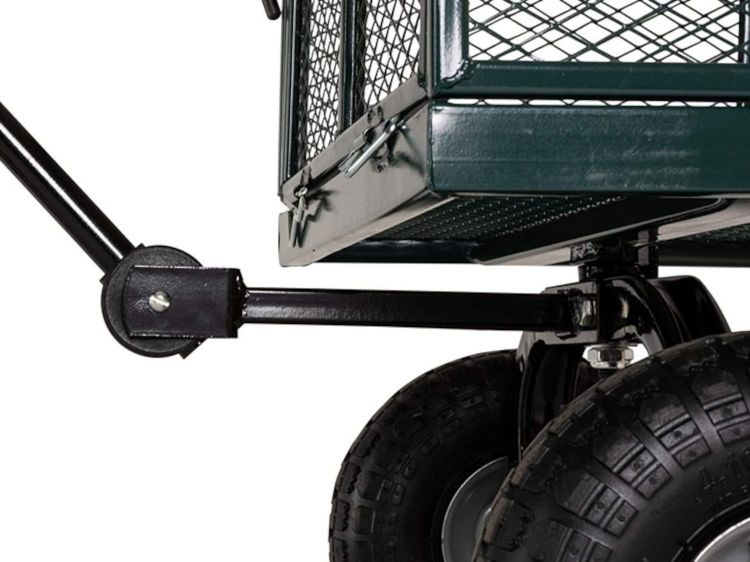
For reasons not relevant here, I was tapped to replace the plastic parts attaching the handle to a garden cart:
Garden Cart – handle attachment
The owner tried to contact the “manufacturer” to no avail; repair parts are simply not available, even if the name painted on the cart had a meaningful relationship to anything else.
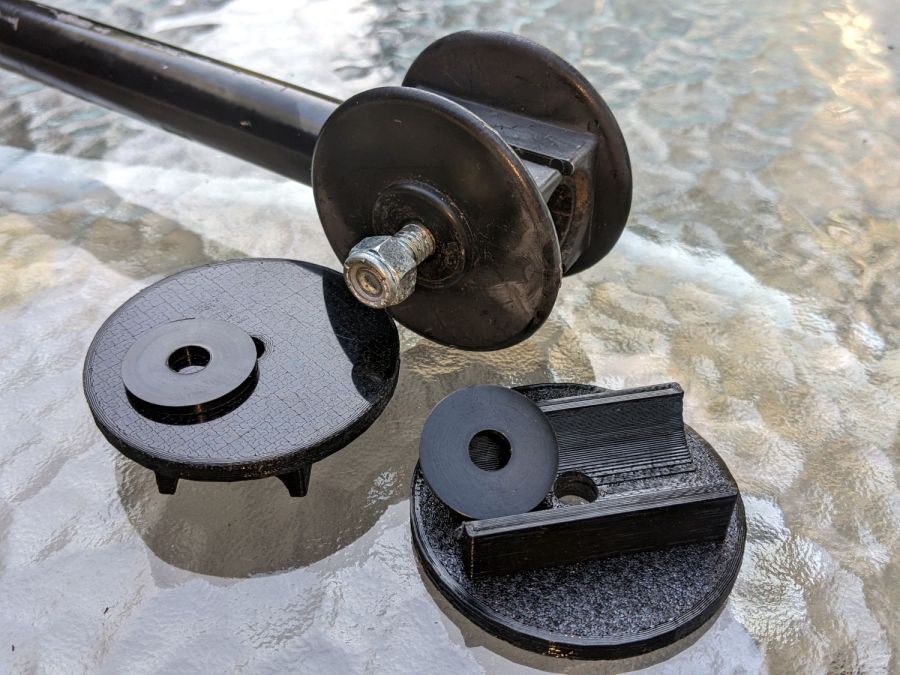
Well, I can fix that:
Garden Cart – handle repair parts
Fortunately, another cart in the fleet provided the missing bits so I could reverse-engineer their measurements.
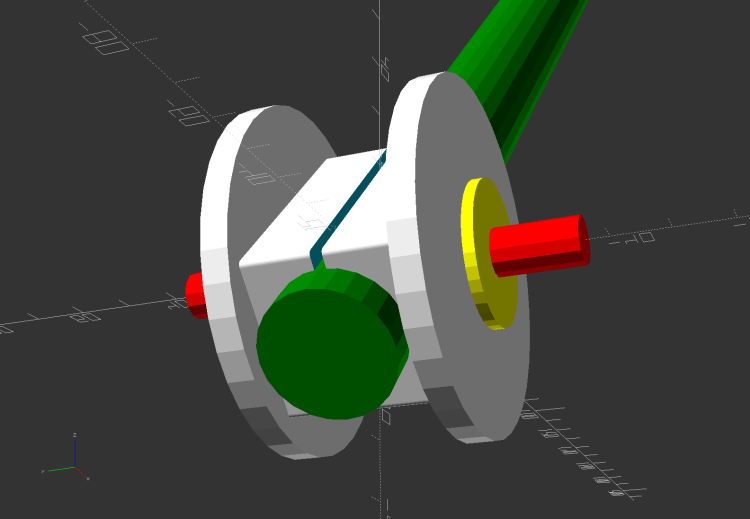
The solid model looks about like you’d expect:
Garden Cart Handle – show view
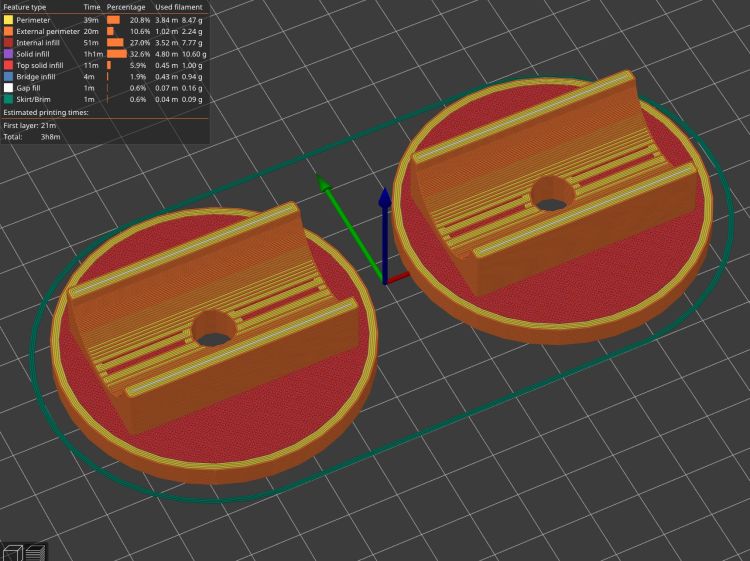
Printing the two halves with those nice (yellow) bosses in place wasn’t feasible. They were exactly 1 inch in diameter, so I just parted two cookies from the end of a stout acetal rod after drilling a hole for the 2-¼ inch 5/16-18 bolt.
The two pieces took nigh onto three hours with five perimeters and 50% infill:
Garden Cart Handle – slicer preview
While delivering and installing the parts, I got volunteered to haul plants to cars with one of the carts during the upcoming Spring Plant Sale. That’ll teach me to stay in the Basement Shop …
This file contains hidden or bidirectional Unicode text that may be interpreted or compiled differently than what appears below. To review, open the file in an editor that reveals hidden Unicode characters.
Learn more about bidirectional Unicode characters
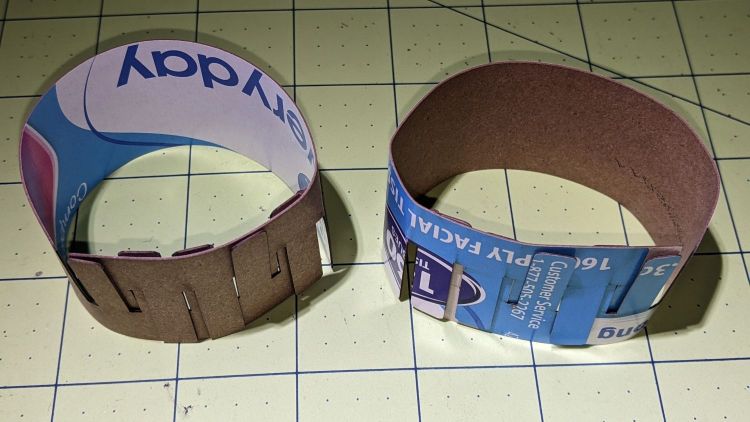
Mary, having had considerable trouble with cutworms in her gardens, routinely deploys cardboard collars around new plants:
Cutworm Collars – assembled
It seems cutworms trundle around until they find an edible plant, chew through the stem and topple the plant, then trundle off without taking another bite. A small cardboard barrier prevents them from sensing the plant: apparently, motivation to climb a short wall hasn’t yet evolved.
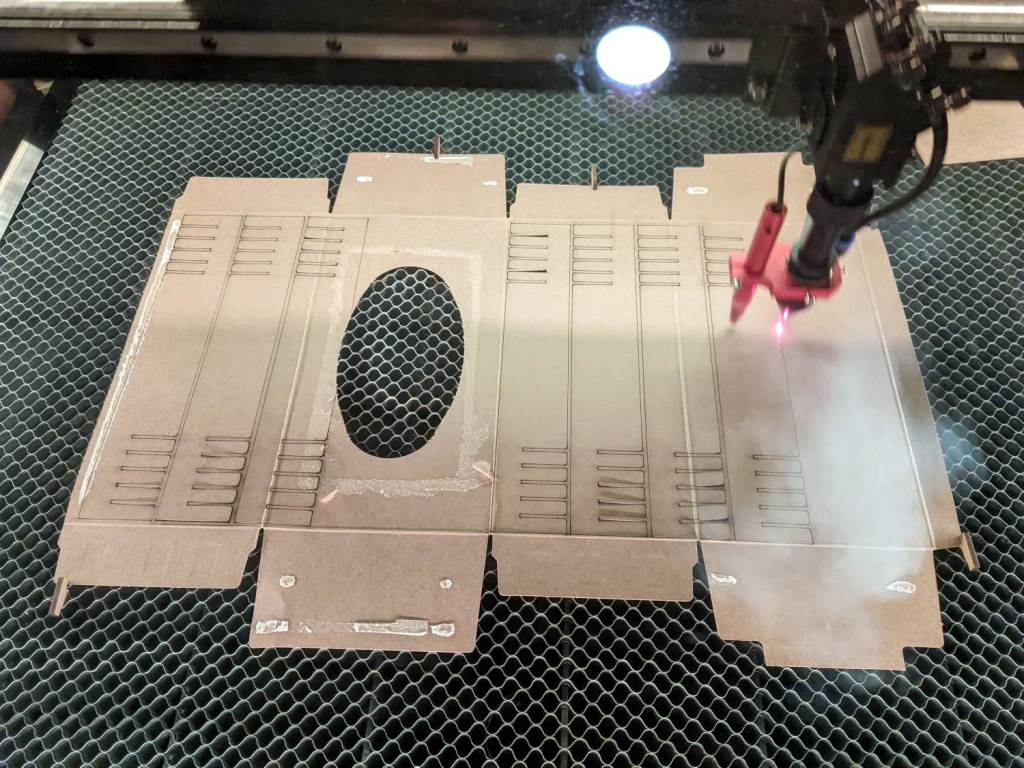
Up to this point, Mary applied scissors to tissue boxes, but I proposed an alternative with an adjustable fit to any plant:
Laser Cutting Cutworm Collars
A splayed cardboard box rarely lays flat, a condition enforced by a few MDF stops used as clamps.
Come to find out no two tissue boxes have identical dimensions, even boxes from the same brand / retailer, so lay out duplicates of the collar template to match your stockpile.
When you (well, I) get fussy about angular alignment on the laser cutter’s honeycomb platform, an adjustable stop or two may come in handy:
Laser Honeycomb – Adjustable Pins
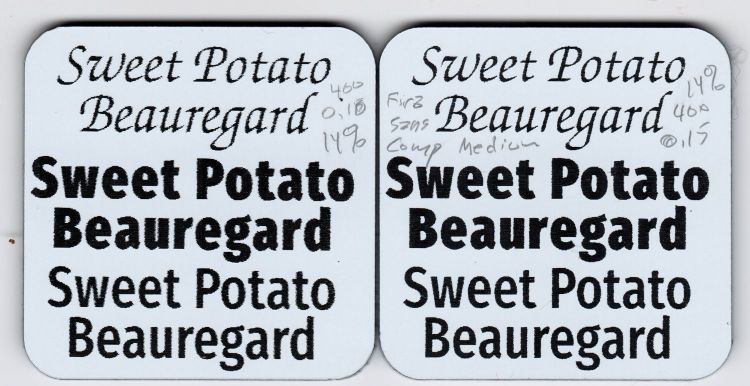
That’s a serving suggestion based on a true story, because I really wasn’t all that fussy about precise engraving alignment on those signs.
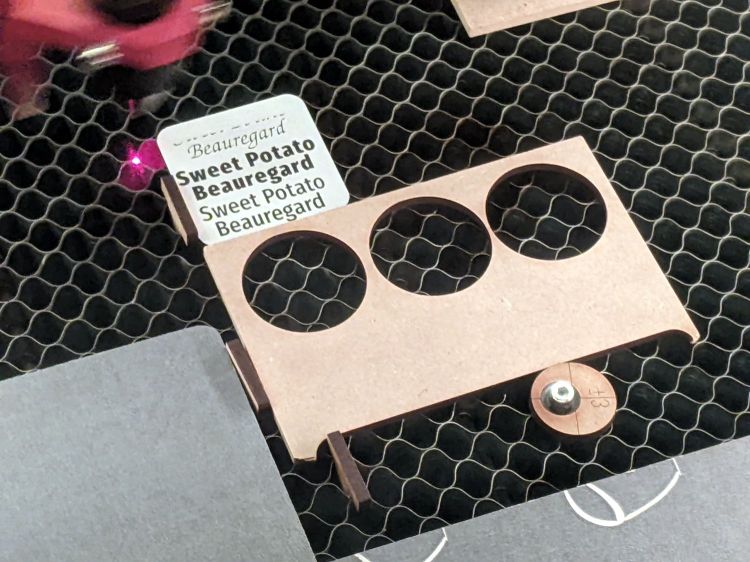
A more typical situation on a smaller scale:
Laser Honeycomb – Adjustable Pins – engraving
The scrap of MDF with three holes provides angular alignment for the little two-color acrylic test coupon, so you can tuck successive squares into the corner, hammer them with slightly different patterns, then compare the results.
The stops are an off-center hole (the ±3 text gives the offset) in an MDF disk with an acetal post:
Laser Honeycomb – Adjustable Pins – detail
The 3 mm SHCS provides a convenient way to turn the post and disk, so the threading isn’t critical. Sufficiently snug threading will let you turn the screw counterclockwise without loosening it, but that surely depends on how tightly the 8 mm section fits into the honeycomb. The larger top section is 9mm, cleaned up from the rod’s nominal 3/8 inch OD, for a jam fit into the 8.8 mm + 0.1 mm kerf hole.
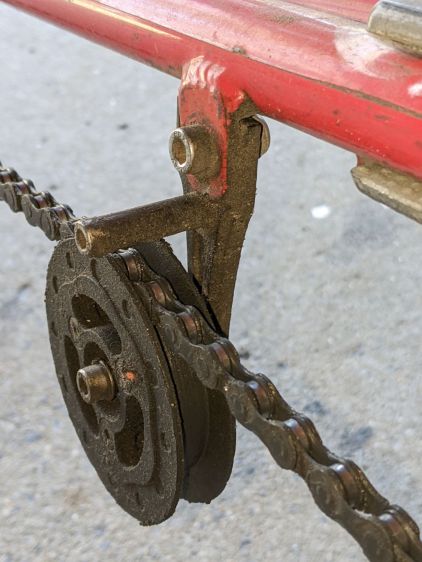
It turns out that under rare conditions, triggered by fumbling a front derailleur shift, the upper chain section (out of the picture on the top) can whip vertically enough to jam between the Terracycle Idler’s mounting bolt and its longer chain retaining pin:
Tour Easy – Terracycle idler
Whereupon the chain falls off the chainring, jams firmly between the spider and the crank, and brings the proceedings to a halt.
Having finally figured out the cause, I made a simple bushing to fit around the mounting bolt, reduce the gap, and (I hope) eliminate the problem:
Tour Easy – Terracycle idler bushing
Given its rarity, I will need a few more years to verify the solution.
Might get around to cleaning the chain one of these days, too …
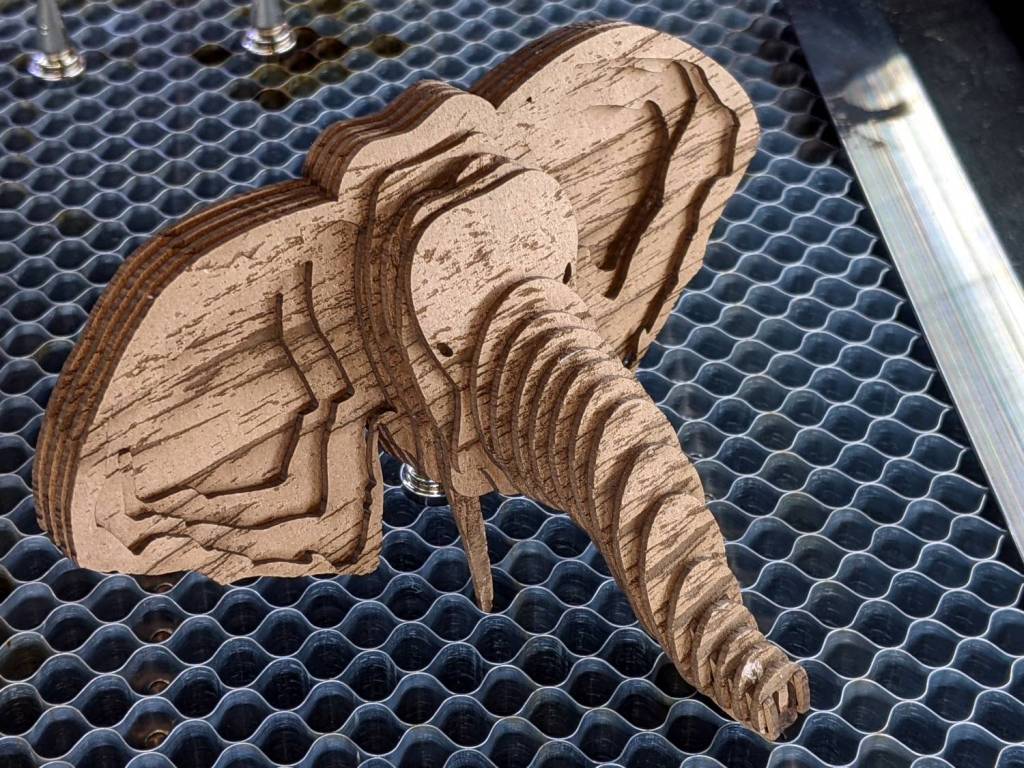
It’s cut from 3 mm MDF, rather than the fancy Trotec Eco 1 mm cellulose sheet they recommend, which required embiggening the mounting slots in all the pieces.
It served as good, albeit tedious, practice for my atrophied GUI alignment and editing skilz.


