Ed Nisley's Blog: Shop notes, electronics, firmware, machinery, 3D printing, laser cuttery, and curiosities. Contents: 100% human thinking, 0% AI slop.
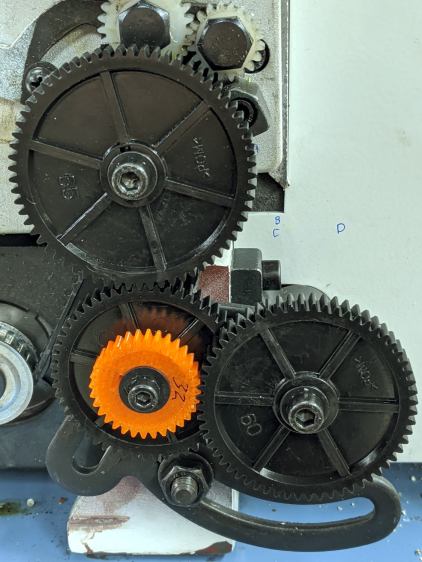
Going from a 21 tooth gear to a 42 tooth gear means you must reduce the remaining train ratio by a factor of two for a given thread pitch. Here’s a 42-50-45-60 train, with the same -125 ppm error as the 21-50-60-40 train and no screw / washer clearance issues between the A screw and the C gear:
Mini-Lathe change gears – 1 mm – 45-50-45-60
The original 60-40 CD pair has a 3:2 ratio, the 45-60 CD pair is 3:4, so that’s where the factor-of-two reduction happens.
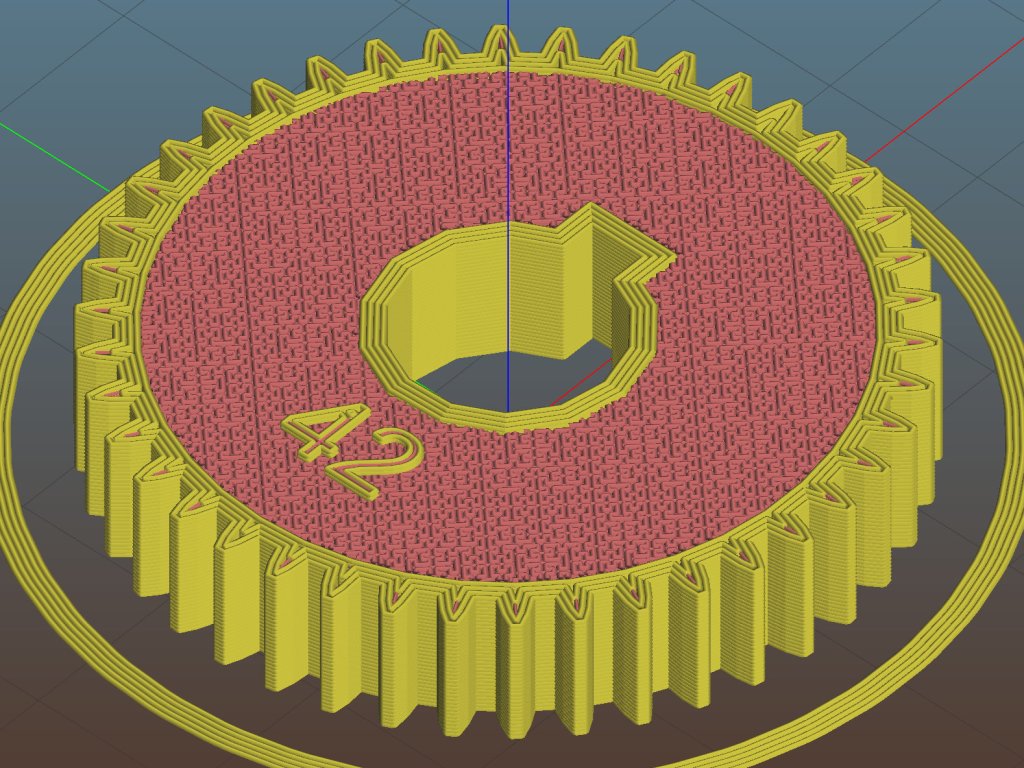
The first pass at the solid model included a debossed legend:
Mini-lathe 42 tooth change gear – Slic3r
With a printed gear in hand, I realized the legend must be embossed below the surface, so as not to rub against an adjacent gear; better modeling is in order.
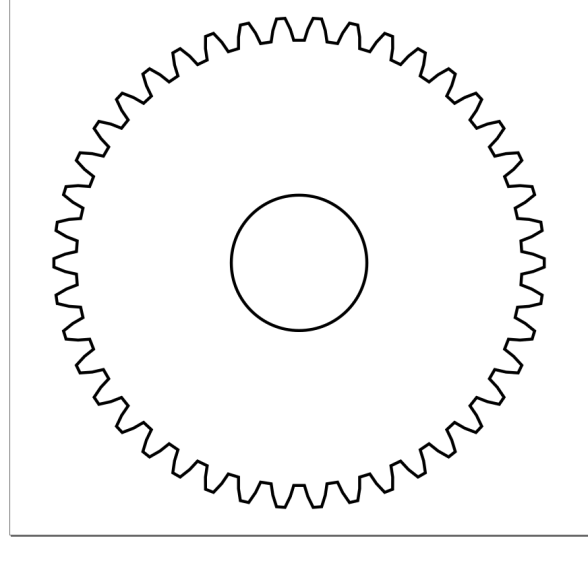
The general idea is to set Inkscape’s (known-good) gear generator to the correct gear parameters (module 1 → 3.14 mm circular pitch, 20° pressure angle):
Inkscape Gear Generator dialog
Save the outline as an SVG:
Inkscape Gear Generator result
If you do like I did and neatly position the gear at the bottom-left origin, all SVG viewers will show only the Quadrant I arc, probably because Inkscape sets the SVG file to display it that way. I’ve made that mistake before and maybe, someday, I’ll remember.
Load the SVG into OpenSCAD, which will find the entire gear, no matter where it falls in the coordinate space, and spike it at the origin:
The linear_extrude( … center=false … ) keeps the bottom of the blank at Z=0. The import( … center=true … ) puts the 2D shape at the XY origin. Because OpenSCAD centers the bounding box, gears with an odd number of teeth will be ever so slightly off-center, which would matter a whole lot more in a fancier machine tool than a mini-lathe.
All of which produces a tidy 3D gear blank:
Mini-lathe change gear – 42 tooth – SVG import
OpenSCAD ignores SVG holes, which isn’t a problem for me, because I’d rather punch the bore, keyway, and so forth programatically.
While not strictly necessary for metric threading on a USA-ian mini-lathe, a 32 tooth gear can produce reasonable approximations, so I printed a pair from a Thingiverse collection:
Mini-lathe 32 tooth change gear – Slic3r
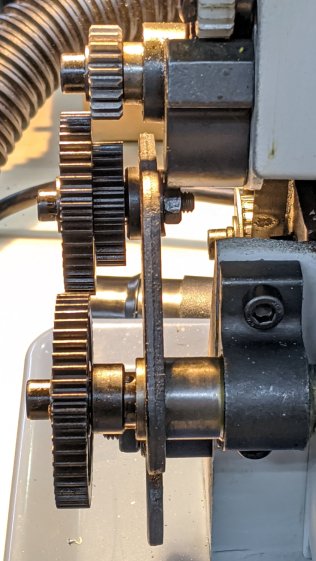
The model was designed for a slightly different mini-lathe, as it includes a short boss and thinner plate, but it did fit on the shaft:
Mini-Lathe change gears – 1 mm – bad 32 60 65 55
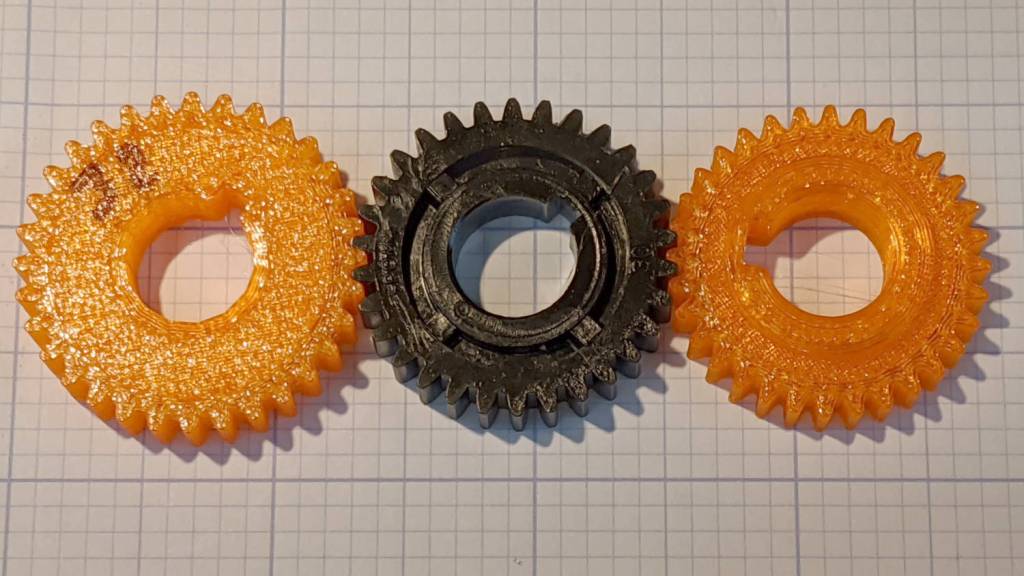
The gear mesh seemed odd, though, and comparing it with a standard 30 tooth gear and a different printed 32 tooth gear (about which, more later) showed it was definitely not compatible:
Mini-lathe change gears – 32 30 odd 32
Yes, the 32 tooth Thingiverse gear on the right is slightly smaller than the stock 30 tooth gear in the middle.
The larger 32 tooth gear (on the left, above) meshes better:
The real reason you need a 32 tooth gear is for exact 25, 50, and 100 TPI threads with a 1/16 inch leadscrew. I don’t foresee much need for those around here, but you can never have too many change gears …
Mini-lathes sold everywhere except the USA have hard-metric leadscrews with a 1.5 mm pitch, so they can cut metric threads without any trouble at all. USA-ian mini-lathes have hard inch leadscrews with a 1/16 inch pitch and require gymnastics to cut decent metric threads.
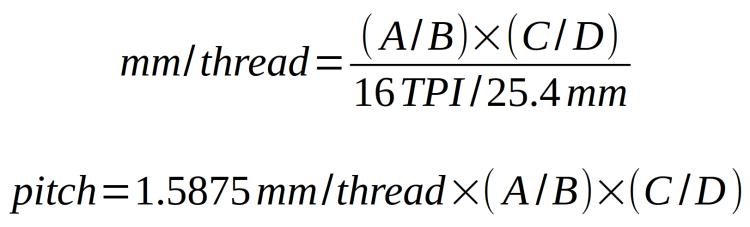
For inch threads:
Mini-lathe – inch thread equation
For metric threads, it’s upside-down and converted:
Mini-lathe – metric thread equation
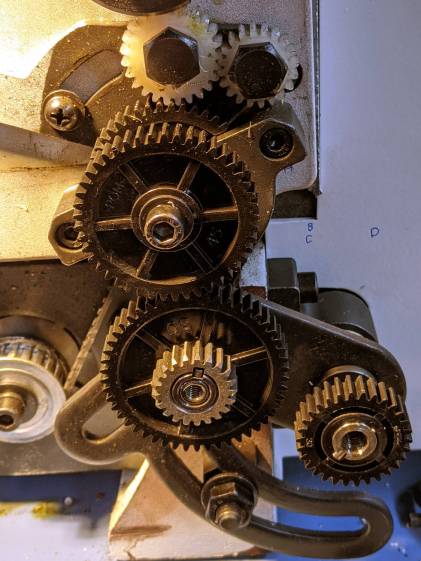
Including a 21 tooth change gear at A or C in the train will get closer to metric threads, but the stud holding the B-C gears on my lathe imposes a minimum B gear size. Here’s a 1 mm thread with a 21-30-45-50 train:
Mini-Lathe change gears – 1 mm – 21 vs 30 tooth – AB
Oops.
You can interchange the AB and CD gear pairs, but the CD pair also has a minimum spacing:
Mini-Lathe change gears – 1 mm – 21 vs 30 tooth – CD
If it worked, the 1 mm thread would be off by -125 ppm, which is surely close enough.
Without the 21 tooth gear, the LittleMachineShop gear calculator produces a 45-55-50-65 train that fits much better, albeit with +875 ppm thread error:
Mini-Lathe change gears – 1 mm – 45 55 50 65
Dropping the 21 tooth gear into the LMS calculator produces a (barely) workable 21-50-60-40 train with -125 ppm error:
Mini-Lathe change gears – 1 mm – 21 50 60 40
The very very snug fit of the screw (omitted here) on the 21 tooth gear nearly hits the 60 tooth gear. Your mileage may vary, of course.
Varioussourcessuggest the gears are module 1, 20° pressure angle, 12 mm bore, and 8 mm thick (mine measure a scant 7.75 mm), with a 3 × 1.4 mm keyway (the key itself is 3 mm square, but it’s half-buried in the shaft).
Mary’s long-suffering garden rake pulled apart while we were flattening a section of what will become something like a lawn next to the garden:
Garden rake – shank and ferrule
For whatever reason, there’s no cross bolt holding the shank into the ferrule, like there should be on any tool subject to pulling force.
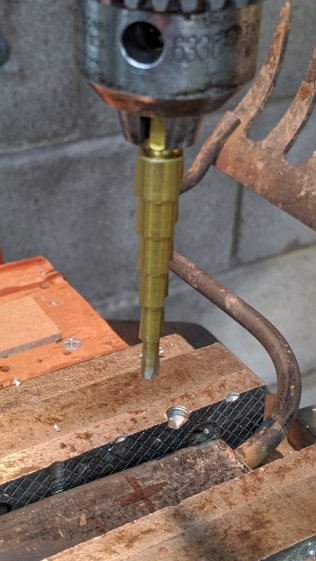
After marking the wide spot on the shank, a couple of good shots with a two pound hammer flattened the ferrule around it well enough to start a hole with a 3/16 step drill:
Garden rake – cross drilling
Go through the far side with a 13/16 inch drill for a generous 5 mm fit, drop a bolt into the hole while it can’t get away, tighten the nyloc nut, and it’s all good:
Garden rake – cross bolt
In fact, it’s better than it ever was, because now the shank can’t pull out until the ferrule falls off the handle. Which could happen, but I’m not averse to another bolt.
Admittedly, it’s not a stainless steel socket head cap screw, because that’d just about double the value of the rake. The handle is in such bad shape that the bolt will probably outlast the wood …
Done!
Update: The consensus says I totally missed the Ritual Invocation of the Epoxy, so:
After trimming off all the extraneous bits, the larger half of the connector (male pins) fits through the tubing and the smaller half (female sockets) barely fits through the bottom bushings.
It turns out half-inch copper pipe fittings (ID = 15.9 mm) almost exactly fit the tubing (OD = 15.7 mm):
Floor Lamp – copper 45° elbow
A quick test showed the 45° (actually, it’s 135°, but we’re deep into plumbing nomenclature) positioned the lamp head too high and with too much reach:
Floor Lamp – gooseneck exercise
So shorten the tube attached to the head and deburr the cut:
Floor Lamp – tube deburring
The 45° fitting is too high and a 90° fitting is obviously too low, so cut a 20° slice out of a 90° fitting:
Floor Lamp – copper 90° elbow – 20° cutout
Cut a snippet of brass tubing to fit, bash to fit, file to hide, buff everything to a high shine, silver-solder it in place, and buff everything again:
Floor Lamp – copper 90° elbow – 20° fill strip
The 5/8 inch aluminum rods serve to stiffen the fitting, smooth out the torch heating, and generally keep things under control.
Wrap the obligatory Kapton tape around the butt ends of the tubes to fill the fitting’s oversize hole, put everything together, and it’s just about perfect:
Floor Lamp – copper 70° elbow – installed
I immobilized the fitting with black Gorilla tape, but it really needs something a bit more permanent. One of these days, maybe, a pair of setscrews will happen.
The additional reach required a little more counterweight on the far side for security, so I added the broken stub of a truck leaf spring. It should be secured firmly to the base plate, but no tool I own can put a dent in those three pounds of spring steel. Maybe it’ll merit a fancy enclosure wrapped around the base?
Grab the buckle in the Sherline vise, center on the post hole, and drill a #38 = 2.58 mm hole:
Reversible Belt Buckle – cross drilling
Tap it M3×0.5, clean out the hole, tap the post + spring back in place, dab threadlocker on the shortest M3 setscrew from the assortment, snug down on the post, and reinstall the belt:
Reversible Belt Buckle – M3 setscrew installed
Looks like it grew there, doesn’t it?
Now, as my buddy dBm will remind me, the real problem is too much weight in the saddle, but this fix should move the symptoms elsewhere …