Ed Nisley's Blog: Shop notes, electronics, firmware, machinery, 3D printing, laser cuttery, and curiosities. Contents: 100% human thinking, 0% AI slop.
The odd numbers are what was left in the bottom of the bottles
Memo to Self: That’s about 8 oz = 250 ml of each color and 500 ml of Black since getting the printer in late Dec 2007. Figuring OEM ink at $2/ml: $3500. Current bulk ink cost is on the order of $20/bottle: $140. The continuous ink system was about $50 back then and $100 now.
If you have to move it to clean behind it, don’t move it.
Dad knew that most dirt wasn’t particularly harmful, so he didn’t worry about it. If you had occasion to move something for whatever reason, that was the appropriate time to break out the vacuum cleaner (or shovel) and deal with whatever you find, but there was never a reason to go looking for trouble.
Of course, I feel the same way. Equally of course, this drives my esteemed wife crazy…
The shop spec says the lug nut torque shall be 104 newton·meter or an equally odd 77 lb·ft. Let’s not get into quibbles about the differences between lb·ft and ft·lb here, OK?
Anyhow, based on the wildly differing and grossly excessive tire pressures left by the guys who installed the new tires, I figured the lug nuts would be over-torqued… as, indeed, they were. My bending-beam torque wrench goes up to 140 n·m and didn’t even come close to breaking those puppies loose.
So I deployed a manly breaker bar and applied most of my weight to the far end. A back of the envelope guesstimate says they were well over 200 n·m, with a few grunt outliers.
Yes, the breakaway torque can be higher than the tightening torque, but they were far beyond even that level.
Lubed the threads, tightened to spec, and it’s all good. I’ll check them next week just to be sure, but sheesh if we had to fix a flat on the road, it would have gotten ugly.
Just got a new shipment of dope from our usual mail-order med supplier. The new dope comes in a livid red capsule, a disconcerting change from the previous green.
So, being an educated and somewhat wary consumer, I check the label to see what’s new. It seems my supplier is dealing from a new manufacturer!
Hitherto, I’d only encountered the word nostrum in phrases preceded by words like quack. The dictionary definition, at least for some values of dictionary, seems to back that up:
The idea behind unit pricing was to simplify comparisons between packages with different quantities: each package would have a price-per-unit value.
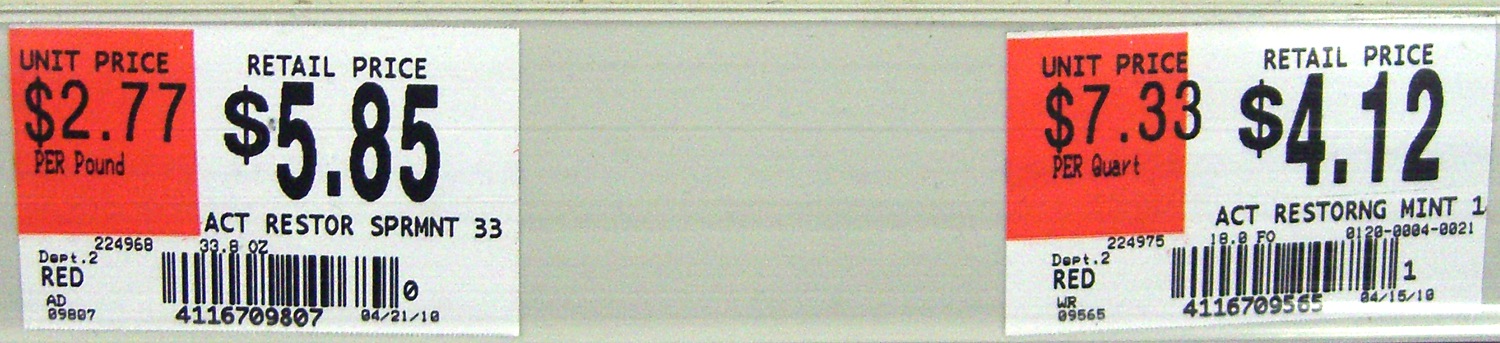
Here are the two shelf labels for two sizes of the lah-dee-dah fluoridating remineralizing mouthwash that our young lady must use for the next few years. The unit price is in the orange block, with some fine print underneath giving the unit. Click for a bigger image; you’ll probably need it.
Unit Pricing Obfuscation
Need a bit more help? Here’s the one on the left:
Price Per Pound
And the one on the right:
Price Per Quart
For those of you in the rest of the world with volumes in liters and weights (uh, masses) in kilograms:
1 pint = 0.5 quart = 1 pound of water
What’s most interesting is that this only occurs when the package with the larger quantity has a higher per-unit price, as with these bottles.
This is a perfect example of something that’s technically legal, but definitely not in keeping with the spirit of the law.
Another interesting situation: if a shelf pricing sticker is missing for one of several similar items, you can be absolutely certain that package is more expensive. A missing shelf price sticker is technically illegal, but I doubt anybody ever gets prosecuted… it’s a simple mistake that could happen to anyone, right?
Because nothing in a Walmart store is left to happenstance, this is obviously planned and approved at the highest levels.
It happens elsewhere, too, but we just happened to be in Walmart this morning. Check it out where you shop…
This story begins years ago, as mentioned there. I’d retrieved the offending outlet expander / extension cord from my mother’s apartment and tossed it in my big box of Extension Cords.
I recently plugged it in and was rewarded with a flash-bang inside the box. Taking it apart reveals two more blackened outlet compartments (in the lower right), but no more missing contact blades.
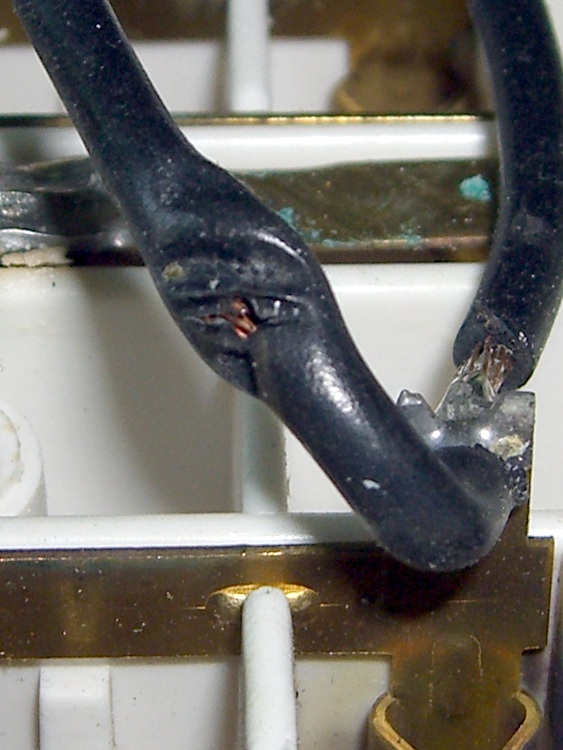
It turns out that the black (hot) wire got caught between a stiffening rib on the back plate and the edge of the box supporting the brass plate connecting the white (neutral) wire to the contacts. Here’s reconstructed view after I cut off the extension cord.
Crushed wire
Flipping the wire over shows the spot where the copper conductor eventually poked through the insulation.
Exposed conductor
It touched the sharp corner of the brass strip just to the left of the divider in this view. The notch in the divider channeled the jet of burning debris across the far wall of the right-hand compartment. The left-hand compartment is completely smudged.
Short-circuit point and debris jets
Looks like I get credit for this one… but even seeing how I did it, I’m not sure there’s any way to know none of the wires got crushed while reassembling the box.
It’s safely in the trash and the cord is in my big box of Random Power Cords.
Memo to Self: Make sure the box fits together smoothly?
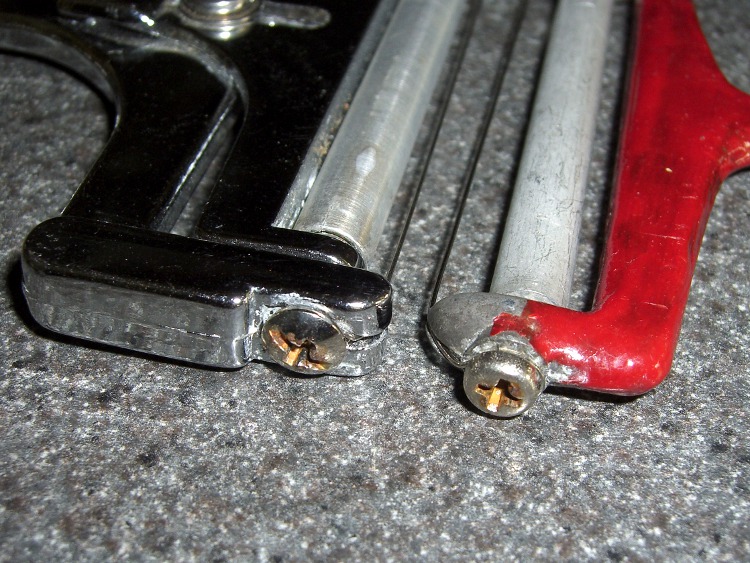
My ladies favor hard cheeses that are murder on cheese slicers. I just replaced the wires on a pair of favorite slicers, using 0.020 inch stainless wire. That’s thicker than the 14-mil wire they came with, so I’m hoping it’ll last longer.
Being thicker, it’s also harder to push through the cheese, so it’s subject to more force and might break sooner. Ah, tradeoffs…
What I really want are monomolecular wires that can cut through anything…
I’ve suggested using a knife on the Romano and Gruyere, reserving the slicers for Cheddar and other sissy cheeses…
Oh, the red stuff on the right-hand slicer is Liquid Electrical Tape. The handle is raw aluminum and leaves smudges all over the place. I’m assuming the layer doesn’t have much lead content, but who knows?