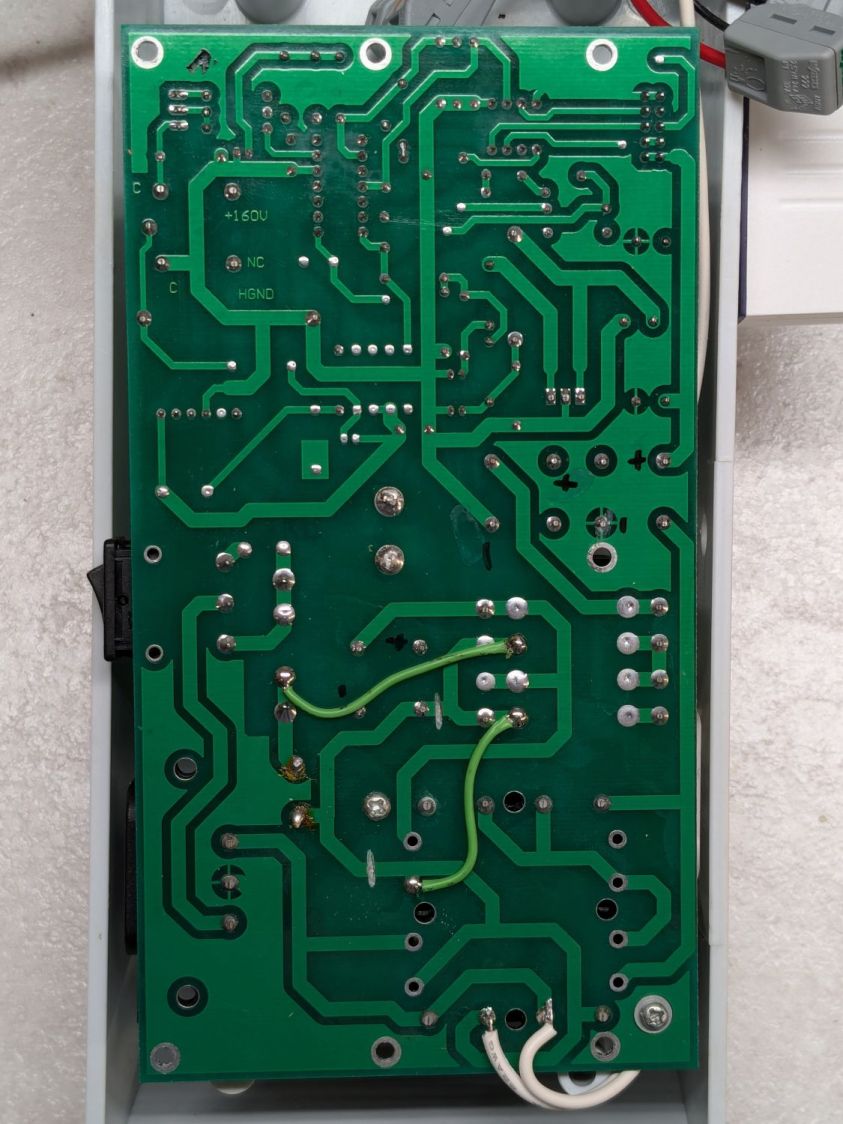
After running reliably for a few weeks, the HQ Sixteen Heisenbug returned, displaying a Motor Stall error on the first attempt to run the motor. This gave me the opportunity to extract the PCB, compare it with the first rough schematic, then correct a few resistor values and connections.
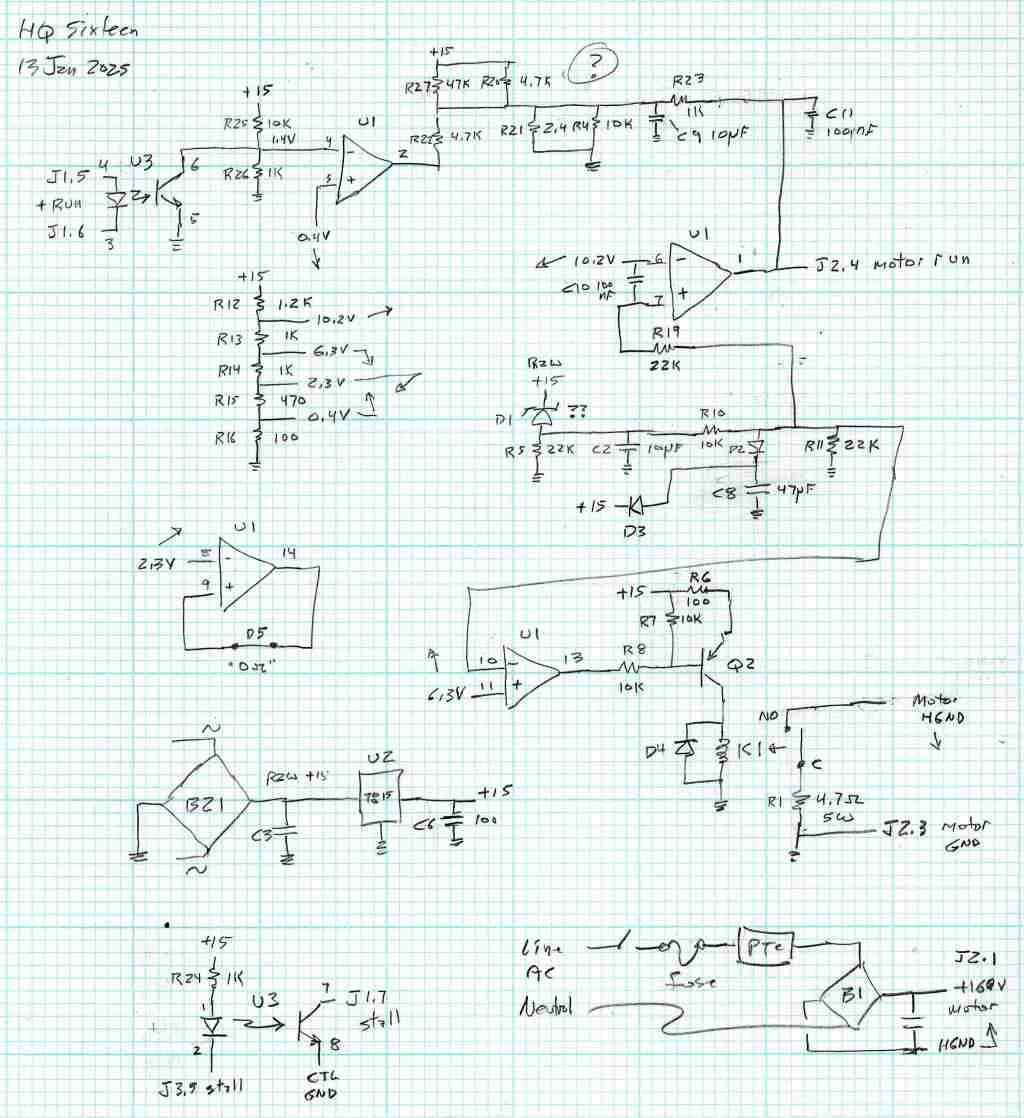
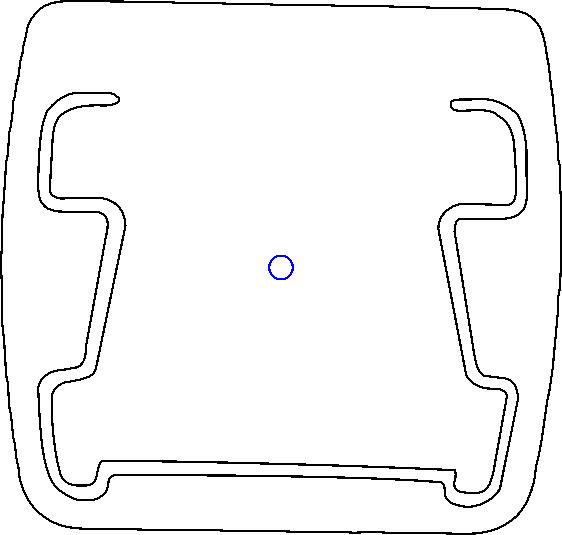
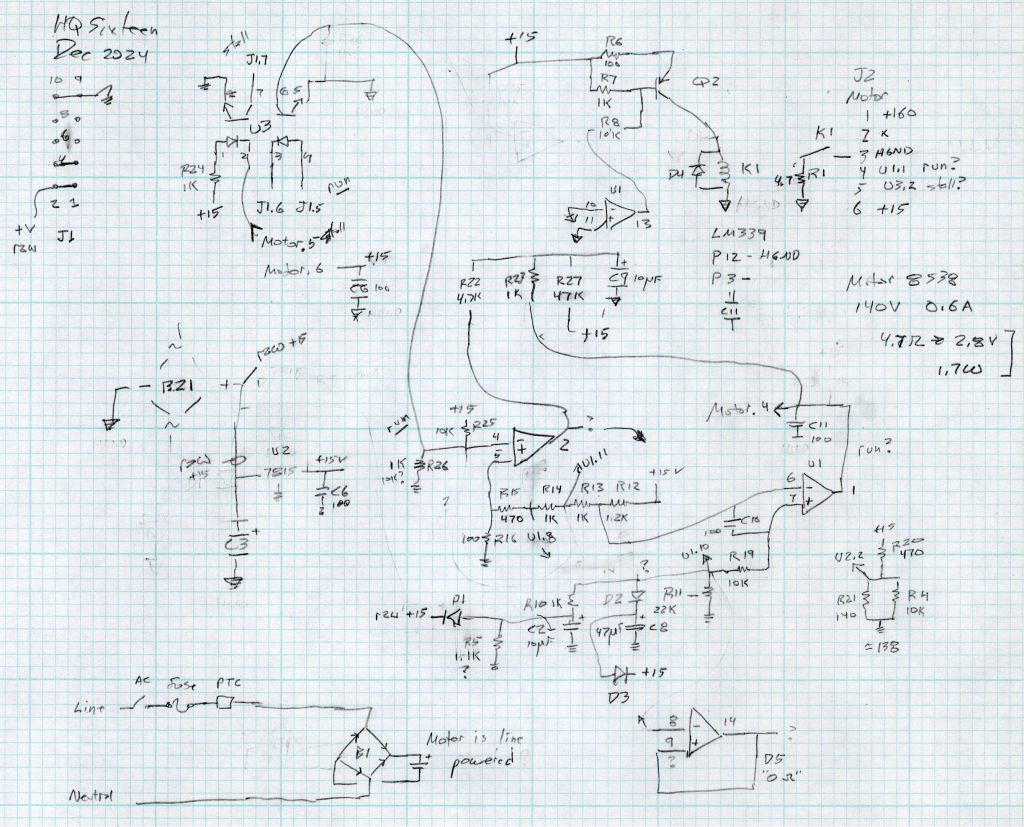
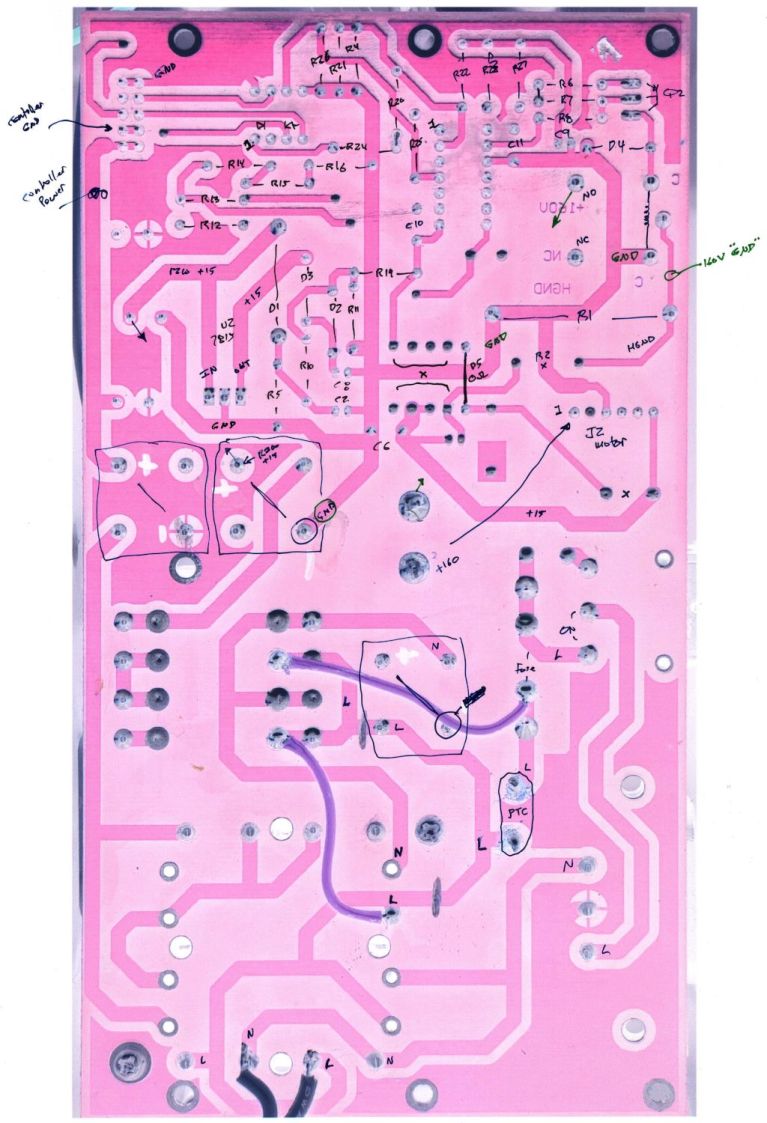
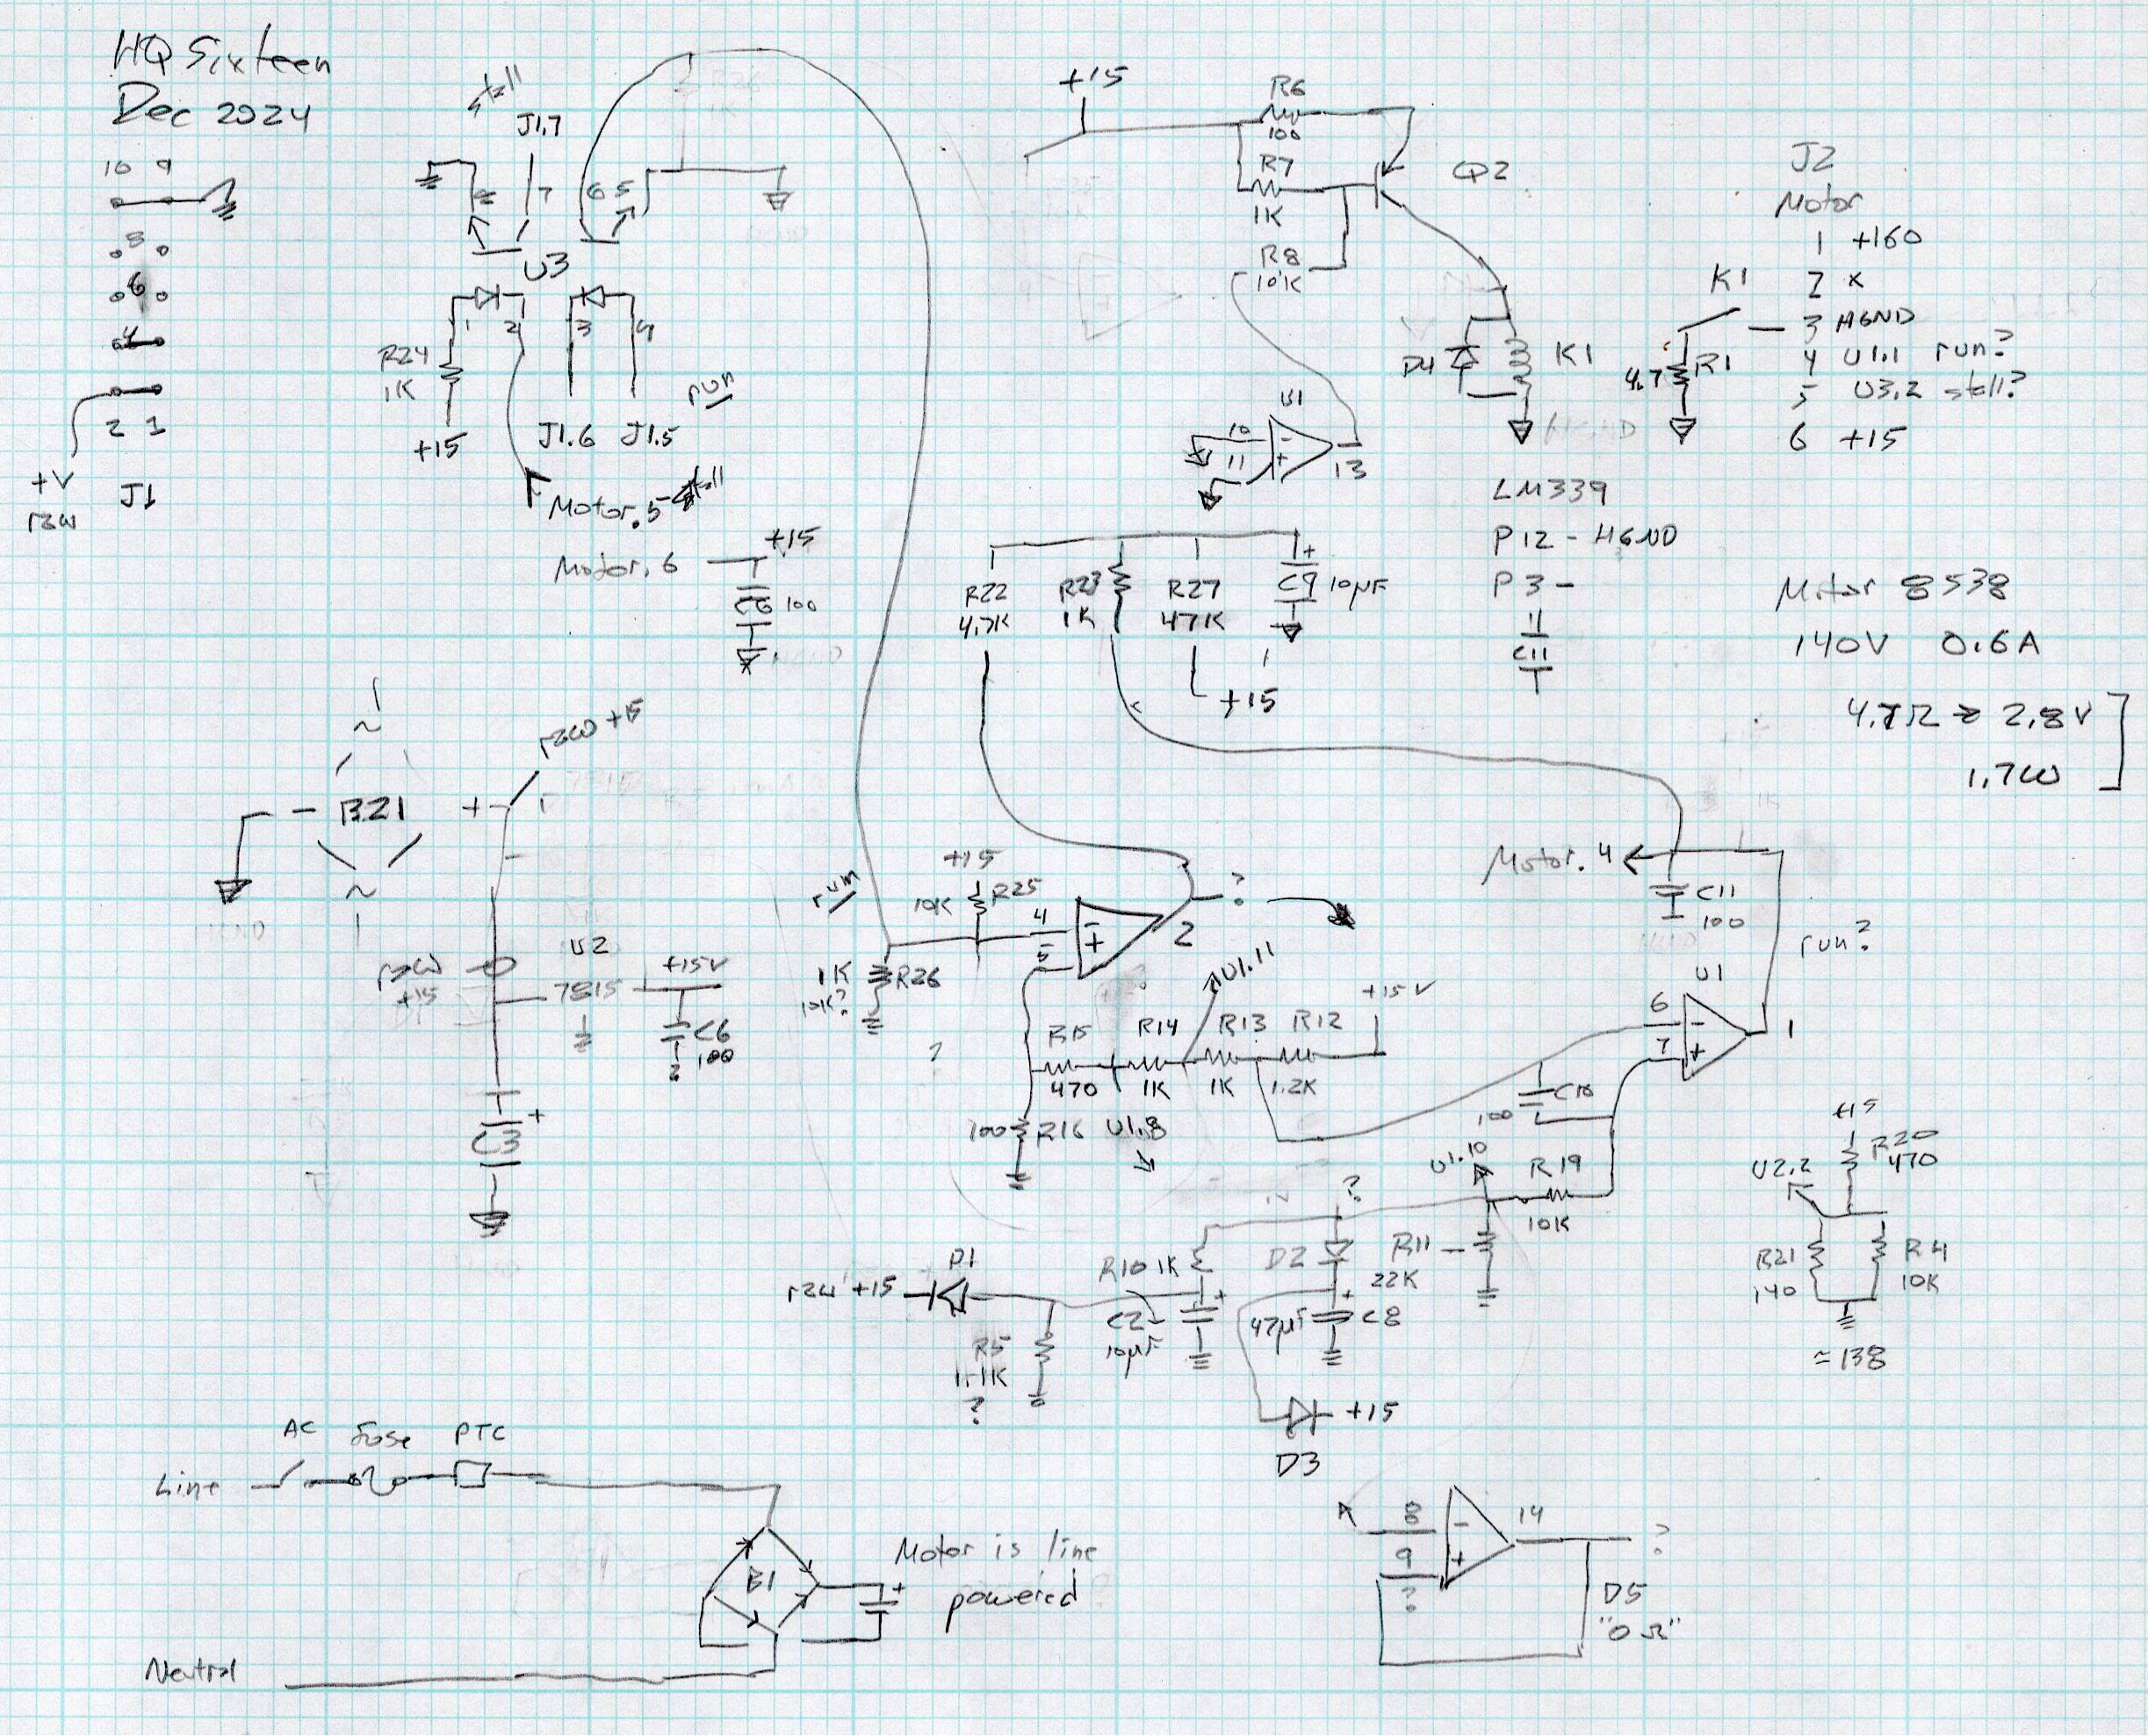
Redrewing (most of) it in somewhat canonical form:
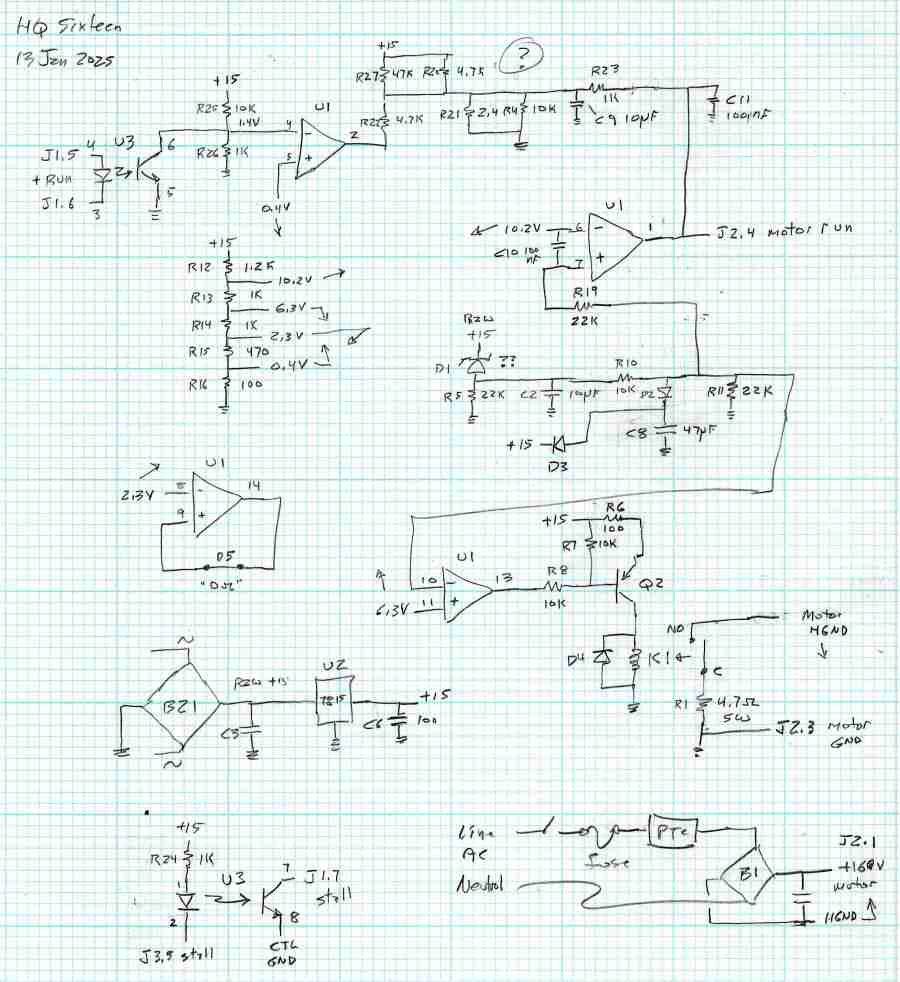
As before:
- Do not assume any connections or components are correct or correctly drawn.
- !!CAUTION!! The motor supply is direct-from-the-AC-line non-isolated +160 VDC.
- !!CAUTION!! The
GNDtraces are not isolated from the AC line and are not at the normal “0 V” AC neutral potential.
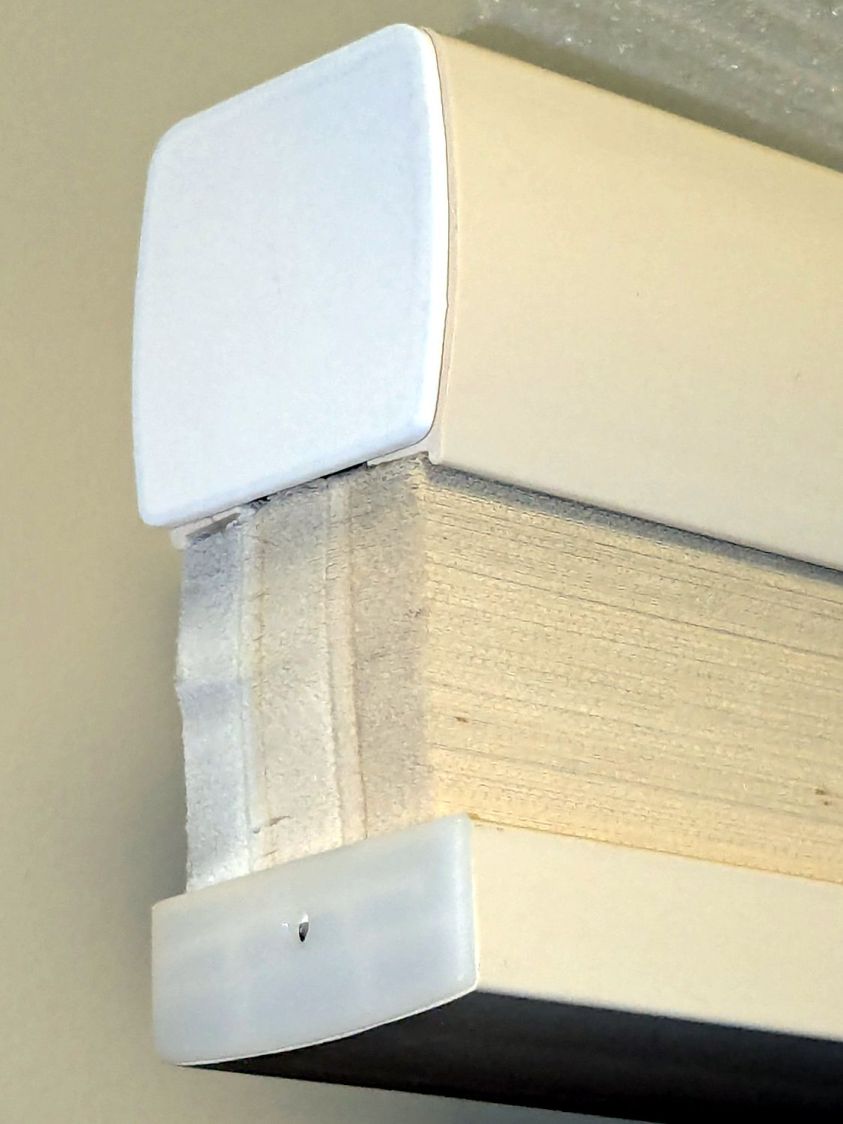
When the machine operates normally, the relay pulls in with a distinct click slightly after the power switch closed. With the Heisenbug in full effect, the relay does not click, suggesting a fault in its driver circuitry.
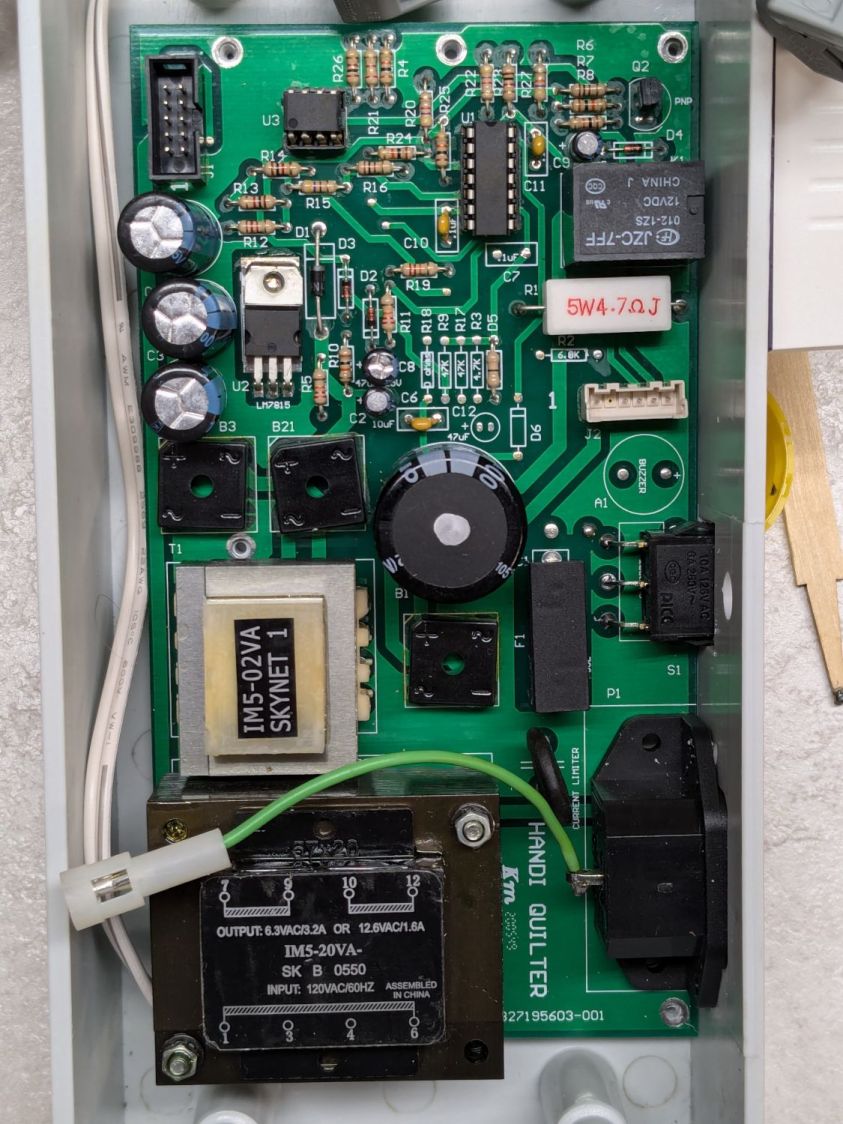
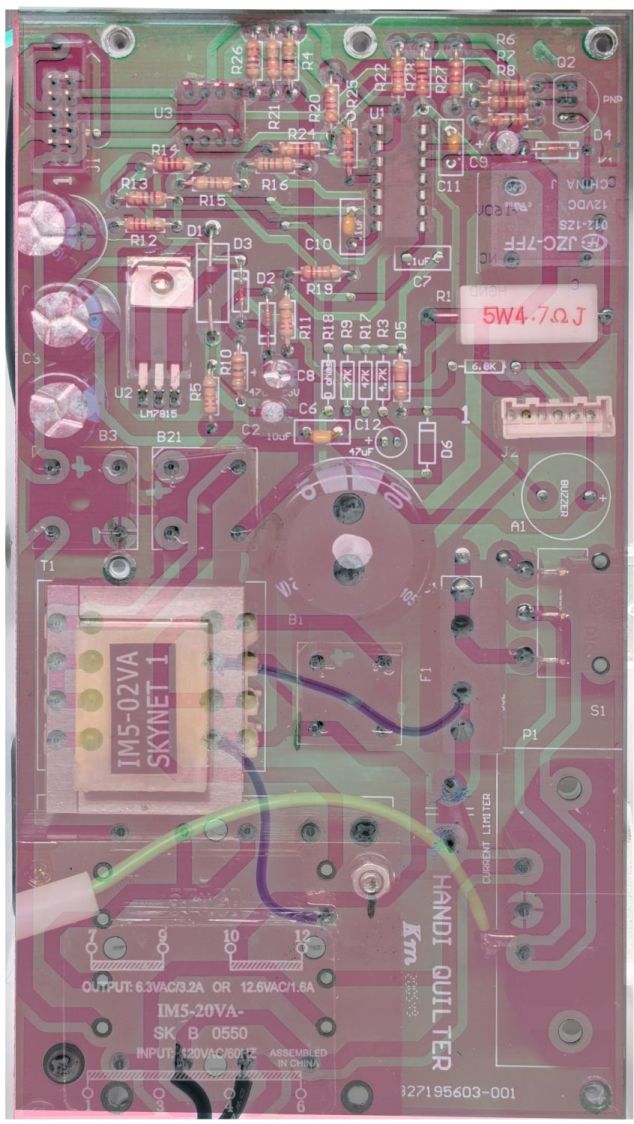
With the motor pod resting on a box beside the machine, I gingerly measured the voltage at various points on the top of the PCB. As far as I could tell, the entire +15 VDC power supply was dead: no voltage at either the input or output terminal of the LM7815 regulator!
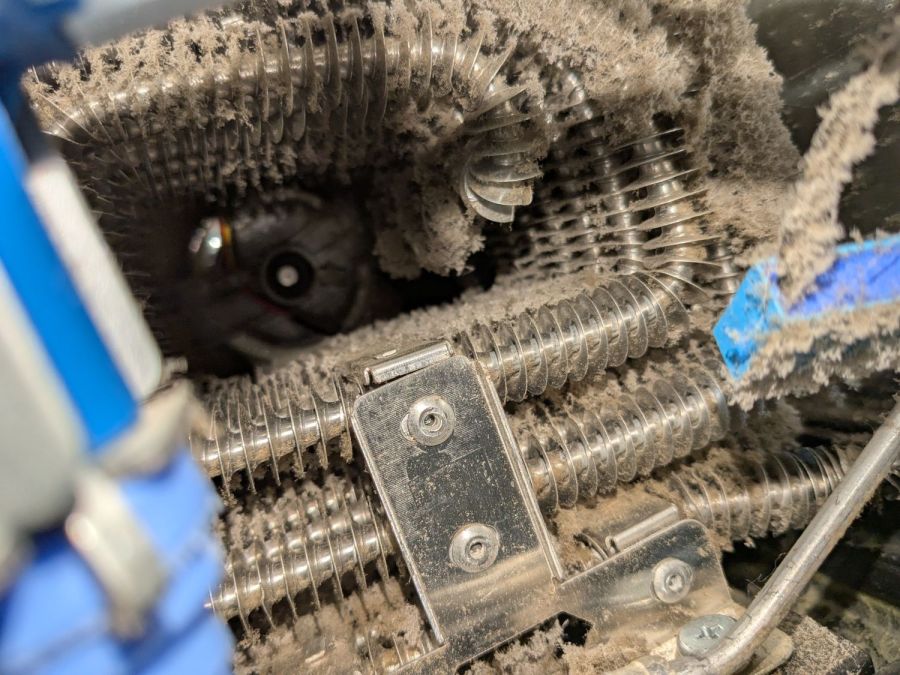
NOTE: The obvious screws along the top edge of the PCB are not connected to the power PCB circuit GND. Instead, they’re part of the controller’s power circuitry from the isolated power supply produced by rectifier bridge B3 and passed through J1 in the upper left corner of the PCB. Instead, the left lead on R1 (the 5W sandbox resistor) is a convenient GND terminal.
So I hauled the little DSO150 battery-powered oscilloscope and a handful of clip leads up from the Basement Laboratory, got everything arranged, turned on the power, and the machine worked perfectly again.
That’s why it’s called a Heisenbug: look at it and it vanishes.
Given a faint indication of power supply problems, I verified all four diodes in Bridge Rectifier B21 are OK and the Skynet transformer windings were solid. I resoldered all the PCB connections from the transformer to U2, the LM7815 regulator, plus the green jumper wires.
The machine is now back together, it continues to work, and all my test equipment is back in the basement.
If it happens again, I’ll mount a cheerful LED on the pod to show the supply is working.


