Ed Nisley's Blog: Shop notes, electronics, firmware, machinery, 3D printing, laser cuttery, and curiosities. Contents: 100% human thinking, 0% AI slop.
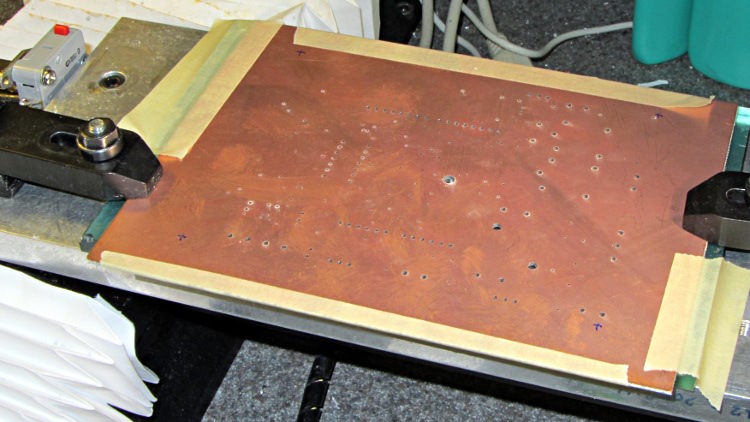
This one came out surprisingly well, apart from the total faceplant with that resistor. With any luck, it’ll measure MOSFET on-state drain resistance over temperature for an upcoming Circuit Cellar column; it’s a honkin’ big Arduino shield, of course.
I think I can epoxy the resistor kinda-sorta in the right spot without having to drill through the PCB into the traces. Maybe nobody will notice?
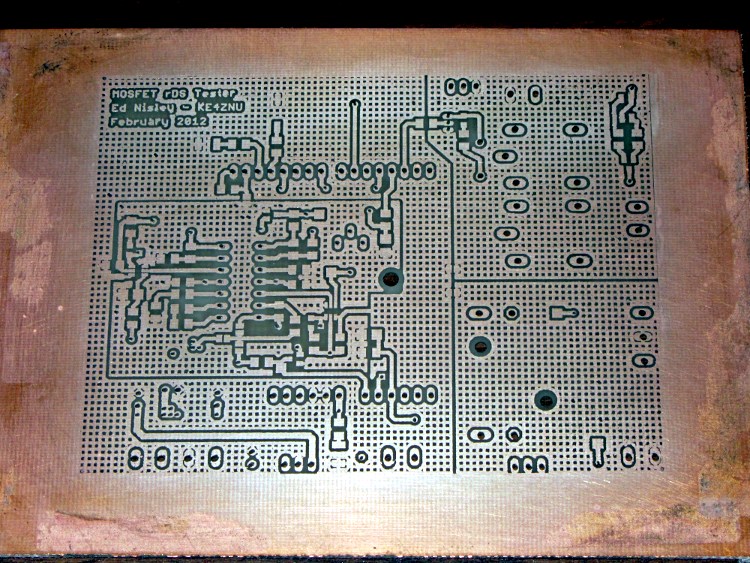
The traces came out fairly well, although I had to do both the top and bottom toner transfer step twice to get good adhesion. Sometimes it works, sometimes it doesn’t, and I can’t pin down any meaningful differences in the process.
And it really does have four distinct ground planes. The upper right carries 8 A PWM Peltier current, the lower right has 3 A drain current, the rectangle in the middle is the analog op-amp circuitry tied to the Analog common, and surrounding that is the usual Arduino bouncy digital ground stuff. The fact that Analog common merges with digital ground on the Arduino PCB is just the way it is…
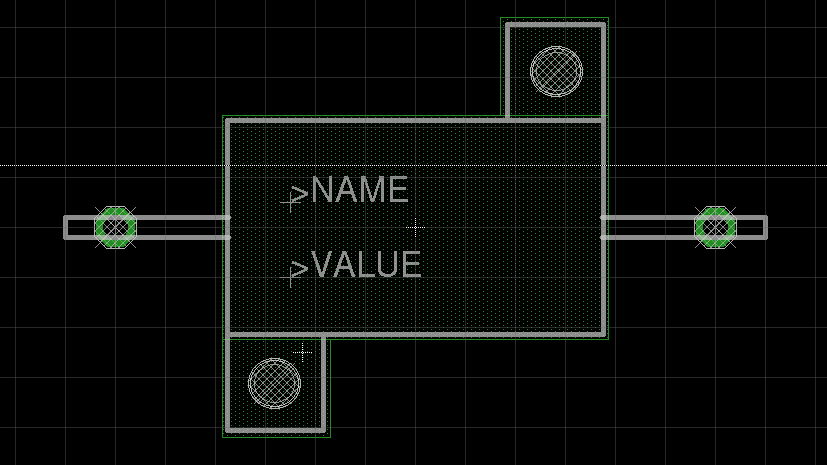
It appears there are at least two different 10 W aluminum resistor sizes: the one used by Dale and the one used by everybody else. It’s either that or the EAGLE HS10 symbol is wrong…
Using those dimensions, here’s a part that more closely fits the resistors in my heap. EAGLE 6 uses an XML file format, so you can stuff some ASCII text into the appropriate sections of your custom.lbr file (or whatever).
The EAGLE package, which remains HS10 as in the resistor-power library, should produce something that looks like this:
EAGLE 10 W Resistor package
The XML code includes top-keepout rectangles under the body footprint:
The third hand grabbers I have all put bare alligator clip ferrules in the adjustable sockets with a thumbscrew to secure them. Over time, that thumbscrew crunches the ferrule and makes the clip hard to adjust. This has become enough of an annoyance that I rummaged around in the brass tubing cutoffs to find some that fit into the ferrules:
Alligator clip with brass tube insert
Given the sorry state of the ferrules, they required quite a bit of squeezing and shaping until that tube fit inside, but after that they rounded up nicely.
I suppose I should solder the tubes in place, but …
These are the bare cells, without the protection circuit in series, so the voltage is a bit higher than the camera will see. One is completely dead and two of them appear to have about 1 A·h of capacity, but the discharge voltage evidently drops below what the camera considers acceptable.
They’d work fine driving a less fussy load, though…
It seems that a much older version of Eagle allowed device names along the lines of ELECTRET MIC that contained blanks and worked perfectly at the time. Since then, the rules changed to prohibit blanks, but the EAGLE 5.x series evidently allowed those names to exist as long as they weren’t used in the schematic or touched in the library editor. In 6.x, however, you can’t even load the library without triggering an error message.
Because 6.x won’t load the library, you can’t use the library editor to remove the blank.
Because the most recent version of 5.x kvetches about the blank, you can’t use the library editor to remove the blank.
Having only two offending device names, I figured I could use a hex editor to jam a hyphen in place of the blanks and be done with it. Come to find out that EAGLE (wisely) wraps a checksum around the binary library file to detect such changes and prevent the files from loading. I think that’s an excellent idea, even if it was inconvenient in this situation.
Fortunately, 6.x both complains about the problem and offers up a “text editor” window with the complete XML source code for the library that it converted from the 5.x binary format.
So:
Copy-and-paste the text into an editor that supports highlighted XML editing
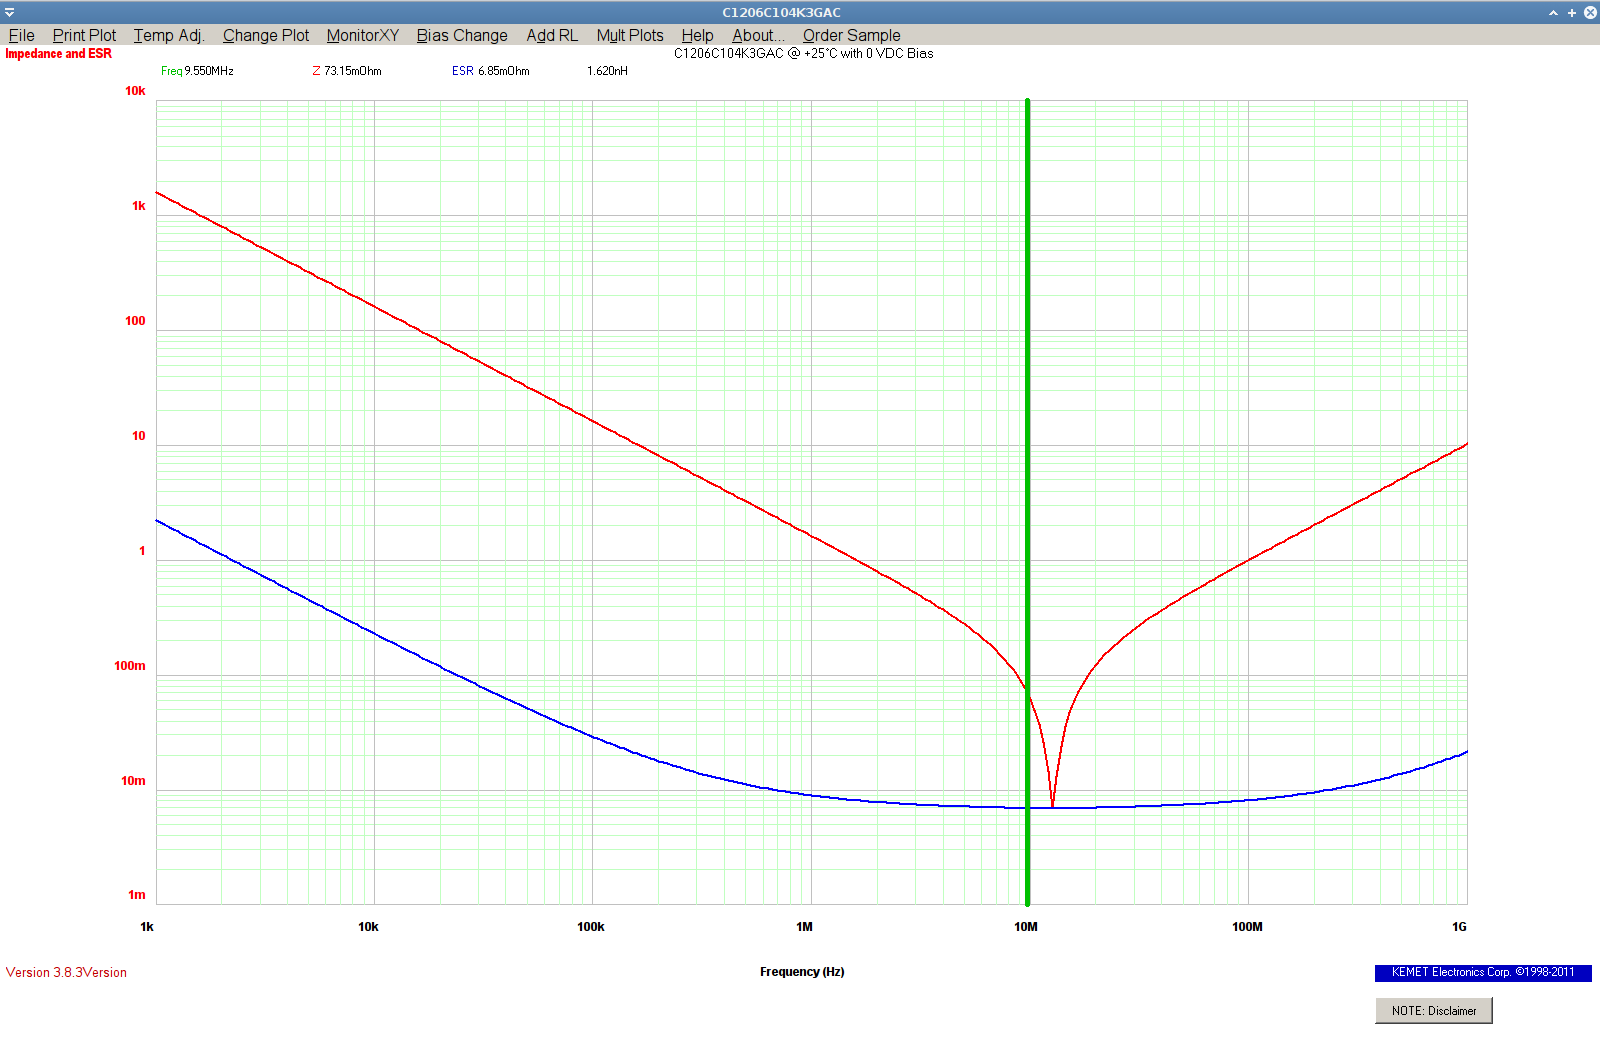
A Circuit Cellar reader recommended the KEMET Spice calculator that lets you explore the Z / ESR / capacitance / inductance of their various capacitors:
Faced with the need to measure heatsink temperature in an Arduino project and being unwilling to putz around with a MAX6675 thermocouple amp, I found a bag of thermistors in the heap. Unlike most surplus, the bag pedigreed them as Semitec 103CT-4, which led to some relevant parameters:
T0 = 25 °C
R0 = 10 kΩ
B = 3270 K
The equation for a thermistor’s resistance at a given temperature (in K, not °C) is:
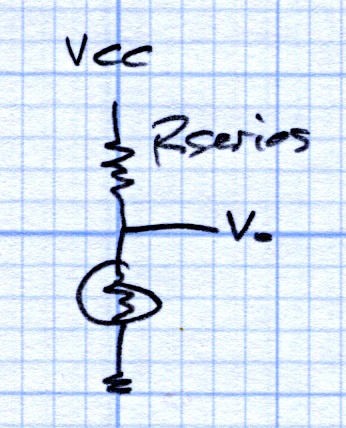
Setting Rseries = 10 KΩ and applying a bit of spreadsheet-fu produces this:
Thermistor Linearization – Rseries – Graph
Getting within +2 °C /-1 °C over -20 °C to 60 °C isn’t all that bad, but … I wondered whether there might be an easy way to get better linearization. The heatsink temperature will range from about -10 °C to 60 °C (yes, there will be a Peltier cooler involved), so the range is a bit broader than usual.
A bit of diligent rummaging turned up that description, which led to US Patent 3,316,765 from back in 1967, which teaches the concept of two different thermistors, one for low temperatures and one for high temperatures, with some resistive blending:
Patent 3316765 Fig 3
The patent includes the claim of many different thermistors, each with a series resistor, to cover a much broader temperature range.
Given a bag of identical thermistors, I wondered what might be possible. A bit more spreadsheet-fu produced this:
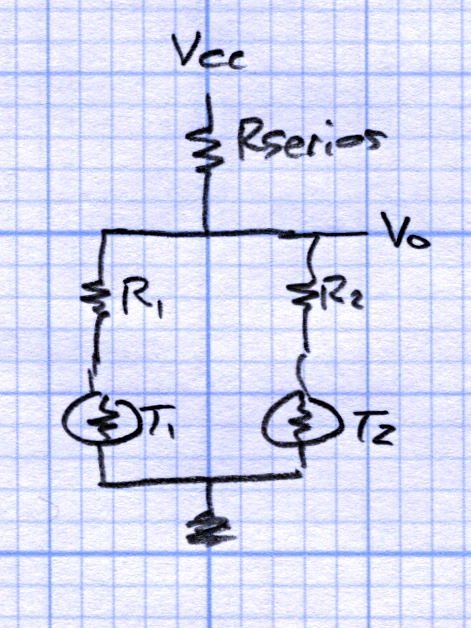
Which corresponds to this sketch, with Rseries = 6.2 kΩ, R1 = 27 kΩ, and R2 = 0.0:
Thermistor Linearization – Dual Thermistors
All in all, a nicely centered ±1 °C error from -15 °C to +60 °C can’t be beat. The output voltage even spans 0.13 to 0.71 of Vcc, about 9 of the available 10 ADC bits.
Those two resistors came from hand-tweaking with standard values, so it’s not like there’s a genetic algorithm involved. The value of Rseries wants to be a bit below the parallel combination of the two branches near 30 °C and R1 seems happiest around the 0 °C thermistor resistance. I vaguely thought about using a multivariable solver, but what’s the point?
The result seems good enough that I didn’t try three thermistors. T2, the one with R2=0, already handles the high temperature range and the low end is fine, so it seems there’s not much to be gained. If you had a stash of different thermistors and knew their characteristics, then the results would be different.
Admittedly, one could program the actual logarithmic equation to unbend a single thermistor’s voltage into temperature, but I must kludge up a thermistor mount anyway, so why not entomb two thermistors and an SMD resistor, then use a linear fit? It’s not like fancy math will give the whole lashup any greater accuracy.
The spreadsheet may be of interest. It started out as an OpenOffice spreadsheet, but WordPress doesn’t permit *.ods files, soooo it’s in MS Excel format.