Ed Nisley's Blog: Shop notes, electronics, firmware, machinery, 3D printing, laser cuttery, and curiosities. Contents: 100% human thinking, 0% AI slop.
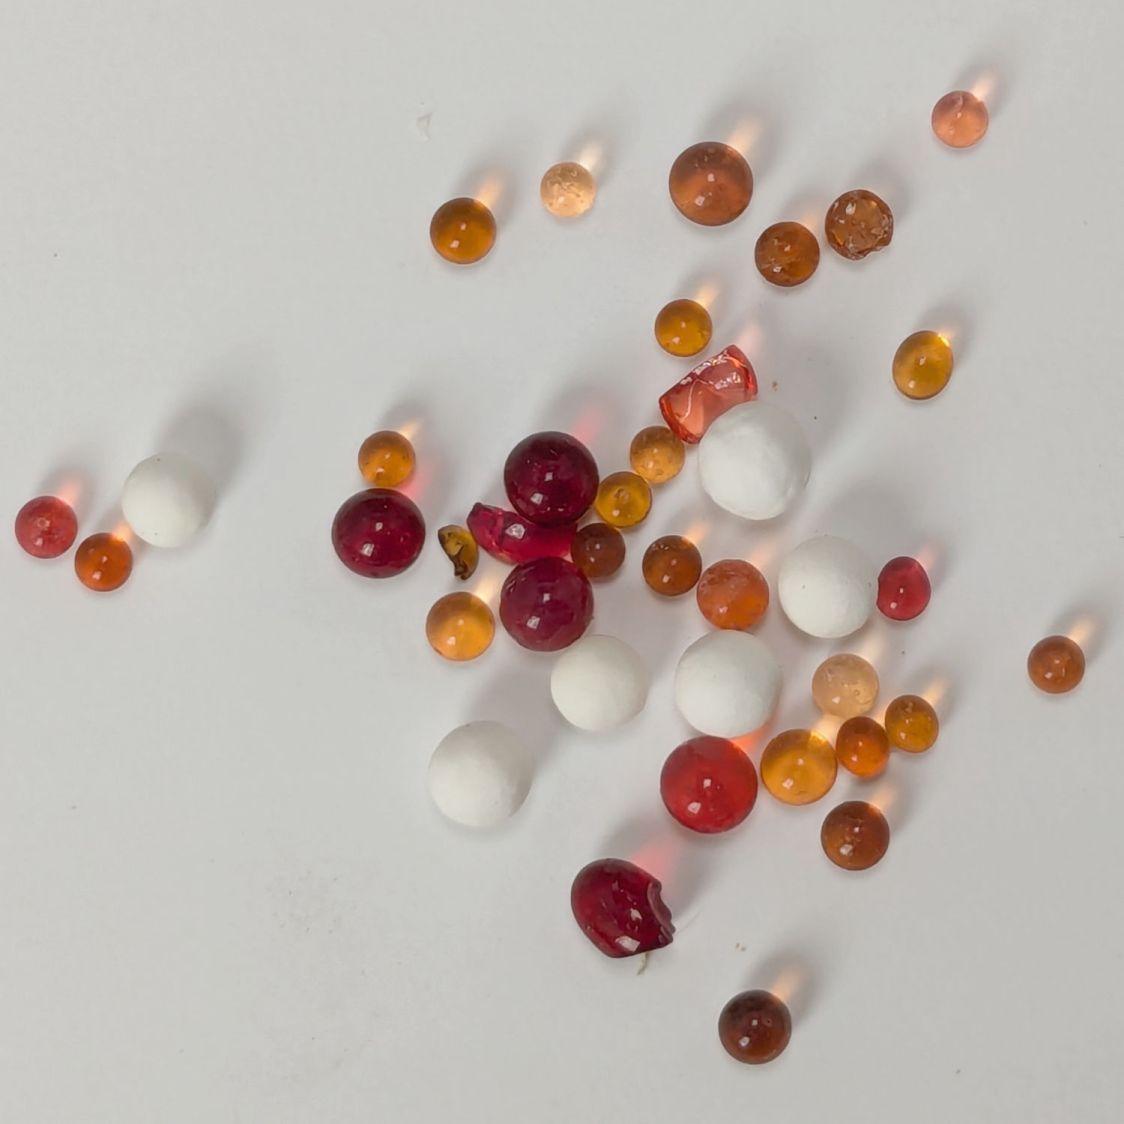
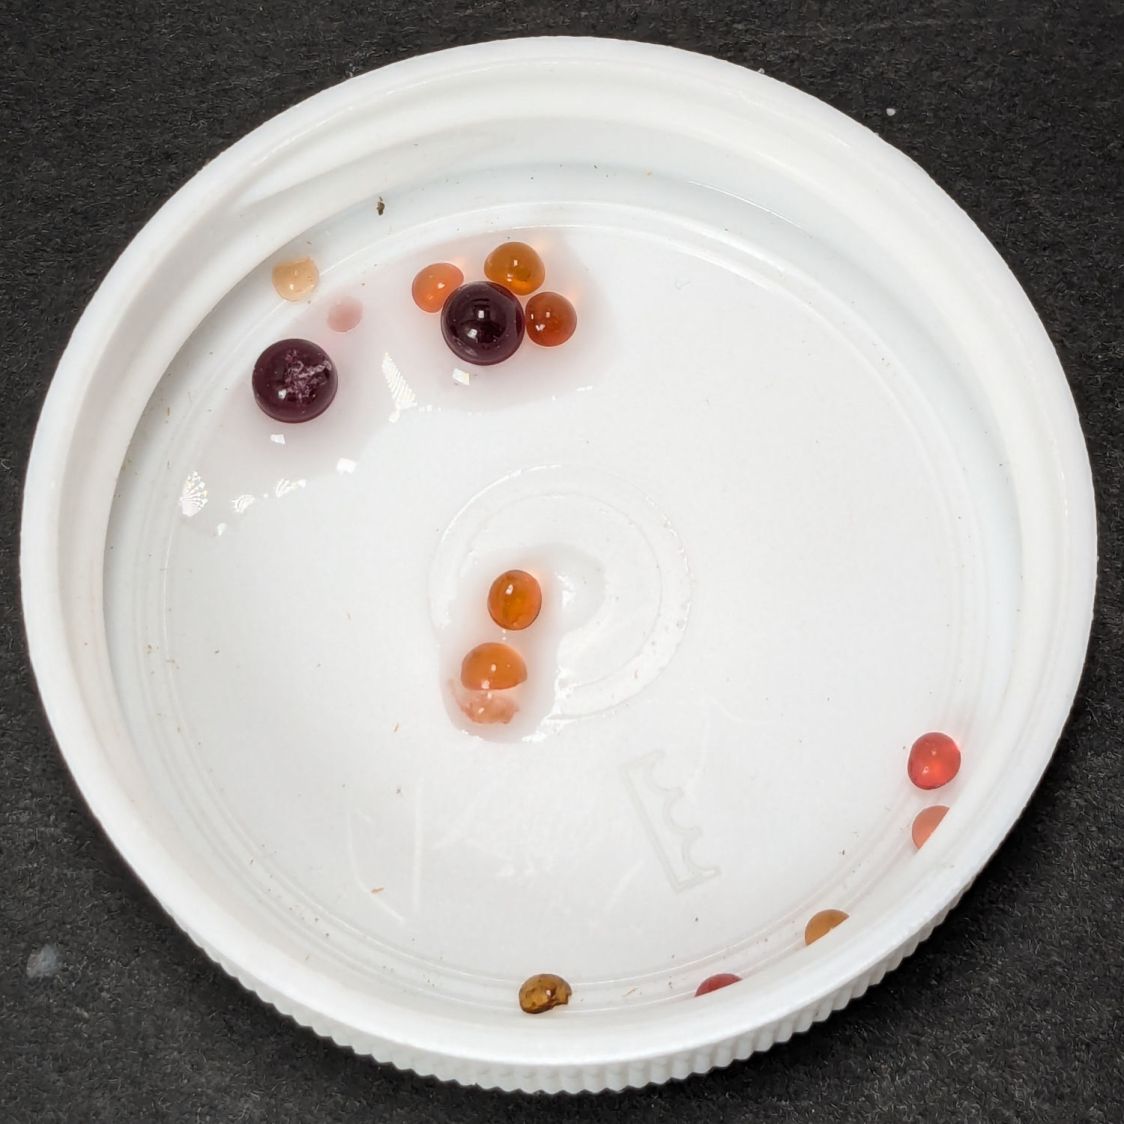
After a few days, it was obvious only the larger beads changed color and, no matter what the description said, they were not going to become any color I would recognize as green.
While the larger ones did get darker, the smaller ones must have already been at their limit of adsorption and remained at the same shade.
For humidity levels under about 20%, I think changing the desiccant every month or so is the only way to be sure.
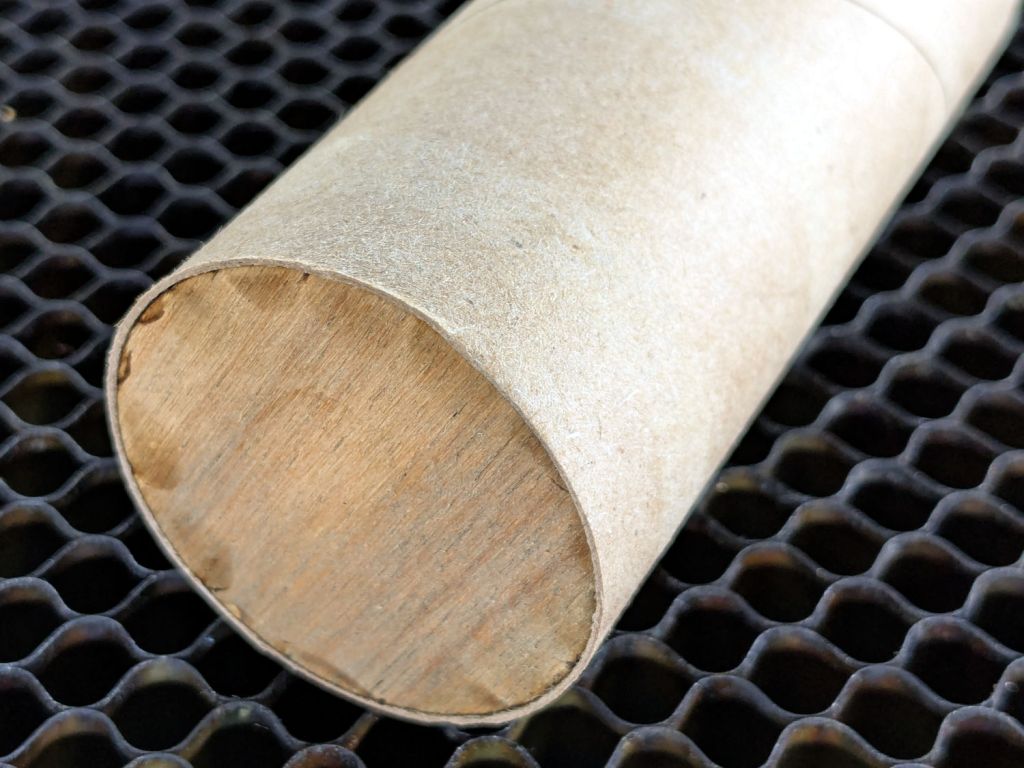
Whereupon the tube remains nicely tubular on both ends and aligned along the chuck axis:
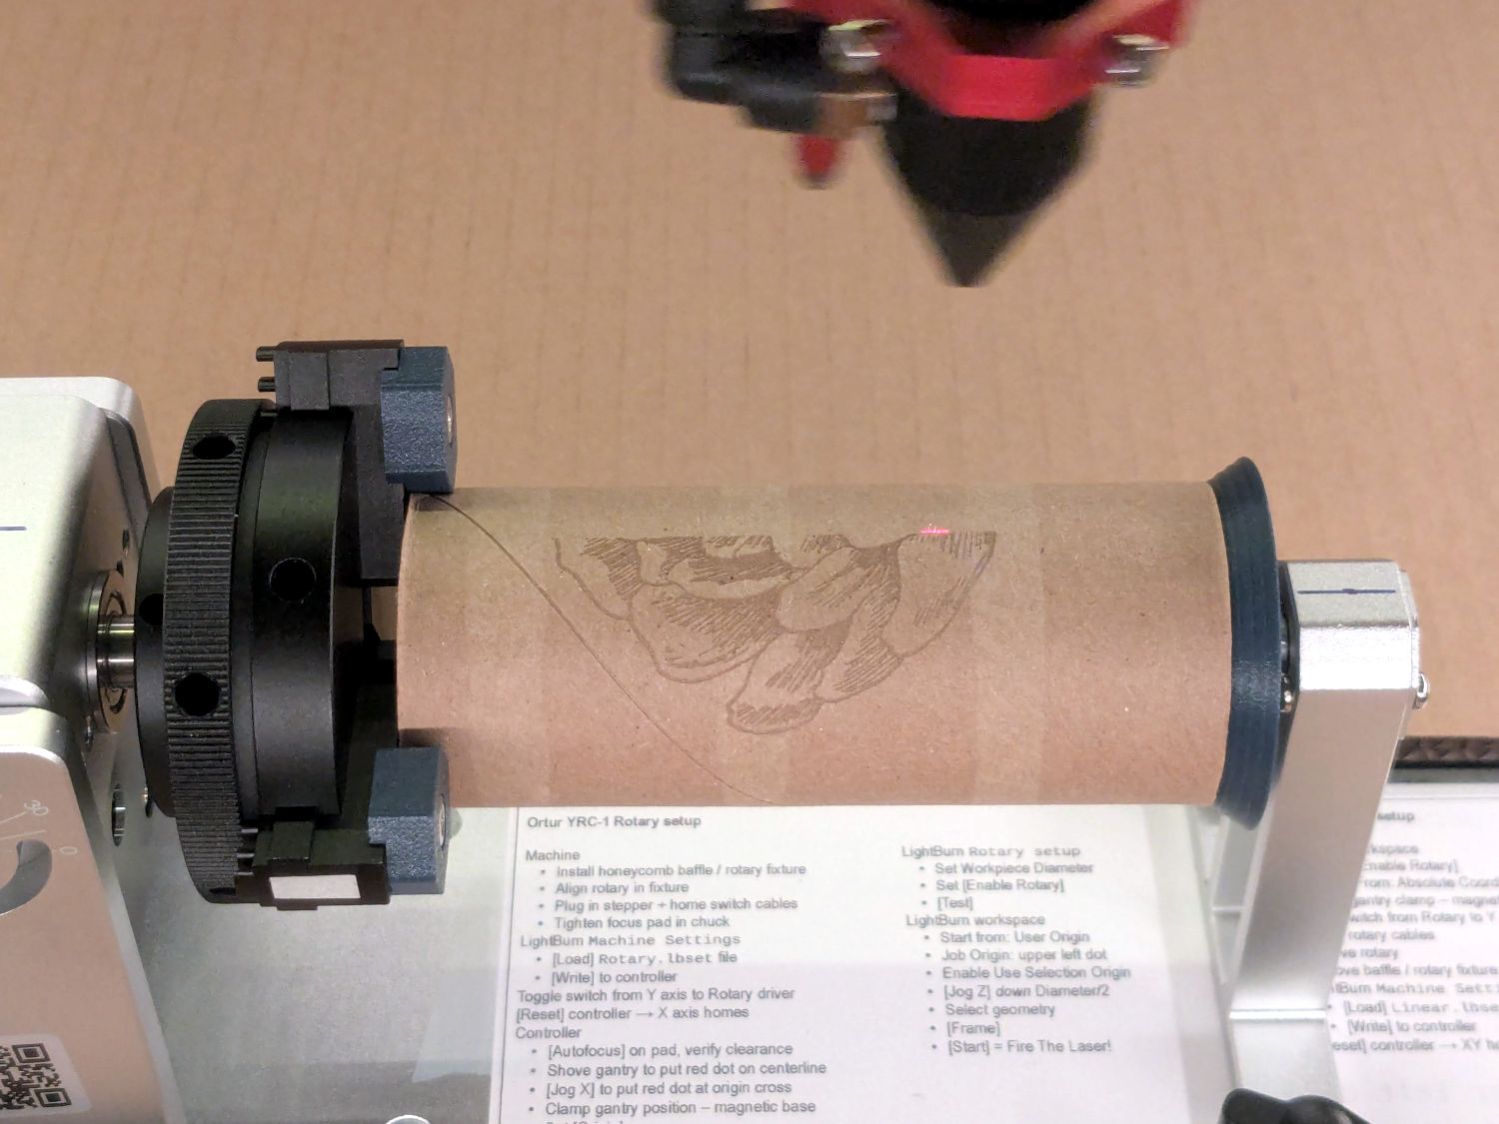
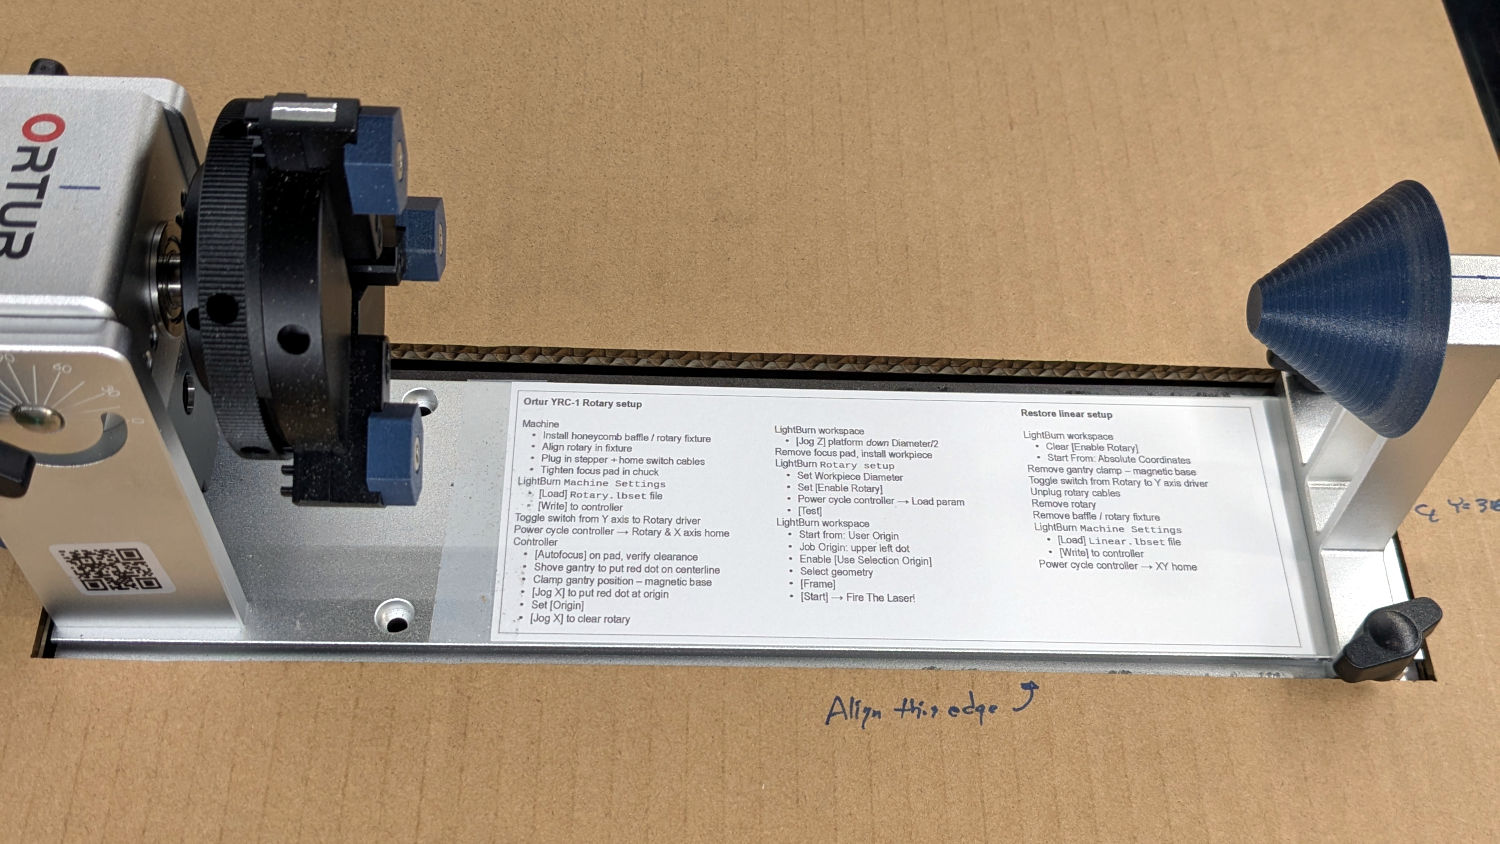
Ortur YRC-1 – chucked cardboard tube
Which is why you save all that scrap material …
Yes, it’s the core from a toilet paper roll, which is way cheaper than burning through tumblers / mugs / shot glasses / whatever while figuring this stuff out.
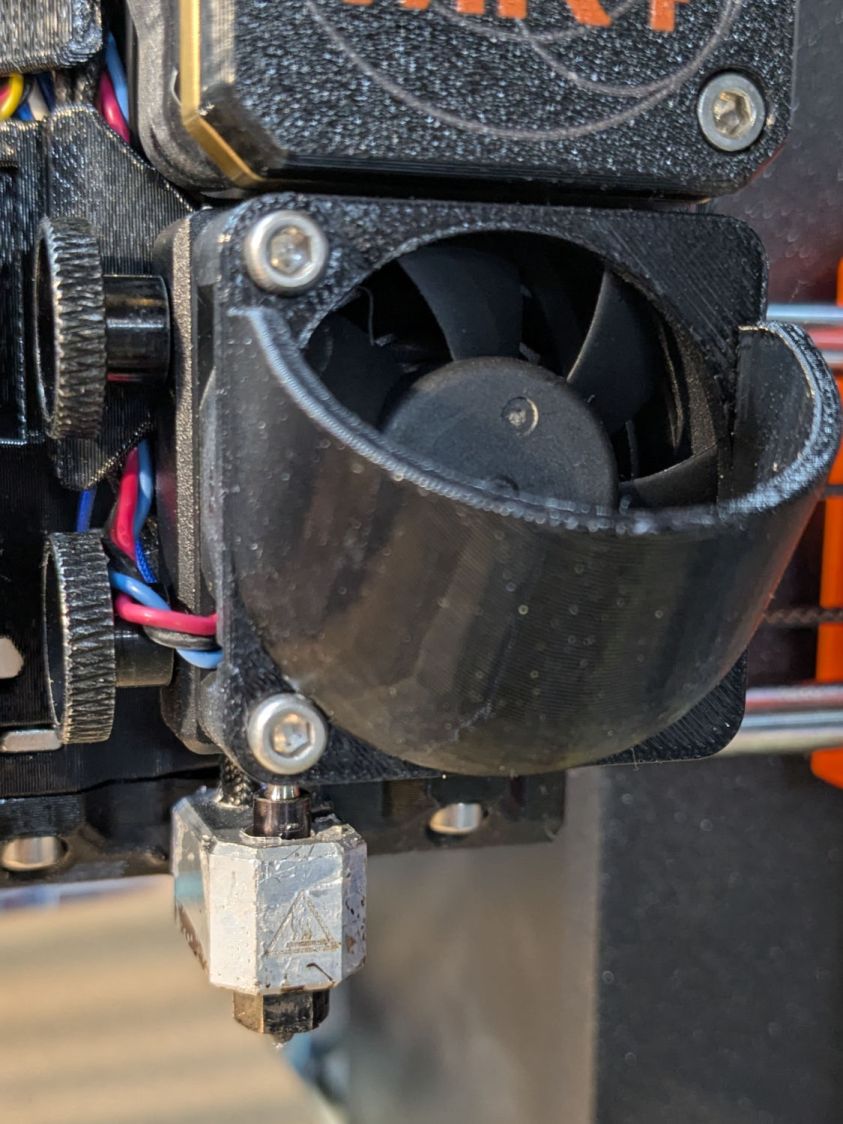
For obvious reasons, it doesn’t fit with the inlet scoop I installed as part of blinging the MK4:
Prusa MK4 Nextruder Tool – inlet scoop installed
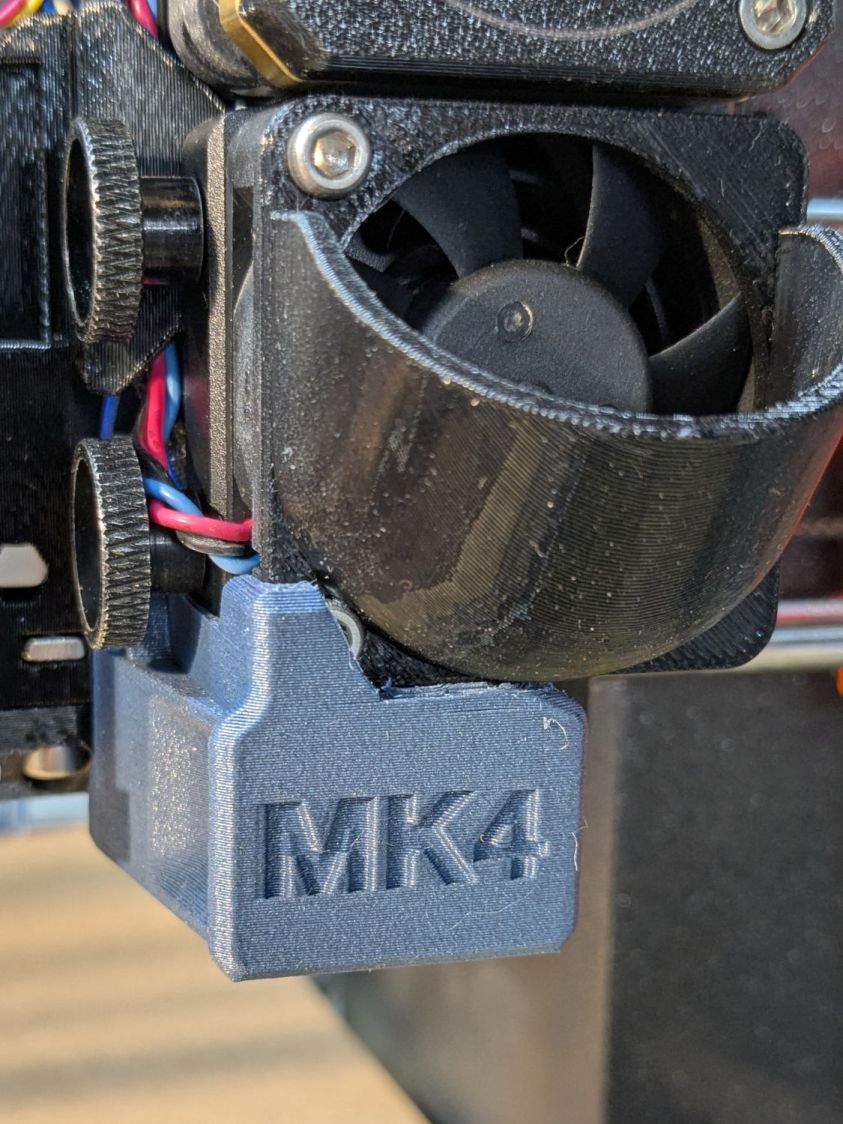
Removing the scoop is a matter of removing those two cap screws, which is no big deal, but a little flush-cutter action made that problem Go Away forever:
Prusa MK4 Nextruder Tool – inlet scoop mod
Yeah, I should have modified the solid model. Maybe next time.
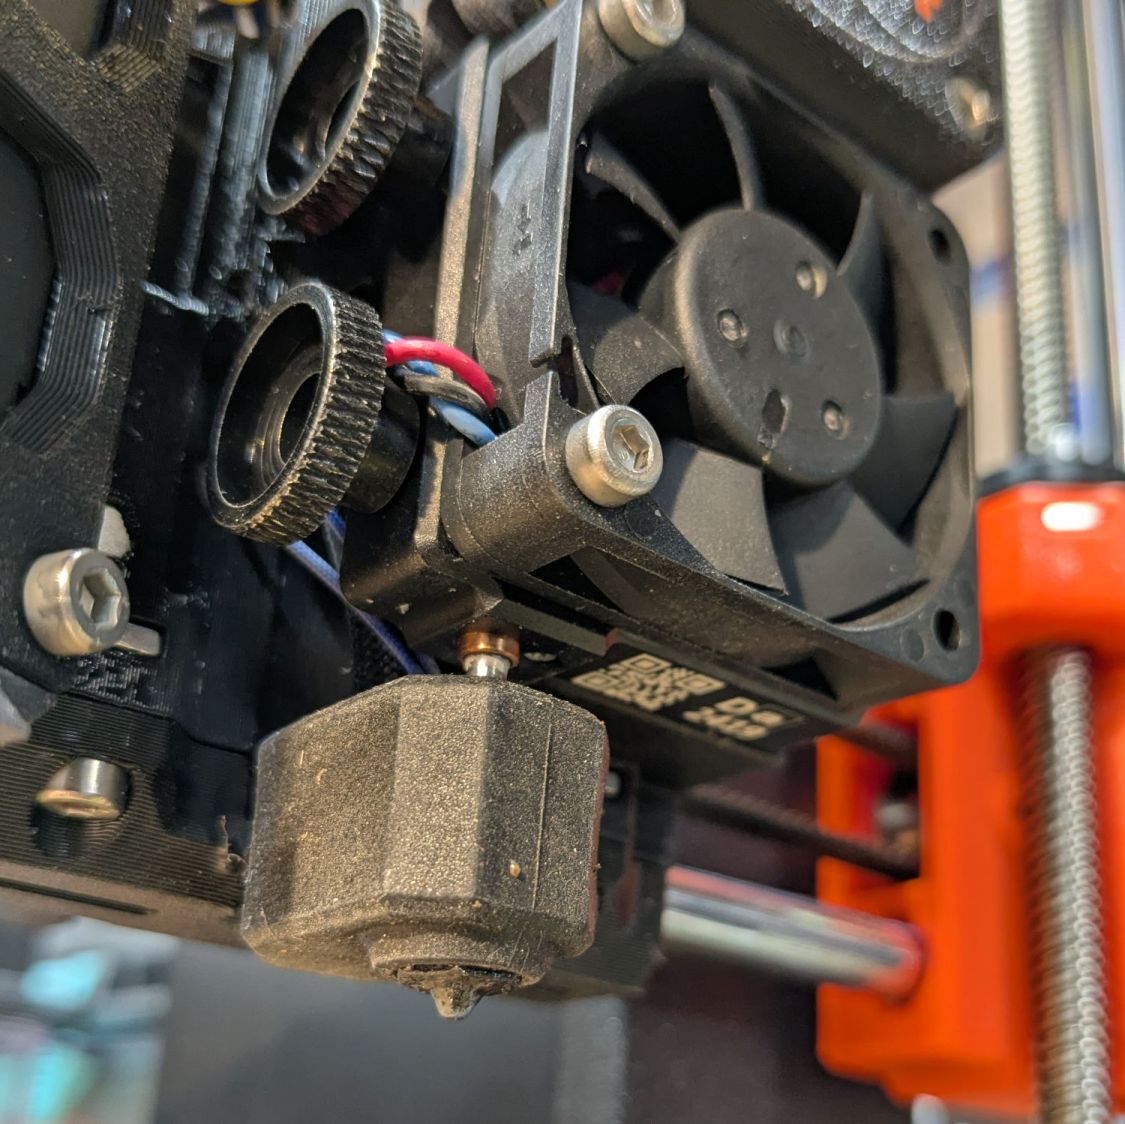
A version of the tool fits extruders covered with an Official Prusa Silicone Sock thermal insulator, but they were out of stock when I was in the mood. My heater wears a knockoff sock:
Prusa MK4 Nextruder Tool – silicone sock vs nozzle
Unlike the Official Sock, there’s no way to get a wrench on the nozzle with that one installed, but removing the sock is no big deal.
I apparently installed the nozzle / heater block slightly higher than specified, so the tool didn’t quite fit. Loosening those two thumbscrews and lowering the nozzle to fit the tool solved that problem. Fortunately, the automatic bed leveling routine corrects for nozzle height differences on the fly.
The scoop is back on the fan, the sock once again surrounds the heater, and I can easily swap in the 0.8 mm nozzle when the time comes.
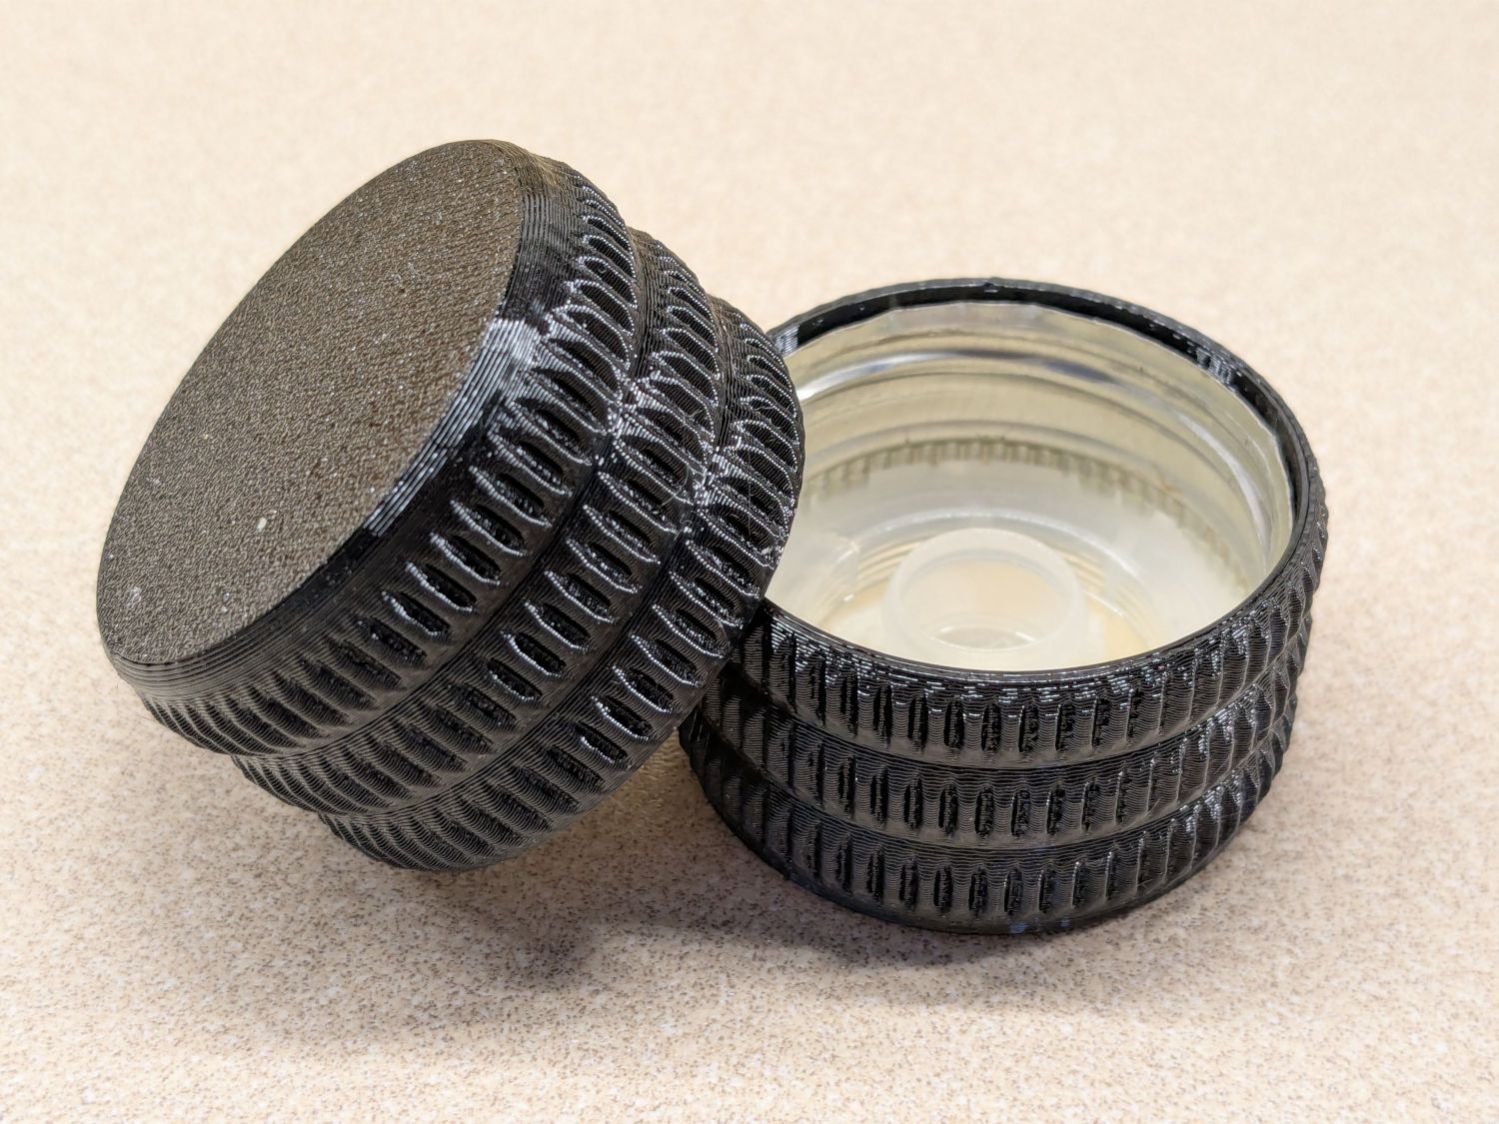
We buy olive oil in large bottles, then fill smaller bottles for easier handling. The caps on those bottles were never meant to last as long as we keep them and the thin, deeply drawn aluminum tends to crack after a while.
So I conjured a cap cover from the vasty digital deep:
Olive Oil Cap – solid model
Which looks exactly like you’d expect when printed in black PETG:
Olive oil bottle cap – details
You can see the raggedy edge of the original cap just inside the cover’s rim. A snippet of double-sided tape holds the cover in place, after de-oiling the cap with alcohol.
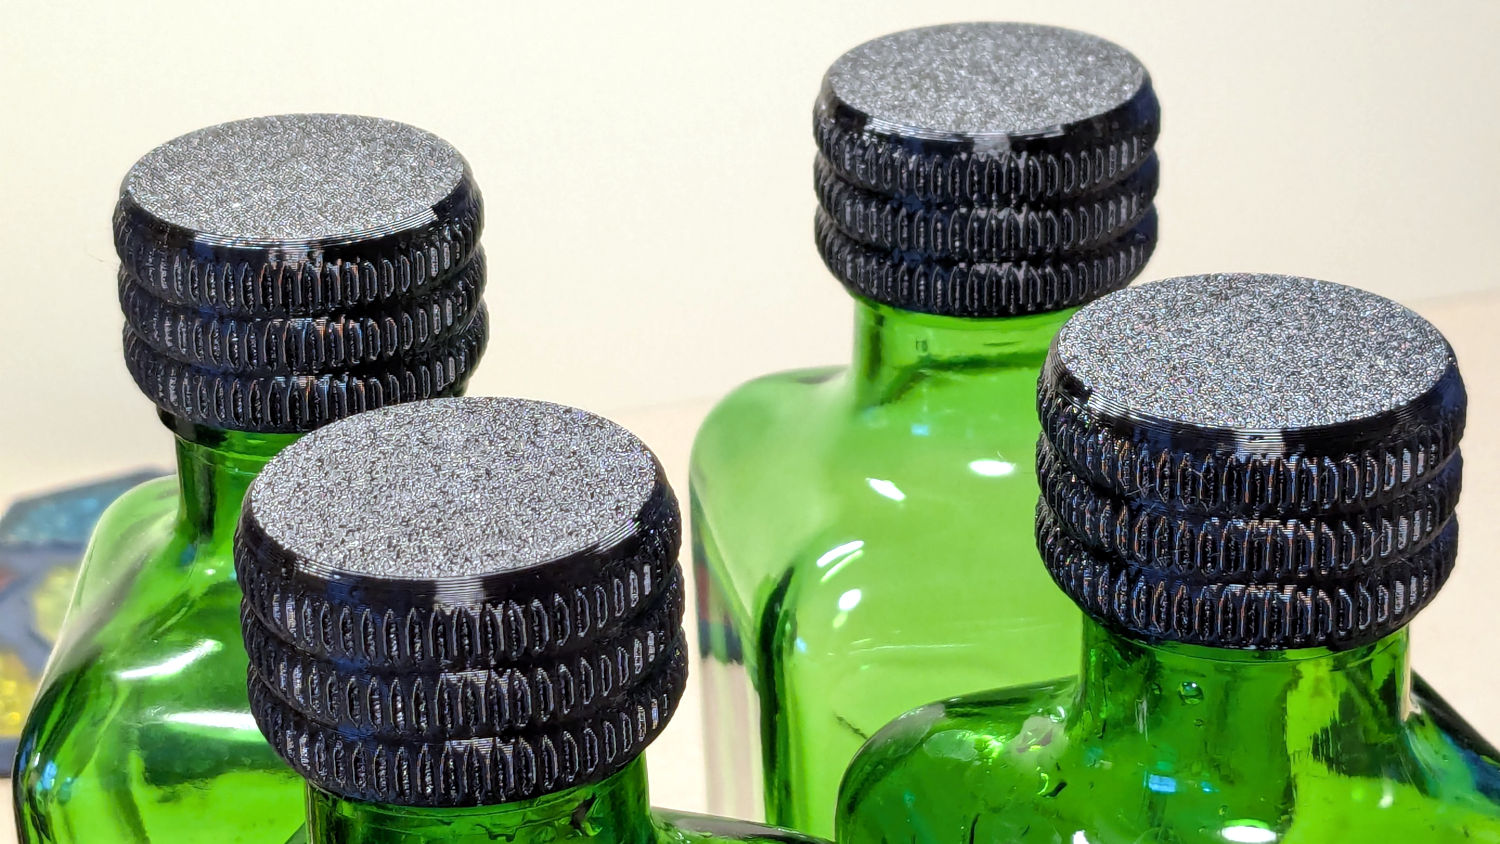
Having gotten one to fit, I made enough for All The Bottles:
Olive oil bottle cap – installed
Only two of those see regular service: one in use and another filled when the first is nearly empty. The remaining pair huddle in the back of the shelf against future need.
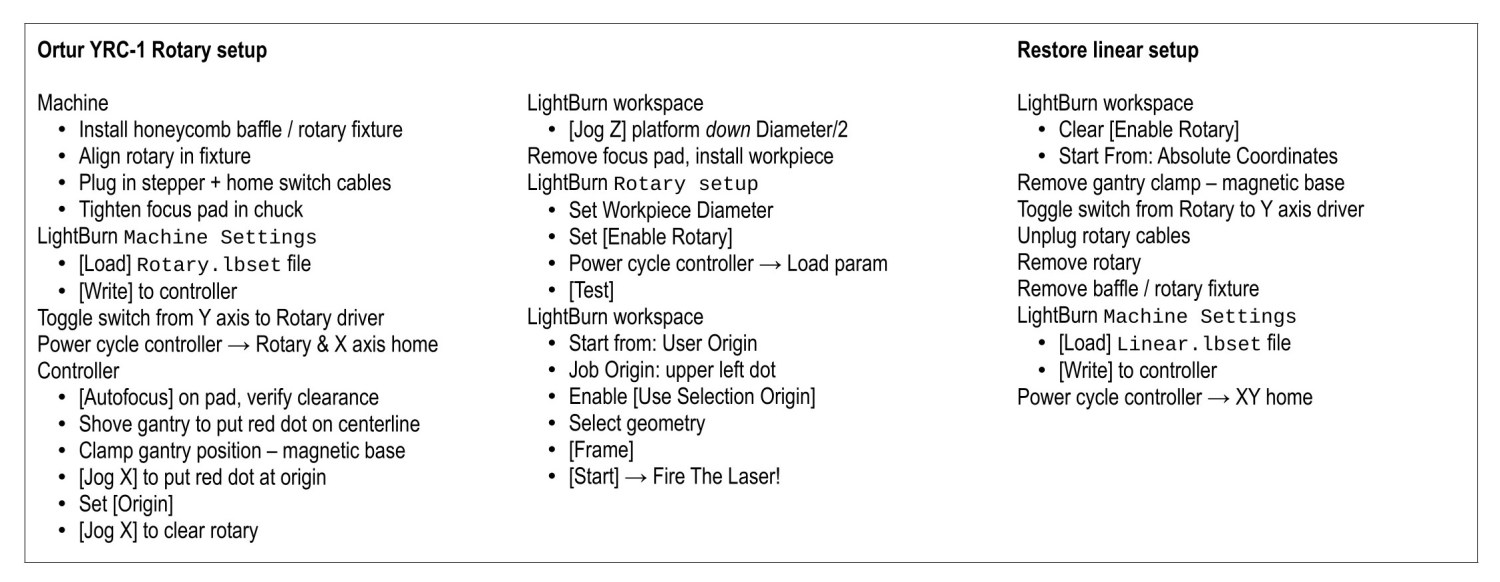
Always disable the rotary’s stepper driver before connecting or disconnecting its cable.
The Ortur YRC-1 rotary has a pulley ratio of 1:3, so the step/rev value is three times the DIP switch setting on the stepper driver. For this setup, 1600 → 4800 step/rev.
The honeycomb frame is a parallelogram, not a rectangle. I align the cardboard baffle / fixture to the bottom edge of the frame and the rotary to the bottom edge of the fixture opening, but your machine will be different. The angular alignment may not be off by enough to matter, but consistency is a virtue.
The Rotary.lbset and Linear.lbset files live on a file server with daily backups. Such backups will come in handy when you inadvertently overwrite one of those files with the other one. Trust me on this.
The Rotary.lbset file does not have Rotary Mode enabled, because the KT332N does not home the Y axis in that mode. If your rotary lacks a home switch, then it doesn’t matter and you’re on your own.
The KT332N controller has a [Reset] button that allegedly does a power-on reset and reloads all the changed Machine Settings. This sometimes does not work as expected: power-cycling the controller is the only way to be sure.
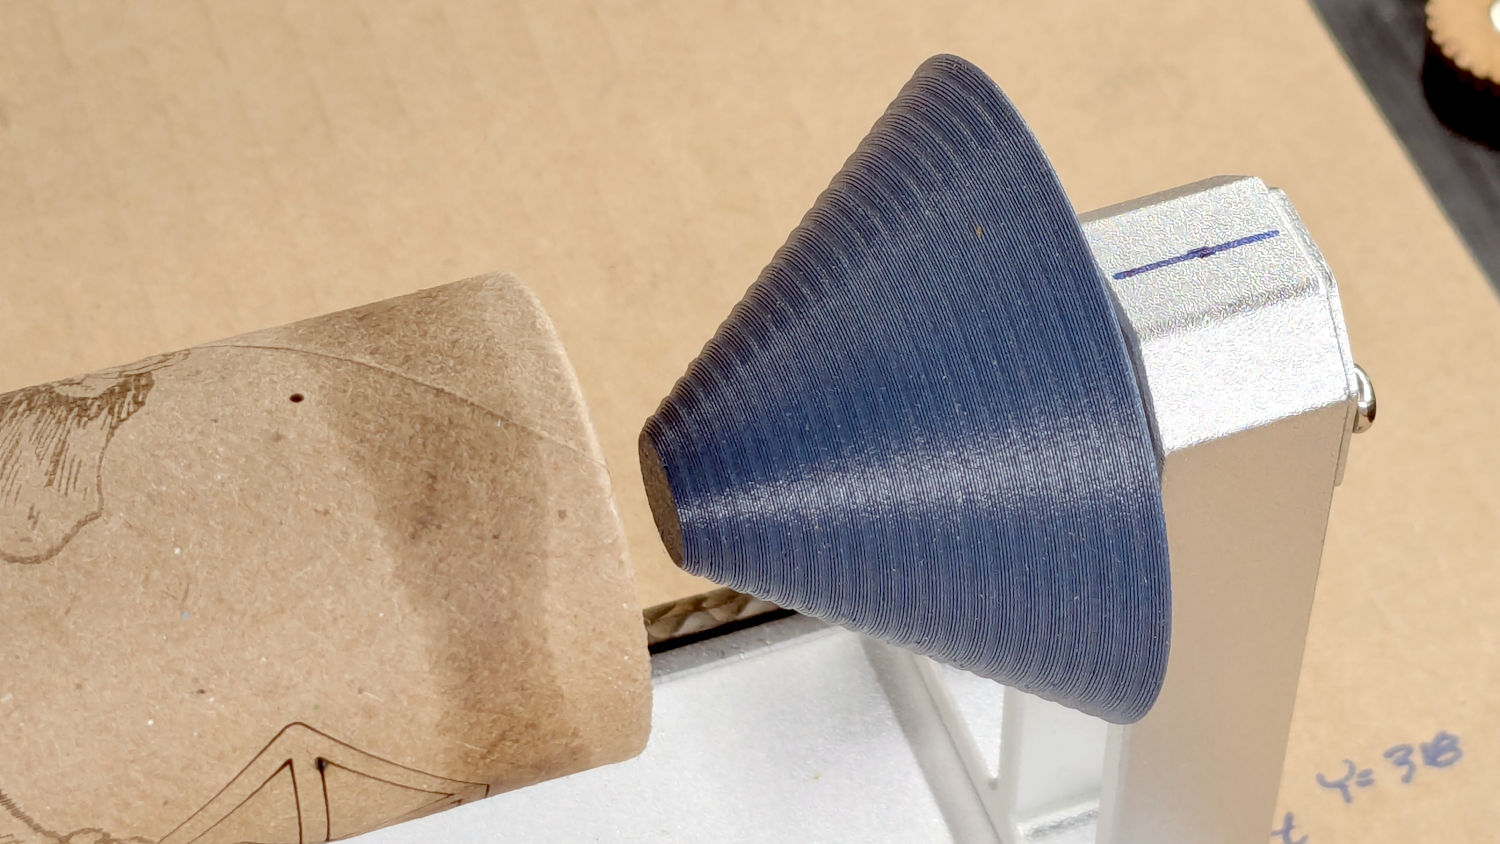
The autofocus operation must hit the focus pad, which can be ensured by positioning the pen near the pad, jogging the platform a few millimeters under the pen, tweaking X and the gantry while peering down parallel to the pen, then doing the autofocus.
The focus pad has a crosshair clearing the chonky Ortur 3-step jaws, but I set the controller’s [Origin] at the foot of the pad’s base for more elbow room.
The Z axis distance field in LightBurn’s Move window does not accept formulas, so you must divide the workpiece diameter by two. Using a focus stick to verify the ensuing nozzle-to-workpiece distance is a Good Idea™.
The LightBurn Job Origin dot must be on the top row, because the KT332N does not go into regions with negative coordinates. With the chuck on the left and the [Origin] just to its right, the upper left dot locks the LightBurn selection to the physical limits.
Selecting [Use Selection Origin] puts the Job Origin at the upper left (per the dot) of whatever you’ve selected, not everything on the LightBurn workspace. [User Origin] then locks the selection to the [Origin] set on the controller.
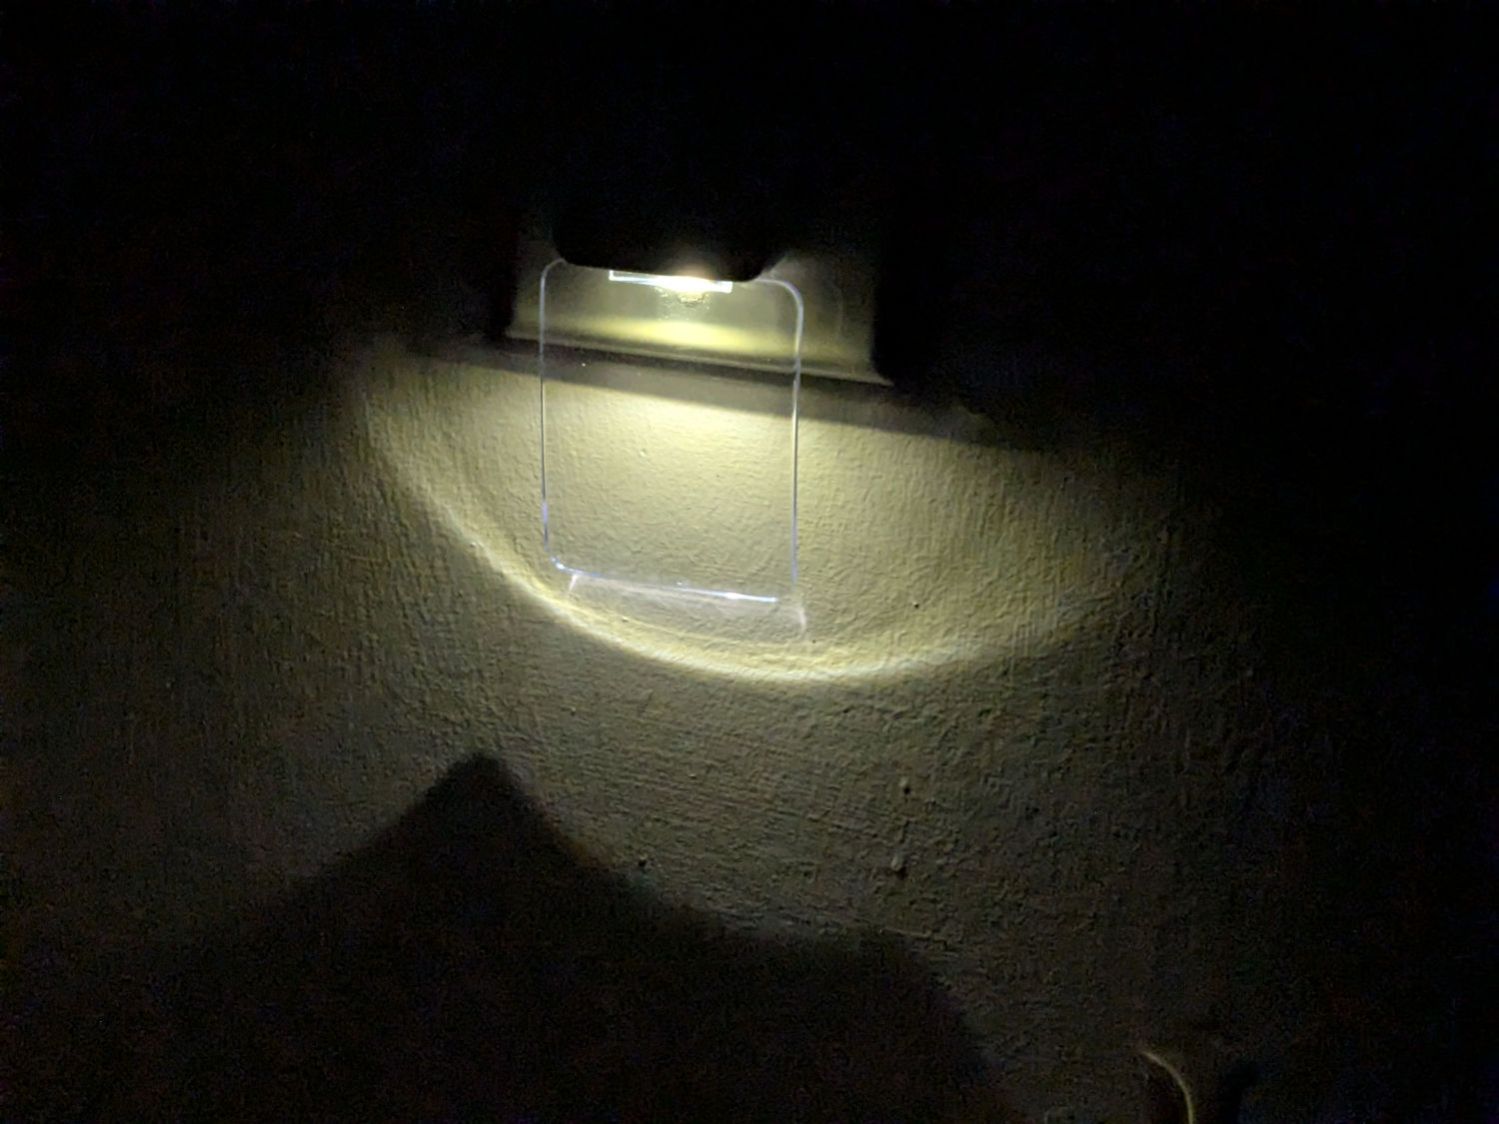
Our house came with several single-LED night lights featuring a transparent light guide / reflector:
Nightlight light guide – original
The plate had snapped off one of them and, being me, I wondered if I could replace it with something similar.
Years passed.
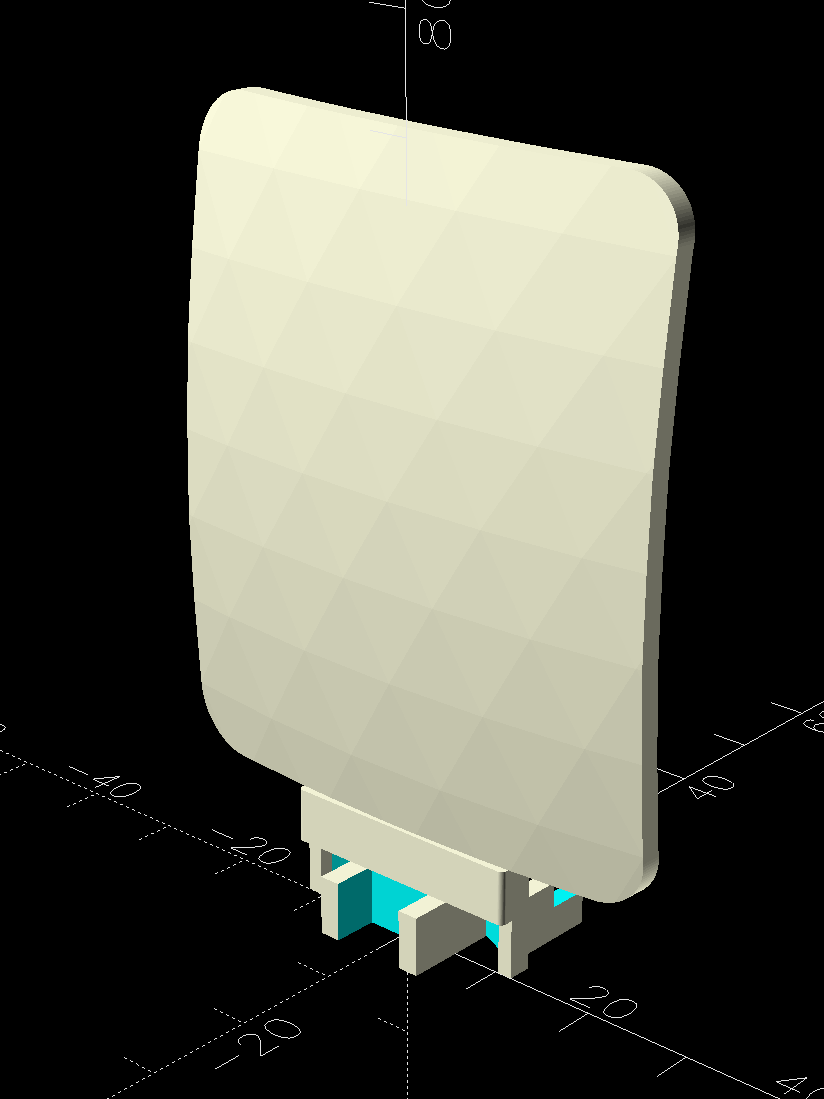
Obviously, this must be made from a transparent substance, which 3D printed things are not, but after some fiddling with parameters I thought the result might be informative.
The guide plate is a section of a spherical surface, here approximated by a BOSL2 spheroid():
Nightlight light guide – view side – solid model
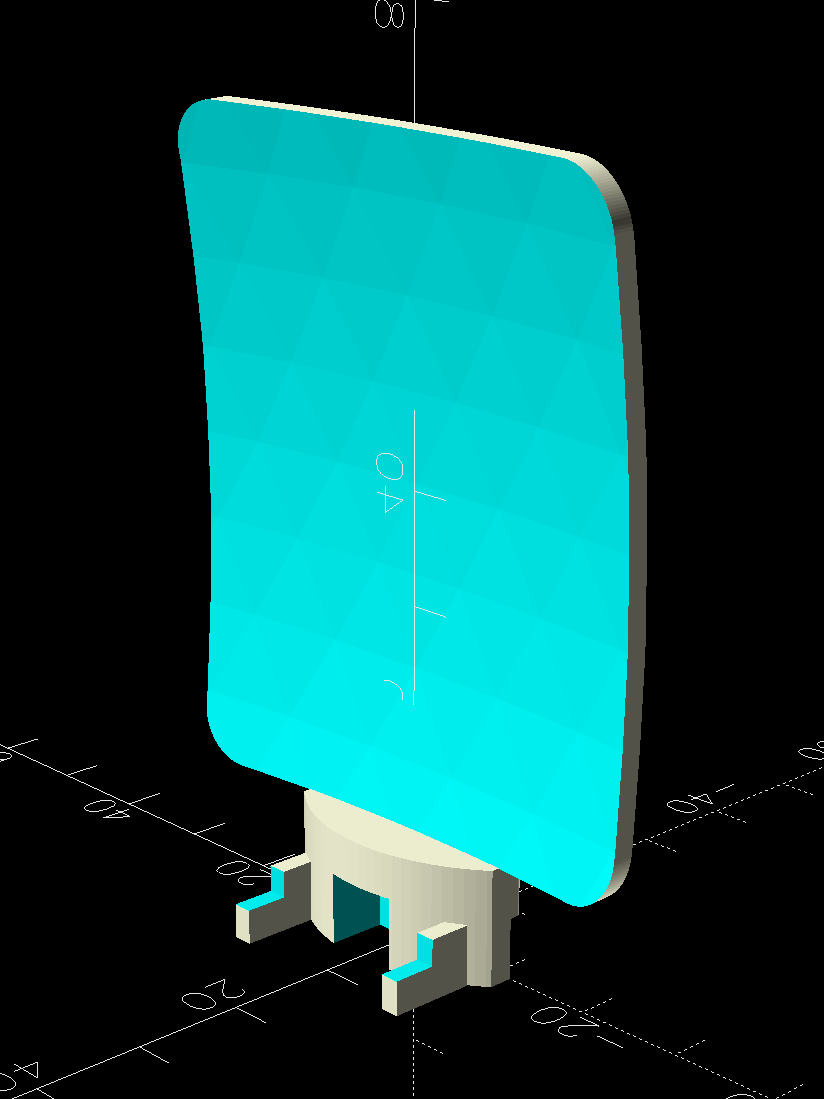
The original is 3 mm thick, but 2 mm worked out better for my purposes by reducing the amount of infill:
Nightlight light guide – wall side – solid model
The intricate base latches into the lamp’s plastic case:
Nightlight light guide – base – solid model
The result is, at best, translucent, because it’s definitely not transparent:
Nightlight light guide – translucent vs transparent
The zigzag pattern seems to come from the icosohedral approximation to the sphere, because it follows the surface tesselation.
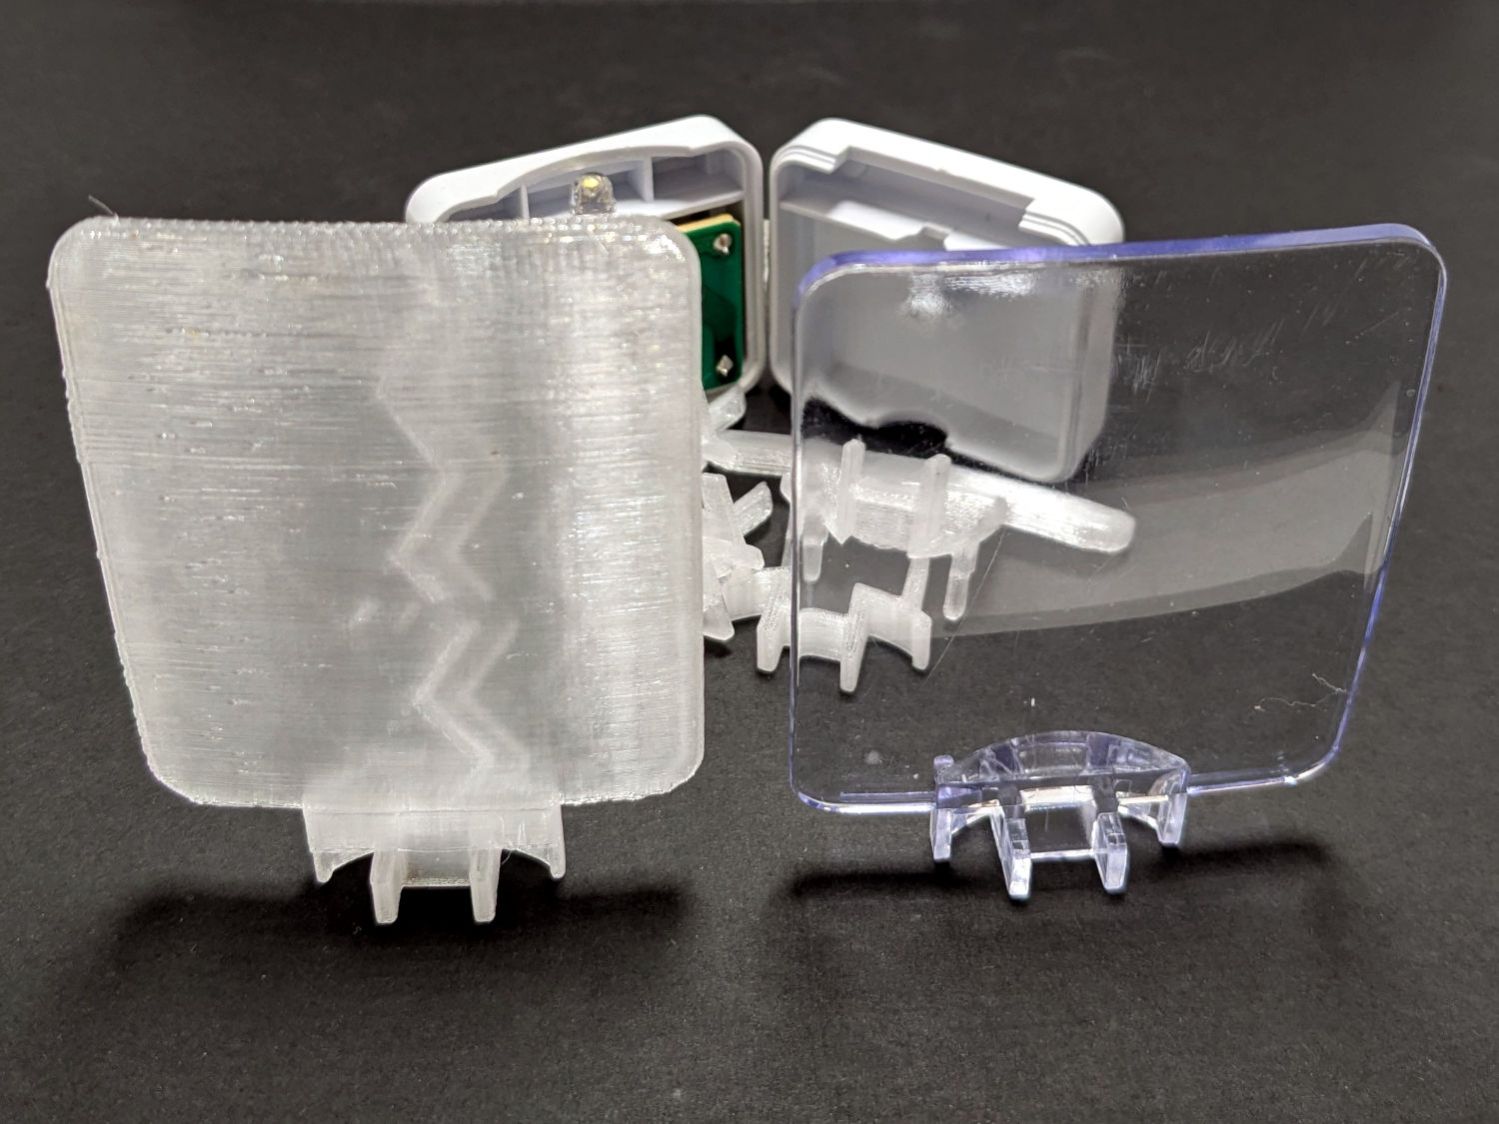
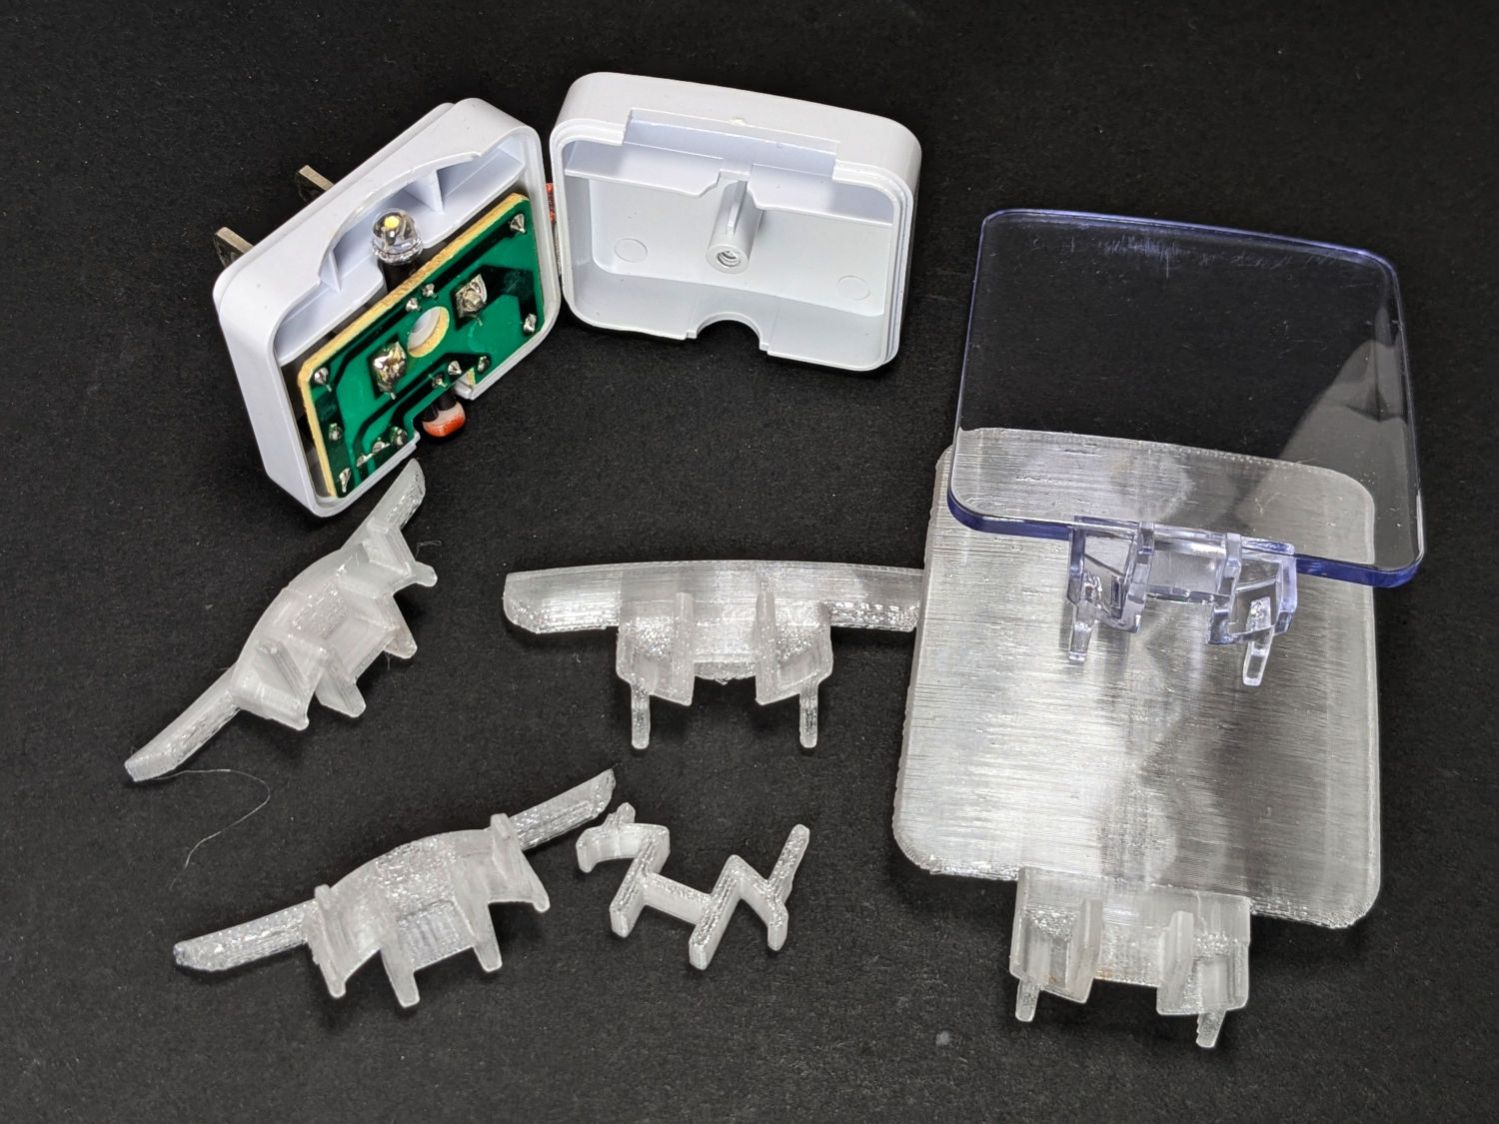
Getting the base shape right required several iterations, each printed with the model cut off just above the bottom of the guide plate:
Nightlight light guide – test pieces
The first two attempts needed attention from a flush cutting pliers before fitting into the case, but they don’t call it rapid prototyping for nothin’.
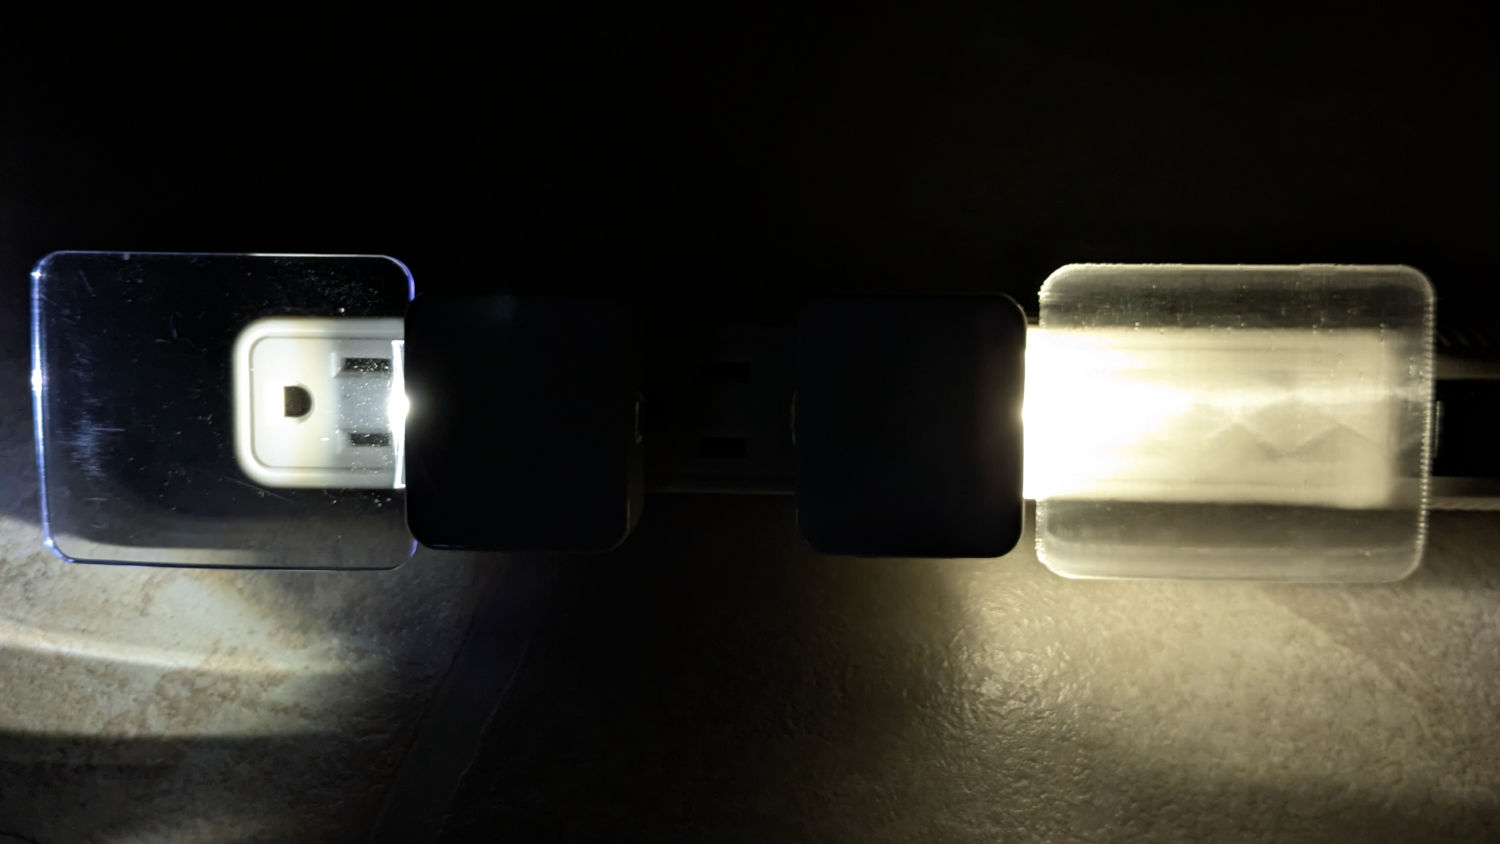
The original and replacement plugged into an outlet strip:
Nightlight light guide – original vs printed on outlet strip
While you can see the vague outline of the strip behind the printed light guide, it’s definitely lacking in detail:
Nightlight light guide – outlet strip detail
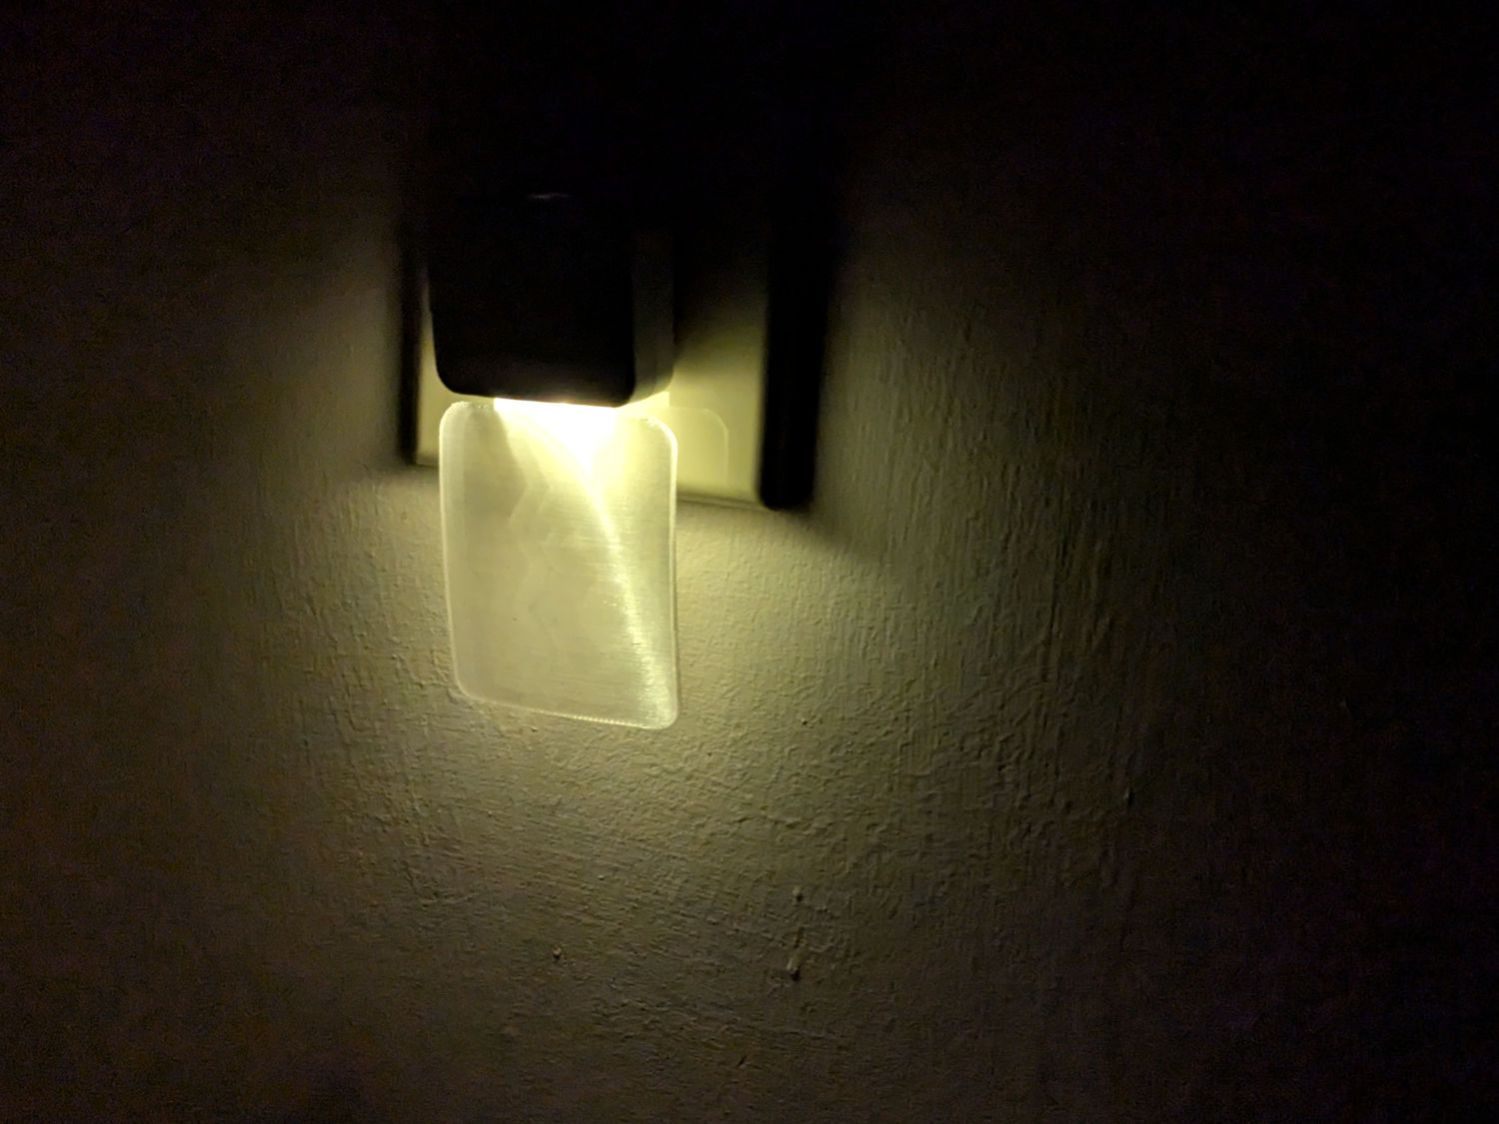
The striations throw more light into the room than the original:
Nightlight light guide – printed
Fiddling with the 3D printing parameters might make it more transparent, but it’s going back into the box it came from after giving me a better idea of which parameters to tweak the next time around.
This file contains hidden or bidirectional Unicode text that may be interpreted or compiled differently than what appears below. To review, open the file in an editor that reveals hidden Unicode characters.
Learn more about bidirectional Unicode characters