The Smell of Molten Projects in the Morning

Ed Nisley's Blog: Shop notes, electronics, firmware, machinery, 3D printing, laser cuttery, and curiosities. Contents: 100% human thinking, 0% AI slop.

Author: Ed

  • Sawhorse: Cap Bracket Repair

    While extricating the sawhorses from the garage, one of the bright yellow cap strips fell off. Whether by coincidence or not, it was the same one I’d previously repaired after sawing completely through the poor thing, but this time the failure came from what’s called inherent vice in the molded bracket-and-pin feature that holds the cap in place:

    Fractured sawhorse top pin
    Fractured sawhorse top pin

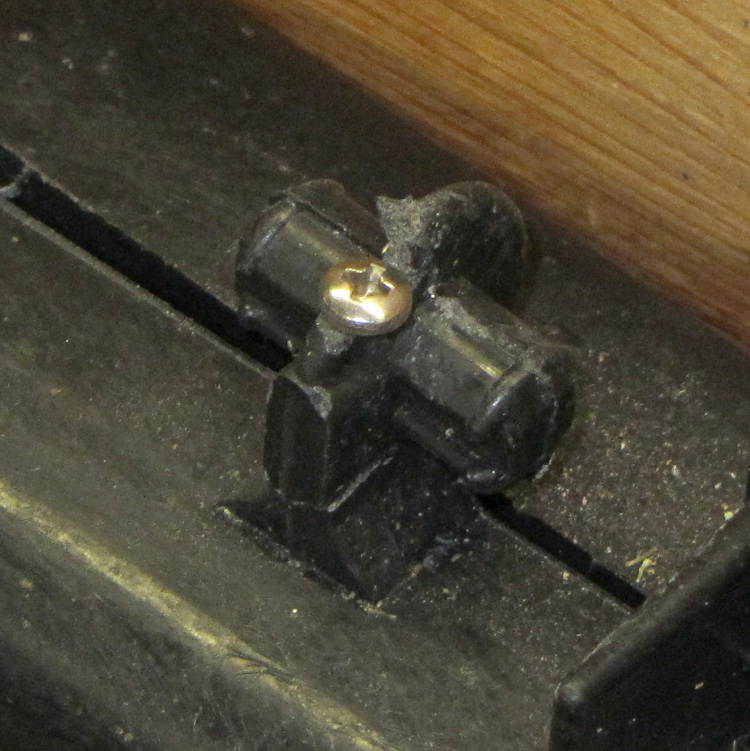
    I filed a flat on the top of the bracket, drilled a 4-40 clearance hole, and then held everything in place while drilling a 4-40 tapping hole into the sawhorse. There was just enough plastic to make all that work, at least for the not very strenuous conditions it should experience around here:

    Fractured sawhorse top pin - with screw
    Fractured sawhorse top pin – with screw

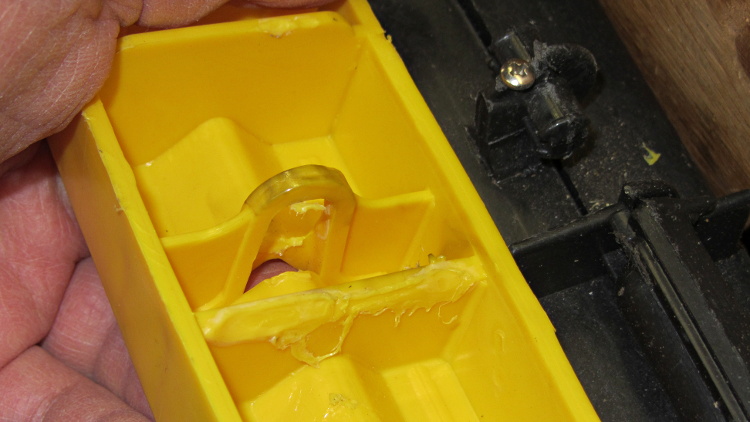
    While trying to reassemble the cap, I discovered why the bracket broke. The yellow cap has a bulkhead with an opening for the pin, plus a solid bulkhead that butts against the hinge along the top of the sawhorse. The bulkheads lie too close together: you simply cannot get the opening over the pin on this end with the cap parallel to the top of the sawhorse, which you must do in order to get the pin in the corresponding hole on that end.

    Evidently they had the same problem at the factory and “solved” it by melting the bulkhead with a hot blade:

    Sawhorse top cover - factory bodge
    Sawhorse top cover – factory bodge

    That didn’t really help me, but I carved off a few more slices to weaken the solid bulkhead enough to bend it around the hinge. I think the strain involved in the original assembly, plus what happened when I had to take it apart to fix the sawed-off end, weakened the bracket enough to snap off at some point over the winter.

  • Outdoor Lamp Replacement

    Mad Phil asked me to replace the bulb in a lamp along the walkway to their garage, which turned into a bit of a circus: the bulb had shattered, leaving only the base in the socket. After clearing away the rubble, I was confronted with this:

    Corroded lamp socket
    Corroded lamp socket

    I removed the entire lamp housing, laid it out on my workbench, and eventually resorted to jamming needle-nose pliers into the base and forcibly unscrewing it. That worked:

    Corroded lamp base
    Corroded lamp base

    Fortunately, the aluminum lamp base had corroded against the brass socket, not the other way around, so buffing the socket with a brass wheel in a Dremel handset and polishing the base contacts brought it back to life.

    Reassemble the lamp and it’s all good…

  • Cassette Tape Case Repair

    Mary has been listening to library books while she quilts and sews; some of the older books actually come on cassette tape and our tape players still work. The newer books come on CDs, but it seems the library hasn’t gotten into audio e-reader files yet. She actually prefers tapes, because she can simply stop the tape and restart it from the same place without any further intervention.

    In any event, a recent tape stalled about 1/4 of the way through and refused to either rewind or fast forward.

    Rather than returning it to the library, which I’m certain all previous borrowers did, I took the cassette apart. This is no big deal, I’ve done it many times before cassettes fell into the dustbin of history.

    That made the failure quite obvious:

    Cassette tape case - detached bushing
    Cassette tape case – detached bushing

    The bushing around one of the hub openings had completely fractured and come loose, jamming the tape hub in place.

    A ring of solvent adhesive around both parts, a few minutes of clamping, and it’s all good again.

    Don’t tell the library; they get tetchy about DIY repairs…

  • Dayton 4X221 Snap-Around Volt-Amp-Ohm Meter

    Mad Phil forced me to take this little gem:

    Dayton 4X221 Snap-Around Ammeter
    Dayton 4X221 Snap-Around Ammeter

    Judging from the much-folded Dayton 4X221 Snap-Around Ammeter Operating Instructions (a scanned copy that I folded around the original and tucked inside the case), the ammeter dates back to 1979, which says Mad Phil probably used it in the early 80s, when he was repairing AV equipment. Unlike most vintage clamp-on ammeters, this one can also measure voltage and resistance:

    Dayton 4X221 Snap-Around Ammeter - Specifications
    Dayton 4X221 Snap-Around Ammeter – Specifications

    The resistance function requires a single AAA alkaline cell in the bulky probe, so this should come as no surprise:

    Dayton 4X221 Resistance Probe - battery contact corrosion
    Dayton 4X221 Resistance Probe – battery contact corrosion

    The probe housing contains a 1 A fast-blow fuse, which blocked the corrosion from getting deeper into the probe tip:

    Dayton 4X221 Resistance Probe - battery and fuse
    Dayton 4X221 Resistance Probe – battery and fuse

    The AAA cell was “Best if installed by Jan 1999”, which I’m sure was true. Somehow, you never recognize the last time you use something; I suppose old instruments get used to not seeing the light over the workbench after a while.

    Anyhow.

    Douse the corrosion with vinegar to neutralize the potassium hydroxide, rinse out the probe body, polish the top of the fuse, buff up the battery contact on the test lead, and it’s all good again.

  • Creeping Toward Metrication

    Spotted this in a Lowe’s sale circular:

    Granite Countertop - mixed units
    Granite Countertop – mixed units

    The thickness comes from the manufacturer and the area from the installer, so it all makes perfect sense…

    Besides, 3 cm sounds much fancier than 1-3/16 inch, doesn’t it?

  • Signs of an Early Spring: Sapcicles

    Maple Tree - sapcicles
    Maple Tree – sapcicles

    The maple at the far end of the driveway sprouted sapcicles (or maybe sapsicles) after a brief warm spell woke it up in early March:

    You can break them off and eat them like Popsicles, but they’re not nearly as sweet as you’d imagine. We’ve boiled sap into syrup and can report from personal experience that the 40:1 boildown ratio is no myth…

  • 6C21 Triode

    Aitch bestowed this gem on me while cleaning out his collection:

    6C21 Triode
    6C21 Triode

    It’s a 6C21 triode, originally used as a radar modulator, atop a letter-size sheet of graph paper. The plate terminal is on top, the grid sticks out to the side, and the filament is common with the cathode through the base pins.

    It has impressive specs (datasheet and pictures):

    • 30 kV plate voltage
    • 15 A pulsed plate current, 100 ms max
    • 7.5 V filament at 15 A = 112 W (!)
    • Pulse duty cycle 0.2%

    The gray film inside the bulb shows that it’s been used, but the filament still has continuity. Ordinarily, you could turn something like this into a night light by running the filament at a voltage somewhat under its rating, but my bench supply maxed out at @ 3 A without even warming it up; a dim orange night light that burns maybe 75 W is Not A Good Idea.

    The base has some intriguing holes, originally used for forced-air cooling, that lead directly to the glass envelope:

    6C21 Triode - base
    6C21 Triode – base

    One could mount discrete LEDs in those holes, maybe a slightly turned-down 10 mm cool-white LED in the middle flanked by red and blue, and run a low-power Arduino-based mood light; by some cosmic coincidence, the hole spacing matches up almost perfectly with those LED strips. Or one could go full analog with three red LEDs driven by the WWVB signal.

    I’m thinking a plain black acrylic case, with the tube base sunk into the middle, would be about right. No readouts, no dials, no buttons, just a gently glowing tube.

    Maybe a 3D printed socket holding everything in place?