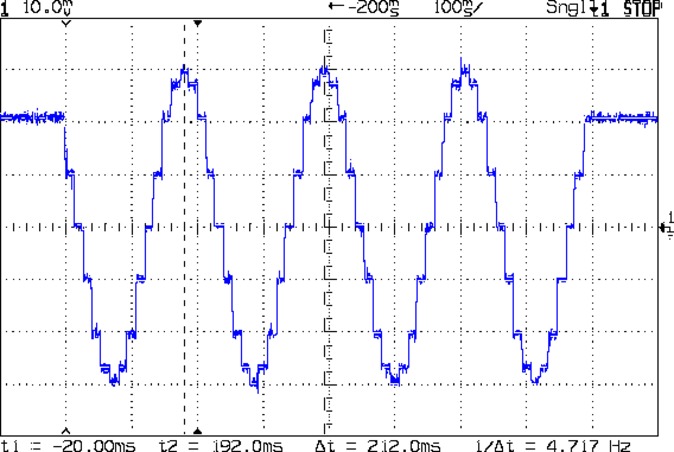
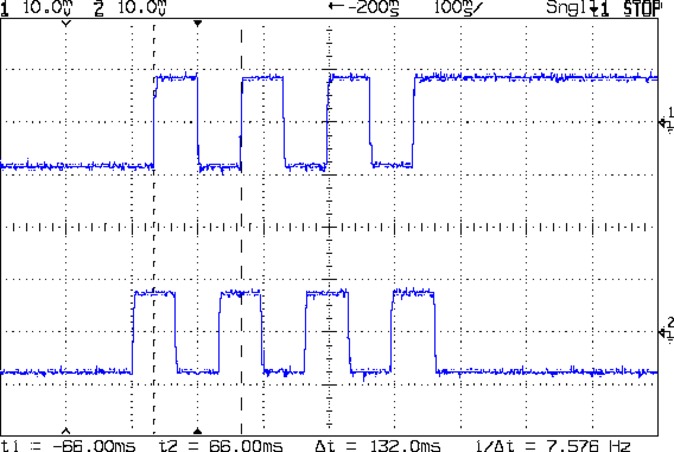
As part of entombing the endstop PCBs in epoxy, I tweaked the switch mounts to (optionally) eliminate the screw holes and (definitely) rationalize the spacings:

The sectioned view shows the cable tie slot neatly centered between the bottom of the switch terminal pit and the EMT rail, now with plenty of meat above the cable tie latch recess. The guide ramp on the other side has a more-better position & angle, too.
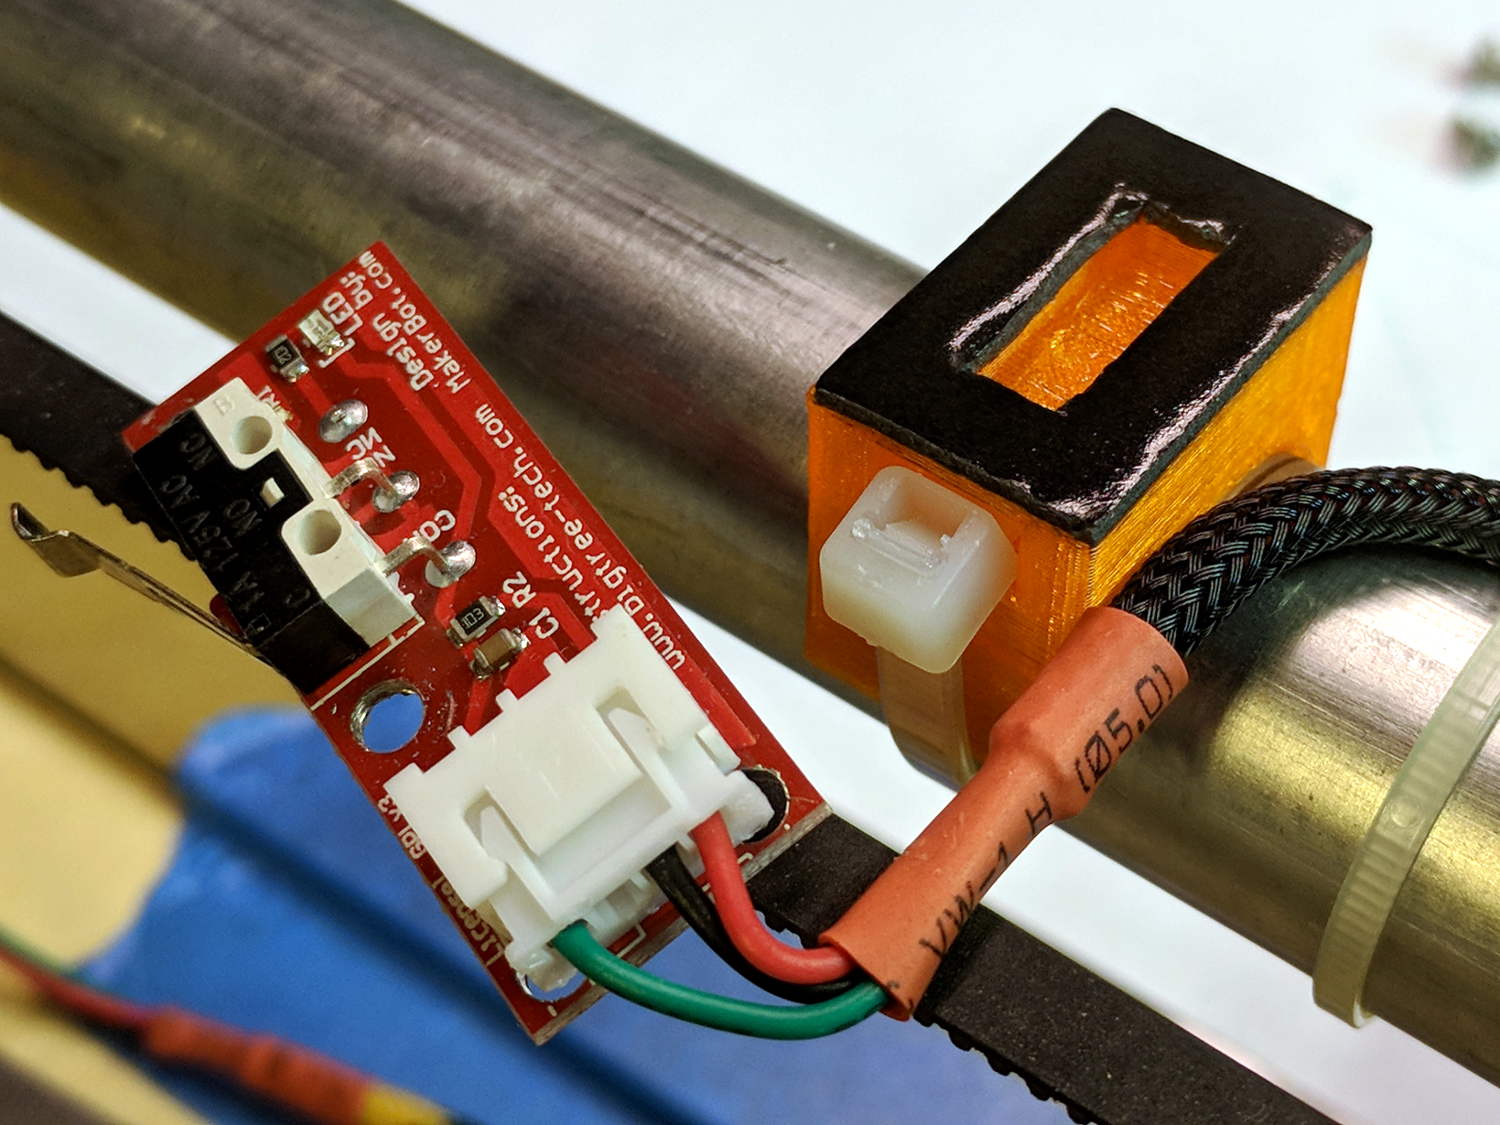
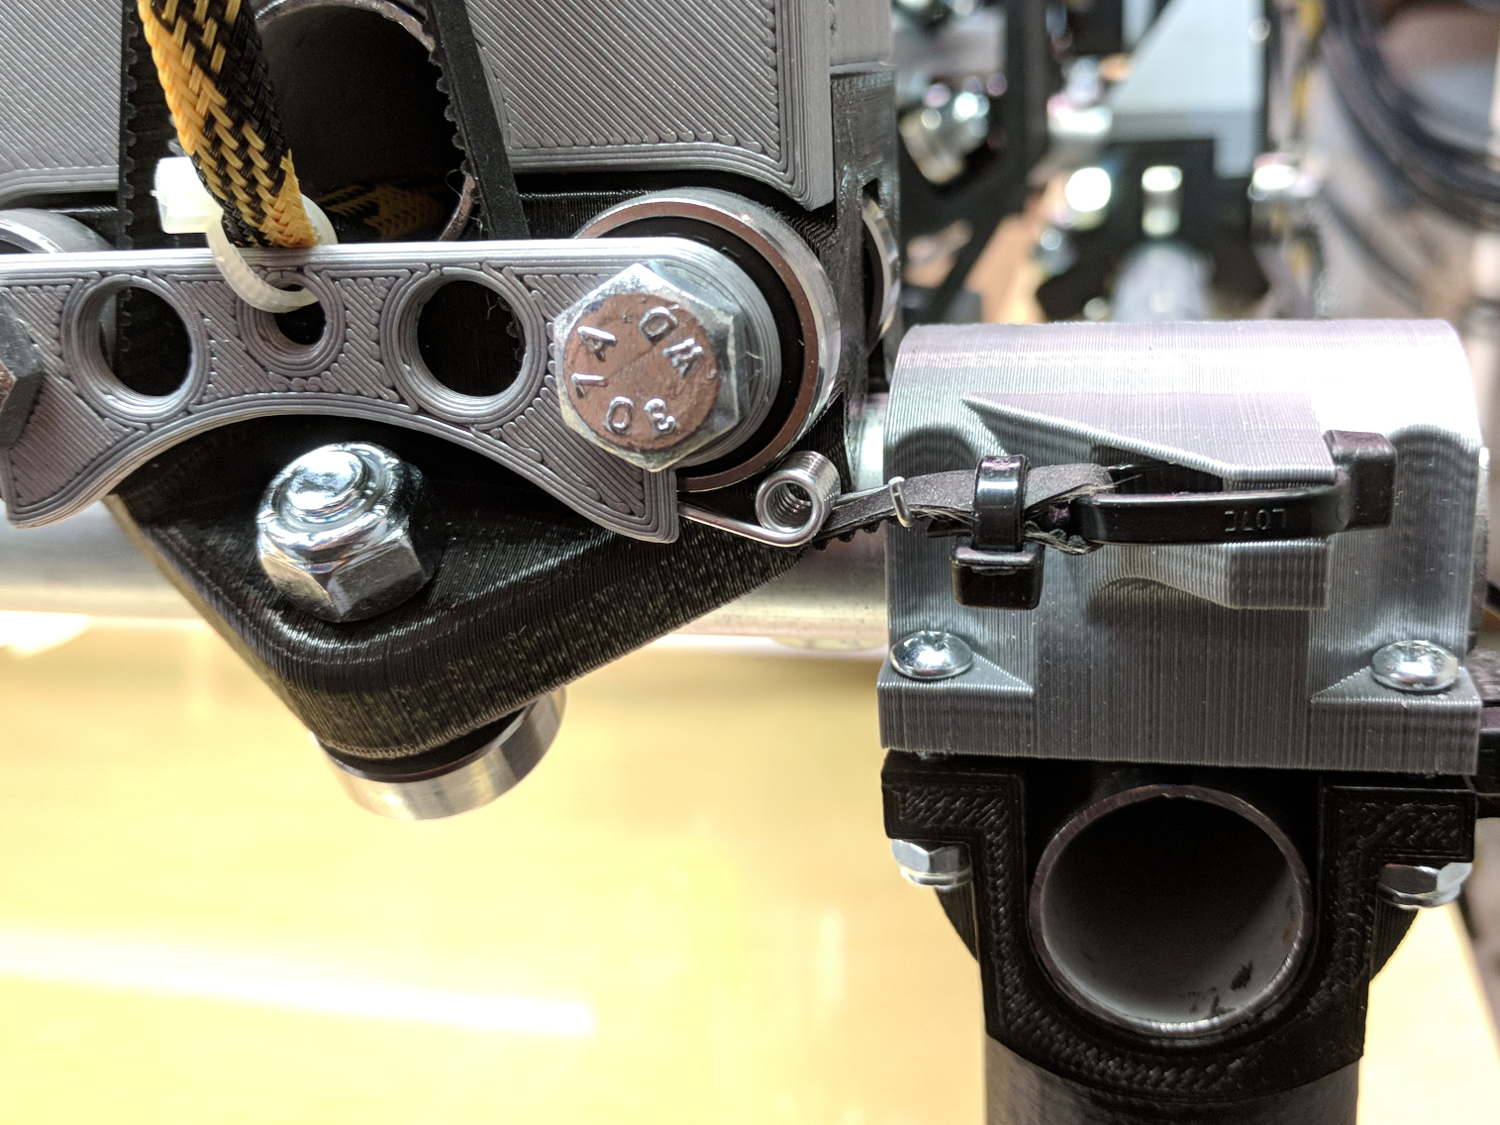
A trial fit before dabbing on the epoxy:

The 3M black foam tape works wonderfully well!
After the epoxy cures, it’s all good:

The OpenSCAD source code as a GitHub Gist:
This file contains hidden or bidirectional Unicode text that may be interpreted or compiled differently than what appears below. To review, open the file in an editor that reveals hidden Unicode characters.
Learn more about bidirectional Unicode characters
| // MPCNC Endstop Mount for Makerbot PCB on EMT tubing | |
| // Ed Nisley KE4ZNU – 2017-12-04 | |
| /* [Build Options] */ | |
| Layout = "Show"; // [Build, Show, Block] | |
| Holes = false; // holes for switch screws | |
| Section = true; // show internal details | |
| /* [Extrusion] */ | |
| ThreadThick = 0.25; // [0.20, 0.25] | |
| ThreadWidth = 0.40; // [0.40] | |
| function IntegerMultiple(Size,Unit) = Unit * ceil(Size / Unit); | |
| /* [Hidden] */ | |
| Protrusion = 0.01; // [0.01, 0.1] | |
| HoleWindage = 0.2; | |
| ID = 0; | |
| OD = 1; | |
| LENGTH = 2; | |
| /* [Sizes] */ | |
| RailOD = 23.5; // actual rail OD | |
| SwitchHeight = 8.0; // switch PCB distance from rail OD | |
| Strap = [5.5,50,2.0]; // nylon strap securing block to rail | |
| StrapHead = [8.2,3.0,5.5]; // recess for strap ratchet head | |
| Screw = [2.0,3.6,7.0]; // thread dia, head OD, screw length | |
| HoleOffset = [2.5,19.0/2]; // PCB mounting holes from PCB edge, rail center | |
| SwitchClear = [6.0,15,3.0]; // clearance around switch pins | |
| SwitchOffset = [6.0,0]; // XY center of switch from holes | |
| StrapHeight = (SwitchHeight – SwitchClear[2])/2; // strap center from rail | |
| Block = [16.4,26.0,RailOD/2 + SwitchHeight]; // basic block shape | |
| //- Adjust hole diameter to make the size come out right | |
| module PolyCyl(Dia,Height,ForceSides=0) { // based on nophead's polyholes | |
| Sides = (ForceSides != 0) ? ForceSides : (ceil(Dia) + 2); | |
| FixDia = Dia / cos(180/Sides); | |
| cylinder(r=(FixDia + HoleWindage)/2,h=Height,$fn=Sides); | |
| } | |
| //- Shapes | |
| // Main block constructed centered on XY with Z=0 at top of rail | |
| module PCBBlock() { | |
| difference() { | |
| translate([-Block[0]/2,-Block[1]/2,-RailOD/2]) | |
| cube(Block,center=false); | |
| translate([(SwitchOffset[0] + HoleOffset[0] – Block[0]/2), | |
| SwitchOffset[1], | |
| (SwitchHeight – SwitchClear[2]/2 + Protrusion/2)]) | |
| cube(SwitchClear + [0,0,Protrusion],center=true); | |
| if (Holes) | |
| for (j=[-1,1]) | |
| translate([HoleOffset[0] – Block[0]/2,j*HoleOffset[1],(Block[2]/2 – Screw[LENGTH])]) | |
| rotate(180/6) | |
| if (true) // true = loose fit | |
| PolyCyl(Screw[ID],Screw[LENGTH] + Protrusion,6); | |
| else | |
| cylinder(d=Screw[ID],h=Screw[LENGTH] + Protrusion,$fn=6); | |
| translate([0,0,StrapHeight]) | |
| cube(Strap,center=true); | |
| translate([0, // strap head recess | |
| (Block[1]/2 – StrapHead[1]/2 + Protrusion), | |
| StrapHeight – Strap[2]/2 + StrapHead[2]/2]) | |
| cube(StrapHead + [0,Protrusion,0],center=true); | |
| StrapAngle = atan((StrapHeight + RailOD/4)/Strap[2]); // a reasonable angle | |
| echo(str("Strap Angle: ",StrapAngle)); | |
| translate([0,-(Block[1]/2 – Strap[2]/(2*sin(StrapAngle))),StrapHeight]) | |
| rotate([StrapAngle,0,0]) | |
| translate([0,-Strap[1]/2,0]) | |
| cube(Strap,center=true); | |
| if (Section) | |
| translate([Block[0]/2,0,0]) | |
| cube(Block + [0,2*Protrusion,2*Block[2]],center=true); | |
| } | |
| } | |
| module Mount() { | |
| difference() { | |
| translate([0,0,RailOD/2]) | |
| PCBBlock(); | |
| rotate([0,90,0]) | |
| cylinder(d=RailOD,h=3*Block[0],center=true); | |
| } | |
| } | |
| //- Build things | |
| if (Layout == "Show") { | |
| Mount(); | |
| color("Yellow",0.5) | |
| rotate([0,90,0]) | |
| cylinder(d=RailOD,h=3*Block[0],center=true); | |
| } | |
| if (Layout == "Block") | |
| PCBBlock(); | |
| if (Layout == "Build") | |
| translate([0,0,Block[2]]) | |
| rotate([180,0,0]) | |
| Mount(); |