The Smell of Molten Projects in the Morning

Ed Nisley's Blog: Shop notes, electronics, firmware, machinery, 3D printing, laser cuttery, and curiosities. Contents: 100% human thinking, 0% AI slop.

Author: Ed

  • SJCAM M20 Action Camera: Stuck Battery

    SJCAM M20 Action Camera: Stuck Battery

    The SJCAM M20 action camera has been attached to the back of my Tour Easy for the last 16 months:

    SJCAM M20 Mount - Tour Easy side view
    SJCAM M20 Mount – Tour Easy side view

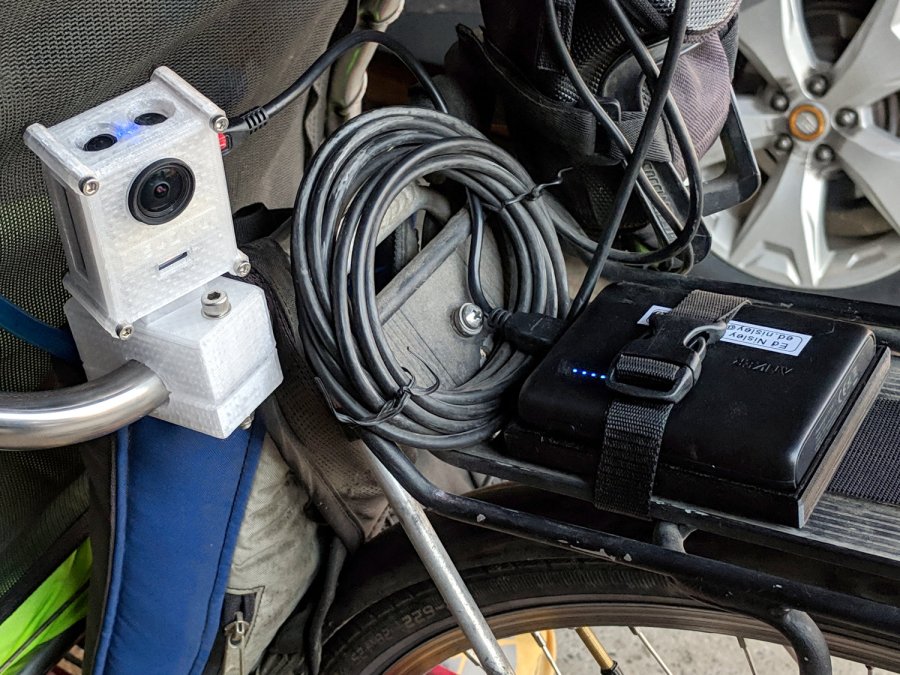
    The Anker 13 A·h USB power pack on the rack provides juice for a week’s worth of rides, letting the M20’s internal battery keep its clock & settings alive between rides. I recently forgot to turn on the USB pack and discovered the camera shut down just after I cleared the end of the driveway.

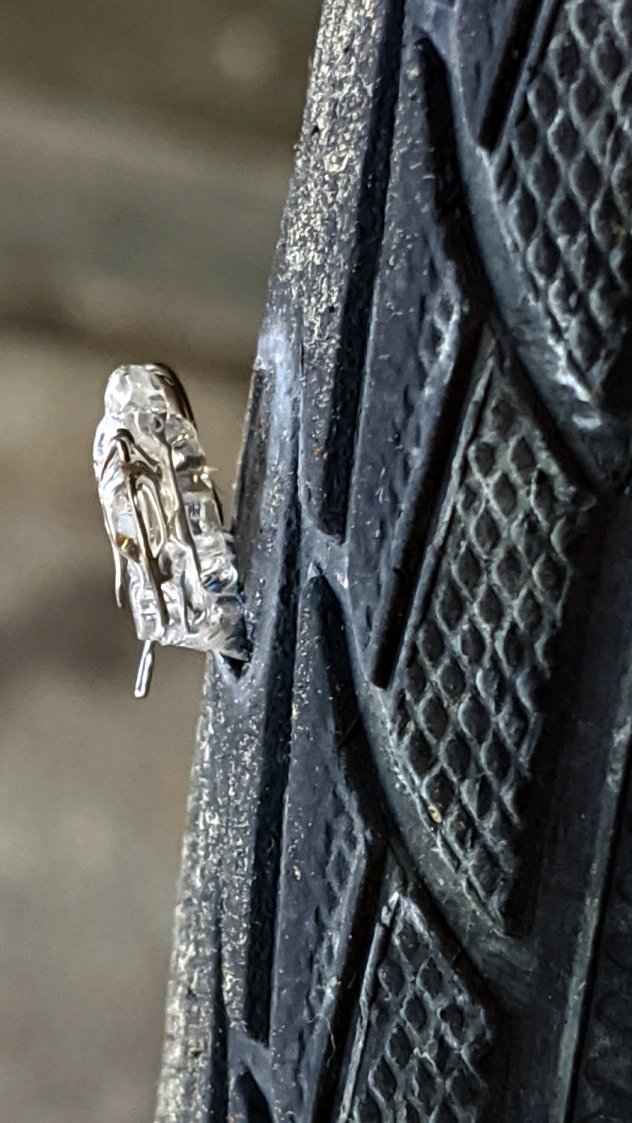
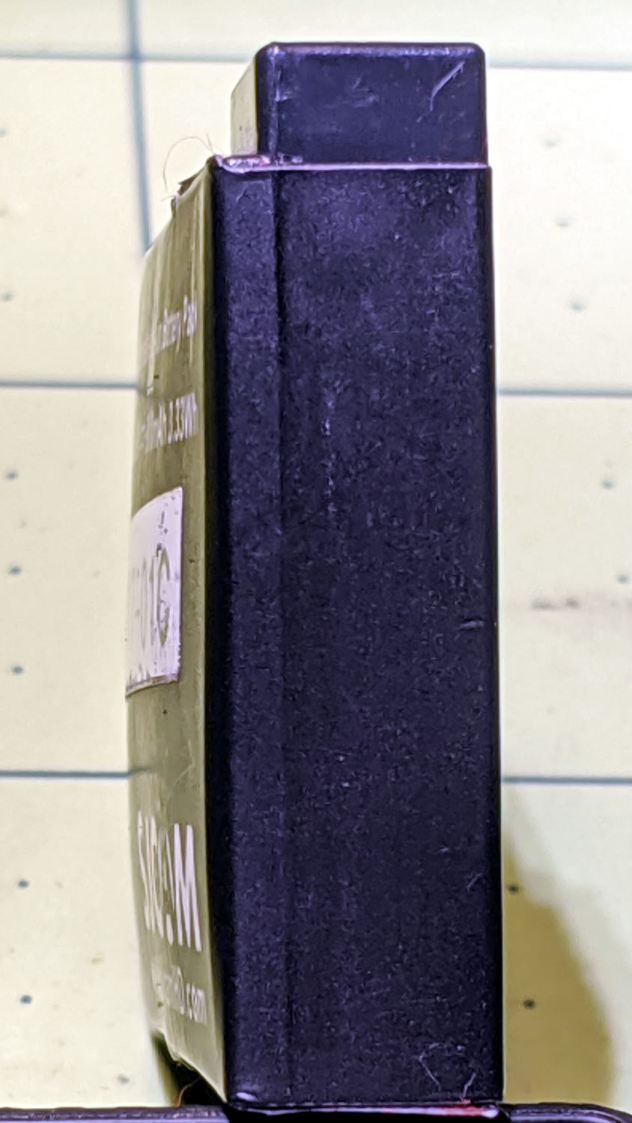
    As you should expect, the battery had swollen so much its pull tab … pulled off … when I tried to extract it:

    SJCAM M20 - stuck battery
    SJCAM M20 – stuck battery

    So, we begin.

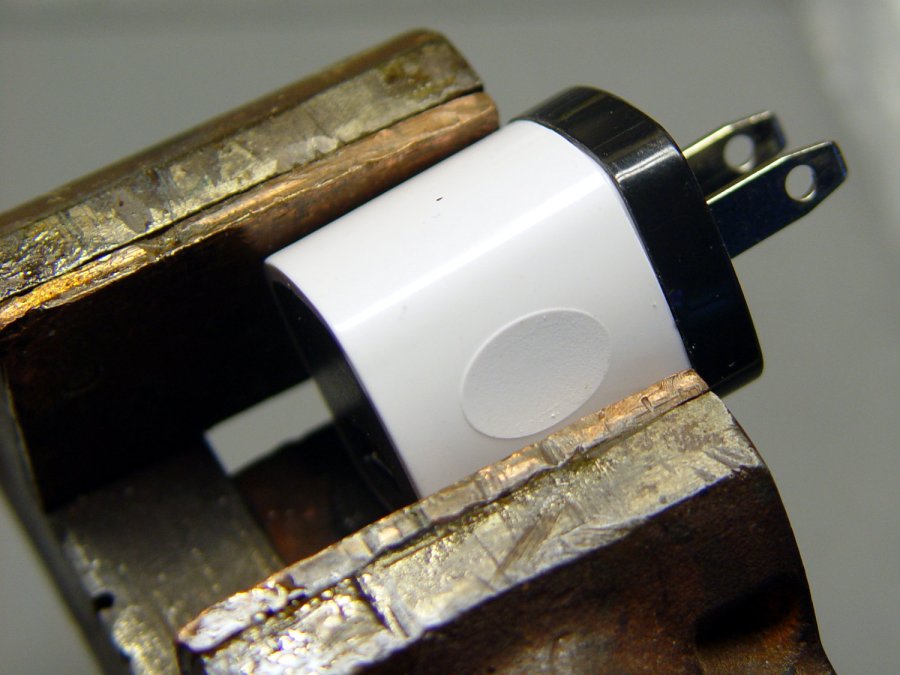
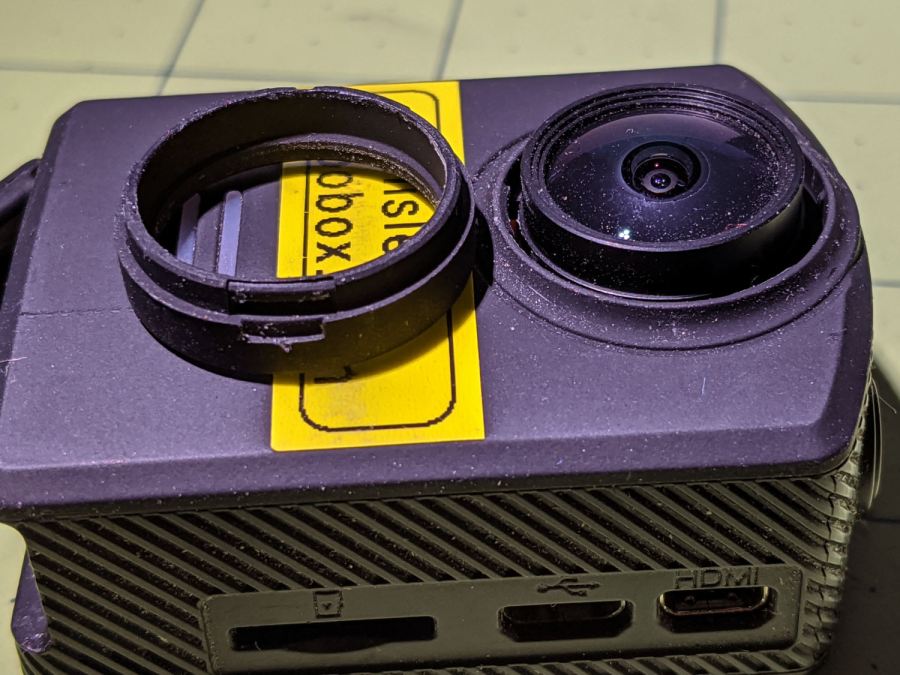
    Pry off the trim ring around the lens by jamming a small screwdriver in any of the three slots:

    SJCAM M20 - lens ring removed
    SJCAM M20 – lens ring removed

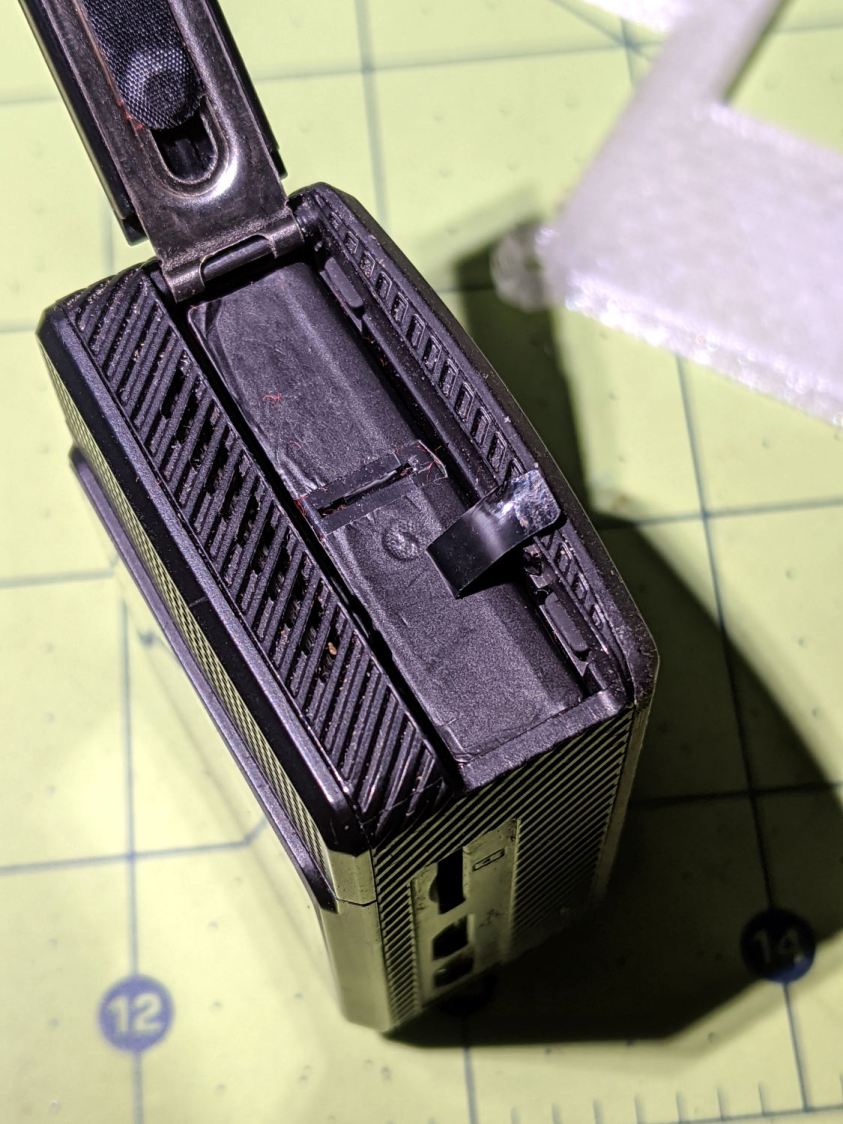
    Then pry off the entire front panel:

    SJCAM M20 - camera front panel
    SJCAM M20 – camera front panel

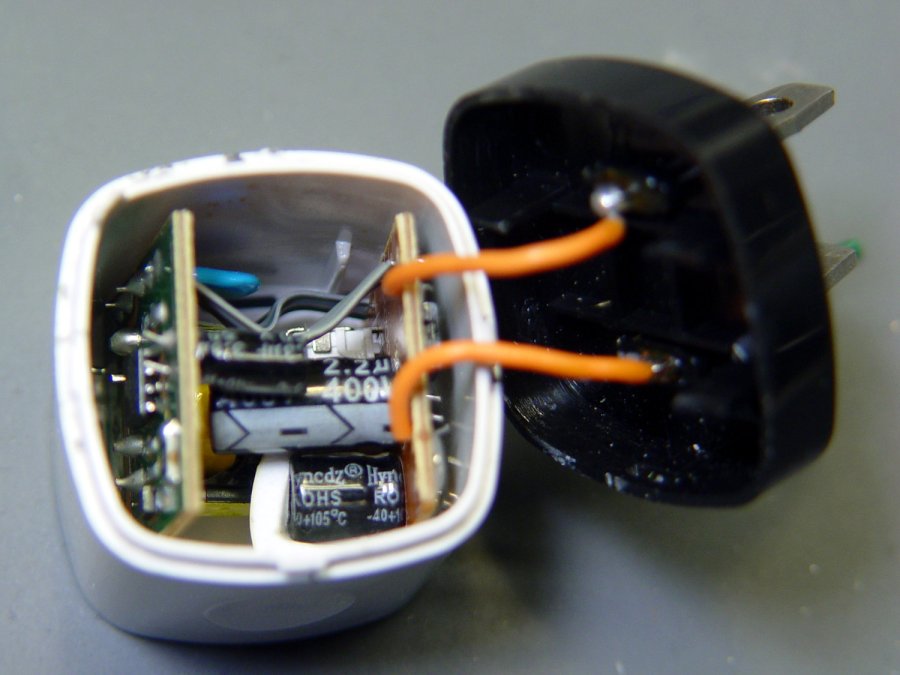
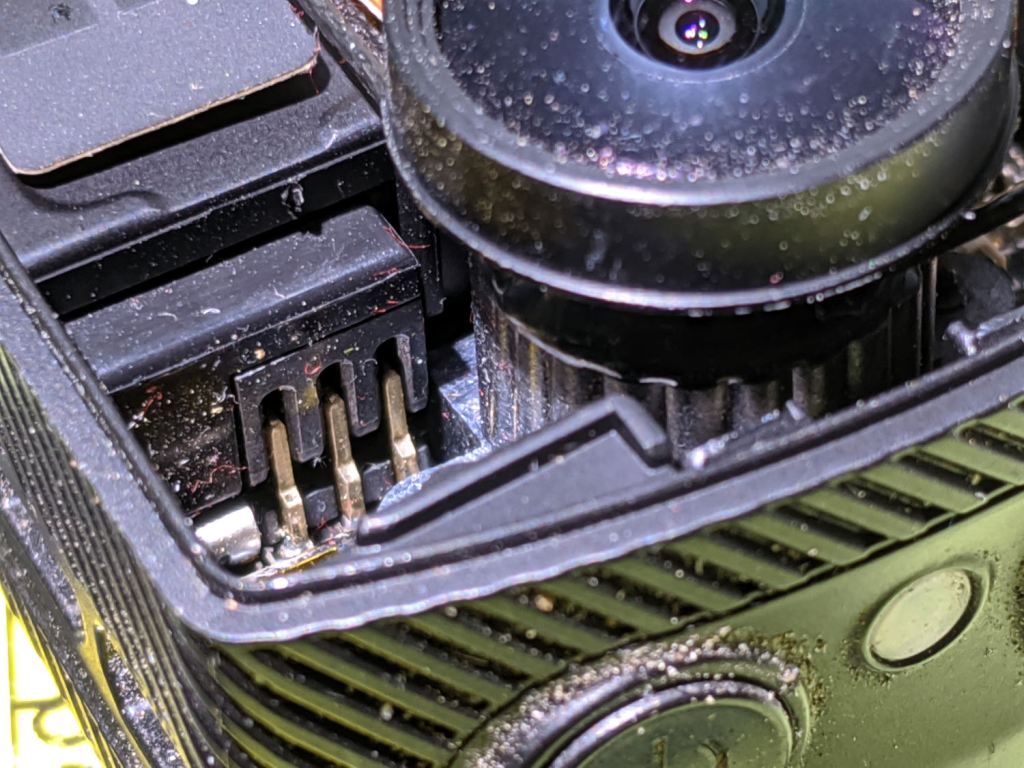
    Thereby exposing the battery’s rectangular protrusion and three contacts next to the optical block:

    SJCAM M20 - camera interior - battery terminals
    SJCAM M20 – camera interior – battery terminals

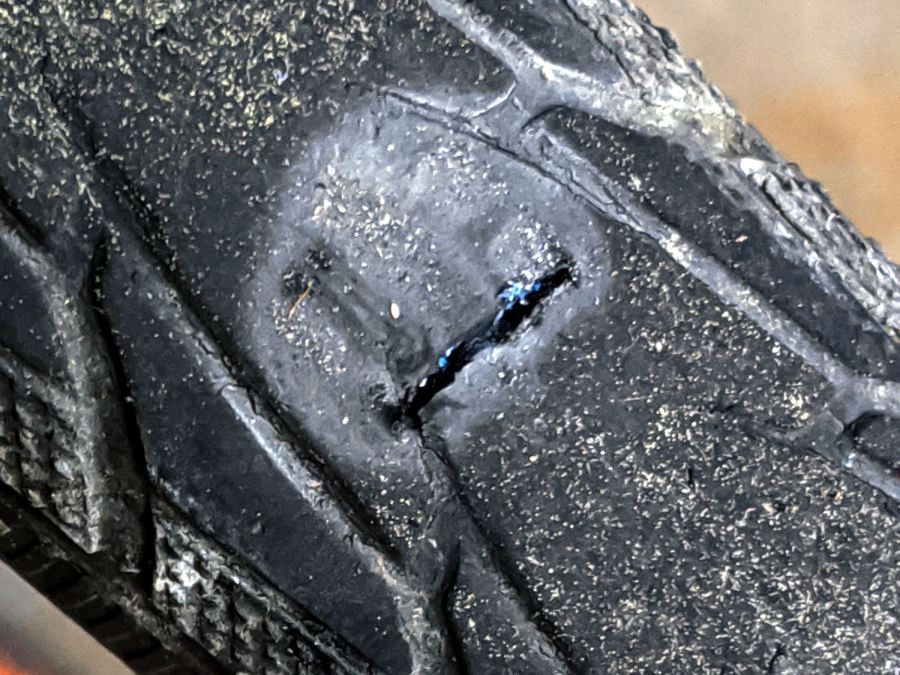
    Avoid shorting the brass terminals with, say, a small screwdriver, while shoving the battery out of the camera until you can grab it with your fingers and haul it out the rest of the way:

    SJCAM M20 - swollen battery case - left
    SJCAM M20 – swollen battery case – left

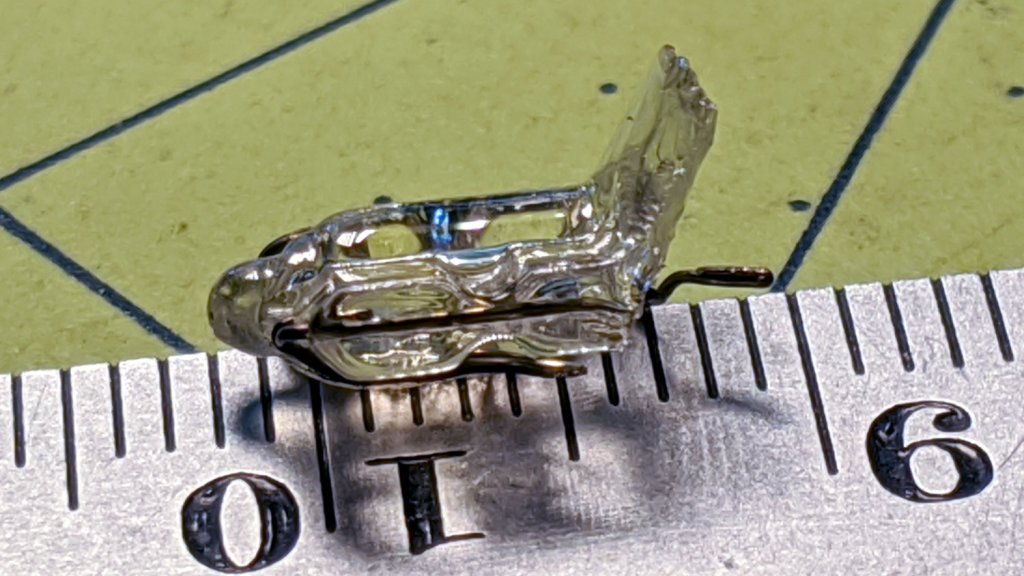
    Yeah, that puppy looks all swoll up:

    SJCAM M20 - swollen battery case - right
    SJCAM M20 – swollen battery case – right

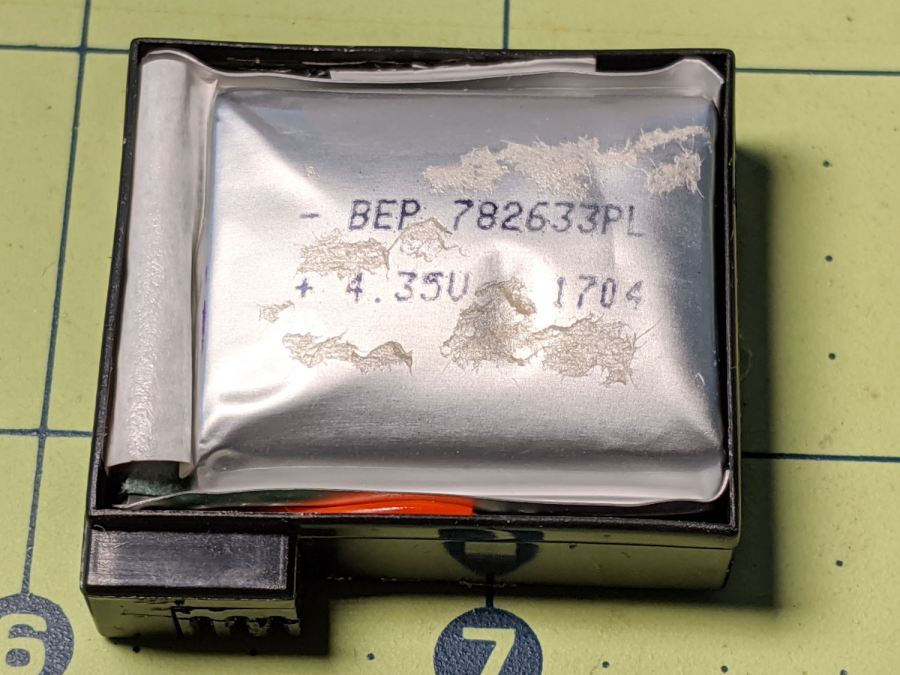
    Remove the all-enclosing label to reveal the bag inside:

    SJCAM M20 - swollen battery bag
    SJCAM M20 – swollen battery bag

    Pull the bag out to reveal the protection PCB:

    SJCAM M20 - battery case interior
    SJCAM M20 – battery case interior

    Snip the wires and salvage the case against future need.

    I bought the camera with three batteries, all three of which are now similarly swollen. I also got two official SJAM batteries with an official SJAM charger; both of those batteries seem to be in fine shape. I expect the codes on the five bags would reveal two different lots, but I’m not going to sacrifice a nominally good battery to find out.

    All three swollen battery bags show the same BEP 782633PL lot code and 1704 date code. I bought everything in January 2018, so those batteries had been sitting on the shelf for the better part of a year. Maybe that’s why they offered a “deal” for two spare batteries along with the camera?

    Installing one of the unswollen batteries, reconfiguring the camera’s settings & clock, and giving it a charge from the Anker USB pack put it back in operation.

  • Robin Nest: Fledging Day

    Robin Nest: Fledging Day

    The robin nestlings fledged fourteen days after we spotted the first eggshell on the driveway below the nest. The first one may have flown away the previous evening, leaving three increasingly restless siblings behind:

    Robin Fledging Day - three nestlings
    Robin Fledging Day – three nestlings

    They’re recognizably robins now, covered in young-bird speckle camouflage.

    Feeding continued apace:

    Robin Fledging Day - feeding
    Robin Fledging Day – feeding

    After feeding, robin nestlings produce fecal sacs, which the parents either eat or carry away:

    Robin Fledging Day - fecal sac
    Robin Fledging Day – fecal sac

    Robins aren’t big on facial expressions, but, speaking from personal experience, anything to do with diapers isn’t the high point of a parent’s day.

    And then there were none:

    Robin Fledging Day - empty nest with parasites
    Robin Fledging Day – empty nest with parasites

    The gazillion black dots on the soffit are pinpoint-sized insects / mites / ticks infesting the nest and, presumably, the birds. The earlier pictures don’t show them, so perhaps these missed the last bird off the nest and are now regretting their life choices.

    Go, birds, … gone!

  • JPG Recovery From a Camera FAT Filesystem

    JPG Recovery From a Camera FAT Filesystem

    You can do it by hand, as I used to, or use recoverjpeg:

    dmesg | tail
    cd /tmp
    sudo dcfldd if=/dev/sde1 of=pix.bin bs=1M count=100
    recoverjpeg pix.bin 
    ristretto image00*
    

    Nothing prizewinning, but better than no picture at all:

    Garage Robin - recovered image
    Garage Robin – recovered image

    Note that you start by copying a reasonable chunk of the partition from the Memory Stick / (micro)SD Card first, to prevent a bad situation from getting worse.

    Now I can remember the easy way the next time around this block …

  • Anonymous White USB Charger: Teardown

    Anonymous White USB Charger: Teardown

    Prompted by ericscott’s comment, I had to tear down the Anonymous White USB Charger to see what caused the bizarre current waveform when connected to the Arduino in a Glass Tile:

    Tiles 2x2 - anon white charger - pulse detail - 50 mA-div
    Tiles 2×2 – anon white charger – pulse detail – 50 mA-div

    Start by grabbing opposite corners in a small vise and gently cracking the solvent-bonded joint between the sections:

    Anon white charger - case cracking
    Anon white charger – case cracking

    Pull the base past the molded latches:

    Anon white charger - case opened
    Anon white charger – case opened

    Behold: components!

    Anon white charger - PCB top
    Anon white charger – PCB top

    On both sides of both PCBs!

    Anon white charger - PCB bottom
    Anon white charger – PCB bottom

    The top half of both boards, above the isolation cut, handles the line voltage and the lower half handles the 5 V USB output. You’ll note the absence of extra-cost parts like voltage feedback or ahem safety fuses.

    The IC on the right half is labeled DP3773, which doesn’t seem to exist, but is surely similar to the LP3773 Low-Power Off-Line / PSR Controller.

    Treating the whole regulator as a black box simplifies the schematic:

    Anonymous white charger - schematic
    Anonymous white charger – schematic

    The cap bridging the two sides should be a Y capacitor, but it’s an ordinary 1 nF ceramic cap with a generous 1 kV rating. As far as I can tell, having it inject AC line noise directly into the +5 V side of the USB supply is just a bonus.

    The base markings again:

    Anonymous white charger - dataplate
    Anonymous white charger – dataplate

    Whaddaya want for a buck, right?

    Other folks give better teardown pr0n

  • Traffic Signal Timing: Vassar Rd at Rt 9

    Traffic Signal Timing: Vassar Rd at Rt 9

    Our southbound bicycling routes take us through the intersection where Vassar Rd becomes NY Rt 9D at NY Rt 9. This is a large intersection:

    Rt 9 Vassar Rd SB - distances
    Rt 9 Vassar Rd SB – distances

    It’s worth noting that Rt 9D and Vassar Rd are also NYS Bicycle Rt 9., so bicycle traffic is expected, if not precisely welcomed.

    We’re traveling south on Vassar Rd, stopped in the right-hand lane (in the upper right of the picture). Eventually, the signal turns green:

    Vassar Rd at Rt 9 - Green signal - 2020-06-21
    Vassar Rd at Rt 9 – Green signal – 2020-06-21

    The traffic to our left starts moving, we start pedaling, and ten seconds later the signal turns yellow:

    Vassar Rd at Rt 9 - Yellow signal at 10 sec - 2020-06-21
    Vassar Rd at Rt 9 – Yellow signal at 10 sec – 2020-06-21

    The traffic hasn’t cleared the intersection, either, but they’re moving faster than we are. The first distance marker on the map shows we’ve traveled 85 feet at an average 5.8 mph from a standing start.

    After another five seconds, we’ve traveled 80 more feet (at 11 mph!), almost the far side of the intersection. Which is a good thing, because the signals on Rt 9 have already turned green and vehicles are accelerating toward us.

    There’s no point in reporting this to NYS DOT, because they don’t care and definitely won’t adjust the signal timing just for bicycles.

  • Schwalbe Marathon Plus vs. W5W Bulb Fragment: Standoff

    Schwalbe Marathon Plus vs. W5W Bulb Fragment: Standoff

    A clicking sound from the rear of the bike suggested something was amiss as I rolled up the driveway after a recent ride. Spinning the rear tire produced this alarming sight:

    W5W fragment - on tire - side view
    W5W fragment – on tire – side view

    Pulling it out of the gash shows it’s the base of a W5W (or something similar) automotive bulb:

    W5W fragment - on tire - front
    W5W fragment – on tire – front

    Which seems perfectly designed to cripple a bike tire:

    W5W fragment - millimeter scale
    W5W fragment – millimeter scale

    The gash cuts all the way across the tire tread:

    W5W fragment - tire gash
    W5W fragment – tire gash

    The blue stuff is Schwalbe’s rubber / latex / plastic SmartGuard layer, all 5 mm of it hard at work separating the glass from the inner tube.

    I cleaned the wound, filled it with silicone rubber, topped it with some duct tape, and it’s still holding air after a 13 mile ride. I think the gash cut through the rubber tread and SmartGuard layer, but didn’t affect the cords in the tire carcass, so keeping further road debris out of the gash should let the tire wear out more-or-less normally.

    Putting duct tape on the tread will certainly help …

  • Traffic Signal Timing: Burnett Blvd at Rt 55

    Traffic Signal Timing: Burnett Blvd at Rt 55

    Nothing has changed since NYS DOT added another five seconds to the green phase on Burnett Blvd in front of their Region 8 HQ building to give bicyclists a generous ten seconds to cross six lanes of traffic from a standing start.

    The Subaru WRX next to us will have no trouble clearing the intersection:

    Burnett Blvd at Rt 55 - Green signal - 2020-06-16
    Burnett Blvd at Rt 55 – Green signal – 2020-06-16

    Ten seconds later, he’s far down the road (barely visible under the median signage) and I’m just lining up with the third traffic lane:

    Burnett Blvd at Rt 55 - Yellow signal - 10 sec - 2020-06-16
    Burnett Blvd at Rt 55 – Yellow signal – 10 sec – 2020-06-16

    Four seconds later, traffic on Rt 55 gets a green signal and I’m almost lined up on the far side:

    Burnett Blvd at Rt 55 - Rt 55 Green signal - 2020-06-16
    Burnett Blvd at Rt 55 – Rt 55 Green signal – 2020-06-16

    You’d think with all the emphasis on bicycling these days, NYS DOT would be receptive to change, but … there’s a reason I’m such a bitter, cynical person on that subject.