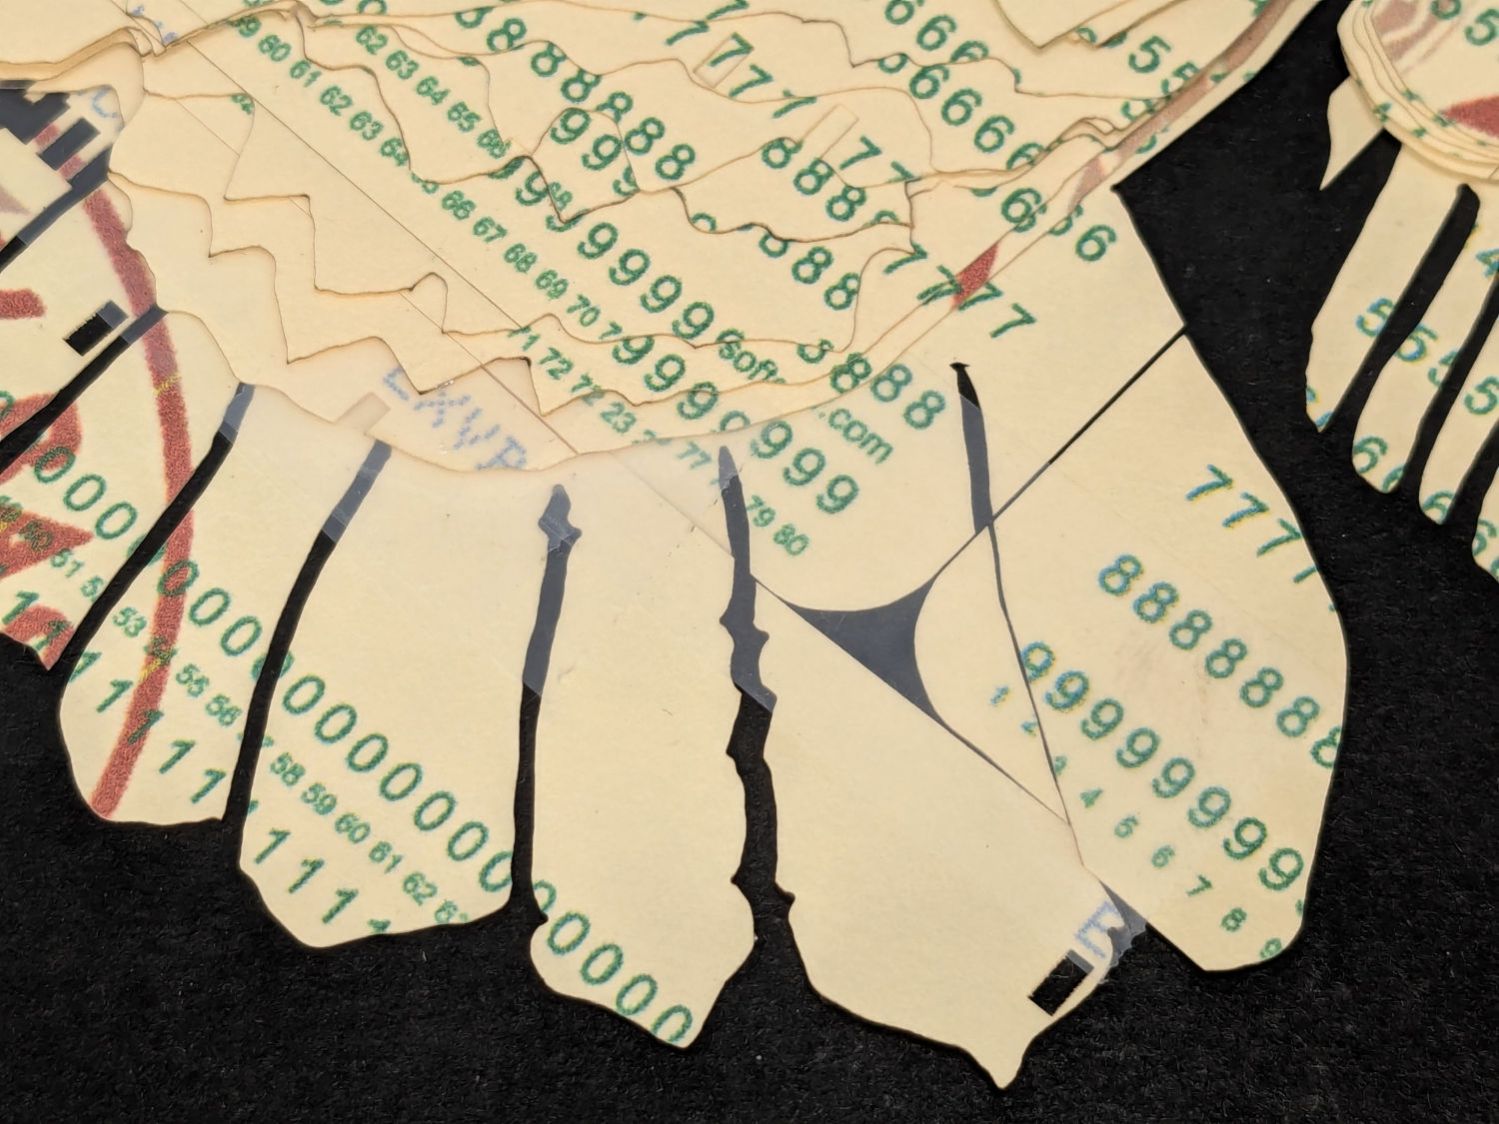
My initial process of picking punched cards from the top of the stack, taping them together, then cutting a layer of the eagle produced unpredictable results when there weren’t enough holes to be interesting or a card joint appeared in a conspicuous spot:
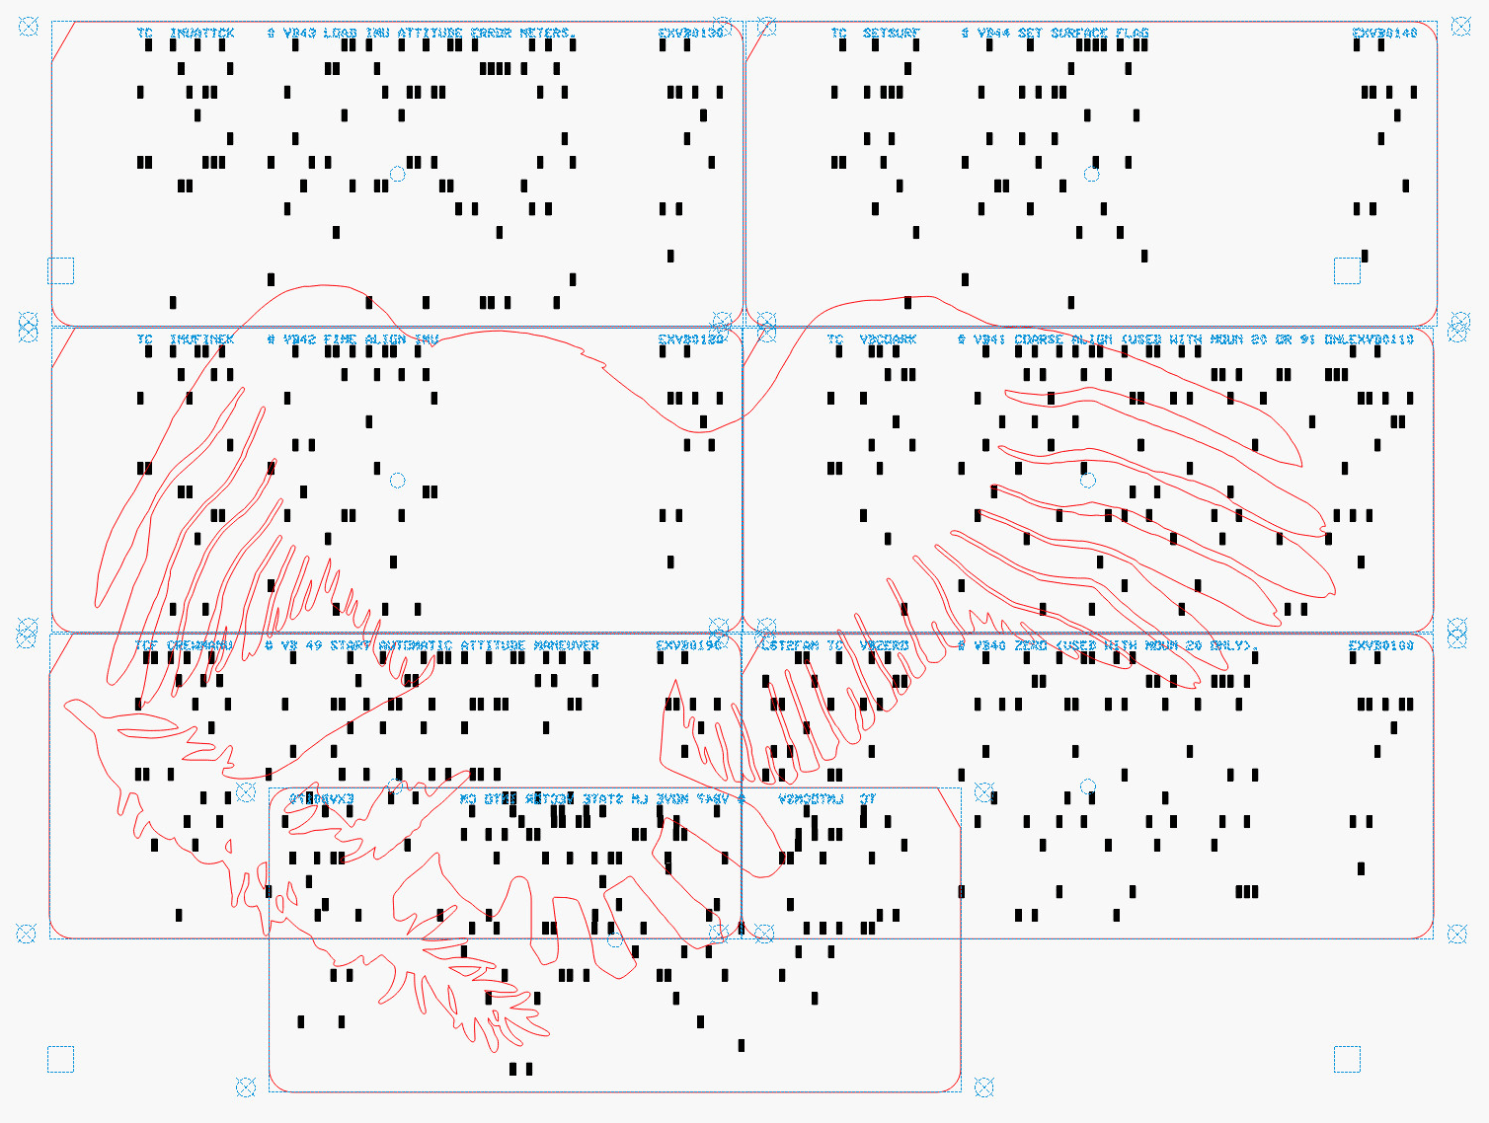
I now arrange the SVG image of the card’s holes for best effect on each eagle layer:
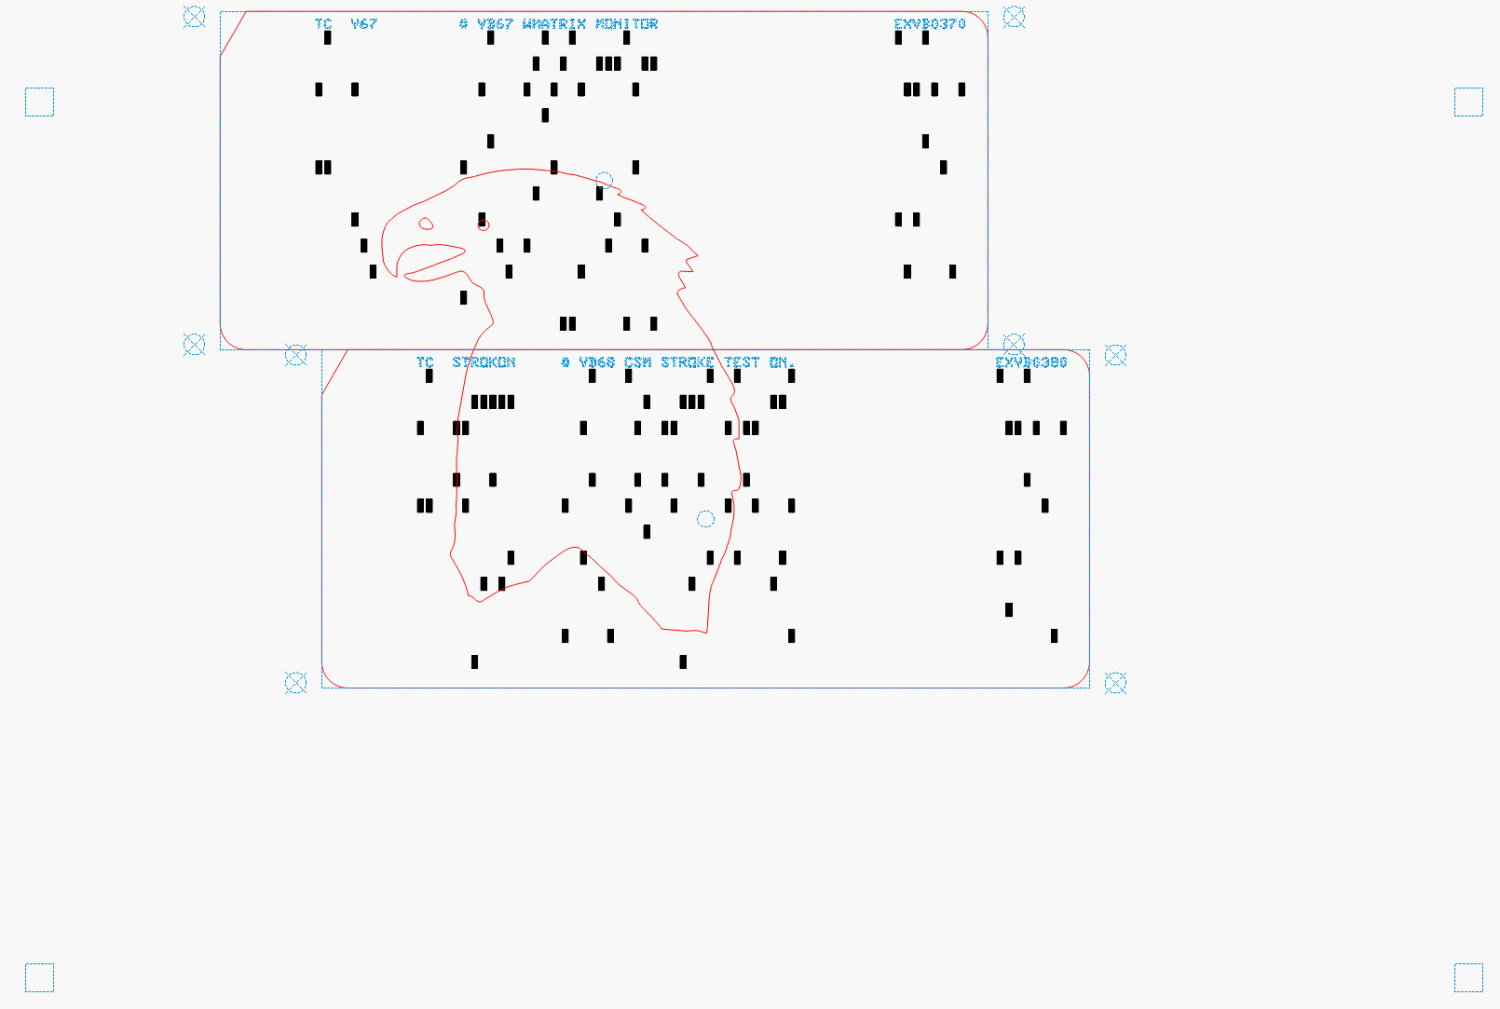
The small squares near the corners of the image appear on every layer to properly register all the eagle outlines.
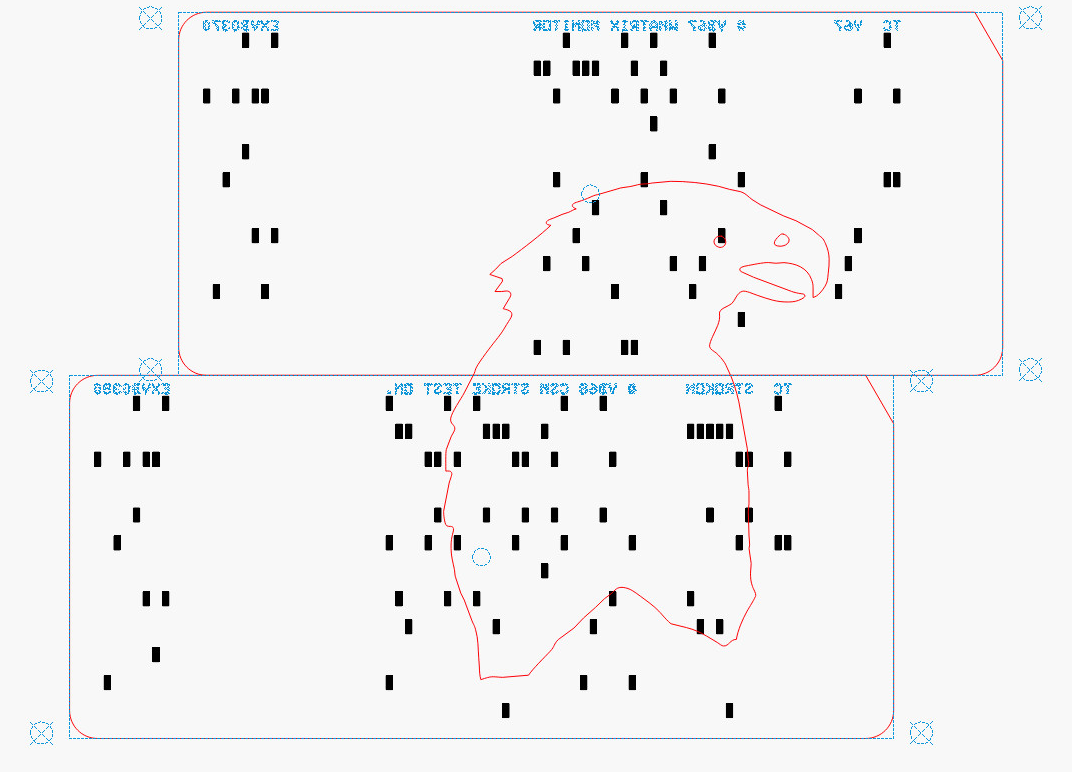
Mirroring the layout produces the hole pattern as seen from the back side of the cards, where the tape is applied:
Then it’s (relatively) easy to align the cards while muttering “the rightmost hole in the lower sequence number is just about aligned with the upper card edge, which puts the middle-ish hole in the group of four in the 9 row over the left hole of those two” and so on and so forth. Cut off a strip of tape, carefully lay it along the joint between the cards, and add them to the outgoing pile.
The top two layers are cut with the back = unprinted = blank side of the card upward to produce the eagle’s white head, with the outlines strategically located to avoid shredding the feathers with holes:
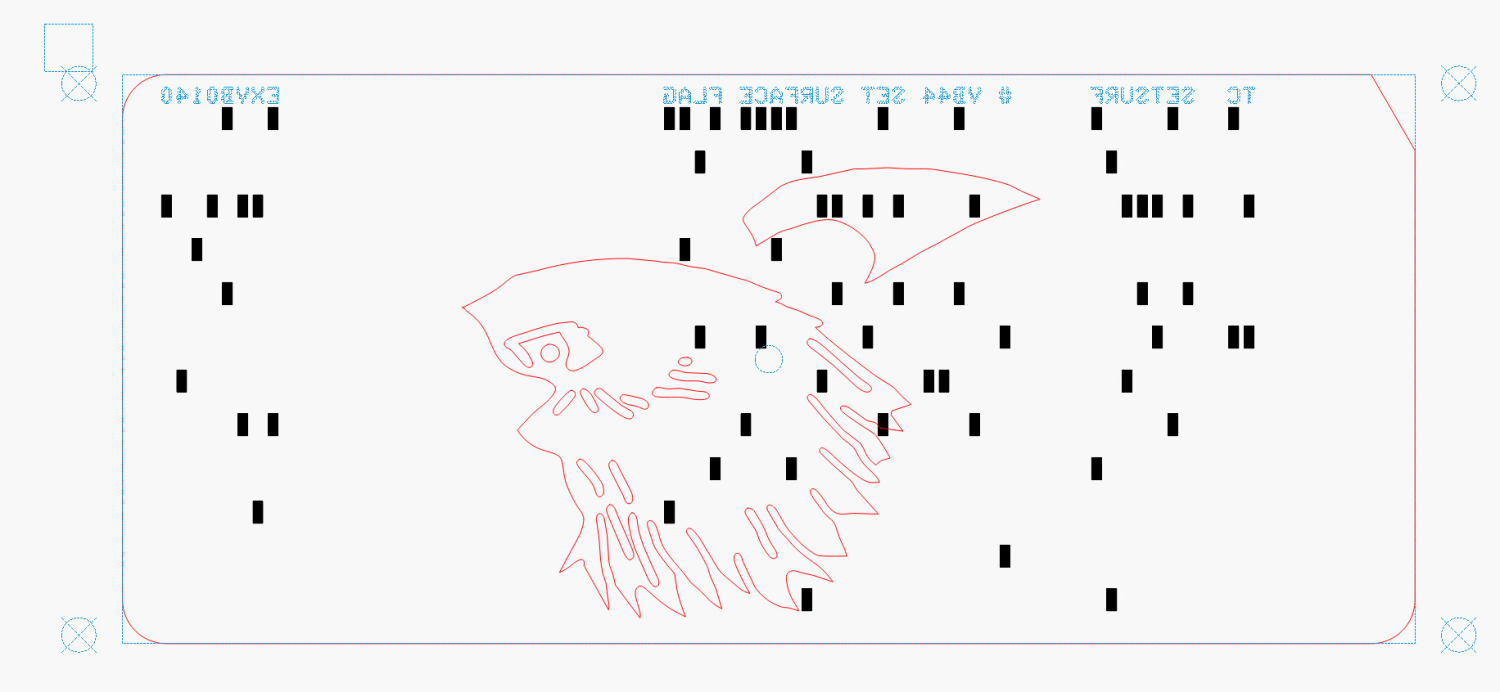
The value of this process becomes more apparent for the nine cards making up the bottom layer:
Most of the white tail comes from the reversed card in the bottom row, inset into the two cards above it. The next layer covers those sections of the legs and olive branch, which is easy to confirm by aligning the layers using their border squares.
The layout mirrored for easier taping:

This is from a previous layout, but the improvement is obvious:
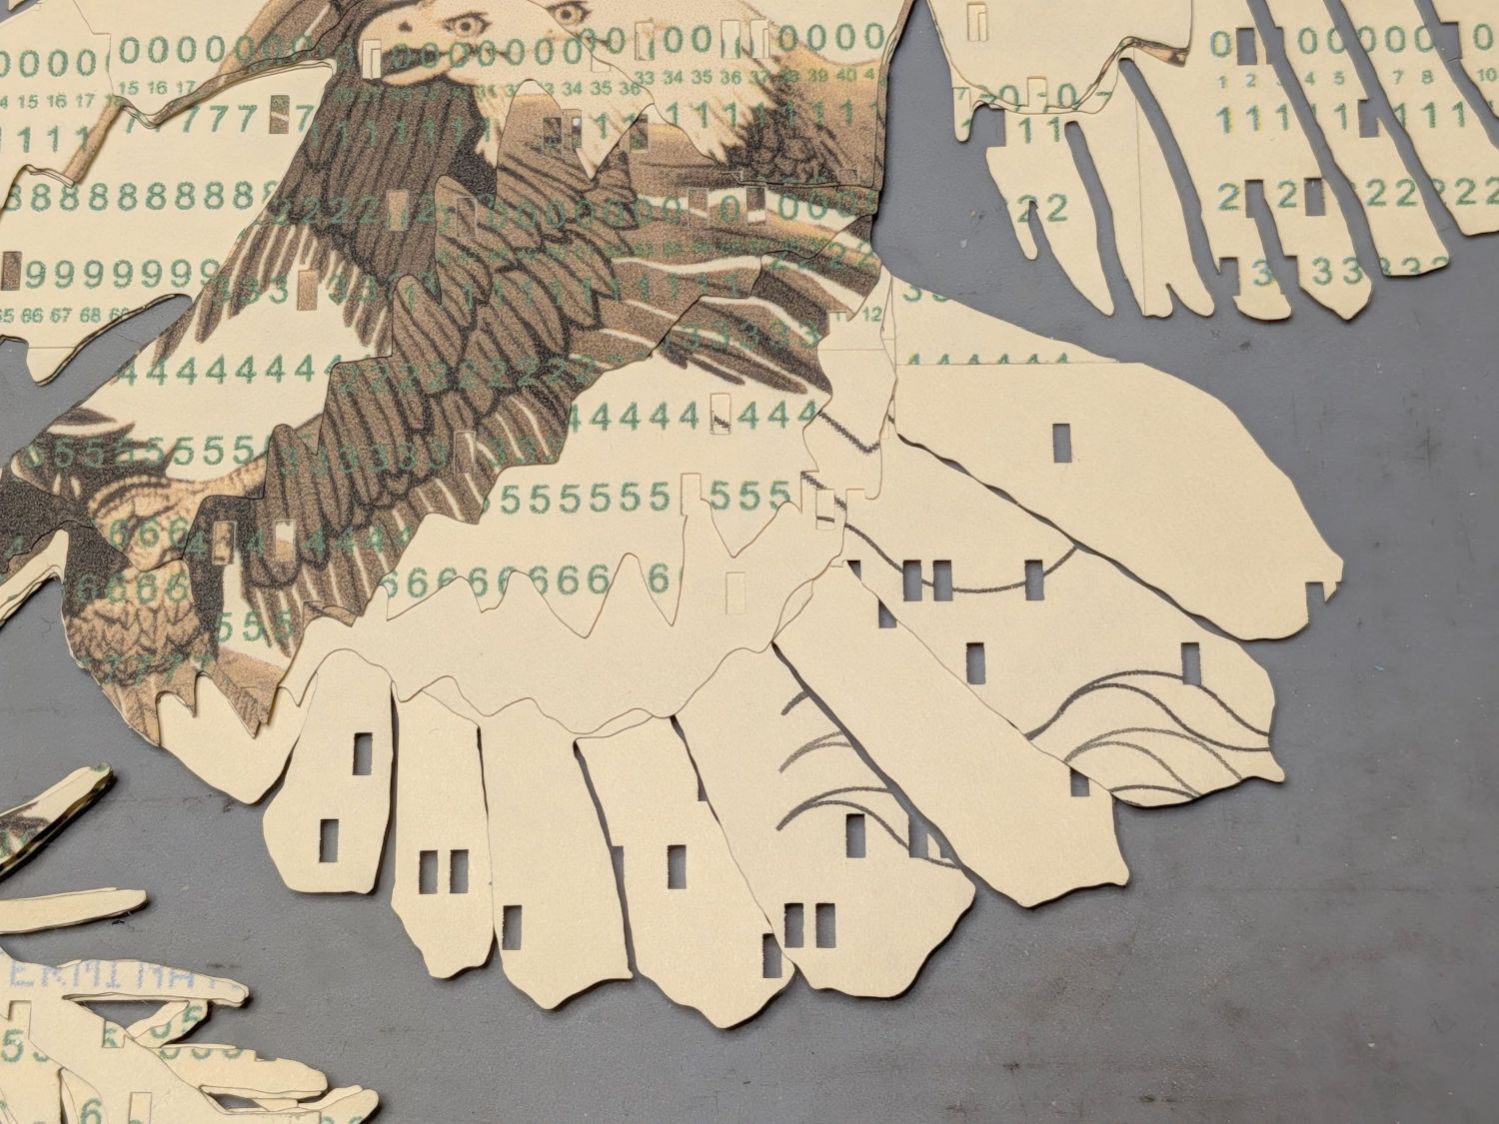
The trick with all this is to select only the eagle outline for cutting amid all the card details. Although putting the cards on a tool layer would avoid that problem, the holes are much less visible and they’re pretty much the entire point of this process.
Aligning the taped cards on the platform with the to-be-cut outline follows much the same process as aligning the printed cards for punching:
- Select the cards and the eagle outline
- Snap to the middle of the LightBurn workspace with the
Pkey - Focus the laser on the cards if you haven’t already done so
- Move the laser head to one of the card bevels using
Ctrl-Land clicking on one end of the bevel - Skootch the cards to put that bevel at the red dot pointer location under the laser head
- Move the laser head to another bevel
- Skootch the cards as needed
- Iterate until satisfied
- Fire The Laser
Although each card layout has the four targets used to cut it from the printed card stock, those targets no longer exist on the cards because they’ve been cut off.
You could use Print and Cut to align the LightBurn workspace to the cards, but it’s easier and faster to just skootch the cards around.
Actually cutting the outline takes a few seconds and is kinda anticlimactic after all that setup.

Spam comments get trashed, so don’t bother. Comment moderation may cause a delay.