The Industrial Age bobbin winder for Mary’s HQ Sixteen long-arm machine bunched the thread on one end of the bobbin, rather than distributing it in even layers as it should. Tinkering with the thread tension setting being unavailing, I settled in for some debugging.
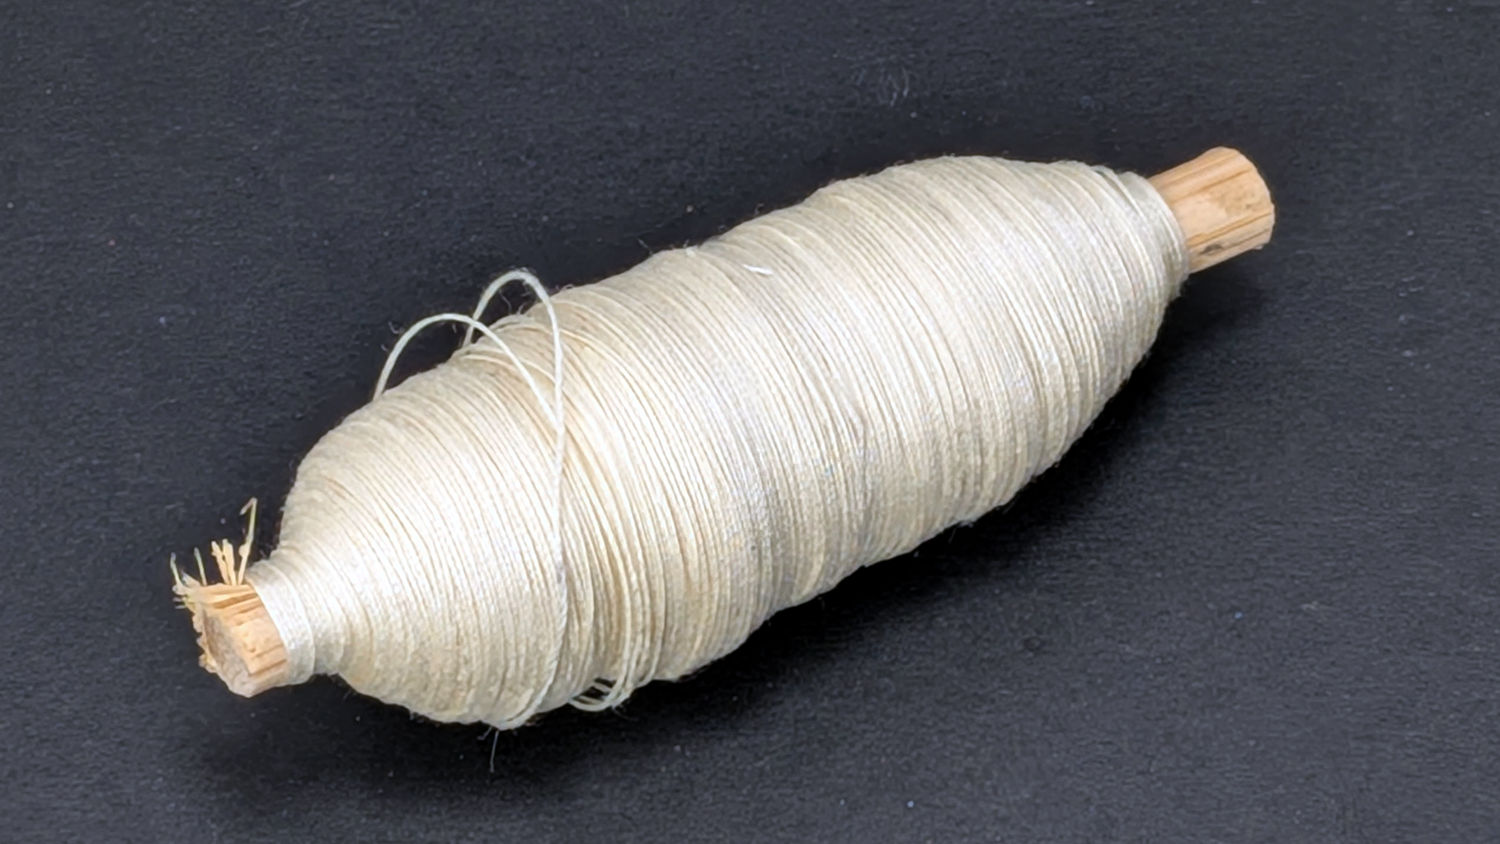
After filling two bobbins from a spool of the thread Mary uses for practice quilts, I decided I should reuse the thread. Mounting the filled bobbin on a 6 mm horizontal shaft attached to the vertical pin normally locating the spool let the thread pay out in the proper orientation, with a duct-tape lashup holding the shaft in place:
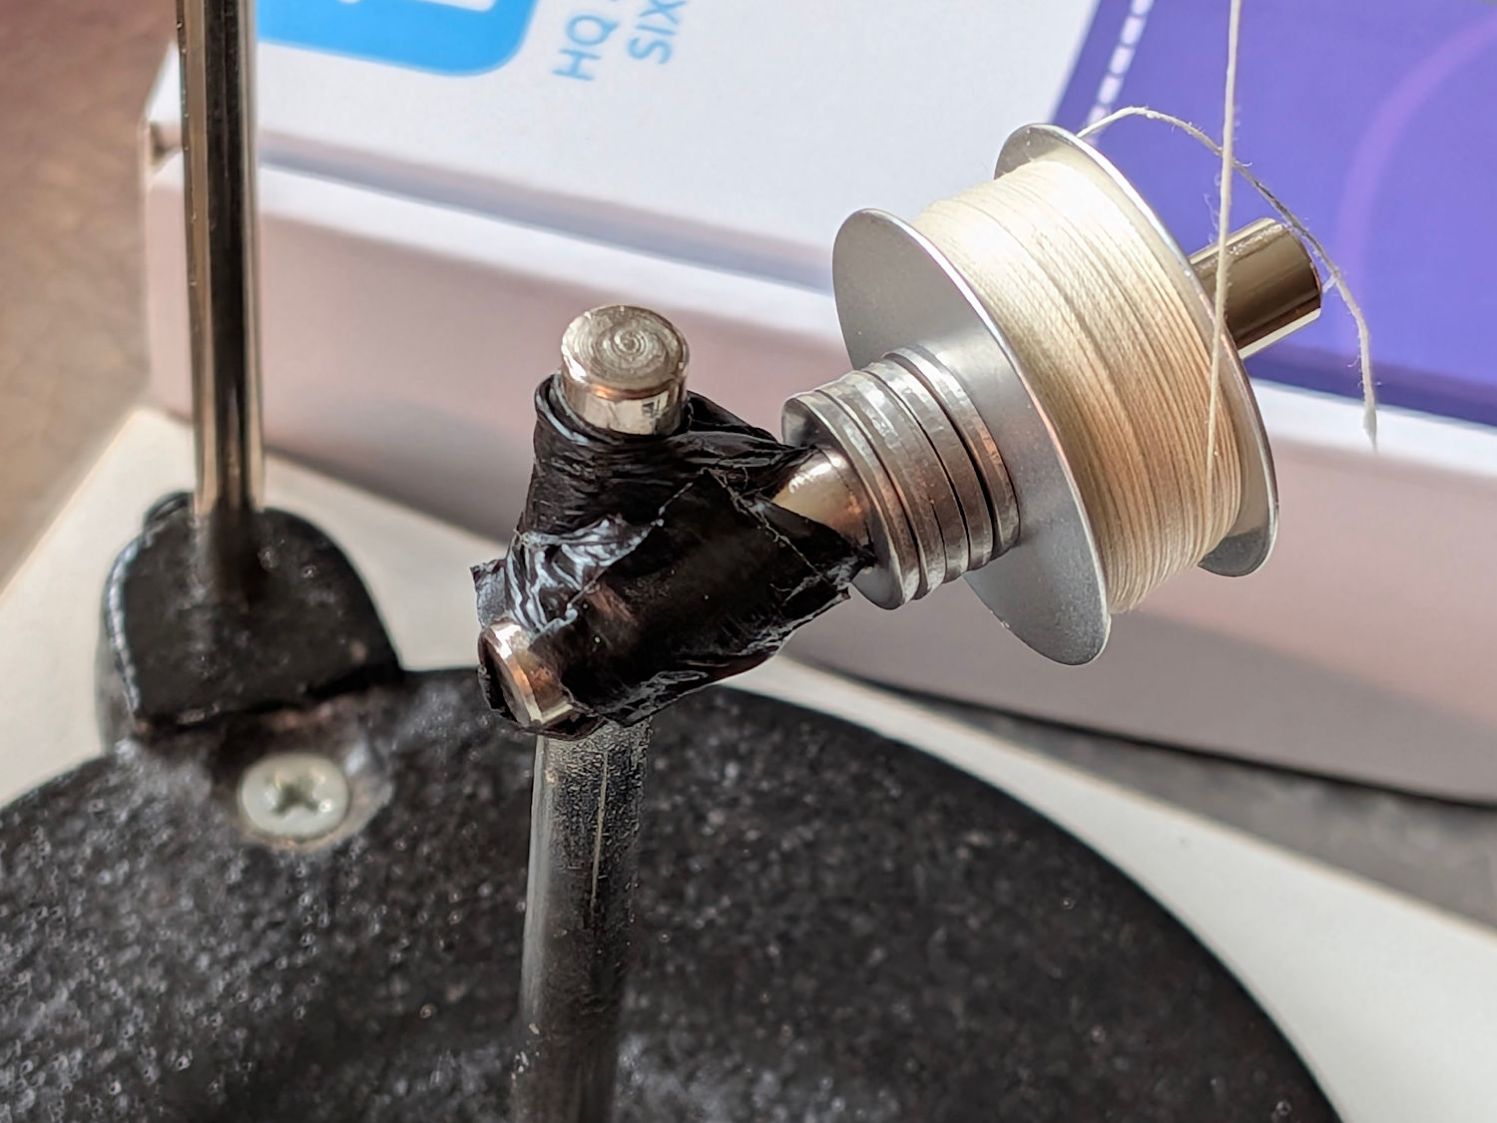
I added the stack of washers to keep the bobbin away from the duct tape after having the tape’s adhesive migrate onto the spinning bobbin.
The thread from the spool or, in my case, a filled bobbin, passes between a pair of tension disks on its way to the bobbin spun by the motor:

A conical spring presses the tension disks together, with the thread clamped between them:
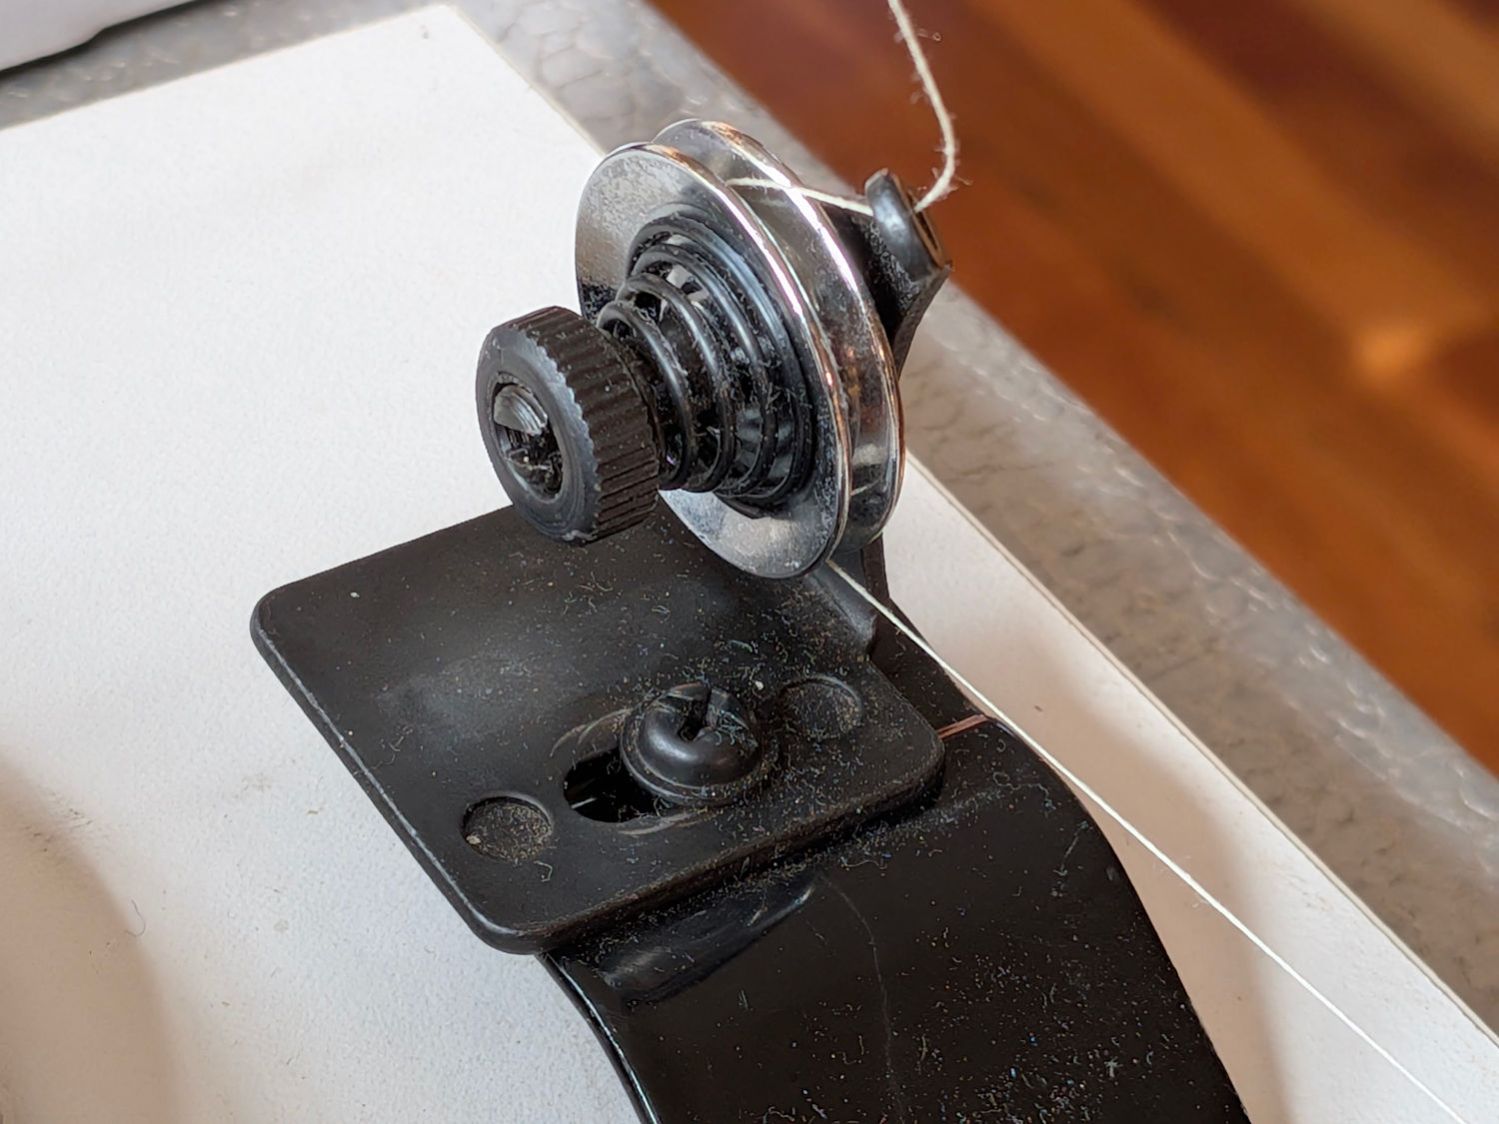
The instructions suggest using “the lightest tension possible”, but backing the nut off to hang by its fingernails had no effect. The spring has a bent end passing through the slotted shaft, so rotation of the disks won’t unscrew the nut.
The washer under the mounting screw left slight scars in the black oxide finish on the fixture, presumably from previous attempts to adjust the thing:

The threaded shaft is not exactly parallel to the base, because the upright arm is slightly over-bent, but I think that has no effect on the outcome, because the thread path doesn’t depend on the disk angle.
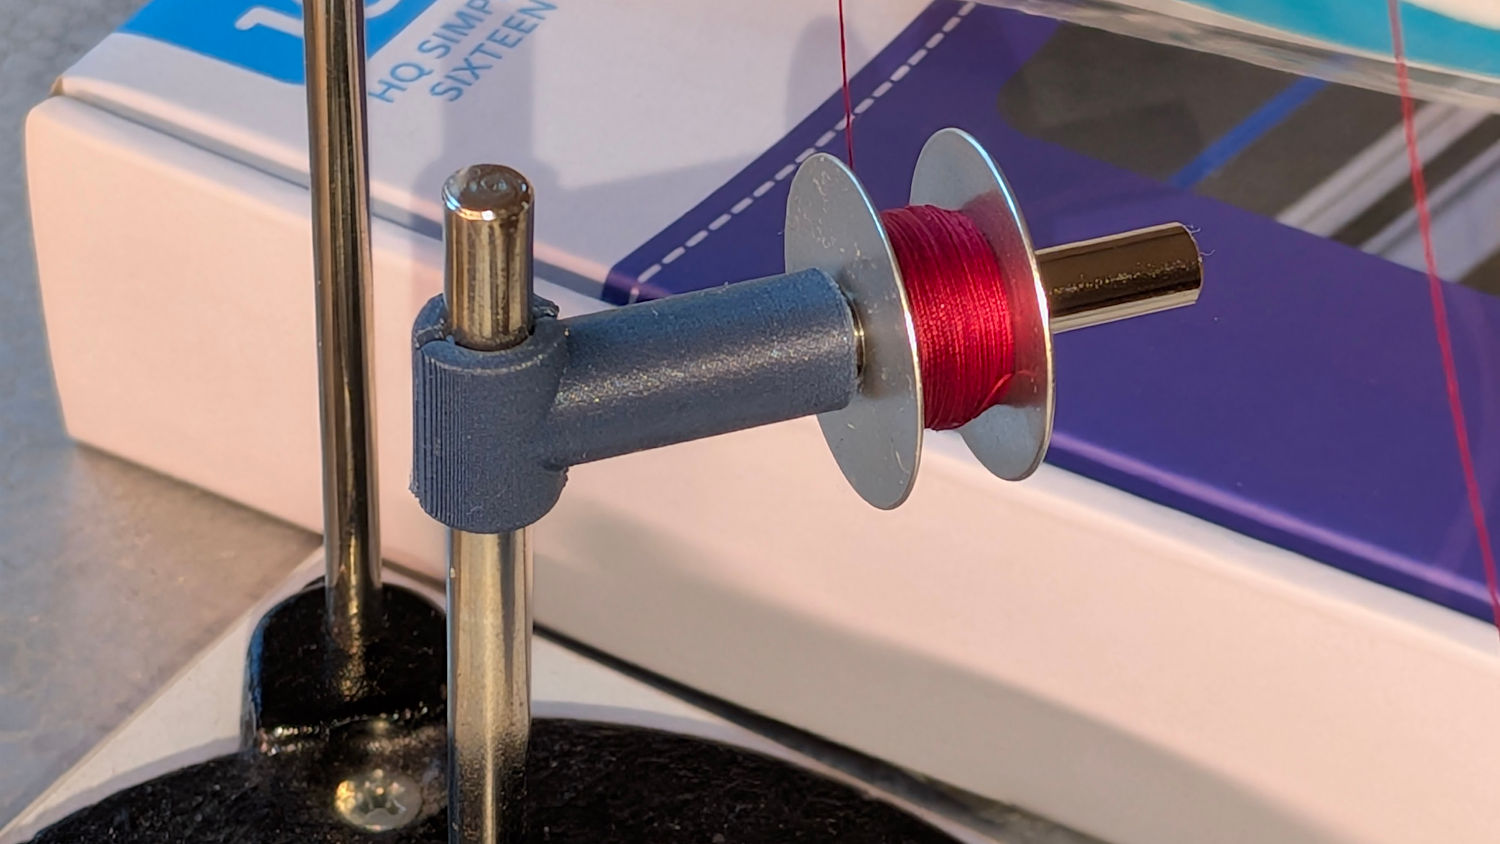
Because the thread accumulated on the outer side of the bobbin (to the right in that picture), I loosened the mounting screw and shoved the fixture all the way to the left. That should, if anything, bias the thread accumulation to the other (inner) side of the bobbin.
As it turned out, relocating the tension disks caused the thread to distribute evenly across the bobbin, with only occasional hesitations and no significant accumulations; Mary pronounced the result entirely satisfactory.
The motor dataplate says it runs at 7000 RPM, so the 3/4 inch O-ring drives the 4 inch wheel at about 1300 RPM. This was sufficiently terrifying I immediately set up a triac speed control (intended for a router) to throttle it down, but with the bobbins now filling properly we run the motor at full speed and it fills a bobbin in 23 seconds flat.
After we filled half a dozen bobbins with blue thread for the quilt project, I conjured an adapter from the vasty digital deep for a snippet of 6 mm rod with a D-shaped end:
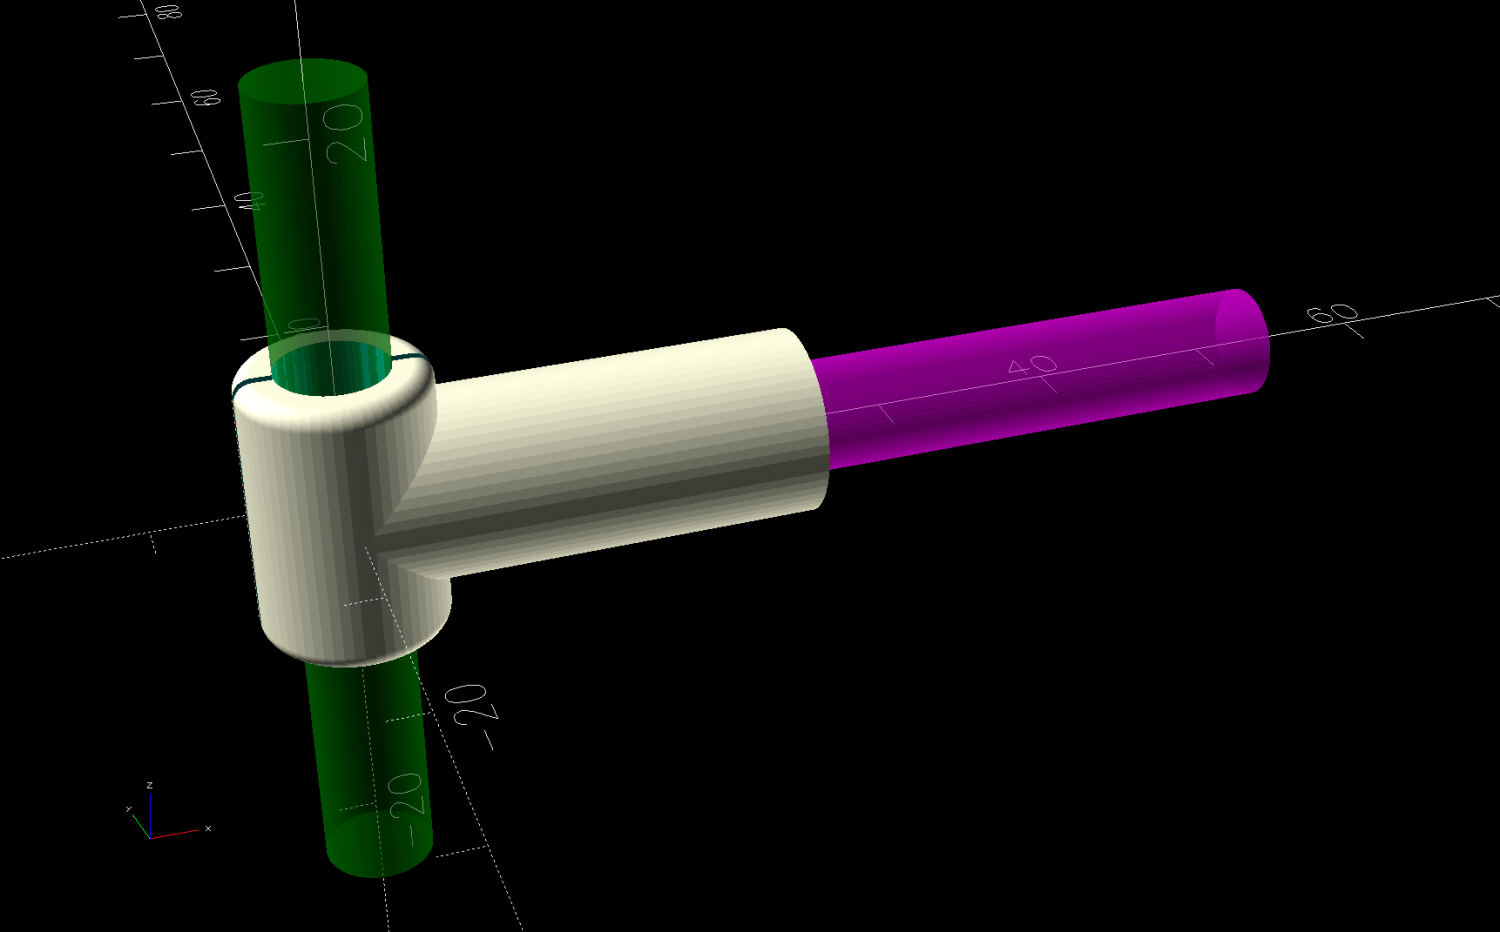
The adapter builds on one leg, with a brim for stability:

And looks like it belongs there:
It’s now in the box of HQ Sixteen bobbins, where we both hope it will remain undisturbed forevermore.
Although the vertical pin locating the spools (and holding the adapter) is nominally 6 mm, burrs in the chrome plating prevented the bobbin’s 6 mm bore from sliding over it. In retrospect, that prevented me from just dropping the bobbin on the pin and unwinding the thread over the side of the bobbin, which likely avoided some serious-to-lethal thread tangles.
After all that debugging, I had several bobbins full of well-worn thread, so:
- Chuck a chopstick in the mini-lathe
- Tape thread to chopstick
- Put bobbin on another 6 mm shaft
- Run lathe at a reasonable speed
- Produce what looks very much like a cocoon
All’s well that ends well.
The OpenSCAD source code as a GitHub Gist:
| // HQ Sixteen Bobbin Winder – Unwind adapter | |
| // Ed Nisley – KE4ZNU | |
| // 2026-03-27 | |
| include <BOSL2/std.scad> | |
| Layout = "Show"; // [Show,Build] | |
| /* [Hidden] */ | |
| HoleWindage = 0.2; | |
| Protrusion = 0.01; | |
| Gap = 5.0; | |
| $fn=5*3*4; | |
| WallThick = 2.0; | |
| SpoolRodOD = 6.03; // vertical spool rod | |
| Kerf = 0.5; | |
| BobbinRodOD = 6.0 + HoleWindage; // horizontal bobbin rod | |
| BobbinRodDee = 4.95; // … remaining rod | |
| DeeLength = 20.0; // … recess depth | |
| DeeRodCyl = 28.0; // … overall rod length | |
| AdapterOD = BobbinRodOD + 2*WallThick; | |
| AdapterOAH = 1.5*AdapterOD; | |
| AdapterOAL = AdapterOD + DeeLength; | |
| //—– | |
| // Define things | |
| // Surplus-deal 6 mm rod with a lengthy flat on one end | |
| module DeeRod() { | |
| union() { | |
| intersection() { | |
| xcyl(DeeLength + Protrusion,d=BobbinRodOD,anchor=RIGHT); | |
| down((BobbinRodOD – BobbinRodDee)/2) | |
| cuboid([DeeLength + Protrusion,BobbinRodOD,BobbinRodDee],anchor=RIGHT); | |
| } | |
| xcyl(DeeRodCyl,d=BobbinRodOD,anchor=LEFT); | |
| } | |
| } | |
| module Adapter() { | |
| difference() { | |
| union() { | |
| cyl(AdapterOAH,d=AdapterOD,rounding=WallThick/2); | |
| xcyl(AdapterOAL – AdapterOD/2,d=AdapterOD,anchor=LEFT); | |
| } | |
| zcyl(AdapterOAH + 2*Protrusion,d=SpoolRodOD); | |
| cuboid([AdapterOD+2*Protrusion,Kerf,AdapterOAH+2*Protrusion]); | |
| right(AdapterOD/2 + DeeLength + Protrusion) | |
| DeeRod(); | |
| } | |
| } | |
| //—– | |
| // Build it | |
| if (Layout == "Show") { | |
| Adapter(); | |
| color("Green",0.5) | |
| zcyl(3*AdapterOAH,d=SpoolRodOD); | |
| color("Magenta",0.5) | |
| right(AdapterOD/2 + DeeLength + Protrusion) | |
| DeeRod(); | |
| } | |
| if (Layout == "Build") | |
| up(AdapterOD/2 + DeeLength) | |
| yrot(90) | |
| Adapter(); |

Spam comments get trashed, so don’t bother. Comment moderation may cause a delay.