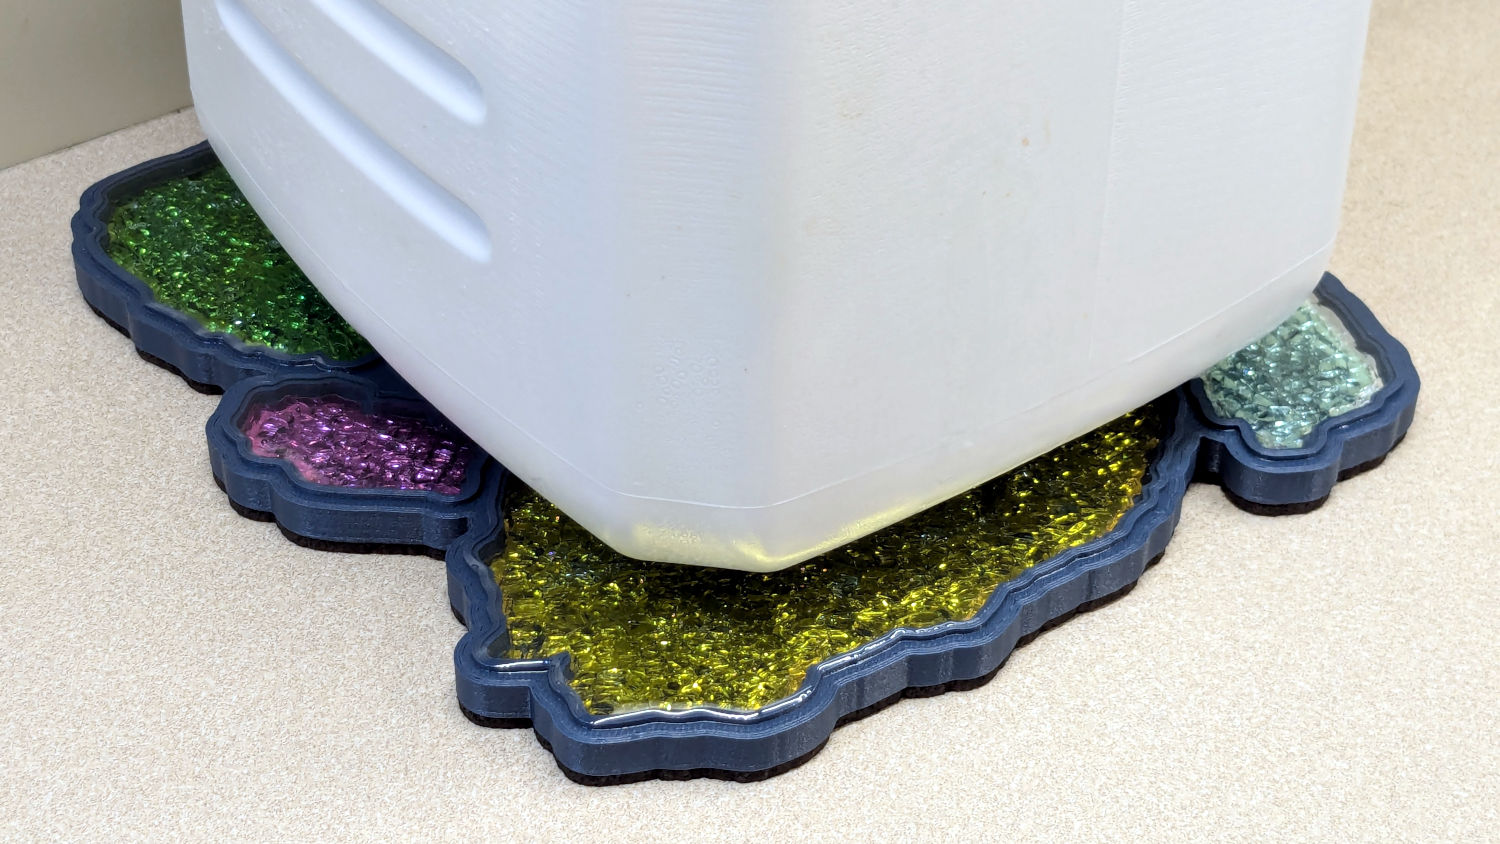
Those of long memory will recall our vermiculture setup in the basement that turns kitchen scraps into plant food. We accumulate scraps in plastic milk jugs, which jugs get recycled after they become grody.
I finally made a decorative coaster to keep the sometimes-wet jug off the counter:
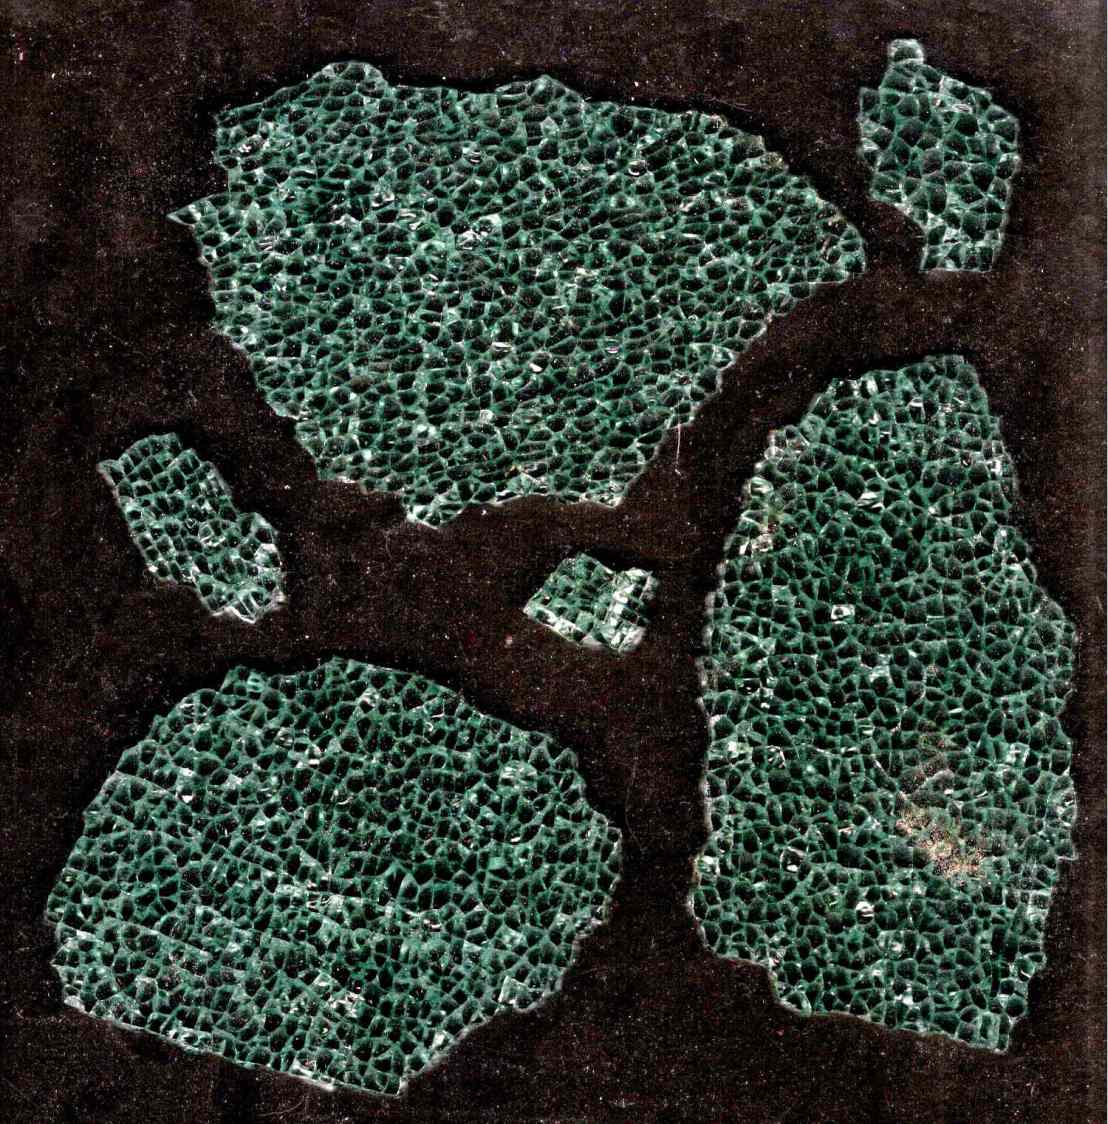
This used several of the larger smashed glass fragments from the collection:
They all fit inside a 165 mm square, with the conformal perimeter disguising the outline:
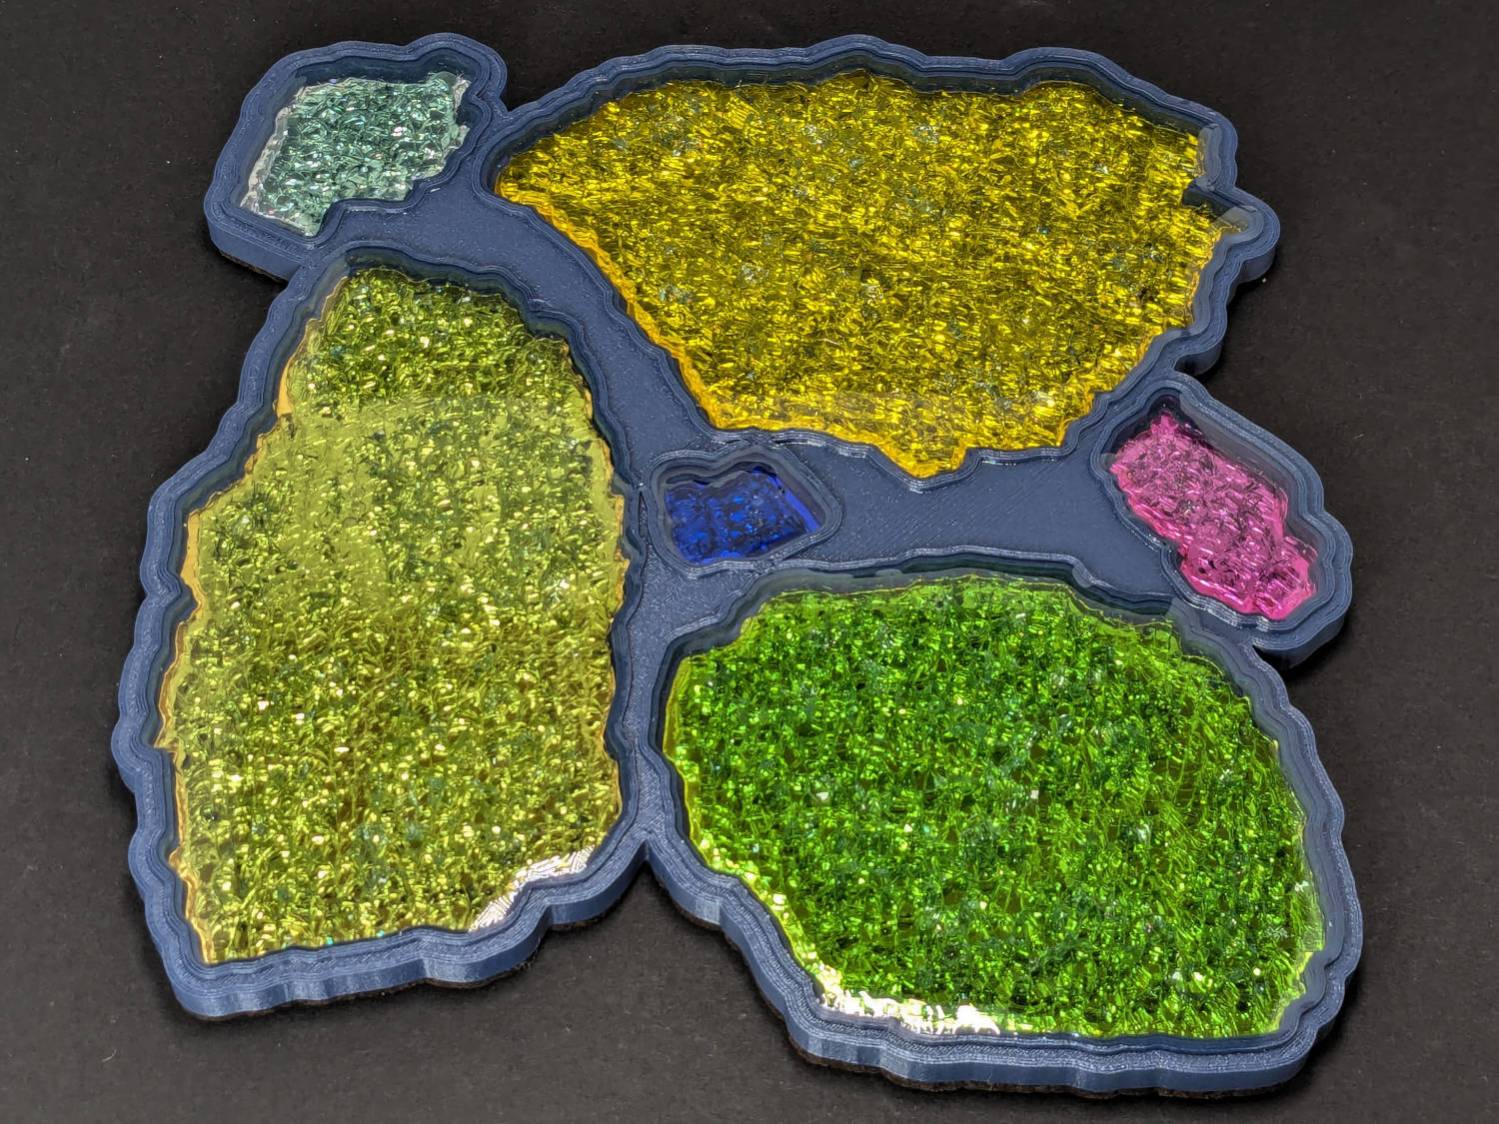
I printed the frame with the same blue PETG-CF that leaked epoxy the last time around. Using the correct filament setting (Extrusion Multiplier = 1.0) produced an epoxy-tight frame:
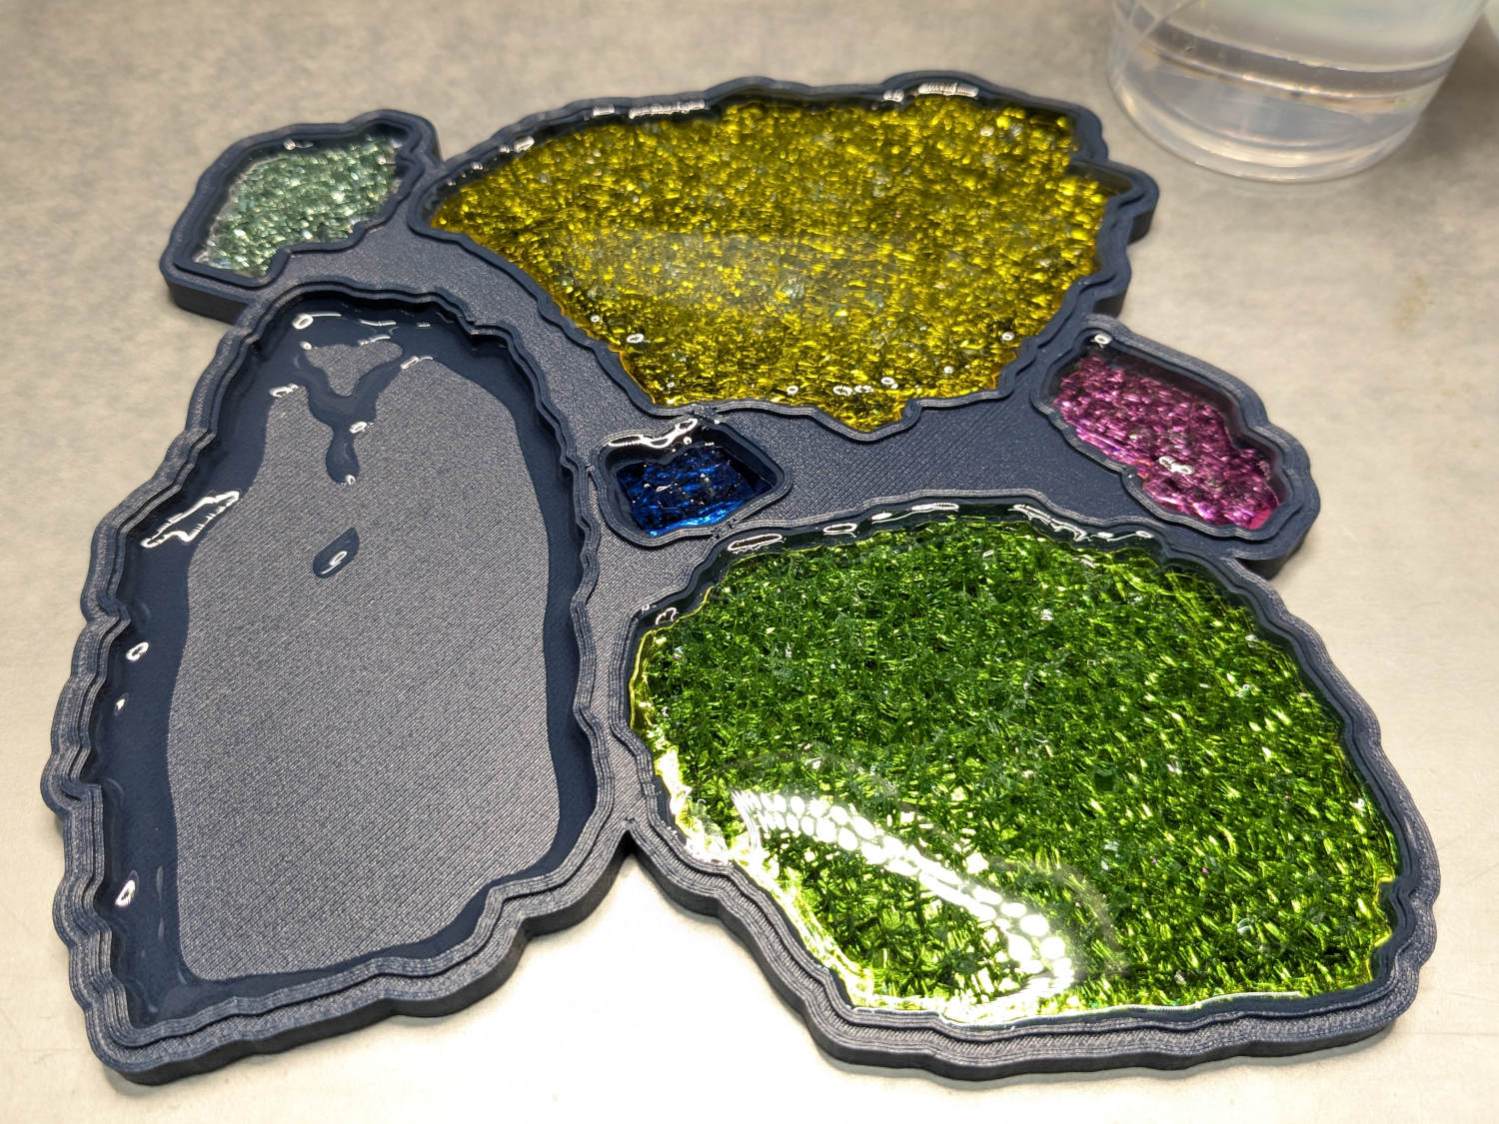
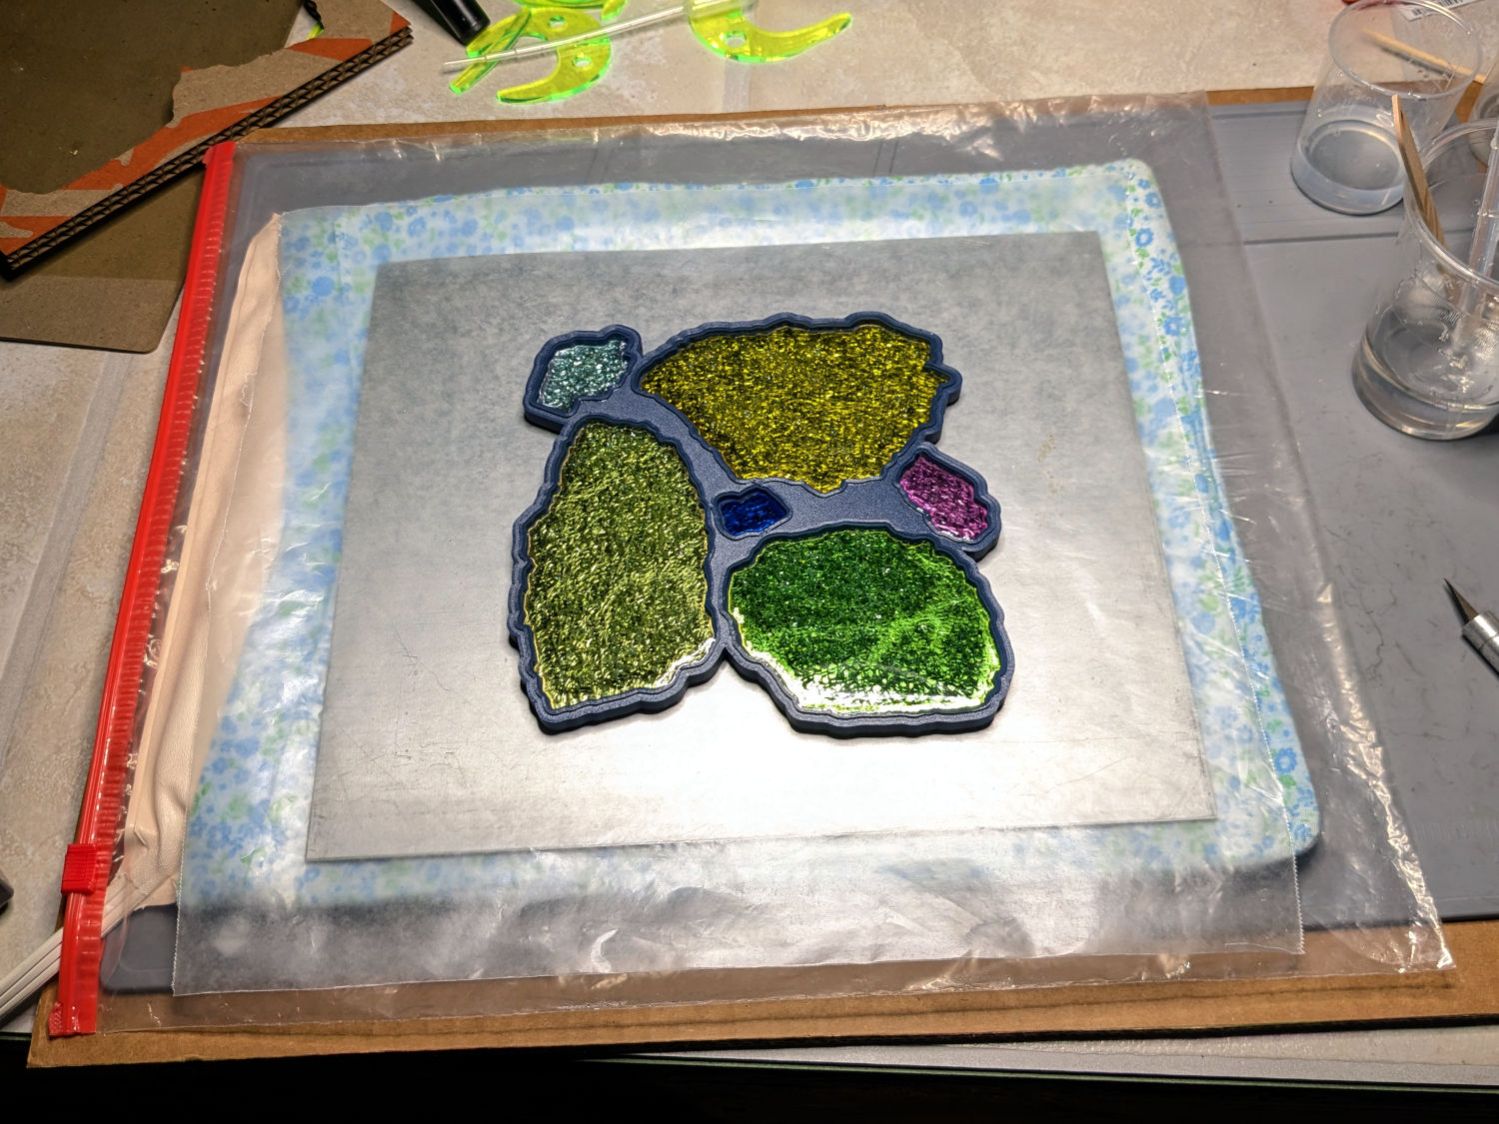
The overall process:
- Run a bead of epoxy around the edge of each recess
- Fill in the center with a thin layer
- Squish the metallized paper reflector in place starting from one end to ease the bubbles out
- Cover the reflector with another layer of epoxy
- Lay the glass fragment down starting at one end
- Press gently down to get all the bubbles out
- Cover the glass with more epoxy
I dripped enough epoxy on each fragment to form a meniscus without having it go over the rim:
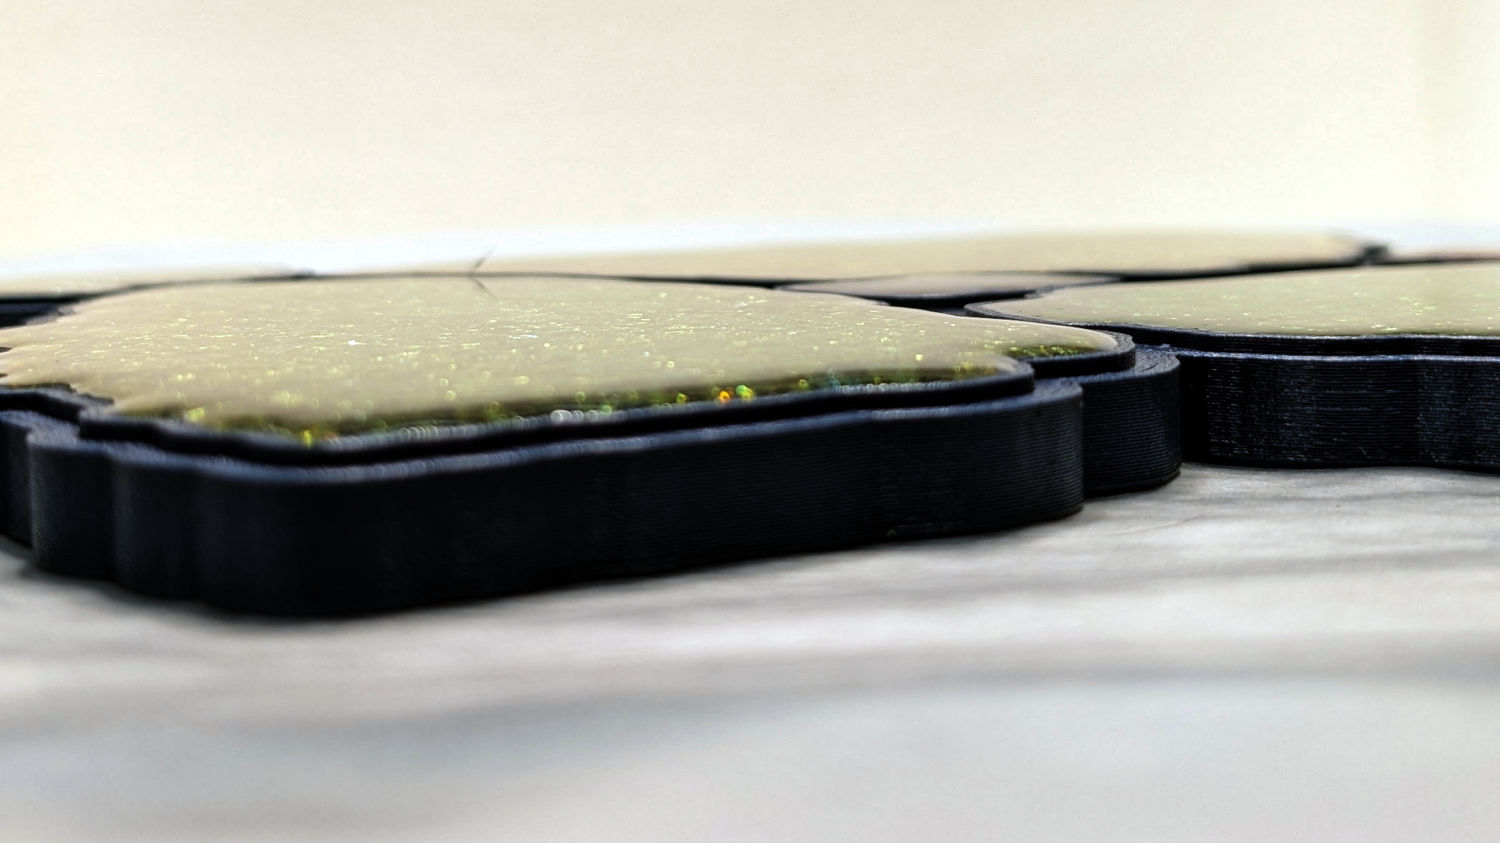
The Basement Shop temperature is just over 60 °F, so I put a heating pad in a huge ziplock bag, laid an aluminum sheet atop it as a heat spreader, put some waxed paper on the aluminum just in case, then did the filling described above:
A cardboard box on top helped the heating pad keep the coaster at a uniform 85 °F, slightly warmer than the epoxy instructions recommend, but it cured overnight with a wonderfully shiny surface.
Now that I have the process down, making glittery coasters is surprisingly easy.

Spam comments get trashed, so don’t bother. Comment moderation may cause a delay.