Making 200×200 mm layered paper “pictures” involved cutting the square blanks from 8½×11 Letter sheets, putting those blanks in a fixture to hold them flat, then cutting the layer patterns:

That worked well enough, but it occurred to me that I should cut the patterns directly into the Letter sheet, with a couple of tabs on each edge holding the square to the sheet so it didn’t fall free.
A cardboard prototype showed this would actually work, at least after I fixed the tab width to keep them from just evaporating:

The top and bottom strips of tape hold cardboard bars that flatten the slightly curled metallic paper. The tape on the sides holds the cardboard flat to the knife bars across the laser platform.
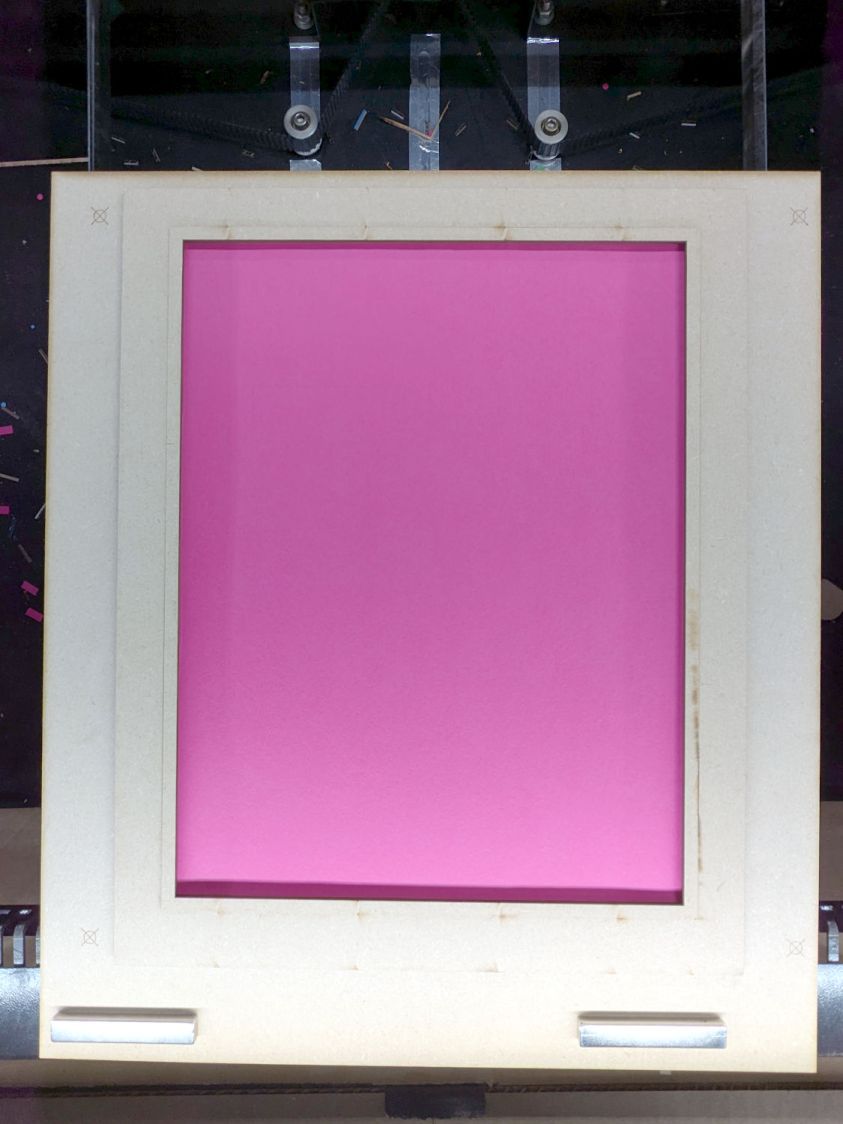
A few adjustments later, I had an MDF version:

Which fits atop the bars even better:

Cutting colored paper definitely makes for cheerful chaff!
The two bar magnets hold the fixture in place on the steel platform rim. The aluminum knife bars stand slightly proud of the steel, so there’s a 1.4 mm chipboard shim glued under the fixture to put it flat on the bars.
The opening is 10 mm smaller than the Letter sheet to support it all around. The recess is 1 mm larger than the sheet to allow for slight size variations, with an MDF ring flattening the sheet:
The four targets in the corners correspond to targets in the LightBurn template suitable for Print and Cut alignment:

The alert reader will note the fixture targets on the MDF fixture sit juuuust slightly to the right of where they are in the template. It turns out the targets cannot be grouped with anything else (or even each other), because when you select a target on the template for Print and Cut the center of the selection must match the location of the physical target on the fixture.
However, it’s convenient to have the rest of the template grouped into a single lump, so it’s painfully easy to select and move only the template while leaving the targets behind. It seems while setting up to mark & cut the template, I managed to click-n-drag the group a few millimeters to the left.
I eventually used Print and Cut to align the template and target with the corners of that MDF frame, re-engrave the targets at the correct locations, and scribble over the misplaced targets. If I don’t tell anybody, they’ll never know.
The LightBurn SVG layout as a GitHub Gist:

Comments
3 responses to “Laser Cutter: Letter Page Fixture”
[…] various iterations of the Letter sheet fixture in place, I made some layered paper “art” using metallic […]
[…] sheets sit in the Letter sheet fixture and get four round holes in the corners for the assembly fixture, plus a binary sheet ID helping me […]
[…] the Letter Page Holder template to put the center of the sheet cutout at the center of the […]