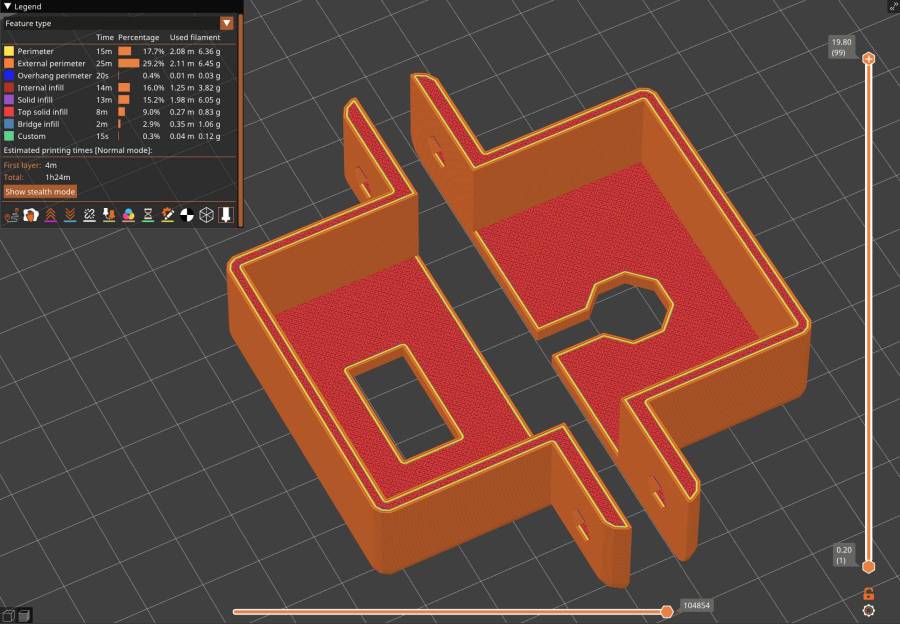
Descending directly from the holders for the MPCNC power brick, slightly smaller brackets for the power bricks attached to the under-cabinet LED strip light in the kitchen:
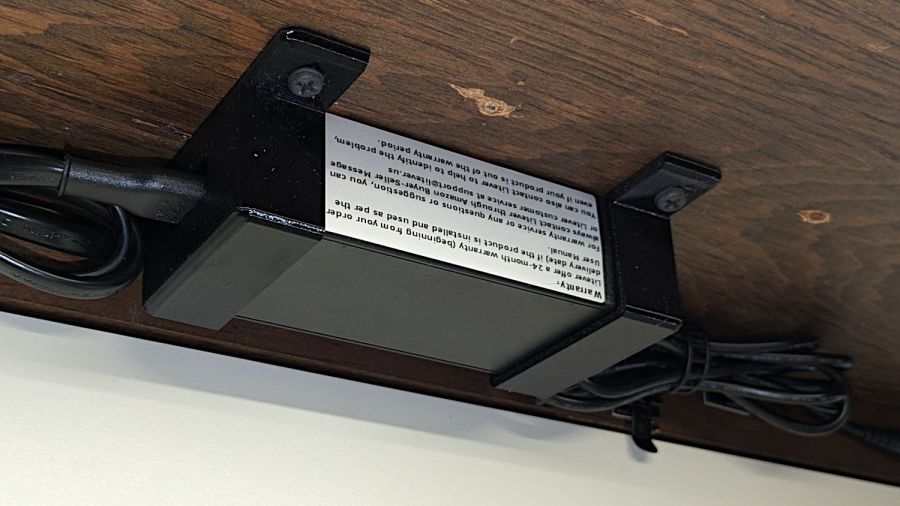
Made from black PETG (because they’re in the kitchen) they fit fine:

Although the elegance depends on which way the brick points:
They have the distinction of being the first “real” objects from the Prusa MK4. All my hard-won knowledge of forcing solid models into reality through a 3D printer is obsolete: the default slicer settings on a new printer work perfectly, with no fiddling required.
The OpenSCAD source code as a GitHub Gist:
This file contains hidden or bidirectional Unicode text that may be interpreted or compiled differently than what appears below. To review, open the file in an editor that reveals hidden Unicode characters.
Learn more about bidirectional Unicode characters
| // Power Supply Brick brackets | |
| // Ed Nisley KE4ZNU 2024-08-19 | |
| Layout = "Show"; // [Show,Build] | |
| //– Extrusion parameters | |
| /* [Hidden] */ | |
| ThreadThick = 0.20; | |
| ThreadWidth = 0.45; | |
| HoleWindage = 0.3; // enlarge hole dia by this amount | |
| function IntegerMultiple(Size,Unit) = Unit * ceil(Size / Unit); | |
| Protrusion = 0.1; // make holes look good and joints intersect properly | |
| //– Useful sizes | |
| ID = 0; | |
| OD = 1; | |
| LENGTH = 2; | |
| //– Bracket Dimensions | |
| Brick = [115.0,51.0,32.0]; // overall size, add details in module | |
| Socket = [20.0,10.0]; // binocular power socket | |
| Cable = [5.0,12.0]; // DC output cable ID=wire OD=strain relief | |
| //Socket = [30.0,24.0]; // IEC power socket | |
| //Cable = [6.0,15.0]; // DC output cable ID=wire OD=strain relief | |
| WallThick = 3.0; // default wall thickness | |
| BaseThick = 4.0; | |
| Screw = [5.1,10.0,3.0]; // screw size, more-or-less 10-32, OD & LENGTH for head | |
| NumSides = 3*4; | |
| //———————- | |
| // Useful routines | |
| module PolyCyl(Dia,Height,ForceSides=0) { // based on nophead's polyholes | |
| Sides = (ForceSides != 0) ? ForceSides : (ceil(Dia) + 2); | |
| FixDia = Dia / cos(180/Sides); | |
| cylinder(r=(FixDia + HoleWindage)/2, | |
| h=Height, | |
| $fn=Sides); | |
| } | |
| //———————- | |
| // Models | |
| module BrickMount(End="Both") { | |
| difference() { | |
| union() { | |
| hull() // main block | |
| for (i=[-1,1], j=[-1,1], k=[0,1]) | |
| translate([i*(Brick.x/2 + WallThick – WallThick), | |
| j*(Brick.y/2 + WallThick – WallThick), | |
| k*(Brick.z + WallThick – WallThick)]) | |
| sphere(r=WallThick,$fn=NumSides); | |
| hull() // screw flanges | |
| for (i=[-1,1], j=[-1,1]) | |
| translate([i*(Brick.x/2 + WallThick – BaseThick), | |
| j*(Brick.y/2 + WallThick + 2*Screw[OD] – BaseThick), | |
| 0]) | |
| sphere(r=BaseThick,$fn=NumSides); | |
| } | |
| for (i=[-1,1], j=[-1,1]) // remove screw holes | |
| translate([i*(Brick.x/2 + WallThick – Screw[OD]), | |
| j*(Brick.y/2 + WallThick + Screw[OD]), | |
| -Protrusion]) | |
| rotate(180/6) | |
| PolyCyl(Screw[ID],2*WallThick,6); | |
| translate([0,0,Brick.z/2]) // remove center part to leave ends | |
| cube([(Brick.x + 2*WallThick – 4*Screw[OD]),2*Brick.y,2*Brick.z],center=true); | |
| if (End == "Socket") | |
| translate([Brick.x/2,0,Brick.z/2]) // remove cable end to leave socket | |
| cube([(Brick.x + 2*WallThick – 4*Screw[OD]),2*Brick.y,2*Brick.z],center=true); | |
| if (End == "Cable") | |
| translate([-Brick.x/2,0,Brick.z/2]) // remove socket end to leave cable | |
| cube([(Brick.x + 2*WallThick – 4*Screw[OD]),2*Brick.y,2*Brick.z],center=true); | |
| translate([0,0,Brick.z/2 – Protrusion/2]) // remove power supply brick from interior | |
| cube(Brick + [0,0,Protrusion],center=true); | |
| translate([0,0,-Brick.z]) // remove below XY plane | |
| cube(2*Brick,center=true); | |
| translate([0,0,Brick.z/2]) // remove AC socket | |
| rotate([0,-90,0]) | |
| rotate(90) | |
| linear_extrude(height=Brick.x,convexity=2) | |
| square(Socket,center=true); | |
| translate([0,0,Brick.z/2]) // remove DC cable | |
| rotate([0,90,0]) | |
| rotate(180/8) | |
| PolyCyl(Cable[OD],Brick.x,8); | |
| translate([Brick.x/2,0,Brick.z/4 – Protrusion/2]) // … and wire slot | |
| cube([Brick.x,Cable[ID],Brick.z/2 + Protrusion],center=true); | |
| } | |
| } | |
| //———————- | |
| // Build it | |
| if (Layout == "Show") | |
| BrickMount("Both"); | |
| if (Layout == "Build") { | |
| translate([5,0,Brick.x/2 + WallThick]) | |
| rotate([0,90,0]) | |
| BrickMount("Cable"); | |
| translate([-5,0,Brick.x/2 + WallThick]) | |
| rotate([0,-90,0]) | |
| BrickMount("Socket"); | |
| } | |

Comments
2 responses to “Under-cabinet LED Light Brick Mounts”
Hmm, our under-cabinet LEDs use a wall wart power supply, and a malfunction-junction box (with so-so connections) instead of the brick.
If that goes toes up, I’ll consider the Commercial Electric* daisy-chain fixtures with built-in power supply. The LED pucks will be repurposed for the shop microscope. [grin]
((*)) One hides behind the ham radio laptop. It shines upward onto white laminate shelving, so there’s plenty of light and no glare (because the laptop screen is in the way).
The lights I installed in the previous kitchen had warts that worked just fine, but these have more fixtures in the string and need more current. The bricks run plenty warm while powering all six fixtures, which means they’re probably overloaded by an amp or two.