Time spent making a fixture is never wasted time:

The general idea: securely hold a piece of paper flat while cutting it, so that it cannot move or warp, while letting the cut pieces fall out without snagging on anything underneath. The sheet holder I made a while ago worked reasonably well, but those thin metal blades tend to warp while cutting small patterns in restricted areas and the pieces definitely don’t fall free.
The simple fixture I use while assembling the paper layers consists of four rivnuts poking through a chipboard upper layer, with a craft paper layer around the rivnut washers on the bottom:

The cutting fixture uses a similar layout around a hole for freely falling chips:
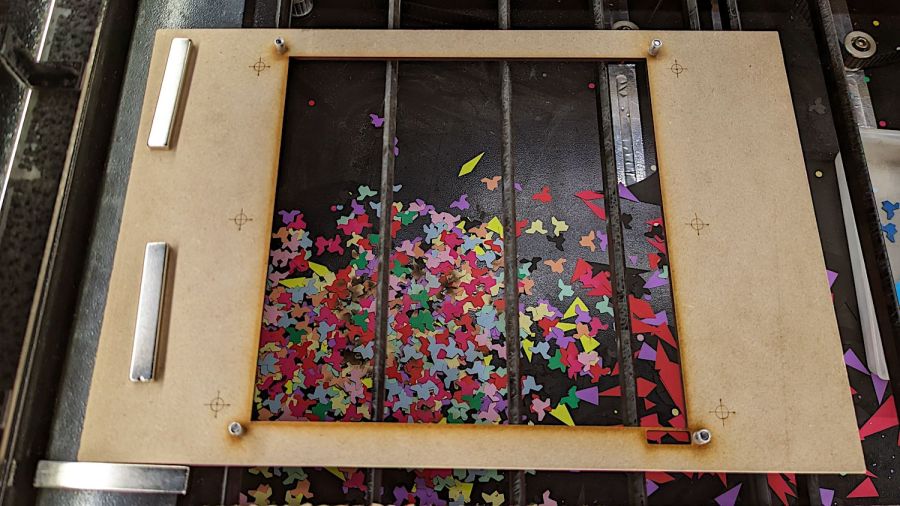
Next time, I’ll remove those three bars across the hole, because the MDF doesn’t need any support. Nearly all the chips fell out, so the fixture worked as intended.
I trimmed the flange off the rivnuts so they would sit flat on the MDF:
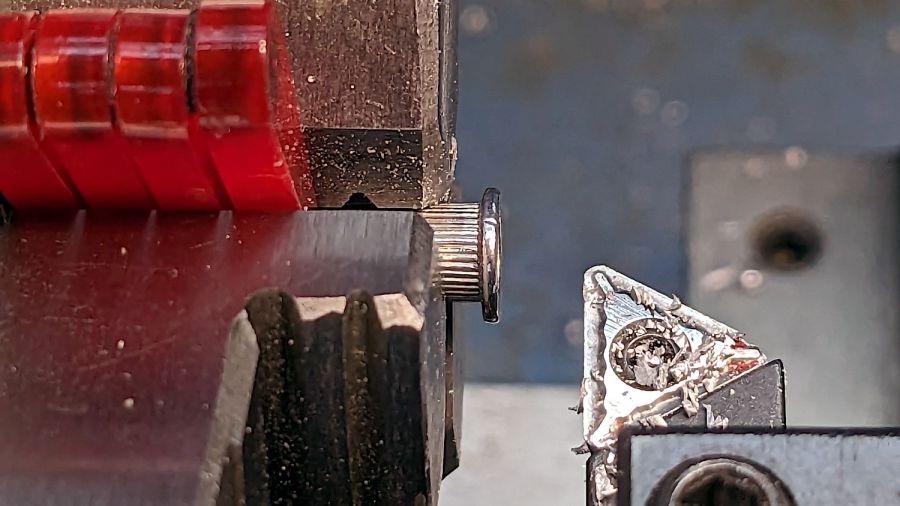
That’s the kind of job chuck stops really simplify.
The cutting fixture requires pre-cutting paper into 200 mm squares with four 5 mm corner holes, which can be done three-abreast on the platform bars, then putting each sheet in the fixture to cut the shapes. That’s not much of a disadvantage compared to messing up an unsupported sheet.
The cutting fixture has crosshair targets to align a LightBurn template using Print-and-Cut, thus eliminating the need to precisely locate the fixture on the platform. The finger-crushingly strong neodymium bar magnets do a fine job of holding the MDF in place on the steel platform.
The small cutout rectangle in the lower right corner frames the sheet number, done in binary code with 0 = 1 mm circle and 1 = 2 mm circle:
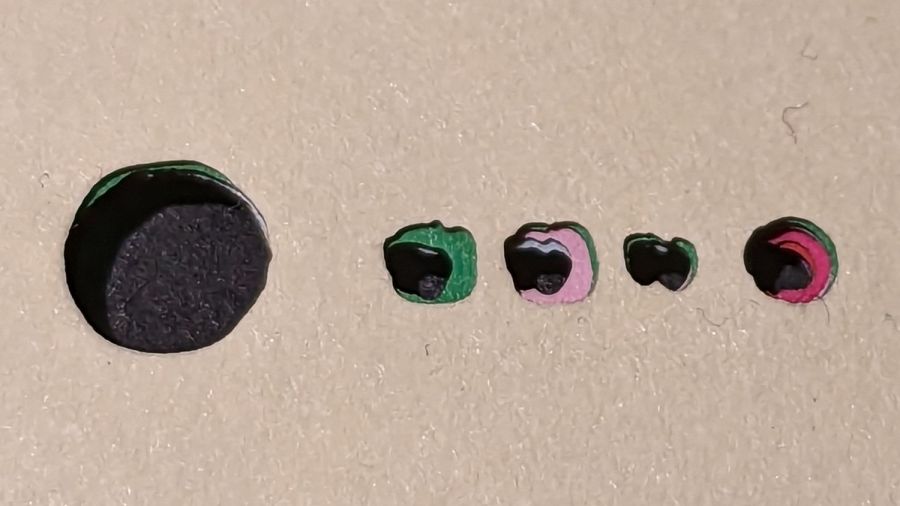
That’s the underside view of a completed stack with the 5 mm lower-right fixture hole on the left and the code for layer 11 = 0b1011 reading backwards. The small 0 holes have two lobes showing the Print-and-Cut alignment was off by maybe 0.3 mm; the off-center hole was in the blank sheet.
Obviously, cutting tiny circles with a big laser at 300 mm/s doesn’t produce perfect results. You can see small wiggles in larger shapes:

Unless you’re trying hard to find a problem, you’ll never notice them.

Comments
One response to “Layered Paper: Cutting & Assembly Fixtures”
[…] Set up the fixture, do the Print-and-Cut alignment, then cut all the layers with different colors: […]