Putting pockets in the legs of the mini-lathe chuck stop blanks requires a fixture to align them in the Sherline mill:
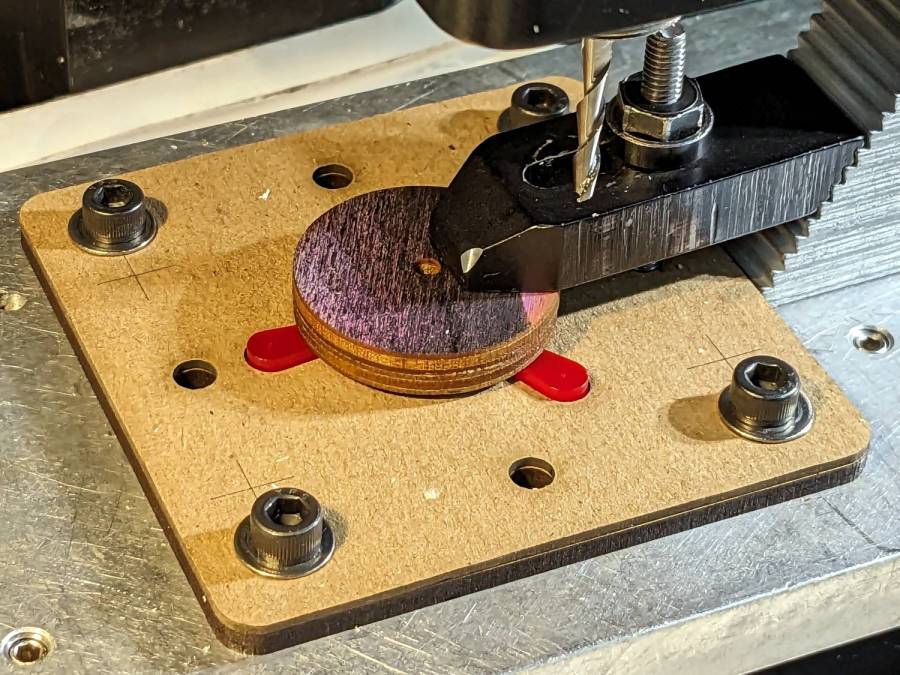
Because it need not withstand much lateral force and will get used only a dozen-ish times, the base is MDF and the stop alignment happens in three matching chipboard layers:
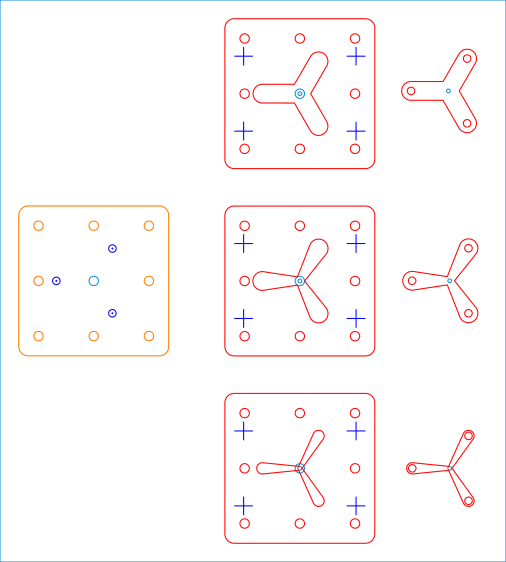
The three stops (over on the right) are copy-pasta from the originals. A 0.1 mm outset in the chipboard (center) lets the acrylic shapes drop into the chipboard sheets with Good Enough™ alignment accuracy. The MDF layer (left) provides some overshoot comfort below the chipboard.
The chipboard layers each have four alignment targets at (±30,±20):

Touch off the lower-left target at (-30,-20) and G0 X30 Y30 should drop the laser dot in the middle of the upper-right target. With the (0,0) origin at the geometric center of the stop, LinuxCNC’s polar notation picks out the three pockets:
G0 @20 ^-60
G0 @20 ^180
G0 @20 ^60
The plywood disk under the Sherline’s clamp has a glued ring to put the clamping force out near the ends of the legs. I started with just the aluminum clamp, but the legs needed a bit more stability; a laser cutter makes impromptu widgets like that trivially easy.
Next: write the G-Code to make the pockets.
The LightBurn SVG layout as a GitHub Gist:

Comments
4 responses to “Mini-Lathe Chuck Stops: Pocketing Fixture”
I think I can hear your 3D printer mumbling that it could do that, any thickness, too.
Aye!
The main advantage the laser cutter brought was a nice flat finish on both sides, which I totally botched with expanding adhesive (about which, more later).
Having worked out the geometry, though, I should print some for comparison.
[…] the fixture aligned and the chuck stop blank clamped down, all that’s left is to make three little […]
[…] Pocketing Fixture […]