With the DSO150 scope running, I printed Geoff’s DSO150 case + battery holder from Thingiverse, added a few bits & pieces from the heap, and came up with a completely portable scope:
The only scope mod consists of embedding a JST-ish connector in the back panel:

Then soldering it to the battery pads and applying generous hot-melt glue blobs:

Add a scrap 18650 Li-Ion cell, a regulated boost converter, and a switch:
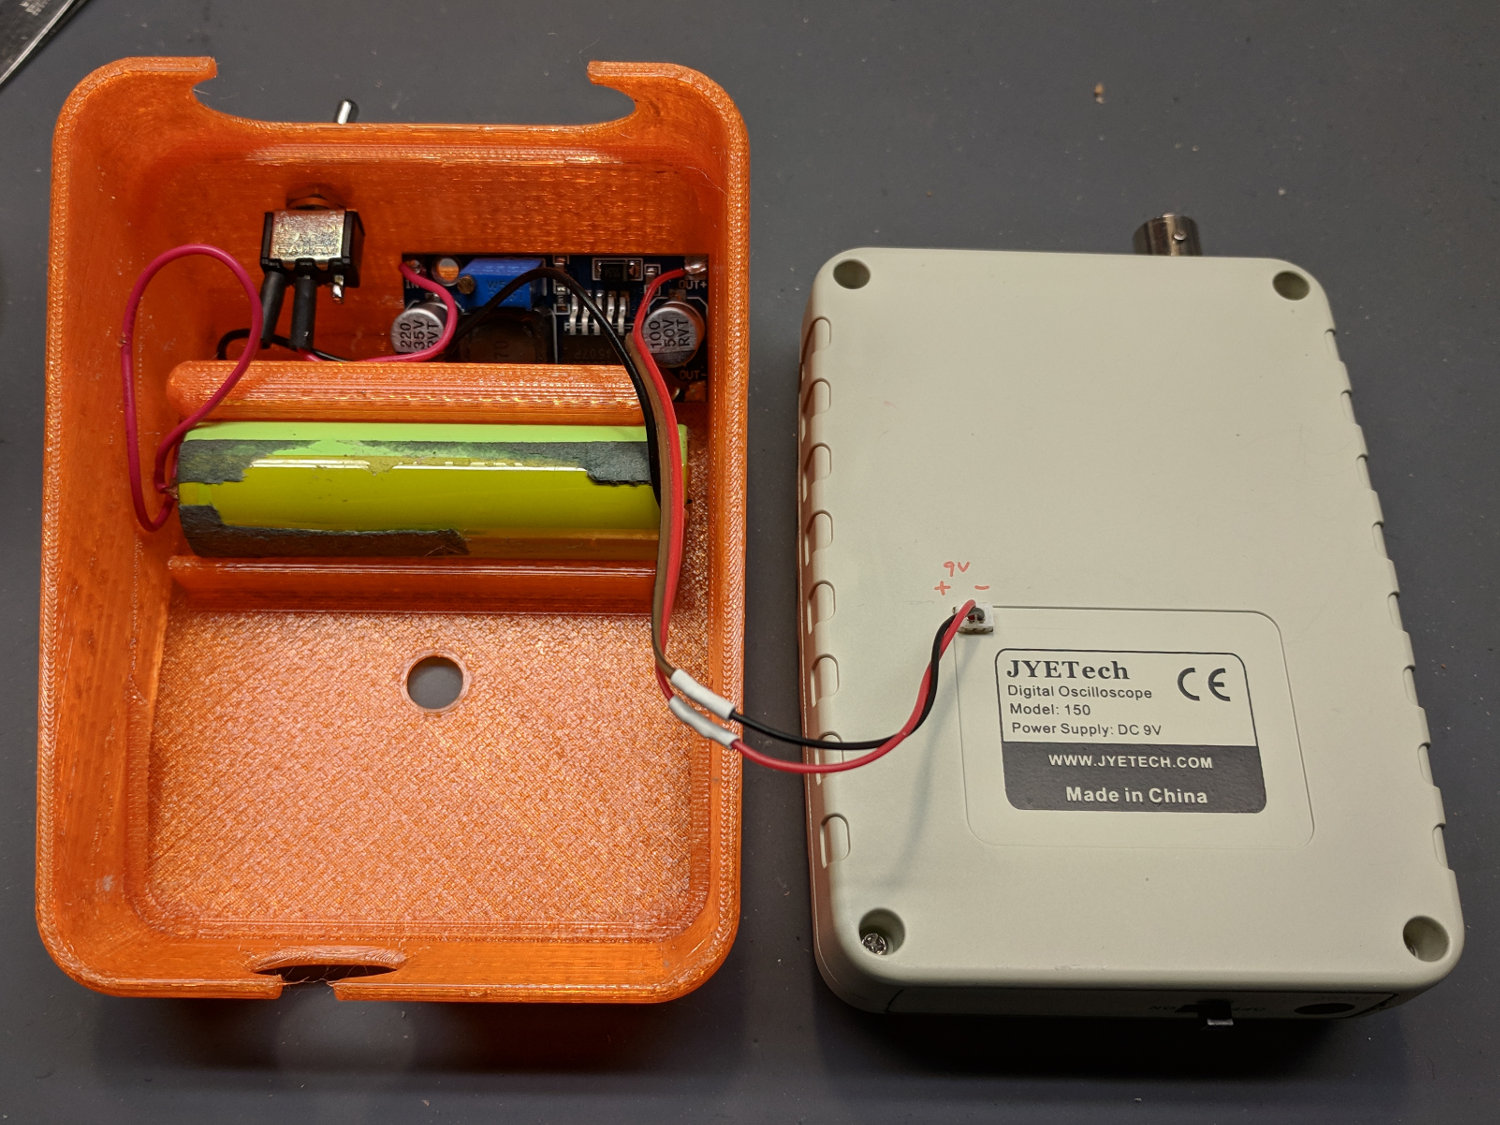
The switch is directly below the DSO150 BNC connector to get a little protection for its handle, which would otherwise stick out in harm’s way. This being an afterthought, I drilled the switch hole, rather than modify the solid model.
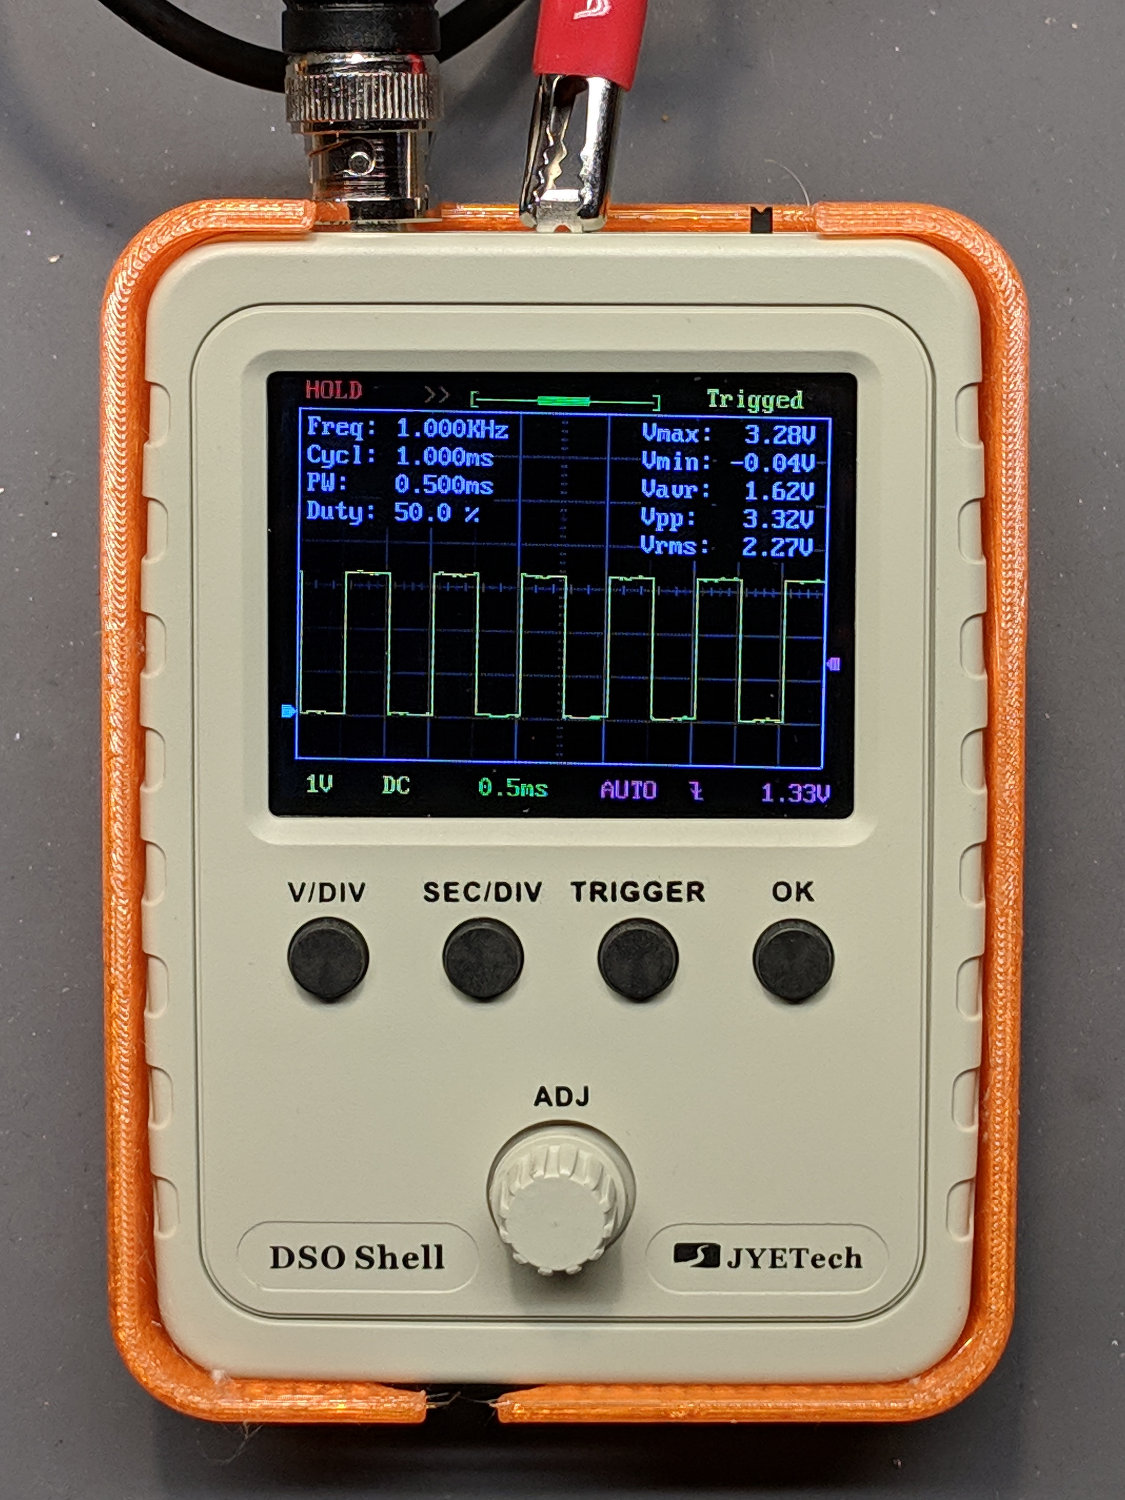
Some testing with a bench supply showed that the DSO150 will not operate correctly from the voltages produced by a pair of lithium cells, despite what you’d think from looking at the case. Below 8 V, the internally generated negative supply becomes larger than the positive supply, so the 0 V point isn’t properly centered and the scope loses headroom for large signals; monitoring the internal 3.3 V test signal makes the problem painfully obvious.
More color commentary from my summary email:
- Combining a case from Thingiverse with a Li-Ion cell and a regulated boost converter produces a portable scope.
- The PCB has provision for battery input, so I drilled / filed a square hole for a teeny JST-ish connector on the back panel, secured it with a blob of hot melt glue, and globbed the wires onto the PCB battery pads.
- The boost converter draws about 400 mA from the cell, so a 2500-ish mA·h cell should last Long Enough™. This is a scrap cell from the recycle box and gave out after maybe four hours.
- It idles at 8 mA, so I drilled a hole in the back of the case for a toggle switch disconnecting the battery; you’d want the hole in the solid model. Perhaps a better converter would have lower idle current; you’d never be able to tell from the eBay descriptions.
- Aaaaand it switches around 200 kHz under load, just barely beyond the scope bandwidth. It doesn’t add much noise to the signal, at least with a 50 Ω terminator jammed in the BNC, but the square-wave “cal” output looks awful at 50 mV/div; a real scope shows even more noise. I assume the noise comes directly from the logic supply; with luck, the DSO150’s analog circuitry has Good Enough™ filtering.
- Which might not matter for logic-level and moderate analog signals, of course, which is the whole point of the DSO150.
- Conspicuous by their absence: a Li-Ion cell protection PCB and any way to recharge the poor thing …
I’ve occasionally wanted a portable scope and now I have one!

Comments
4 responses to “JYE Tech DSO150 Oscilloscope: Battery Power”
[…] DSO150 oscilloscope’s specs give a 200 kHz bandwidth, so a 50 kHz sine wave looks pretty […]
[…] defunct 18650 lithium cell I used for the DSO150 power supplyprompted me to crack open a battery from a long-gone Dell laptop to see if any of its cells were in […]
[…] getting around to measuring the boost converter between the 18650 lithium cell and the DSO150 […]
[…] I drilled & filed a suitable hole / slot / aperture in one of the few remaining spots in the case, then stuck the PCB to the bottom with good foam […]