This object from whpthomas’s collection exercises the deprime operation in Sailfish, but it seemed like it’d be useful to verify the Marlin settings in the M2:

From the other side:
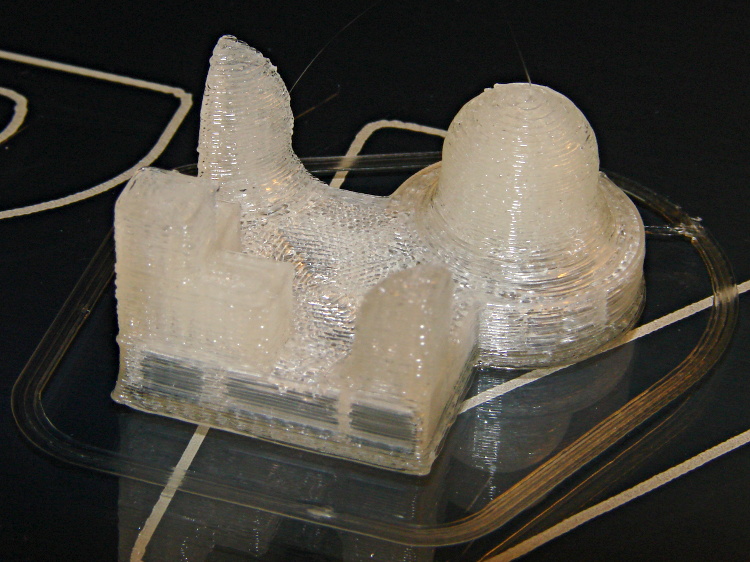
Yes, that was rather anticlimactic. No ooze, no stringing, no surface finish blemishes, just the finished object on the build platform’s glass sheet.
I like that!
The slight bumps on the sharp corner edges seem to be due to the crazy-high perimeter and infill speeds I’ve been playing with, although (I think) those are also where layer changes occurred. The first layer height came out a bit short, so there’s a small flange around the object’s bottom edge; I was figuring out how to get a precise level across the entire surface and stabilize the Z-min switch operation.
The slic3r configuration:
; generated by Slic3r 0.9.8 on 2013-03-29 at 20:51:15

; layer_height = 0.25
; perimeters = 1
; top_solid_layers = 3
; bottom_solid_layers = 3
; fill_density = 0.10
; perimeter_speed = 100
; infill_speed = 300
; travel_speed = 500
; scale = 1
; nozzle_diameter = 0.35
; filament_diameter = 1.70
; extrusion_multiplier = 0.9
; perimeters extrusion width = 0.40mm
; infill extrusion width = 0.40mm
; first layer extrusion width = 0.39mm
No source code, as it’s directly from the STL on Thingiverse; I have no idea which modeling program he used.

Comments
2 responses to “Makergear M2: Deprime Test Object”
Thanks for the post.
What speed and distance are you using for deprime?
Can you push a video of printing at the “crazy-high perimeter and infill speeds” ?
Thanks.
It’s 1 mm at anywhere from 80 to 300 mm/s with 10 m/s^2 acceleration . I confess to not having any notes for these objects, for reasons that should clear up soon, but those are about right.
I recently moved the whole lashup to the Basement Laboratory, where I plan to set up some decent lighting for photography; I tried taking a few videos on my desk with terrible results.
Visually, however, a 500 mm/s non-printing move with 9 m/s^2 acceleration looks like quantum tunneling in action: the nozzle is here and then it’s there, without being spotted anywhere in between. Infill at 300 mm/s means the XY axes reach that speed in 5 mm. Looked at a little differently, the XY axes now accelerate at a bit under 1 G.
The motivation for trying those absurd speeds is to see when the M2 stops producing good results. So far, it’s doing just fine…