Ed Nisley's Blog: Shop notes, electronics, firmware, machinery, 3D printing, laser cuttery, and curiosities. Contents: 100% human thinking, 0% AI slop.
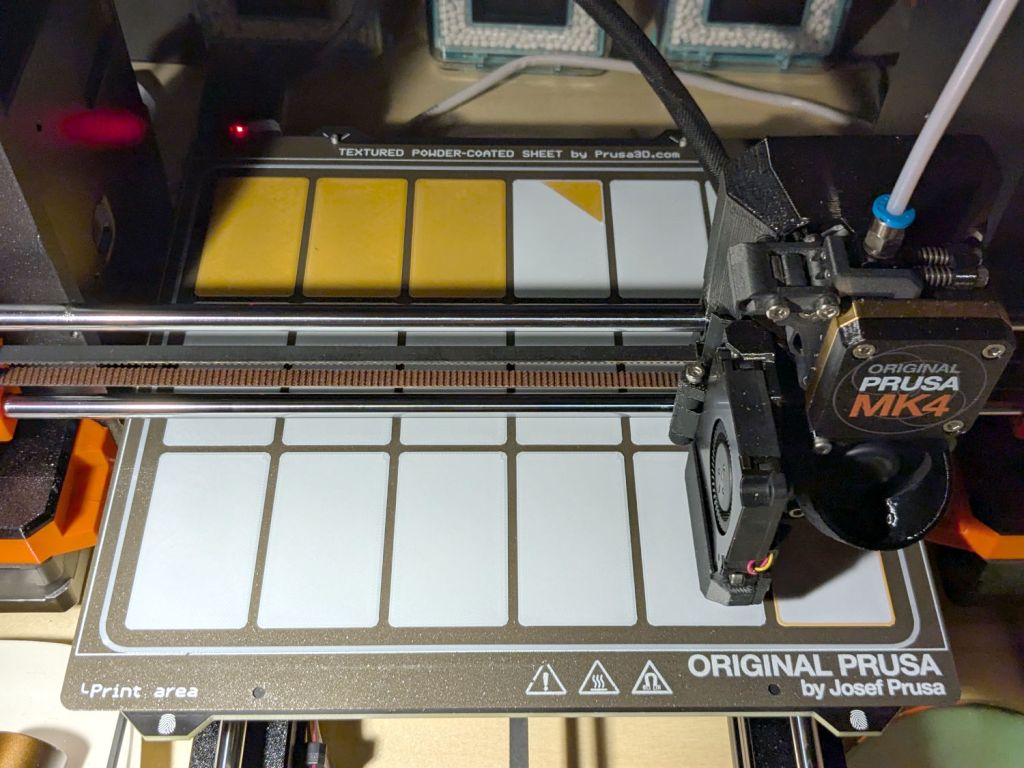
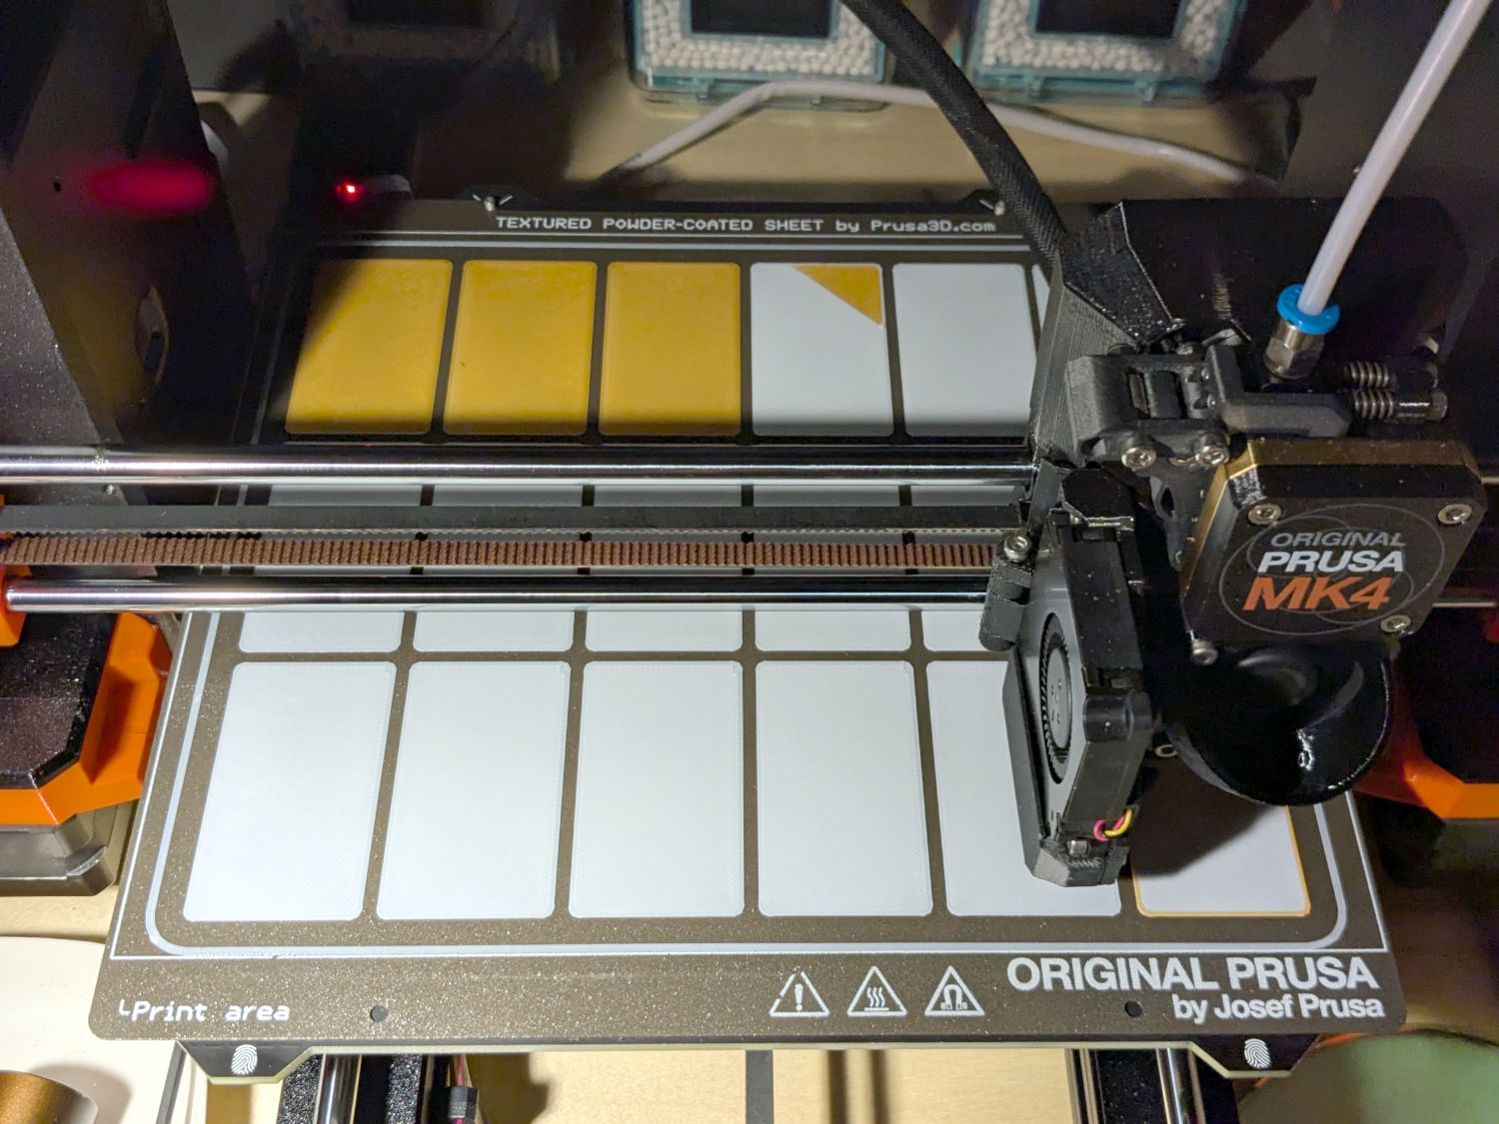
Because nobody will ever see the Radiator Sleds, I started a batch with the tail end of the white PETG spool and set up the Spool Join function to switch to the retina-burn orange PETG when the white filament ran out.
The two colors combined nicely on that layer:
Prusa MK4 MMU filament joining
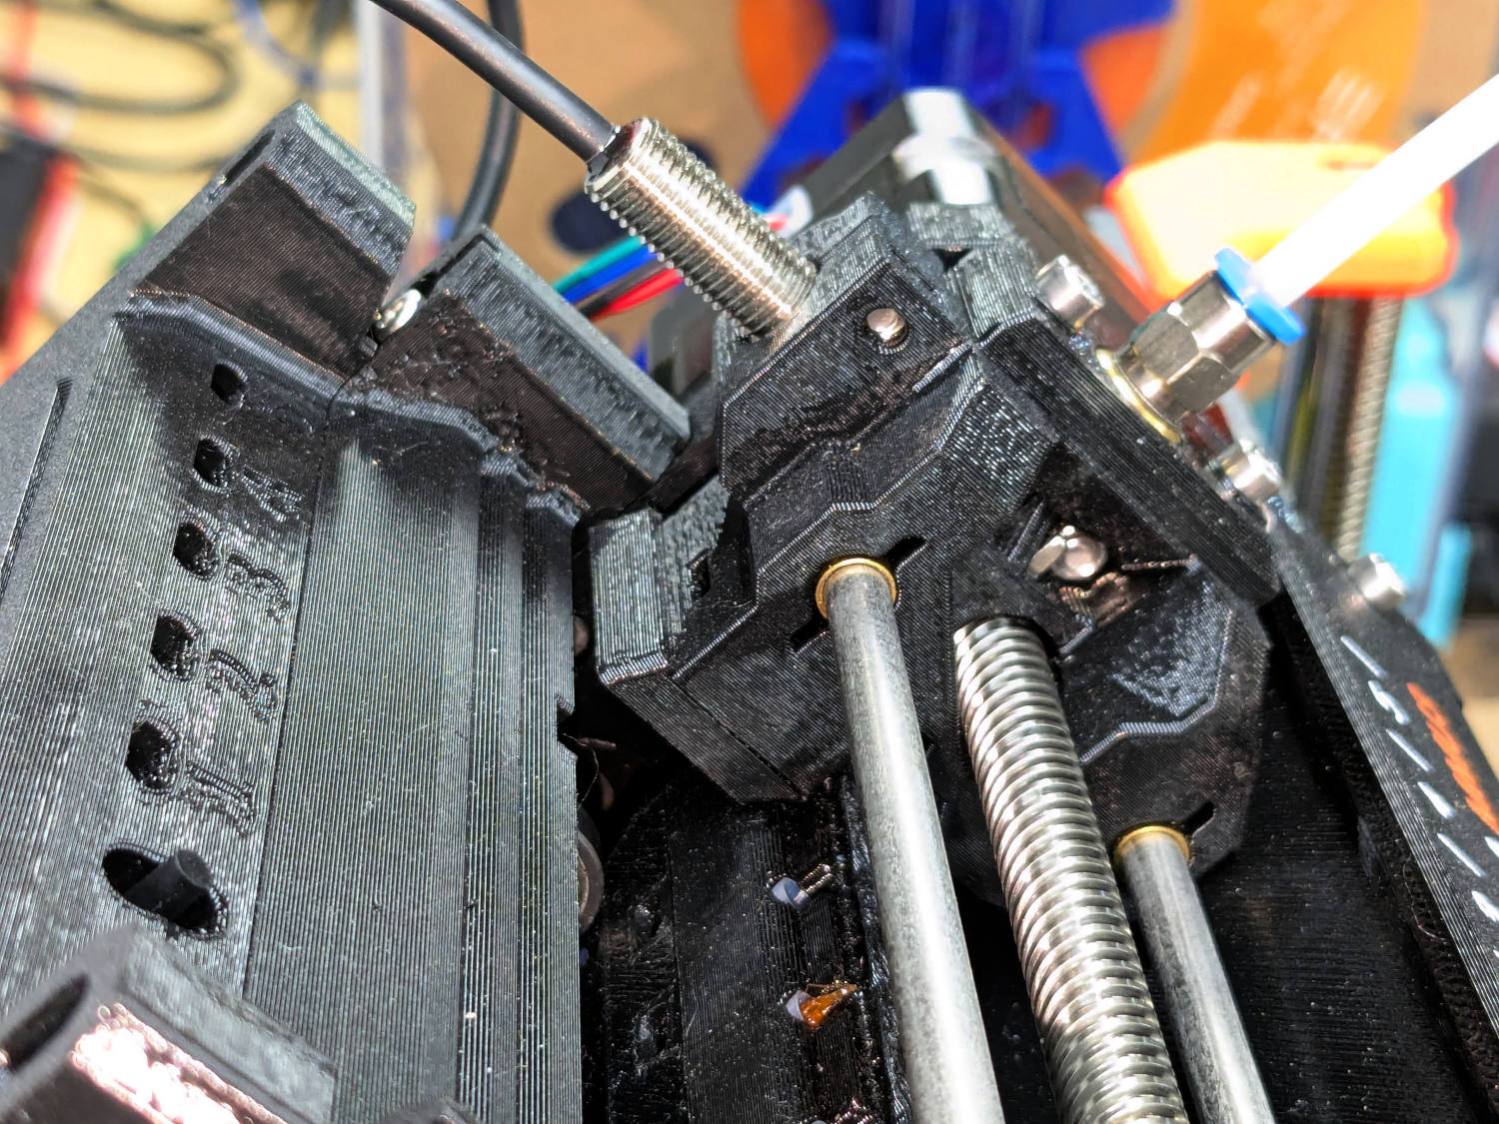
Unfortunately, the Spool Join didn’t work out quite right and I had to extricate the white filament from the MMU3, then coerce the orange filament into position.
The Selector assembly rides on the smooth rods, driven by the stepper motor on the far end of the leadscrew. It stops at one of the five filament tubes (visible to the left of the upper smooth rod, with filament tips showing), whereupon a drive gear pushes the filament into the Selector, under the FINDA sensor (the threaded fitting sticking out of the top), into the PTFE tube, down to the Nextruder, through the idler to trip the Filament Sensor, then into the extruder’s planetary drive gear.
I think this happened:
The rear end of the white filament passed through the FINDA sensor
The MK4 reversed the Nextruder to drive the filament back into the MMU3
The rear end of the filament didn’t reenter its filament tube and escaped out to the side
The MMU3 drive gear couldn’t pull the filament backward, because the back end was misplaced
The Extruder planetary drive gear couldn’t pull the filament forward, because the front end was now above the gear
Both the FINDA and the Filament Sensor showed the filament was present, so the MK4 knew something was wrong
Fortunately, I was watching the whole operation and could intervene.
The MMU3 works well when the filament behaves properly, but it’s very sensitive to bends in the filament and misshapen ends. In this case, the white filament had the usual tight curve due to being would around the spool hub, which was enough to mis-align its end with the MMU3 tube while backing out.
Mary’s zero-mph crash loosened the starboard handlebar plug enough to let it eventually decamp for parts unknown. Its replacement, a somewhat fancier aluminum plug with an expanding cone retainer using an actual M3 nut, worked fine for the last year, but Mary recently noticed the socket head screw had worked loose.
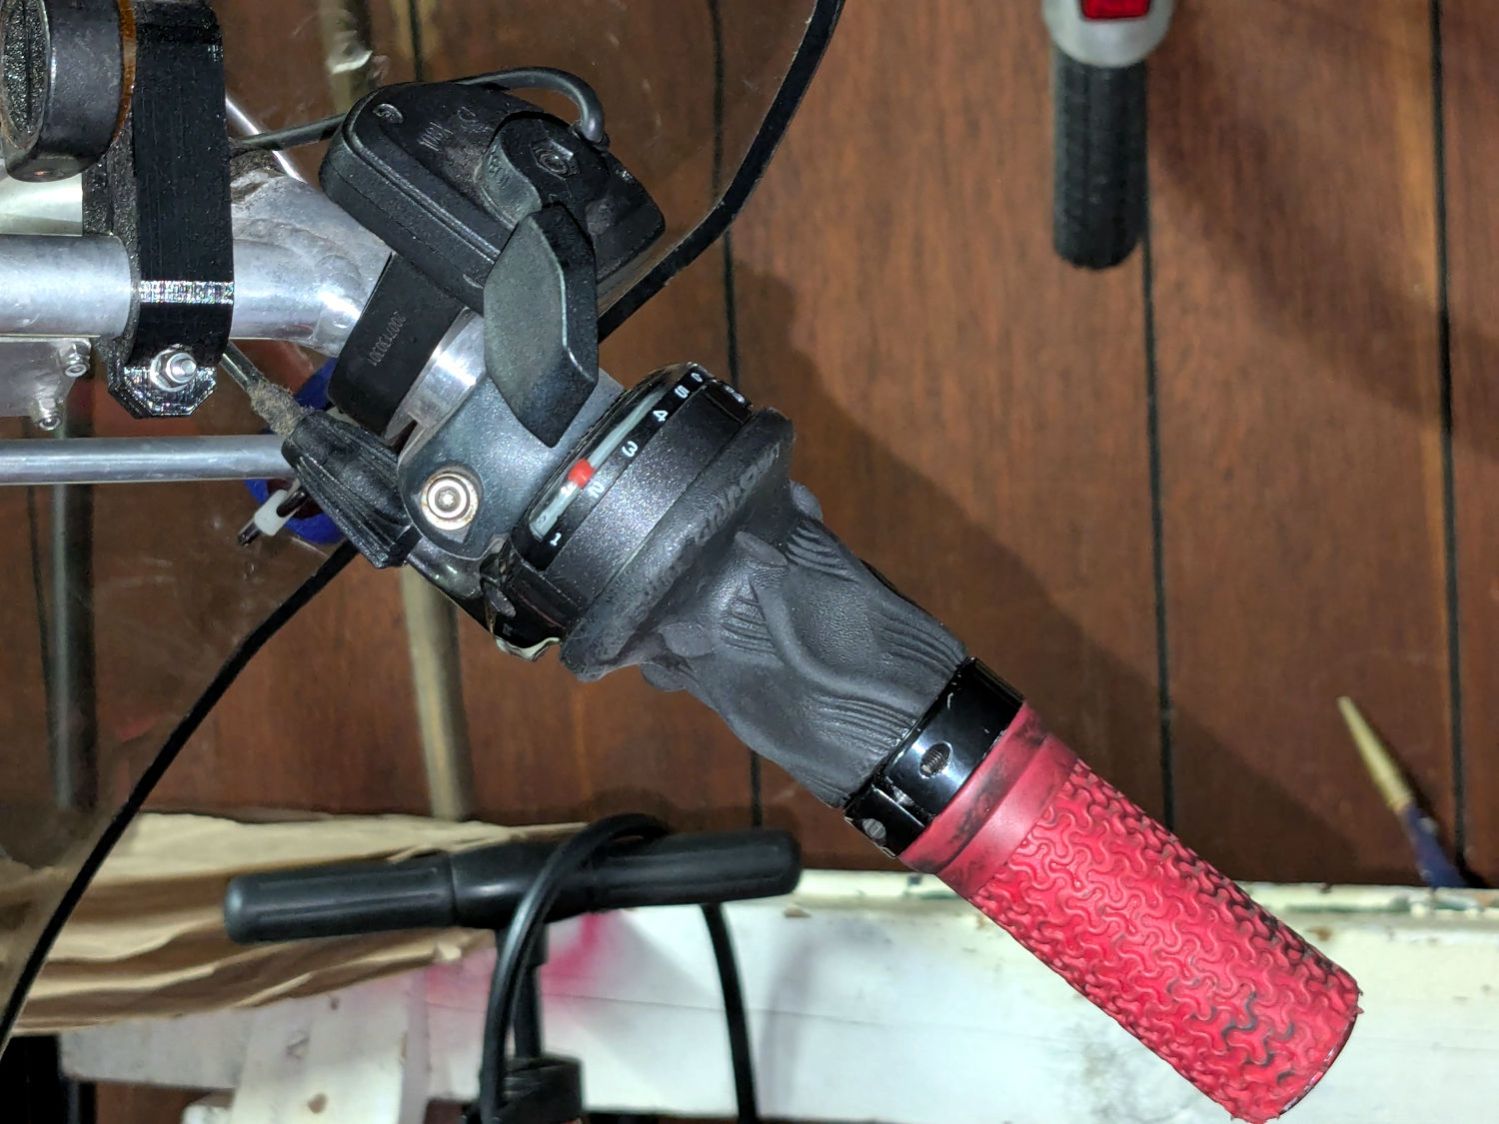
In the interim, I’d moved the Bafang thumb control from its original position on the crossbar to just above the rear shifter:
Tour Easy – right handlebar control stack
Which moved the clamp on the shortened grip off the end of the handlebar tube, so I flipped the grip around, tightened the clamp, and installed the plug.
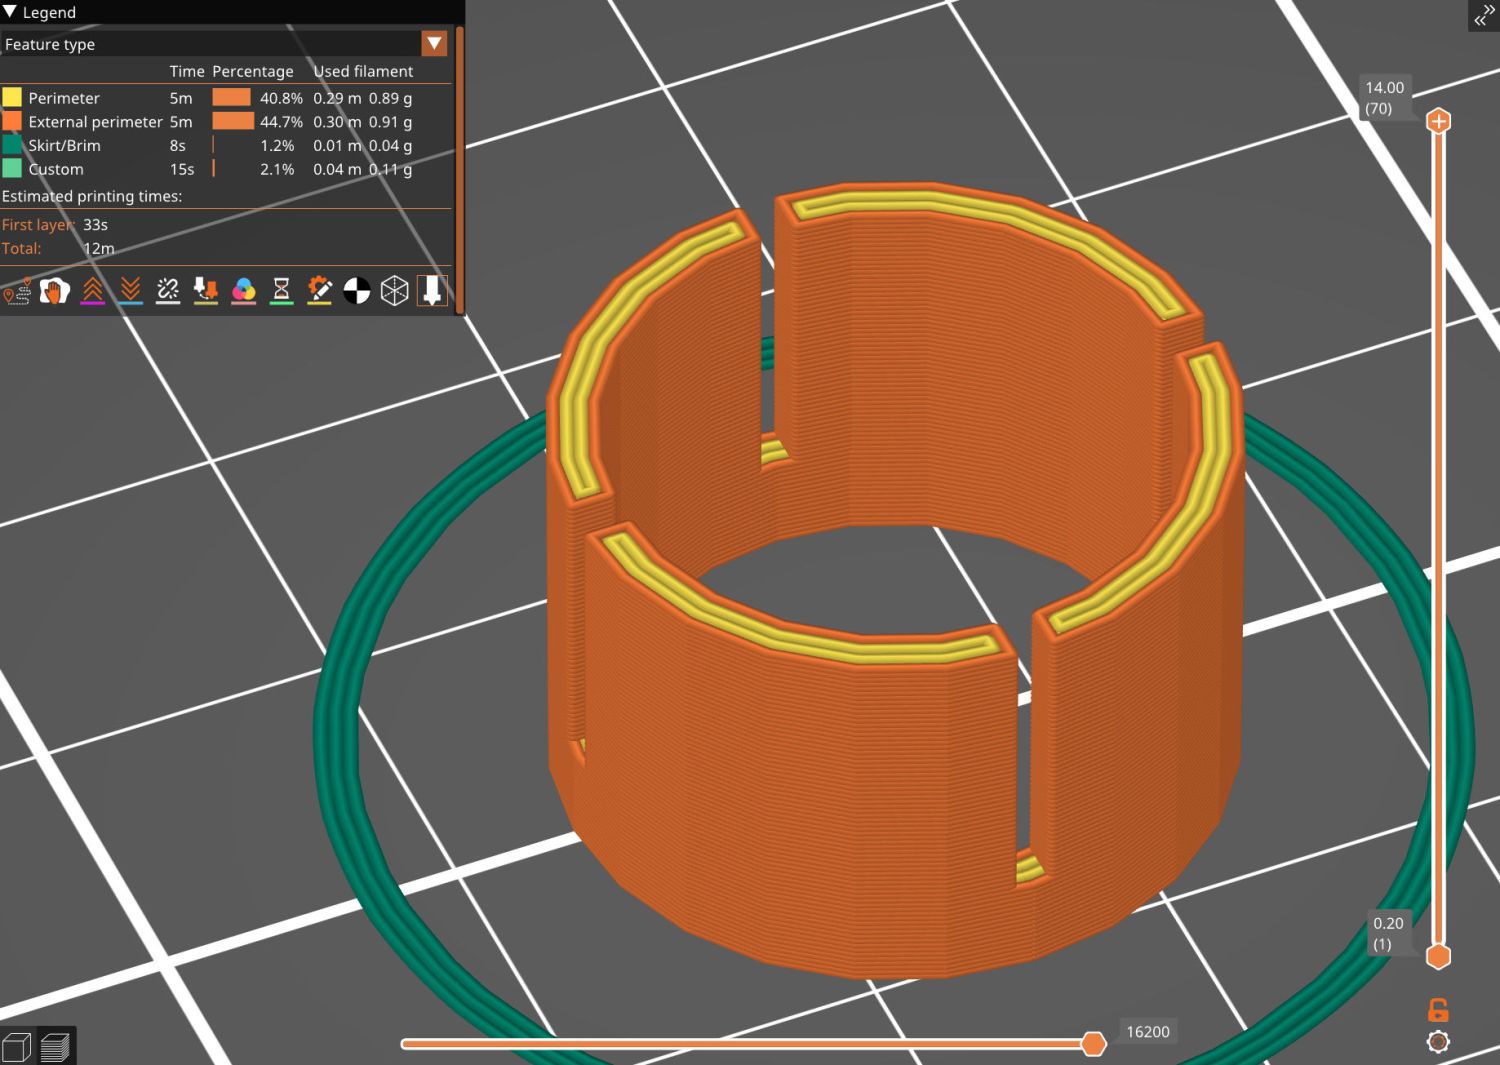
Unfortunately, the grip ID is 4 mm larger than the tube ID, which meant the plug’s cone retainer was struggling to hold on in there. Perhaps the plastic cone has relaxed bit, but I figured giving it more traction would be a Good Idea™ before I declared victory:
Handlebar Grip Sleeve – PrusaSlicer
It’s a little plastic sleeve with slots to let it expand against the inside of the grip:
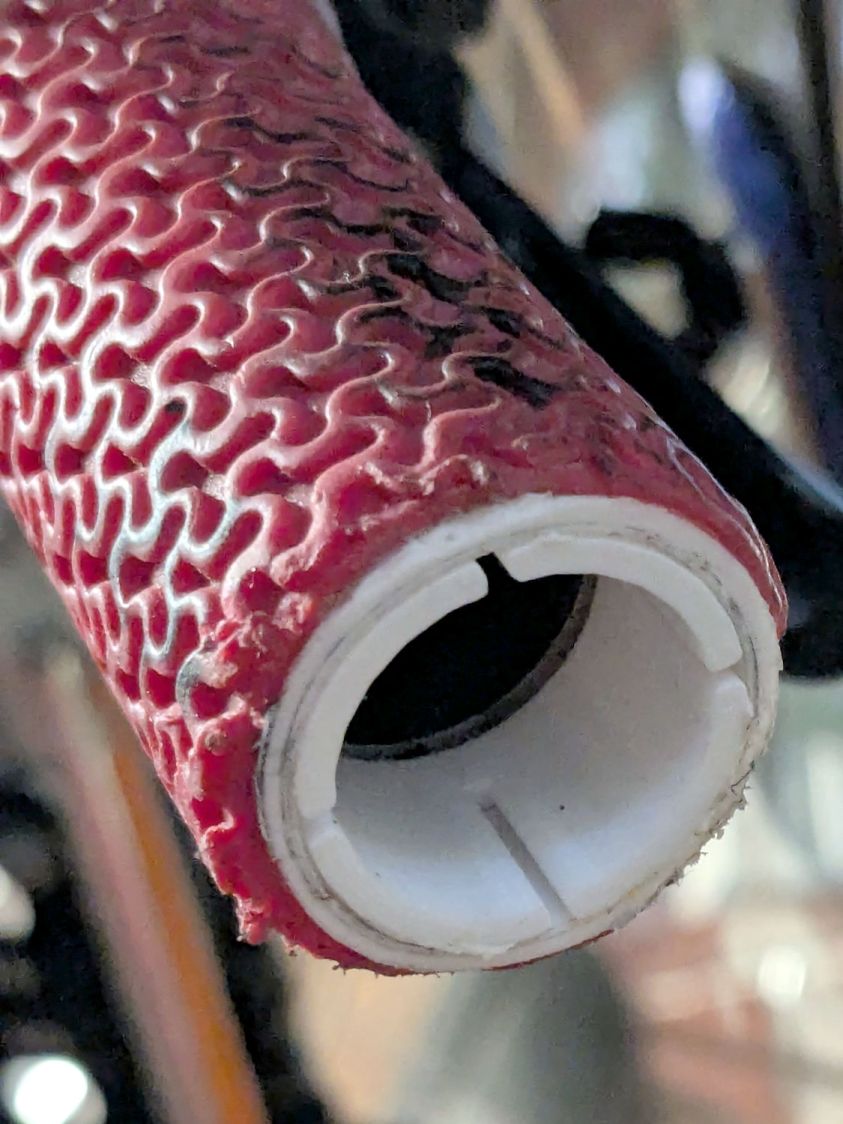
Handlebar grip sleeve – installed
Yes, it’s sticking out slightly; you can see the corresponding gap up inside next to the tube.
A wrap of double-sided sticky tape glues it in place as the retainer presses it against the grip ID and a dot of low-strength Loctite should keep the screw from loosening again.
The OpenSCAD source code:
// Handlebar grip sleeve
// Ed Nisley - KE4ZNU
// 2025-10-25

include <BOSL2/std.scad>

/* [Hidden] */

ID = 0;
OD = 1;
LENGTH = 2;

HoleWindage = 0.2;
Protrusion = 0.1;
NumSides = 3*2*4;

$fn=NumSides;

Sleeve = [18.5,22.0,14.0];
Kerf = 1.0;

  difference() {
    tube(Sleeve[LENGTH],id=Sleeve[ID],od=Sleeve[OD],anchor=BOTTOM);
    for (a=[0,90])
      zrot(a)
        up(Sleeve[LENGTH]/4)
          cuboid([2*Sleeve[OD],Kerf,Sleeve[LENGTH]],anchor=BOTTOM);
  }
I discovered this commentary, in several variations in different contexts, after attending the Poughkeepsie No Kings protest last weekend:
You are allowed to say, at any point, “I can’t support this”.
Even if you did.
Even if you were unsure.
You can say, at any point, “This has gone too far.”
And, while the best time to say that was earlier, the second best time is now.
That is relevant, because the Executive branch of the United States government has internalized two facts:
There are no rules
There are no consequences
The President and the Executive branch now act with the knowledge that the separation of powers, the checks and balances, and the restrictions written into the US Constitution no longer apply.
Justifications based on Constitutional hairsplitting are irrelevant. The Founding Fathers did not intend the Executive branch to operate as it does now.
Justifications based on “But what about …?” are irrelevant. The scale of current malfeasance dwarfs all precedent; there are no valid comparisons.
Justifications based on “But Congress is dysfunctional!” are irrelevant. It takes only one to dysfunction and the parties have been swapping irresponsibility for decades.
I commend to your attention the Army Talk Orientation Fact Sheet 64 from March 1945. It is straight-up US WWII propaganda with a rosy view of the Soviet Union, but you should fact-check all items in the section “Can We Spot It?” on page 4 against current events.
Should you think your particular identity, institution, tradition, behavior, property, possessions, protection, legality, or beliefs will remain untouched because you’re in a particular group, you are incorrect.
I changed my voter registration to “No Party” several decades ago, when it became evident the Republican Party had lost interest in whatever small-government / low-deficit / personal-responsibility principles it may have once had; thinking it had those principles was likely a misunderstanding on my part.
I cannot support many planks of the Democratic Party’s platform, either, but they remain based in rule-of-law and have some appreciation of what functions a government should perform.
I still vote in every election and intend to continue doing so.
WordPress likes images and this seems appropriate:
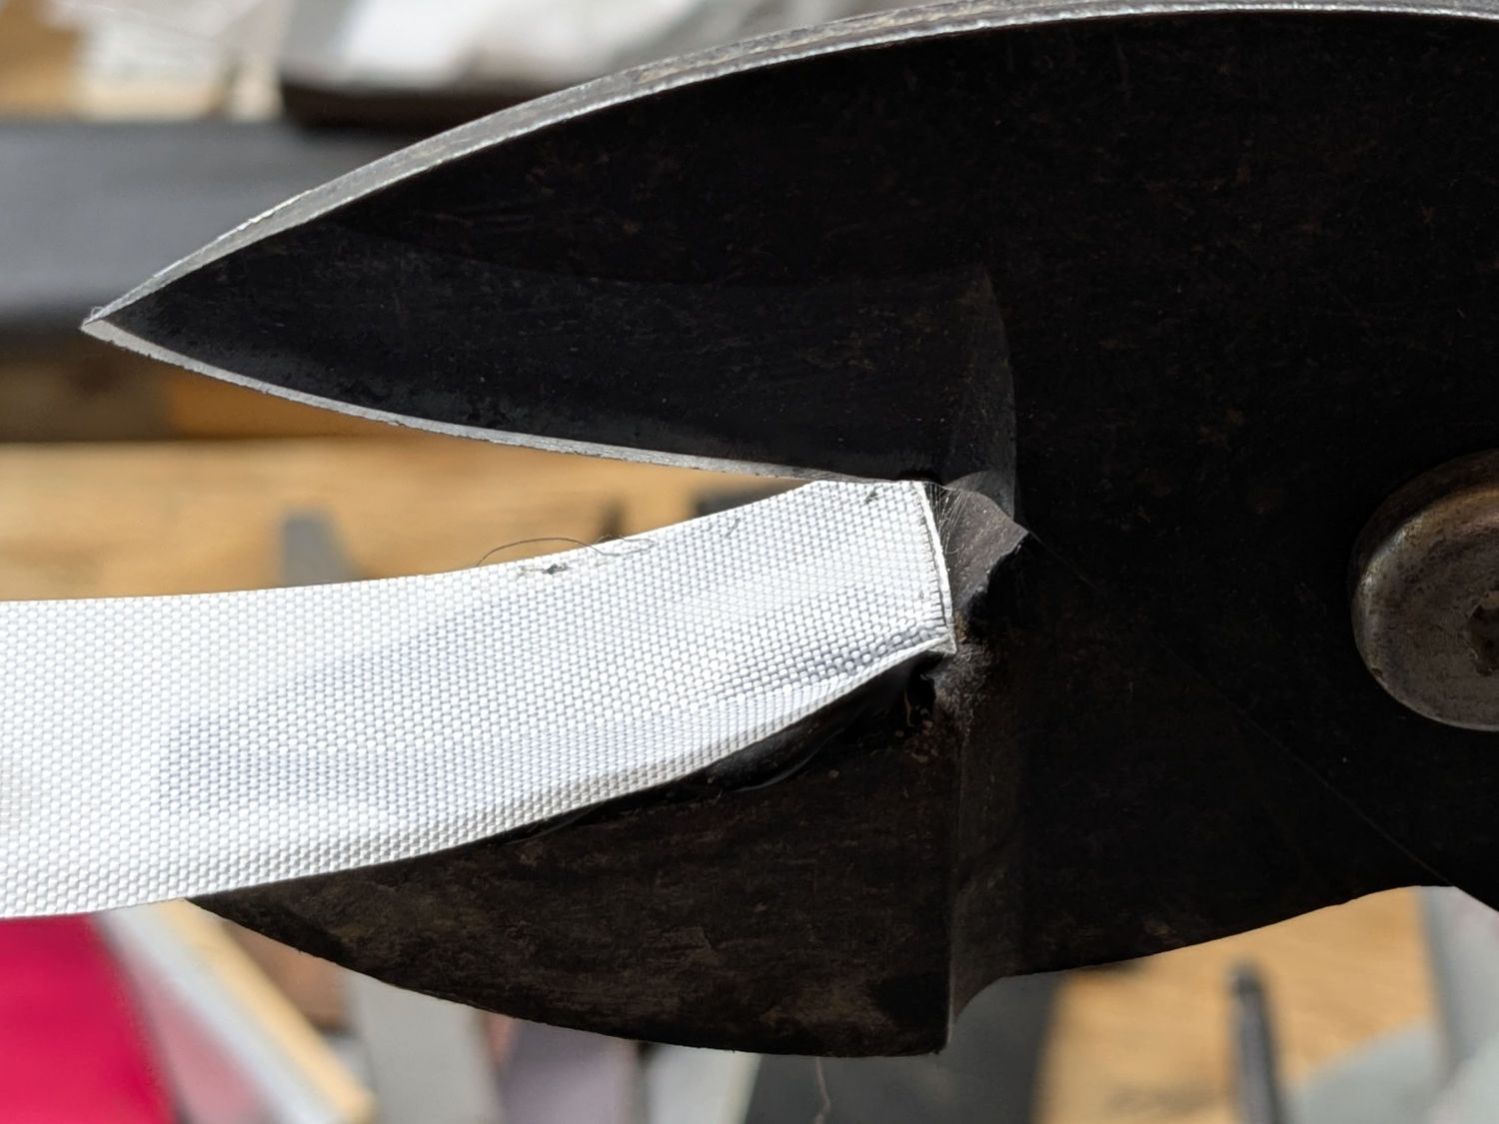
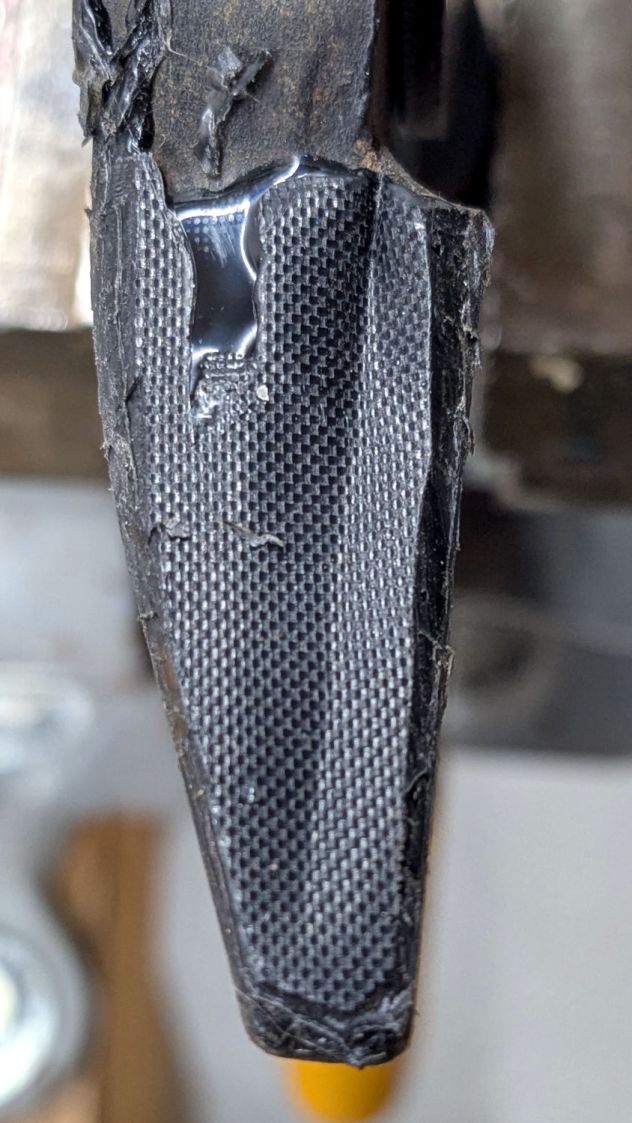
The Fiskars PowerGear lopper Mary uses in the garden had occasionally encountered a tomato cage wire and the blade had a few dents. We recently had a bunch of knives / blades / tools sharpened by somebody who knows what he’s doing and, while the lopper blade is now deadly sharp, grinding the dents out changed its shape enough that it no longer met the opposing plastic (probably glass-filled nylon) anvil.
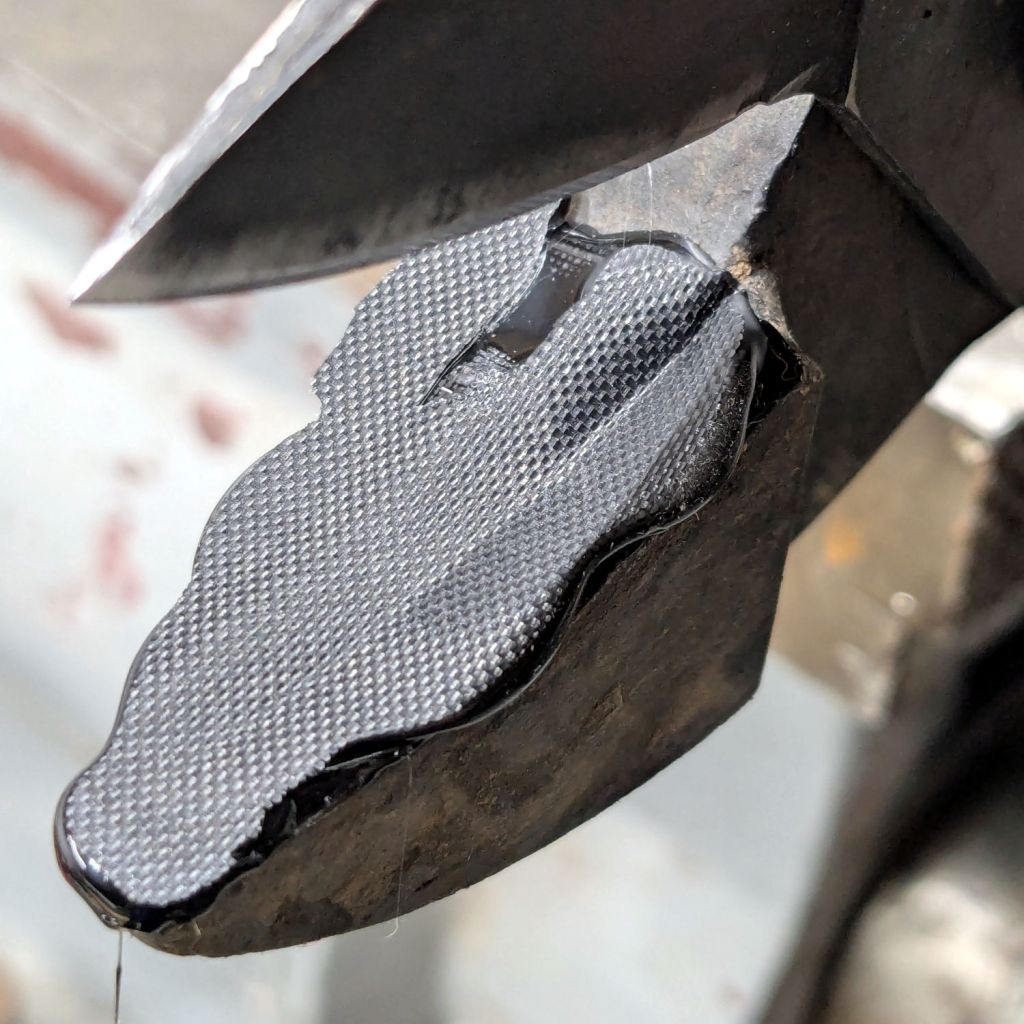
For lack of anything smarter, I cleaned the anvil, spread a layer of hot-melt glue over the surface, squished it flat with a snippet of PTFE fabric, and closed the jaws:
Fiskars lopper jaw repair – silicone cloth indent
Which left a blobular layer on both sides of the now perfectly matched blade channel:
Fiskars lopper jaw repair – blade indent
Trimming off the blobs made it slightly more presentable:
Fiskars lopper jaw repair – trimmed edges
The textured surface definitely looks great, even if the rest looks like the hack job it is.
I’m hoping the glue layer has enough traction on the anvil to survive the duty it gets in the garden, where Mary uses it to harvest cabbages & suchlike. I’m sure the occasional cage wire will test its resolve, but we’ll know more next summer.
Each of the glass fragments in a 3D printed coaster sits atop a metallized paper reflector in its own recess and gets covered with epoxy:
Printed Coasters – epoxy fill
That’s an early printed coaster with the epoxy pool covering the entire surface. Putting a rim around each fragment to form separate pools works better.
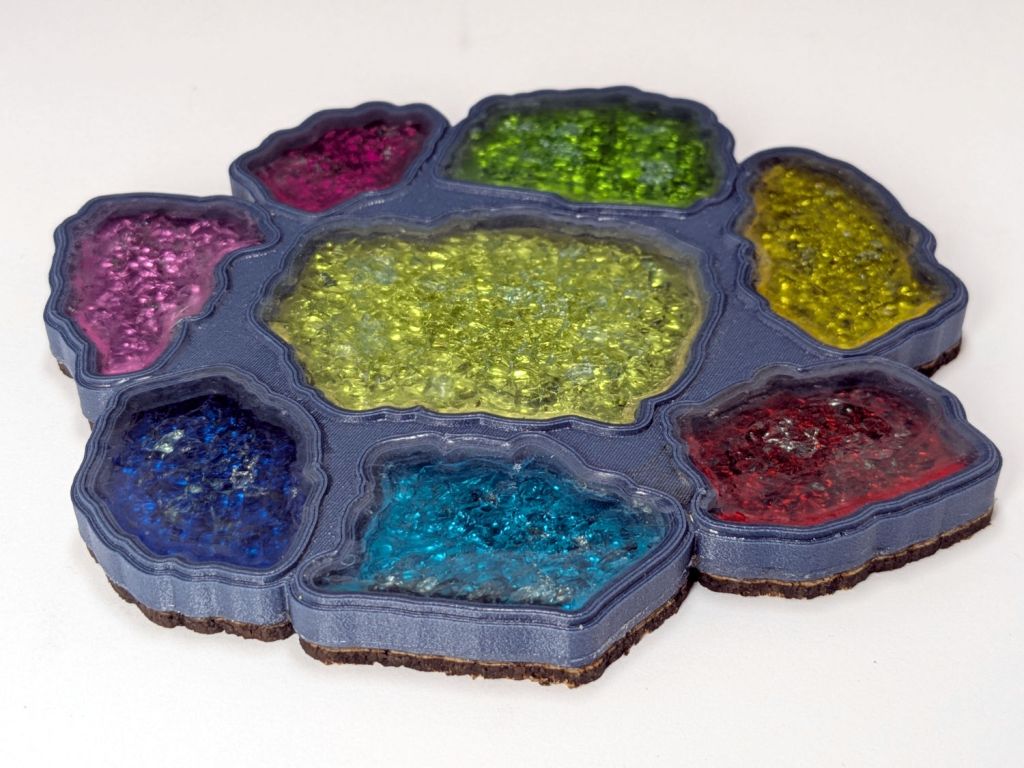
Assuming I do a tidy job of filling the recesses, this process worked exactly as you’d expect until I printed a coaster with blue PETG-CF filament:
Printed Coaster – Set C – oblique
Other than a slightly ragged cork layer motivating me to make the cork slightly smaller and use a fixture to align it properly, the coaster looks reasonably good. However, a close inspection shows all the epoxy pools are slightly recessed below their rims.
It turns out printing PETG-CF with an extrusion multiplier of 0.8, which I figured based on fitting threaded parts together, doesn’t fuse the threads into an epoxy-tight surface:
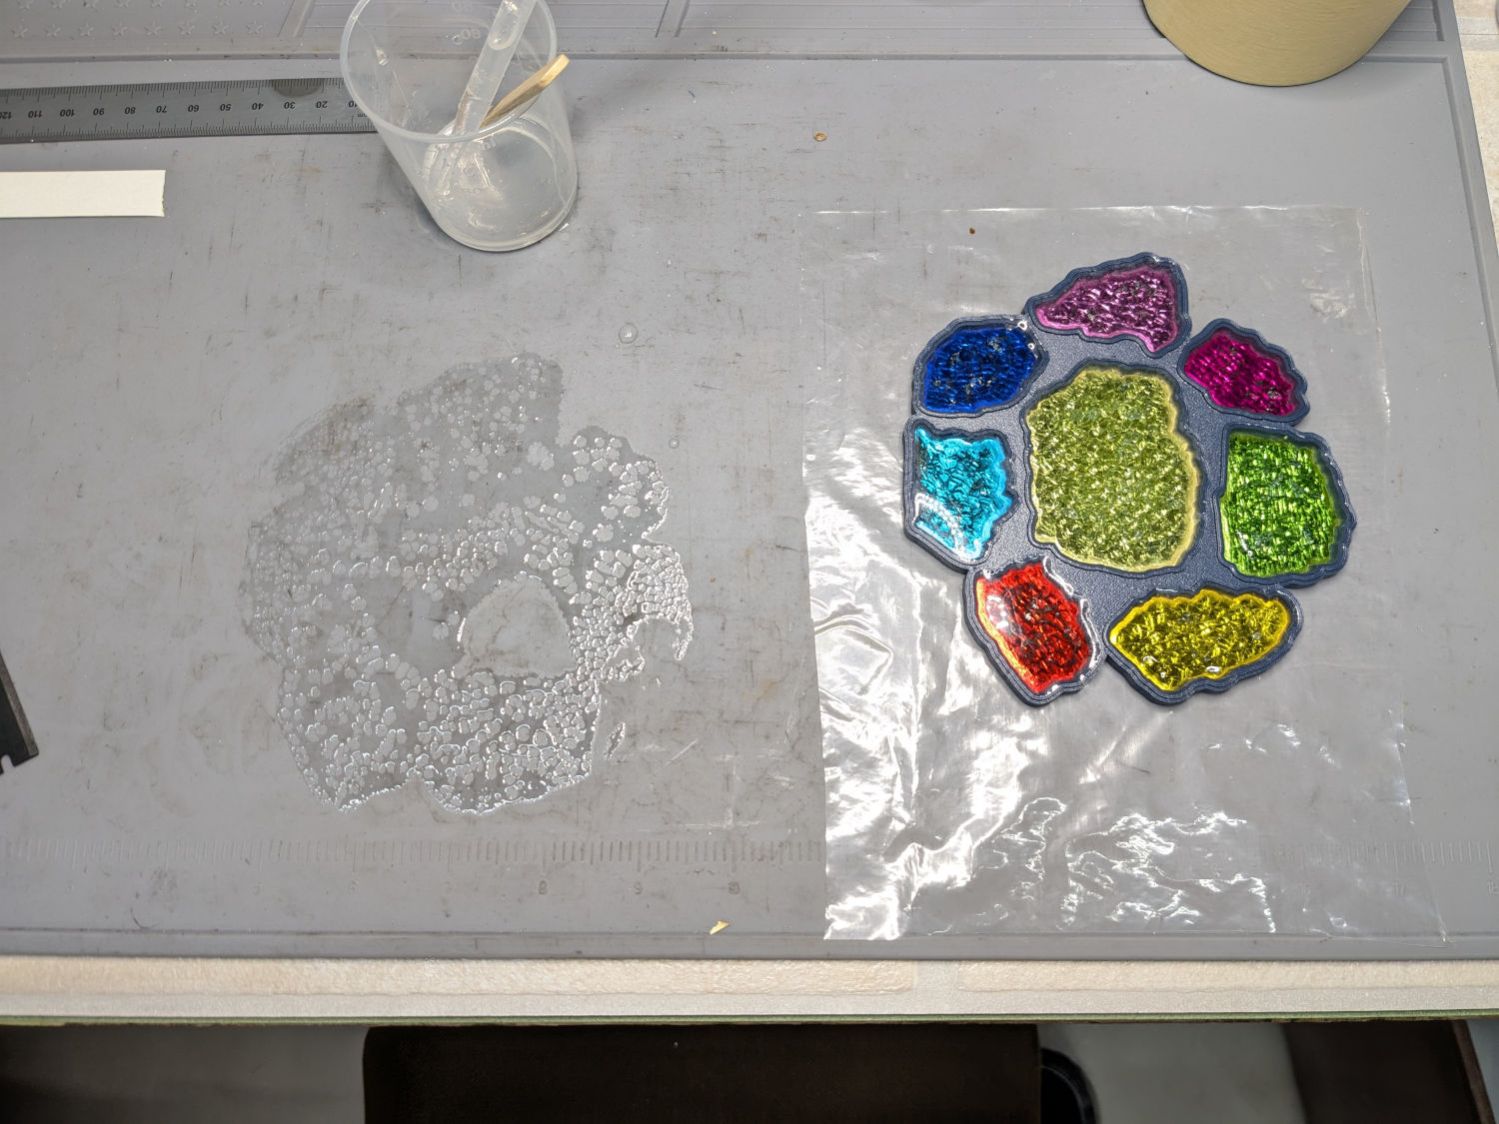
Printed Coasters – PETG-CF leakage – footprint
Fortunately, I’d been working on a silicone mat that could take a joke. I managed to move the coaster to a plastic sheet and refill the drained pools, although they continued to drain while curing.
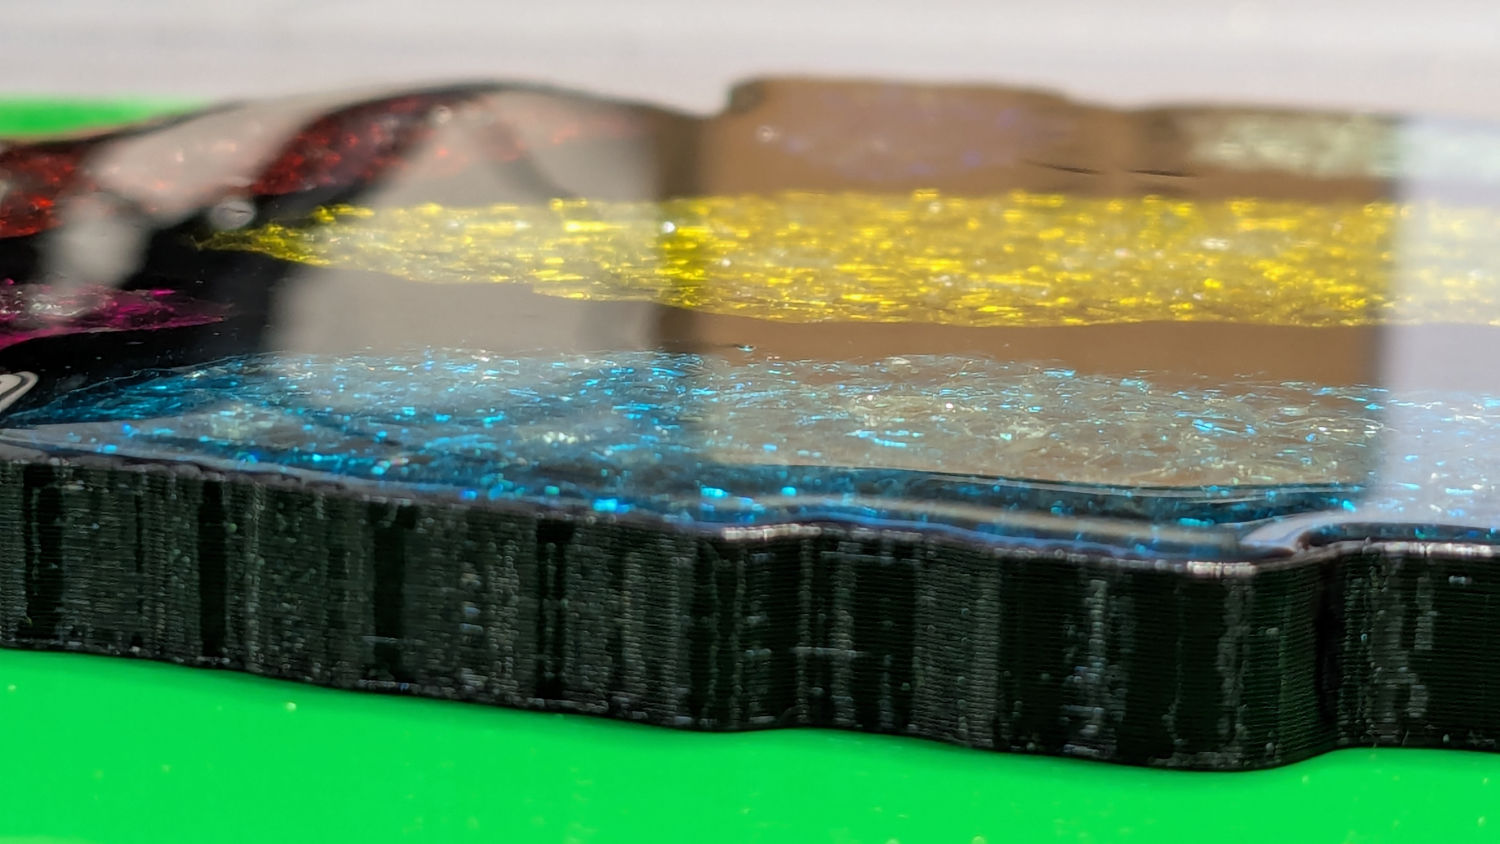
After the epoxy cured to a rubbery texture, I scraped off the meniscus around the perimeter of the coaster, but the bottom shows it cured in a pool of its own making:
Printed Coasters – PETG-CF leakage
The cork conceals the evidence and the result looks good enough for my simple needs:
Smashed Glass 3D Printed Coaster – Set C – in use
Memo to self: Use the correct filament preset for the job!
Cleaning the baseboard radiator fins before moving the houseplants back to their winter abode by the living room window made sense, so I took the trim covers off and vacuumed a remarkable accumulation of fuzz off the top and out from between the fins. The covers had an equally remarkable accumulation of sawdust along their bottom edge, apparently deposited when the previous owners had the floor sanded before they moved in a decade ago.
If you happen to live in a house with baseboard radiators, I’m guessing you never looked inside, because nobody (else) does.
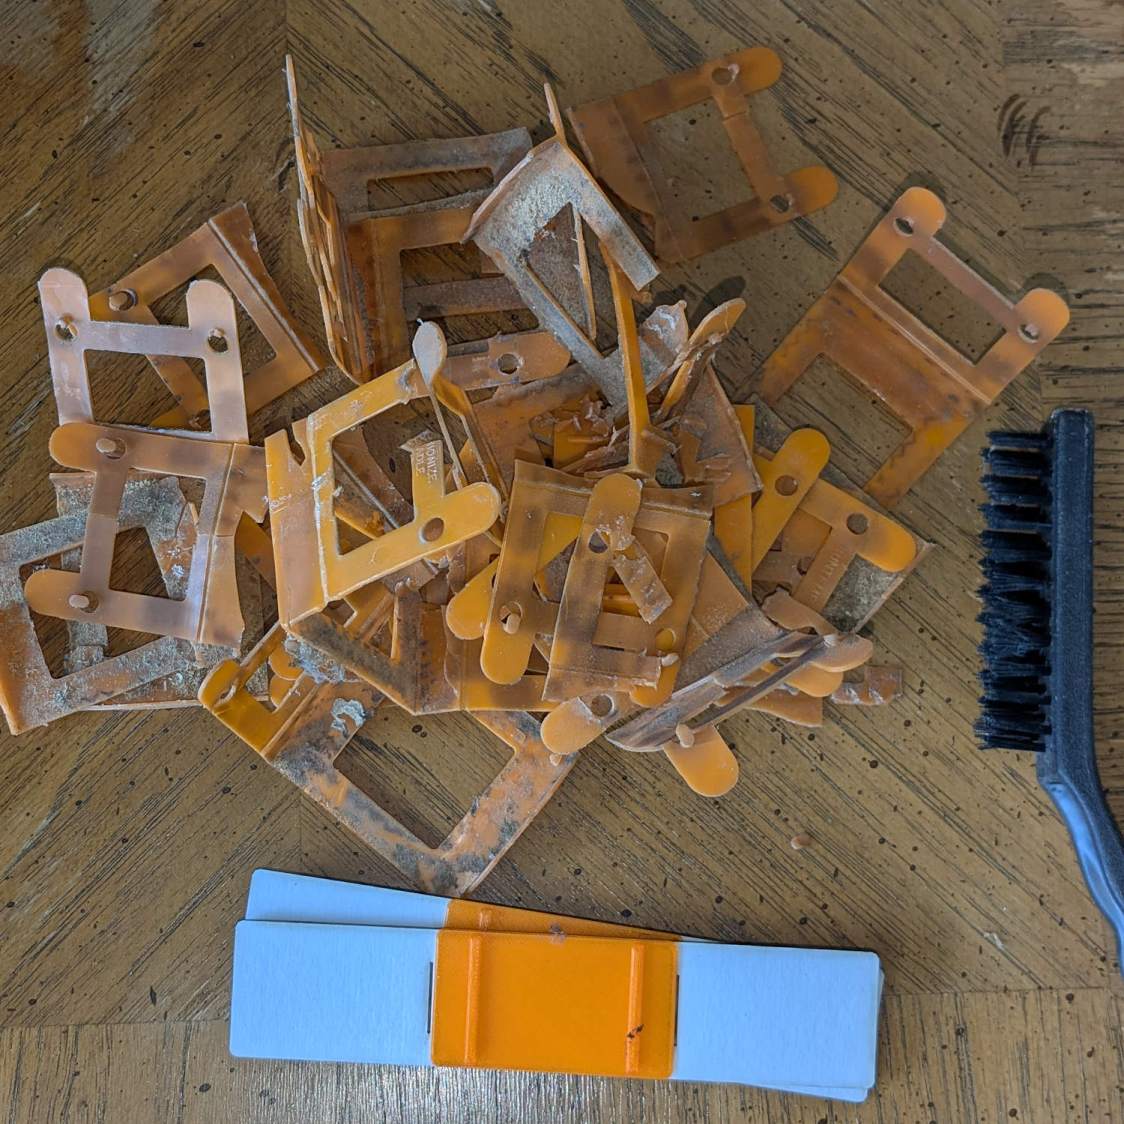
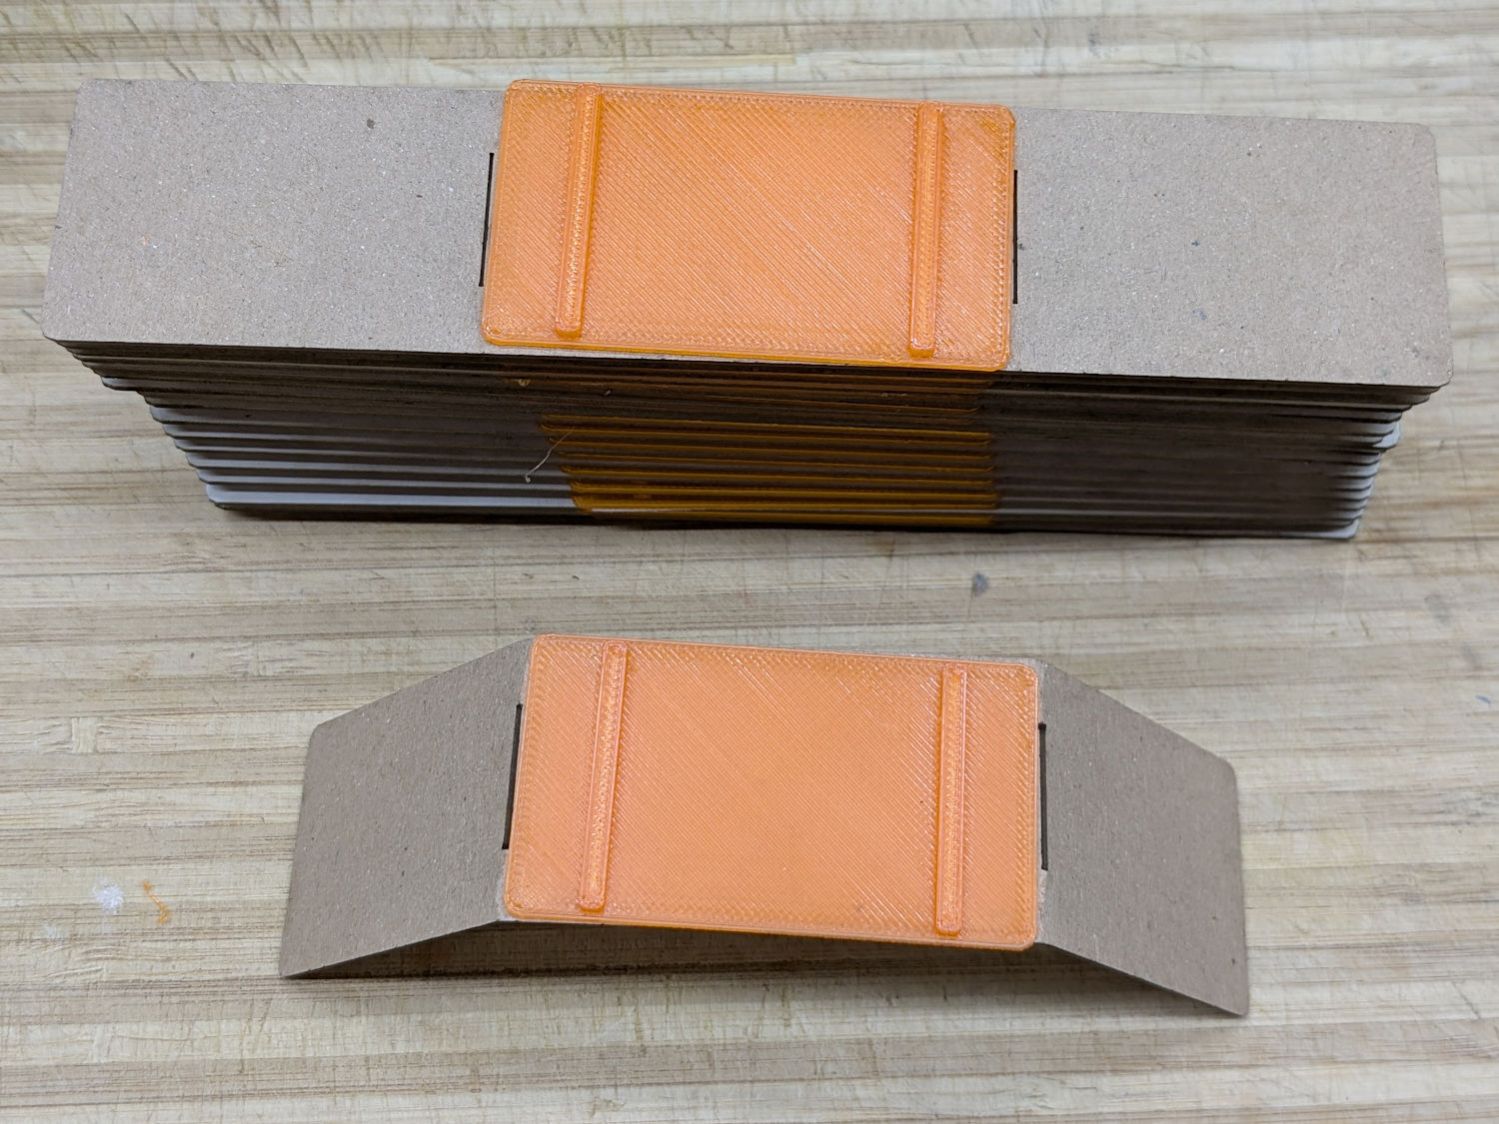
Anyhow, the radiator fins should rest on plastic carriers atop the bent-metal struts also supporting the trim covers, so that they slide noiselessly when the copper pipe expands & contracts during the heating cycle. Over the last six decades, however, the plastic deteriorated and most of the carriers were either missing or broken to the point of uselessness:
Baseboard Radiator Sled – old vs new
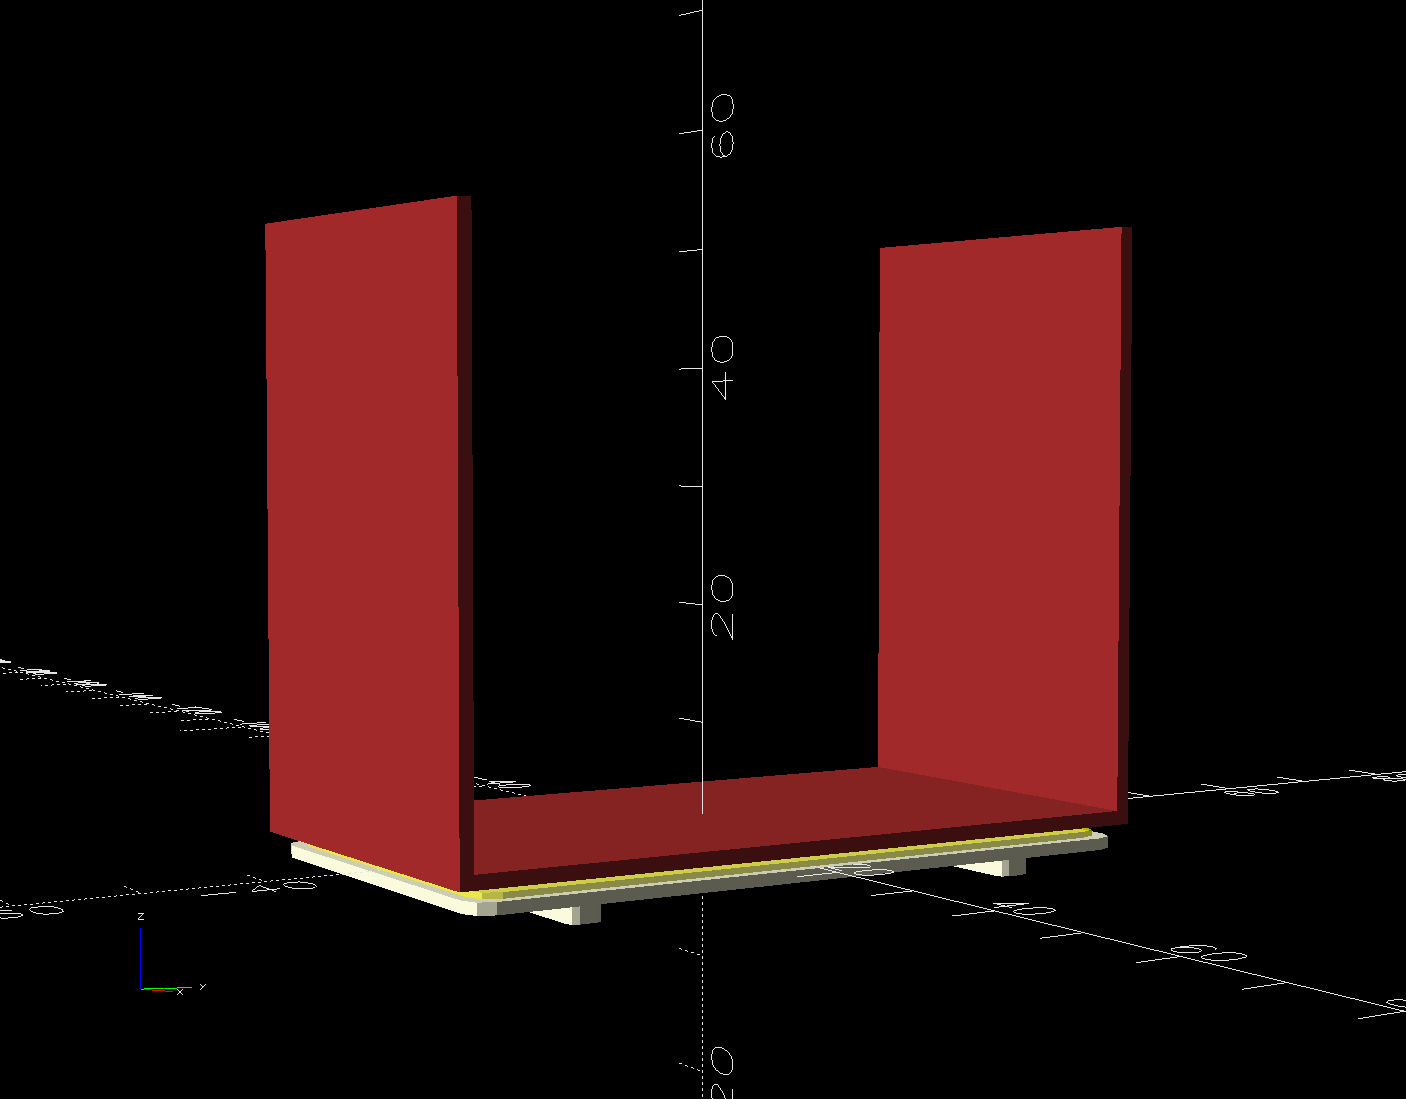
The shapes on the bottom are replacements made with a 3D printed base (“sled”) and a chipboard wrap around the radiator preventing the fins from contacting the strut:
Baseboard Radiator Sled – OpenSCAD show
Although it was tempting to 3D print the whole thing, because plastic, I figured there was little point in finesse: chipboard would work just as well, was much faster to produce, and I need not orient the shapes to keep the printed threads in the right direction.
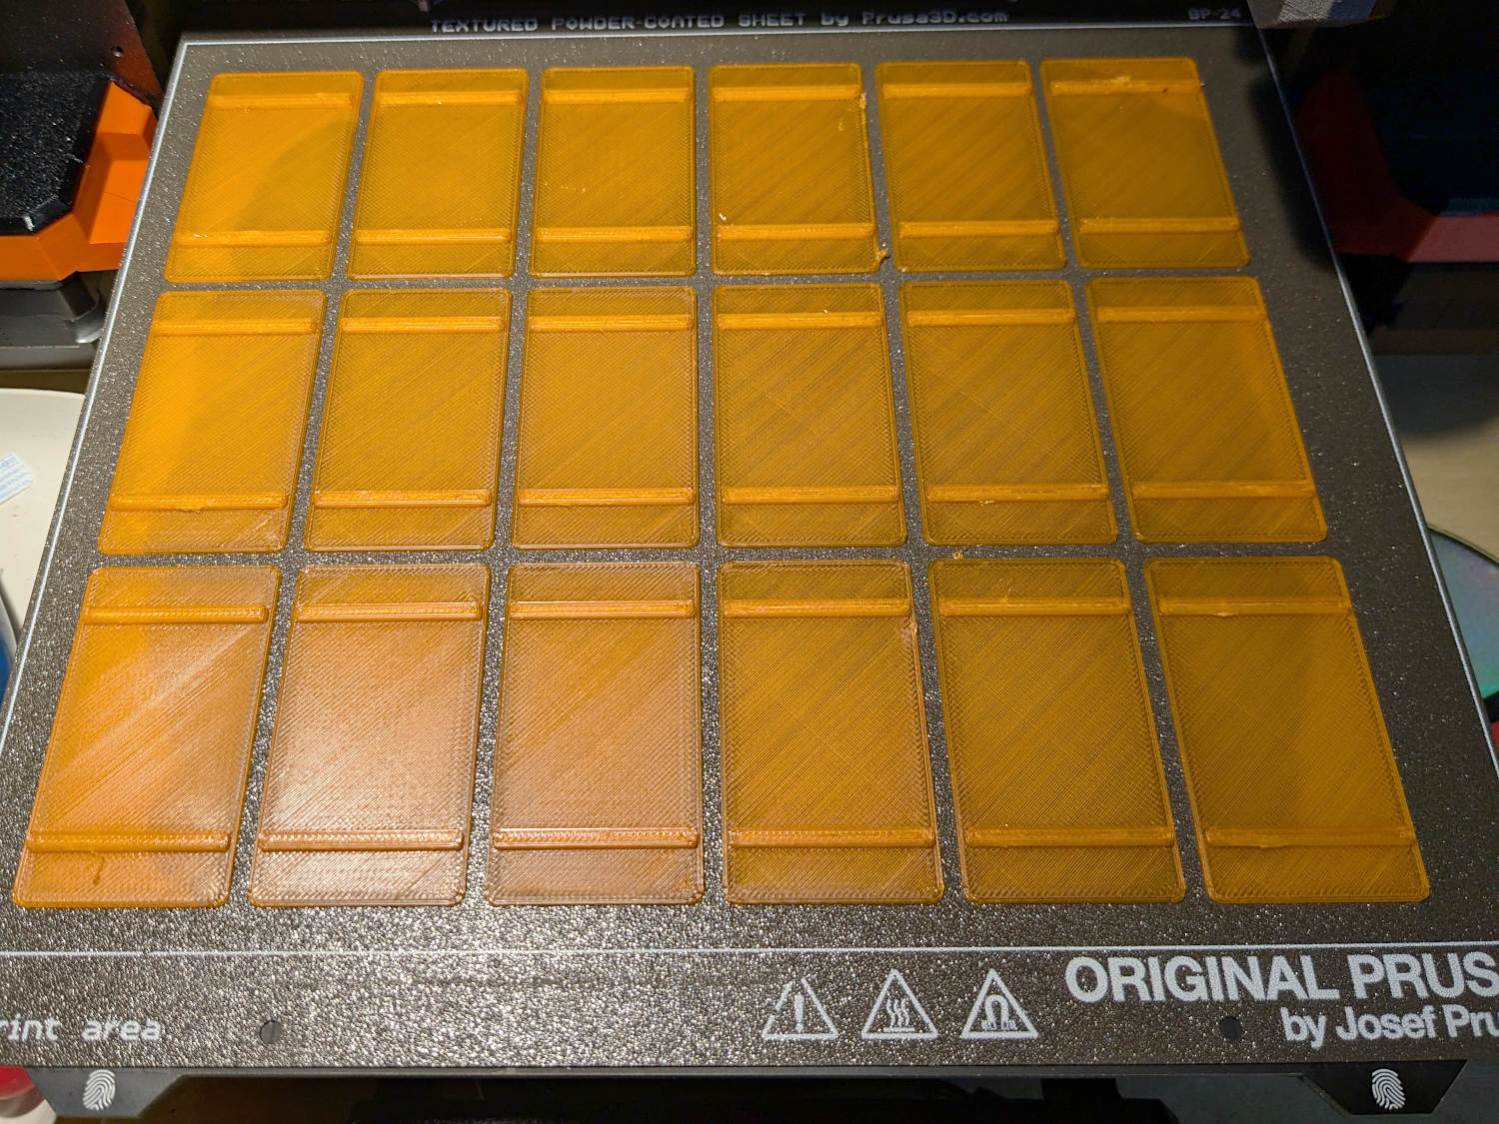
The Prusa MK4 platform was just big enough for the number of sleds I needed:
Baseboard Radiator Sled – printed
The sleds along the left and right edges lost traction as the printing progressed, but everything came out all right.
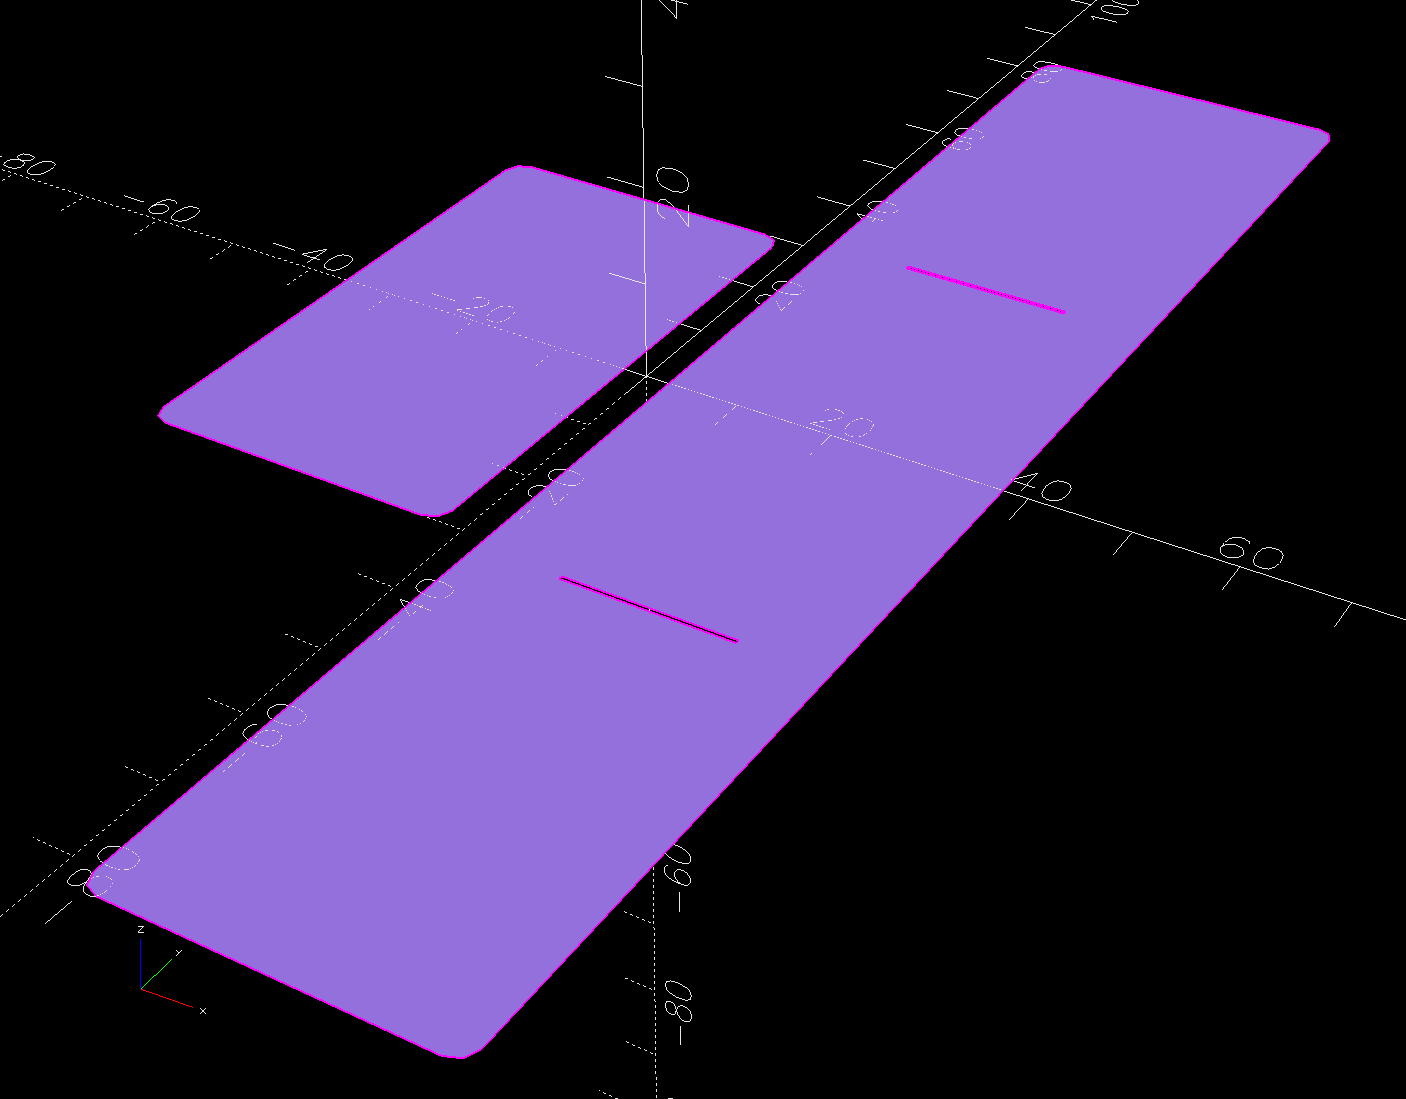
The OpenSCAD program also produces 2D SVG shapes for the chipboard wraps and adhesive rectangles sticking them to the sleds:
Baseboard Radiator Sled – OpenSCAD SVGs
Import those into LightBurn, duplicate using the Grid Array, Fire The Laser, then assemble:
Baseboard Radiator Sled – assembly
The slits encourage the chipboard to bend in the right direction at the right place, so I didn’t need any fancy tooling to get a decent result.
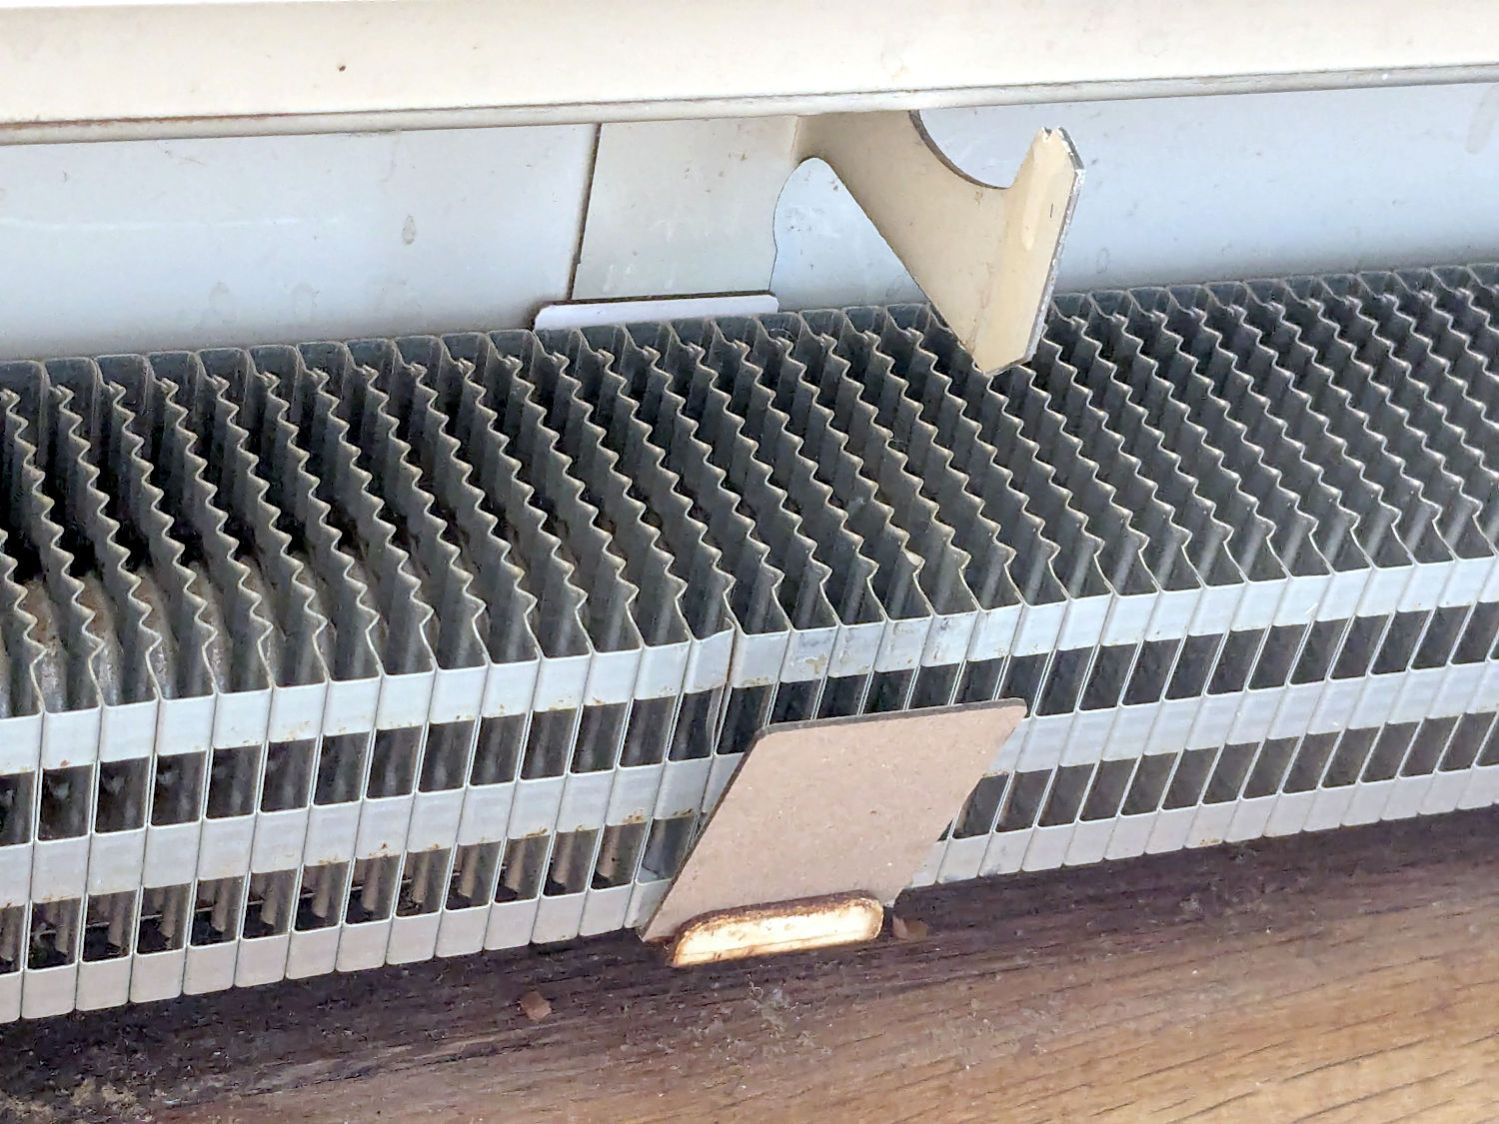
A few rather unpleasant hours crawling around on the floor got the struts bent back into shape and the sleds installed under the fins:
Baseboard Radiator Sled – installed
Protip: Gloves aren’t just a good idea, they’re essential.
The trim cover presses the angled chipboard where it should go against the fins. The covers carry shadows of the plastic carriers, suggesting the clearance was tighter than it should have been and thermal cycling put more stress on the plastic than expected. We’ll never know.
Although I’ll make more for the other baseboards as the occasion arises, I hope to never see these again …
This file contains hidden or bidirectional Unicode text that may be interpreted or compiled differently than what appears below. To review, open the file in an editor that reveals hidden Unicode characters.
Learn more about bidirectional Unicode characters
After about four years, the two well-aged 12 V 9 A·hr batteries in the Belkin F6C1500 UPS gave up after a few minutes without line power, whereupon I swapped the UPS out for a new one.
The old batteries don’t have much life left in them (the date in the title should be 2021):
SigmasTek 12V SLA -2025-09-30
That’s with a 1 A load, rather than the 2 A I used earlier, as they’ll never be used for heavy loads again.
The new 7 A·hr batteries can power a 300 W incandescent bulb for 10 minutes before sounding the Low Battery alert, then another three minutes before shutting down. That’s about 12 A at 24 V, call it 2.6 A·hr from grossly overstressed batteries.