Ed Nisley's Blog: Shop notes, electronics, firmware, machinery, 3D printing, laser cuttery, and curiosities. Contents: 100% human thinking, 0% AI slop.
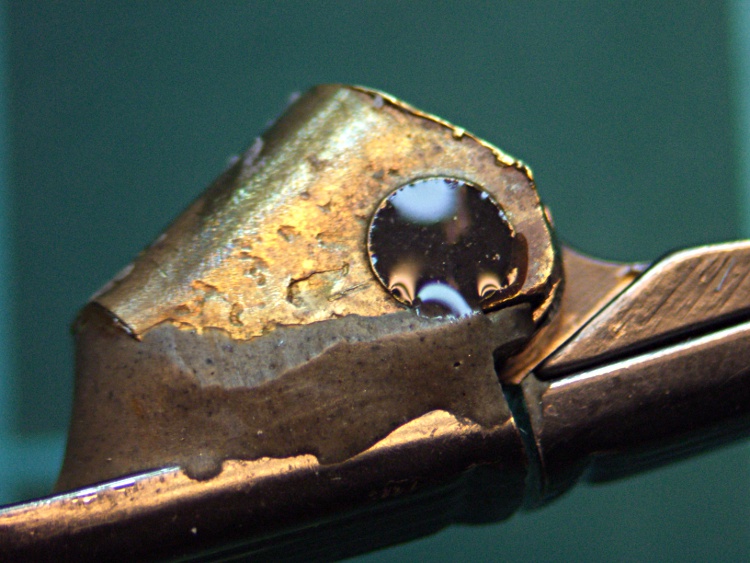
While shoveling things off the workbench, I encountered a old wooden ruler with brass-colored metal edges, one of which had popped out of its groove. No wonder: the poor thing was bent into an arc the hard way. I have no idea how that happened, honest.
Distorted ruler edge
Anyhow, I figured I could fix it with the same technique I apply to straighten copper wire: grab one end in the bench vise, the other in a Vise-Grip, and whack the pliers with a hammer to stretch the wire a percent or two. So I did that and failed completely: the metal strip is actually copper / brass plating on steel.
But it was straight enough to tuck back into the groove, where friction seems to be holding it in place, and all is well.
(If I’d found it before I put a dot of epoxy into the sunglasses hinge, I’d have dabbed some dots along the groove and secured it in place forever. No such luck… the workbench is really buried this time.)
After the hinge repair described there, those old sunglasses have been working fine and I use them regularly. The screw recently worked its Loctite loose and was held in largely by blind faith.
It’s obvious why:
Sunglass hinge screw – loose
A tiny dab of JB KWIK should solve that problem for the foreseeable future:
Sunglass hinge screw – epoxy
In the highly unlikely event I must remove that screw, I’ll just refer to this picture and mill the epoxy out.
While I was fiddling with the camera to get that first spectrograph, it began coughing up an assortment of Memory Stick errors, including the dreaded C:13:01 error. Having had this happen several years ago, I knew it came from the ribbon cable contacts in the Memory Stick socket and the only way to fix it involves taking the camera apart.
Anyhow, here’s my version of the teardown and fix. This is a bit more aggressive than what you’ll read above, in that I disconnect all the cables to get straightforward access to the guts of the camera, but I think it makes everything easier. In any event, re-plugging the cables in those connectors will probably be a Good Thing.
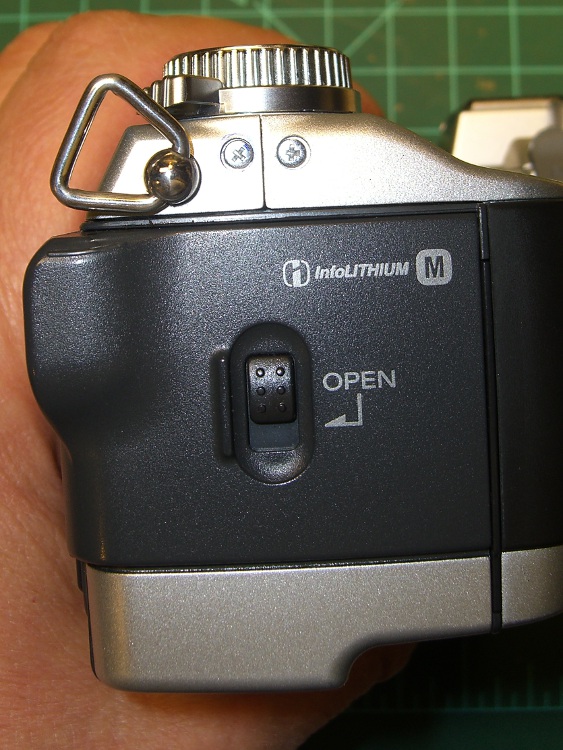
Remove the battery, Memory Stick, and all the straps and doodads. This fix will reset the camera to its factory defaults; you must eventually reset everything, so review your settings.
If your filing system depends on the camera’s numbering system: heads up! This will reset the image sequence numbers; the next picture will be DSC00001.JPG.
Remove the four Philips-00 screws that hold the rear case in place. Note that they are not identical…
Two on the left.
DSC-F717 case screws – left side
The rear screw on the right side.
DSC-F717 case screws – right side
The screw on the right side of the bottom passes through the front part of the case.
DSC-F717 case screws – bottom
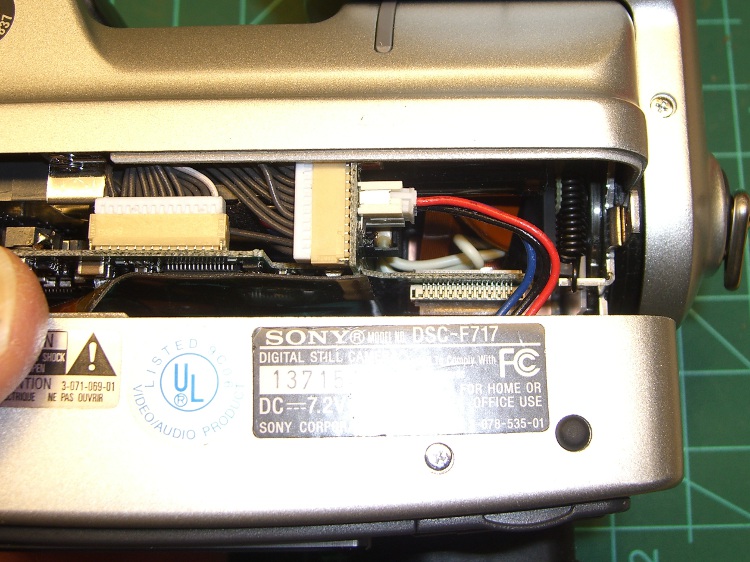
Ease the whole rear half of the case, display and all, away from the front half, until you can disconnect the three-wire cable from the power jack. A needle-nose pliers may be helpful, but be gentle!
DSC-F717 internal power cable
Now things get nasty.
The flat paddle in the lower right plugs into a socket on the display board in the rear case: pry it out if it hasn’t popped out of its own accord.
Disconnect the ribbon cable on the left side by prying the gray latch away from the cable; the ribbon will pop out with no effort.
Put the rear part of the case somewhere out of the way.
DSC-F717 main board cables
Peel the static shield off the main circuit board. The black strip is a surprisingly strong adhesive tape that’s stuck to the ribbon cables along the top edge of the board. Peel gently!
DSC-F717 static shield
Pull the three cables out of the sockets along the top of the board. The blue cable seems to be much more fragile than the others, but they all come out by just pulling directly upward: parallel to the board.
Unscrew the two P-00 screws holding the main board in place: upper left and center of the board.
DSC-F717 main board cables – top
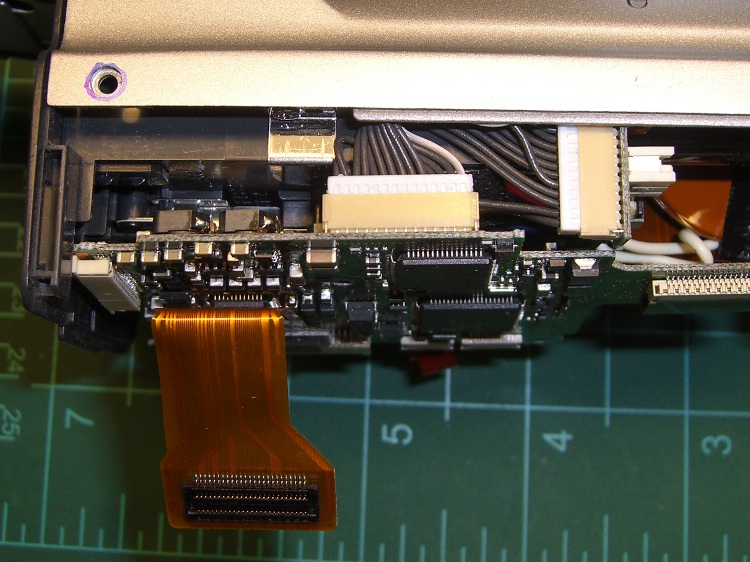
Flip the camera over and ease the main board away from the case to expose the white connector on the bottom. This is stuck firmly in place, so try to not brutalize anything around the connector when it pops out.
DSC-F717 main board cables – bottom
That leaves only the ribbon cable on the right of this picture (left of the camera) connecting the optical section to the main board. Push the two ends of the gray latch bar parallel to the cable (it is not the same as the connector on the other side of the board shown above) away from the connector until the bar releases the cable and it pops out.
Put the main board somewhere safe.
DSC-F717 main board cables – rear
Now you can actually see the Memory Stick socket behind all the ribbon cables!
DSC-F717 Memory Stick socket – exposed
Remove the two P-00 mounting screws, one to the upper right and the other to the lower right in the steel retaining bar.
Remove the socket from the camera. Whew!
DSC-F717 Memory Stick socket – retaining screws
Here is the offending cable entry into the Memory Stick socket. Pull the mumble cable out.
DSC-F717 Memory Stick socket – cable entry
The socket pins evidently move just a little bit, every time you put in a Memory Stick, eroding teeny divots in the cable contact pads. I generally use the USB connection, so the socket doesn’t see a lot of motion. Your mileage may vary.
DSC-F717 Memory Stick cable indentations
I cleaned off the ribbon cable pads with Caig DeoxIT, although I’m not convinced that really does anything in this situation.
This guy dismantled the socket to clean the internal contacts, which would probably make sense while you’ve got the hood up. I didn’t do that this time, though.
Then you reassemble everything in reverse order, after which the camera Just Works. Probably for another few years.
The puzzling part of this failure: the camera has literally hundreds of ribbon cable contacts, but only the Memory Stick cable goes bad. If any other cable failed, the camera would go Toes Up, right? Next time around I may try soldering thin copper pads on the cable or applying a thin backing layer to improve the resilience, but that sounds pretty risky even to me.
If you haven’t done so already, put a write-protected image of your biz card / contact info on every Memory Stick you use with your cameras to make it easy for an honest person who finds your camera to get in touch with you. The dishonest ones won’t change their behavior one way or the other.
Take a picture of your card now: the camera will set up the folders and name it DSC00001.JPG. If you’ve already got such a file, take a picture anyway, delete it, then copy your existing file to the camera as DSC00001.JPG. In either case, write-protect the file.
Memo to Self: next time, take the socket apart and cast some epoxy around the contacts to prevent further motion.
Comes a time in the life of every keyboard when you must simply tear it apart to clean out the crud. I’ve been using a Microsoft Comfort Curve keyboard for several years and it’s worked well, but the grunge finally exceeded even my lax standards.
A handful of screws secures the bottom cover; the shortest screws run down the middle. Surprisingly, the giant HEALTH WARNING label doesn’t cover any screws. A row of gentle snap latches along the edges holds the covers together; ease them apart with a small screwdriver or your fingernails.
The lower cover holds the crosspoint matrix under a giant silicone rubber spring mat, with the USB interface board to the upper left. I left those in place, as the top cover captured nearly all the crud.
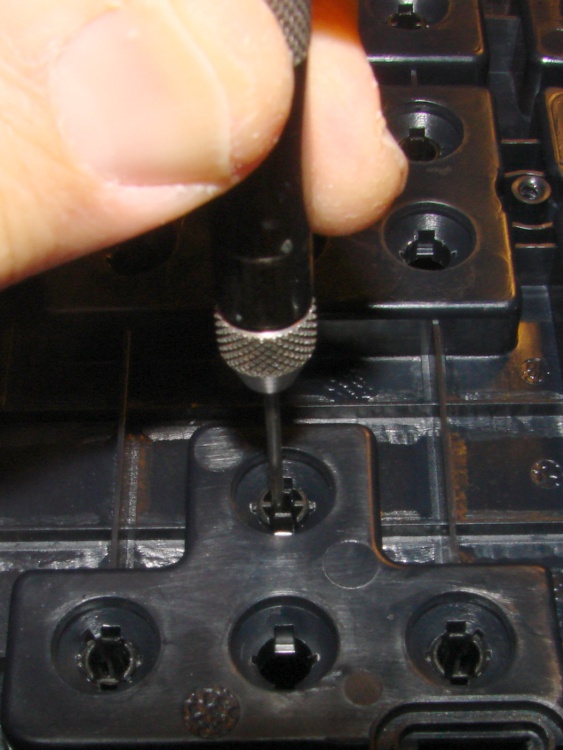
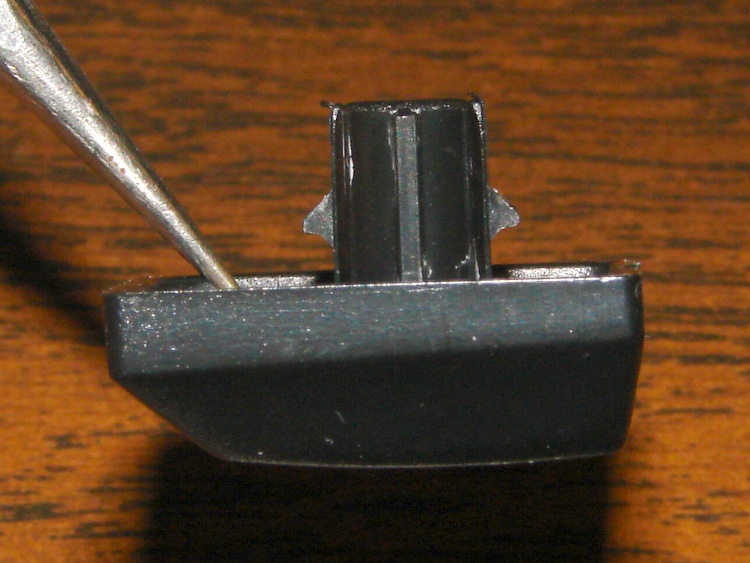
The keycaps have stems that slide in guide tubes molded into the top cover, with triangular latches that both secure the stem and prevent it from rotating. I used a small pin punch to push the keycaps out, as shown in the top picture; the punch much be small enough to allow the latches to bend inward as they clear the notches.
Keycap retaining latches
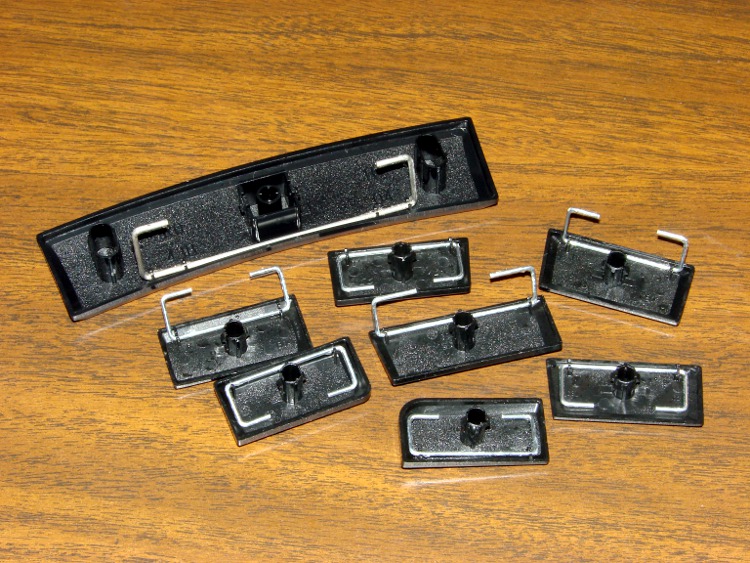
The larger keys have equalizing wire bails that latch under guides molded into the top cover. They’ll slide right out, but don’t shove the pin punch too far too fast.
Keycaps with equalizing wires
Many of the keycap stems have ridges along their length to ensure each one fits only in its proper position; the triangular latches also have different orientations. This view shows the numeric pad (from the “screen” side of the keyboard) with a variety of coded guide tubes, wire bail guides, and the surprisingly deep tub underneath the keycaps that may capture much of the inevitable liquid spill and route it out the drain hole near the far edge.
Keyboard top panel
I tossed the keycaps and top cover in the dishwasher, which did a wonderful job of cleaning them out. A dab of silicone grease on the wire bail contact points should keep them sliding freely.
Reassembly is in reverse order, although I defy you to put all the keycaps back in their proper places without referring to another keyboard…
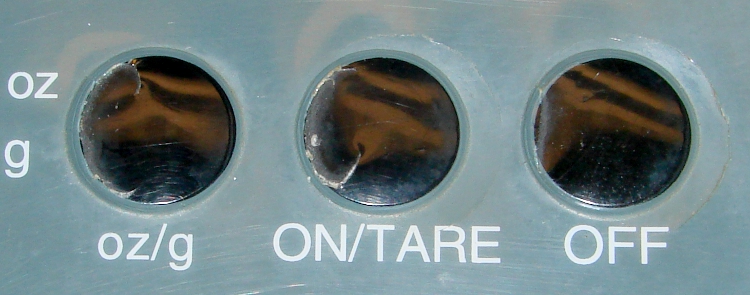
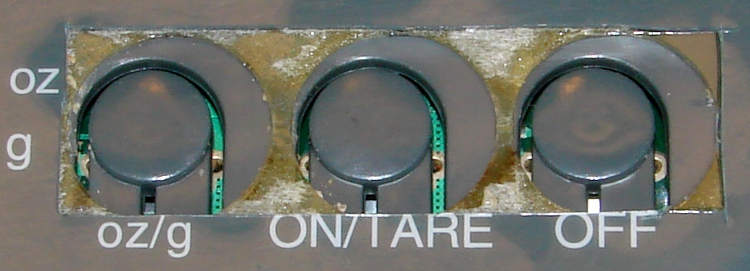
According to the date code on the back, we’ve had this kitchen scale for nigh onto a decade, so I suppose I shouldn’t be surprised that the molded plastic sheet over the buttons has cracked. Mary & I were in the midst of a tag-team baking session when the middle (Power) button cover went crunch and gave out.
Kitchen scale – cracked buttons
Although it’s not obvious, all three buttons are about halfway disconnected from the surface. The rightmost button has a crack nearly all the way around the perimeter.
Button covers removed
A quick encounter with a razor knife removed the entire block of cracked plastic, revealing the surprisingly off-centered button recesses. No wonder the plastic cracked!
The junkpile disgorged a thin sheet of laminated cardboard that peeled neatly down the middle. Cut it to fit the rectangle, apply a strip of Kapton tape, and it was back in action in about ten minutes… the bread dough never missed me.
Kitchen scale – expedient button cover
This was a quick-and-dirty fix to get the thing back in operation; when the Kapton tape fails, I’ll do something more permanent and less hideous. I promise…
Rode around the big block on some errands, stopped at the Vassar Farm garden to haul some squash home, rode off… and the bike handled poorly. Well, with a few dozen pounds of produce in the panniers that’s not unusual, but this was worse. Yup, another flat.
This time, however, our daughter was home and could rescue me in the van. Back in the shop, I found this obvious suspect:
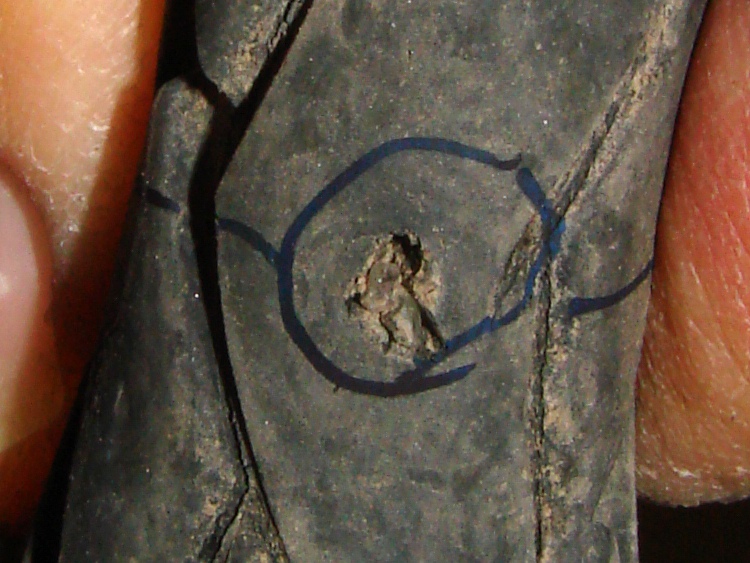
Embedded glass fragment
Once again, however, this wasn’t the problem, as the tire liner was barely scuffed. Those are glass fragments inside the gash, which might actually be the same one as before.
There weren’t any other pointy objects embedded in the tire, but the tube wouldn’t stay inflated long enough to find the leak. I took the tube upstairs, submerged it in a pan of water, and found a rash of holes. Not pinholes, not a failed tube, but a series of punctures.
Steel wire fragment
Examining the tire liner revealed the cause: a strand of what my buddy DBM calls Michelin Hair poking through the tire liner. It’s a fragment of the steel belt from a car or truck tire, most likely shed from a disintegrating semitrailer recapped tire.
There is absolutely no defense against these things, because they have razor-sharp points on both ends where the wire fractured. When the tire picks one up, every rotation drives it through the rubber, the Kevlar belt, the tire liner, and the tube. The usual symptom is a slow leak, eventually followed by a row of holes in the tube as it shifts position under low pressure.
In fact, the tube had a slow leak since I installed it a few weeks ago after a tube failure. I wondered if I’d inadvertently installed a fold, but now I think I ran over this wire during the first few rides and it’s been getting worse ever since.
That tube is a goner! I installed another Schwalbe tube and we’ll see what happens; one has been working fine on Mary’s bike for the last three months.
Here’s a look at the steel wire from the side:
Steel wire fragment through tire liner
It was completely through the liner, with only a stub sticking out on the tire side. There’s certainly a matching hole somewhere on the tire, but it’ll be indistinguishable from all the other nicks and gashes.
Of late I’ve been toting an LED flashlight / laser pointer around in my pocket for peering into dark corners and highlighting interesting objects. It started flickering and I discovered the joint just aft of the switch had become slightly loose.
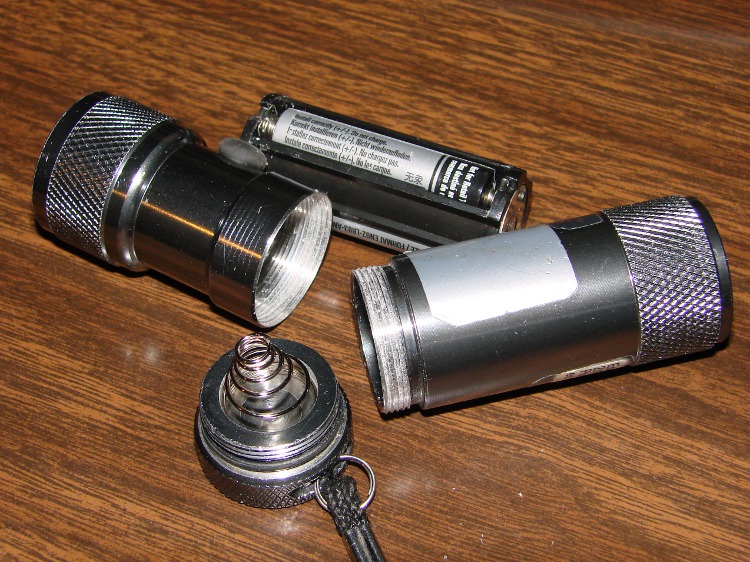
Disassembled LED Flashlight
Well, I always wondered how the thing came apart and now I know!
The threadlocking compound seems to have turned into dusty white powder, although my pocket doesn’t seem all that hostile an environment.
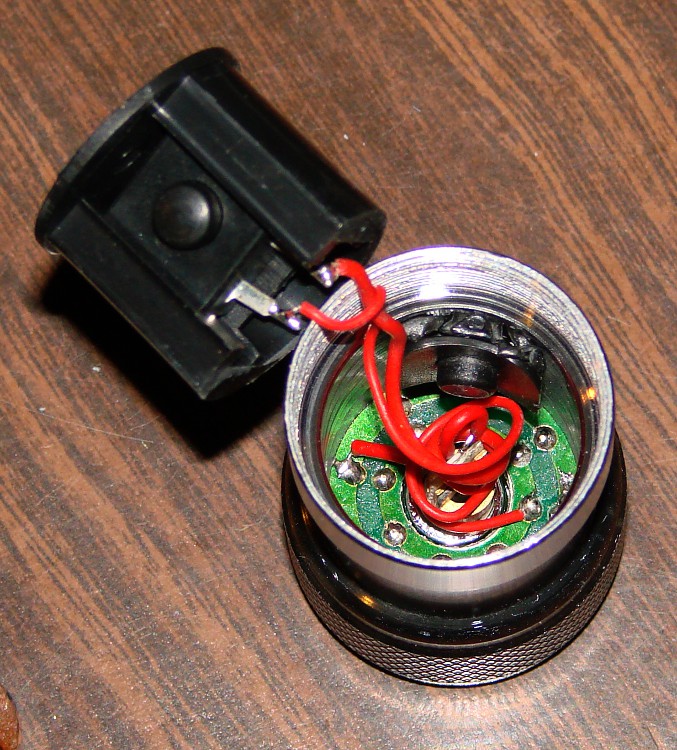
Flashlight innards
The switch assembly pulls out, revealing the LED circuit board with the laser module in the middle. The two wires correspond to the two ON states: flashlight and laser.
For what it’s worth, the 8 LEDs draw 130 mA (16 mA each), far more than the 3 mA each in that pathetic work light.
The laser draws 20 mA.
Screwed everything back together and it works fine again…