Ed Nisley's Blog: Shop notes, electronics, firmware, machinery, 3D printing, laser cuttery, and curiosities. Contents: 100% human thinking, 0% AI slop.
The humidity in the basement safe has been on the rise for the last few months:
Basement Safe Humidity
So I dumped all three bags of spent silica gel onto cookie sheets and baked them at 250 °F for a bit less than 12 hours overnight. As the (gas) oven temperature isn’t all that well regulated, I set it to 230 °F and hoped for the best. I have no way of knowing what the actual temperature was during the night.
The silica gel inside the bag from the safe weighed 583 g and the two bags that had been sitting in the basement air weighed 663 g. After baking, all three trays of beads weighed 496 g, slightly less than the 500 g direct from the factory-sealed cans.
The beads looked undamaged from their ordeal.
Two dozen scattered beads collected from the countertop and floor weighed 0.4 g, for an average weight of 0.017 g each. I definitely didn’t lose 12 g of beads during this adventure!
The translucent white beads vanish against an off-white laminate kitchen floor under ordinary lighting. They’re retroreflective enough that peering along the side of an LED flashlight lights them up; I’m pretty sure I got most of ’em.
Memo to Self: Next time, try 6 hours starting in the morning.
Having experimentally determined that tempering molten chocolate is not optional (i.e., chocolate doesn’t behave just like butter), I tried a cheat discussed in the comments following that helpful post. Basically, because all retail chocolate is already tempered, you can get good results by carefully heating it to the proper temperature, then pouring it into the molds… the proper crystals remain in their places, the cooled chocolate has good snap, and you avoid a huge amount of fuffing and fawing.
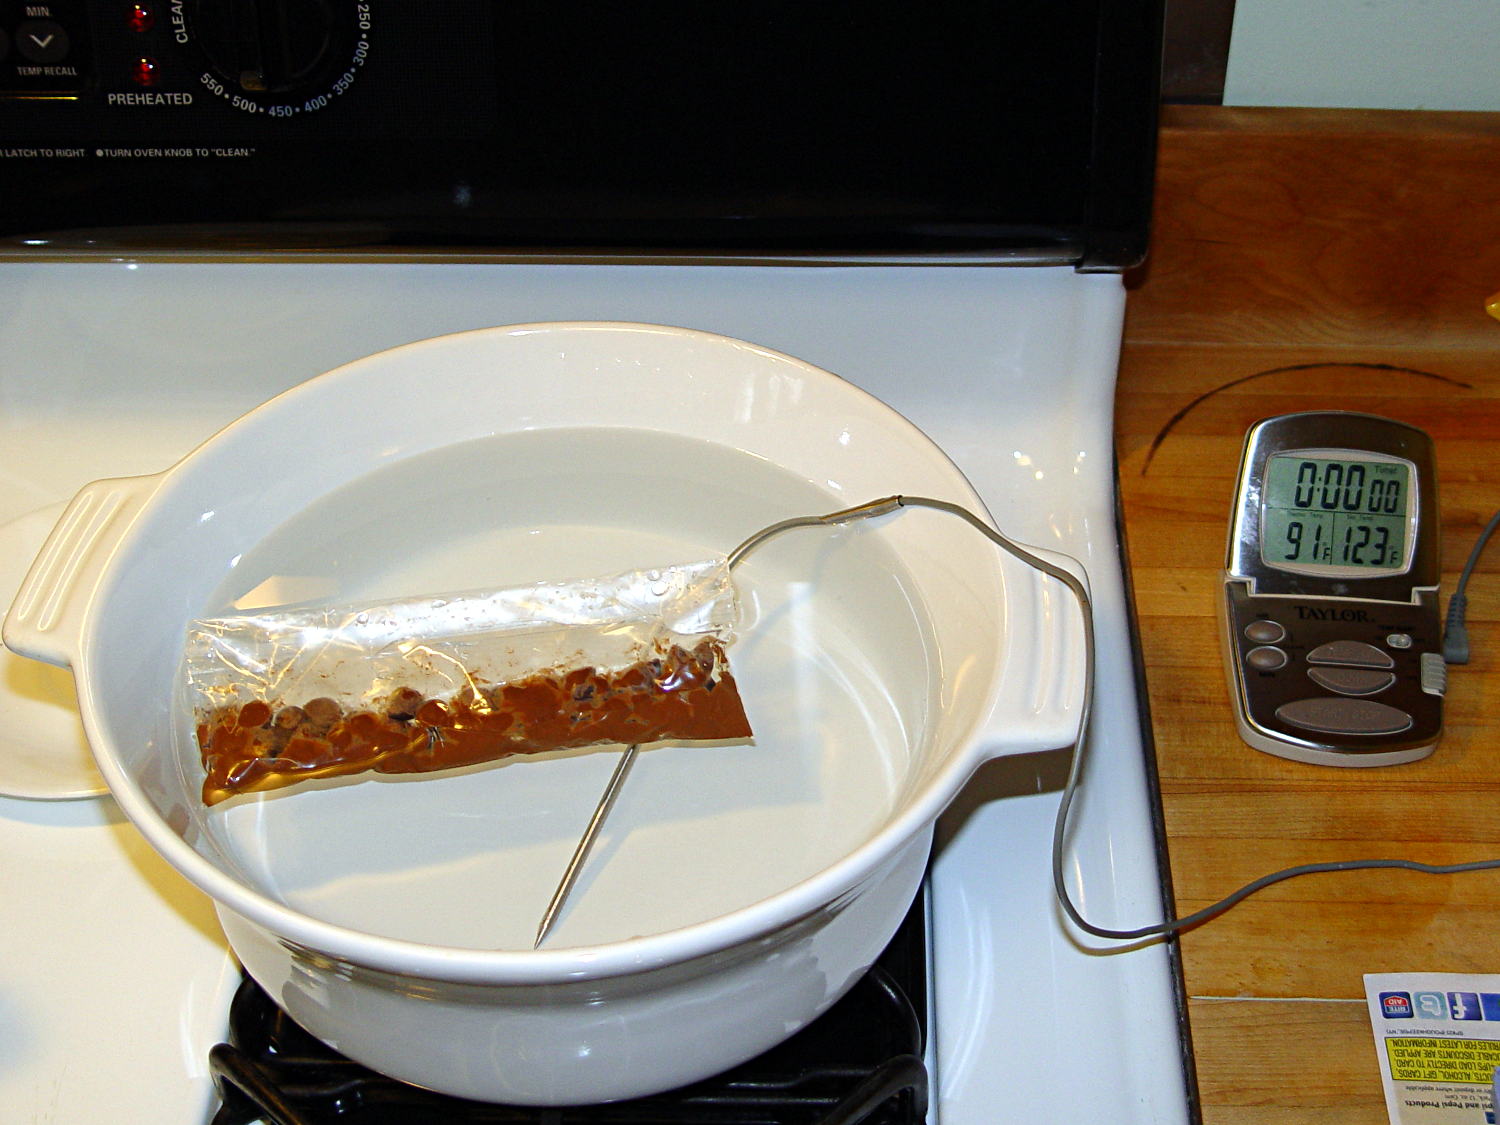
Not having a sous vide setup, but also not working with giant chocolate blocks, I simply filled a big ceramic pot with tepid water:
Chocolate tempering – water bath
Note that the gas burner under the pot is off: the pot’s on the stove because it fit nicely next to the countertop.
A small metal pot sits out of sight on the burner to the left. Goosed with low heat as needed, that pot provided warm water: I moved a cup of tepid water to the metal pot, moved a cup of slightly warmer water back to the ceramic pot, and repeated as needed. As it turned out, the big pot held its heat quite well and the whole process went swimmingly, with the water temperature at 90±1°F, tops.
The Official Tempering Numbers seem to be:
Dark chocolate: 88 – 90°F
Milk chocolate: 86 – 88°F
I suppose I should have used slightly cooler water for the milk chocolate shown in the picture, but it came out Just Fine.
I used Nestlé Toll House Chocolate Morsels for lack of anything better. As nearly as I can tell, cheaper chocolate isn’t really chocolate and fancier chocolate seemed like a Bad Idea until I’ve made a few more mistakes. One bag each of Milk, Dark, and Semi-Sweet sufficed for my simple needs.
The ziplock baggie holds 50 g of chocolate chunks / morsels / whatever, which turned out to be exactly the right amount to fill 16 Tux mold cavities with a 5 mm maximum depth, plus a little bit for the inevitable mess. Sometimes, I just get lucky…
Put chocolate chunks into bag, squeeze out as much air as possible, seal, drop in the pot. Wait a few minutes until it’s not quite completely melted, remove, dry the bag, squeeze out the rest of the air, then knead until it’s all mooshy.
Then cut off one corner of the bag, squeeze chocolate into mold cavities, and flatten the back. I started by easing it into the beak and eyes, filling the tummy, then piling enough to cover everything else. This worked surprisingly well, although the ziplock can unlock if you squeeze hard enough; cut the corner a little bit larger than seems necessary.
Memo to Self: tape the ziplock part of the bag closed to prevent bloopers.
I used a plastic scraper (well, an unused credit card, if you must know) to moosh the chocolate into the cavity and level the back. There doesn’t seem to be much to choose between doing one cavity at a time or a whole row in one pass, although filling more than one row lets the first lump get too cool.
I worried about the chocolate in the bag getting too cool, until I realized that my fingers are hotter than the tempering bath, so, if anything, it would get too hot.
The result came out surprisingly tidy:
Tux Gradient 4×4 – milk chocolate in mold
The silicone block sits atop an aluminum pizza pan, which I transported to the basement for cooling while filling and melting the next bag; the chocolate popped right out of the cavities at about 70°F.
The result looked pretty good to me:
Tux Gradient 4×4 – milk chocolate detail
The detail come out fine and if anybody kvetches about a few bubbles, they don’t get any more.
From left to right, Tux in milk, semi-sweet, and dark chocolate:
Tux Gradient – milk semi-sweet dark lineup
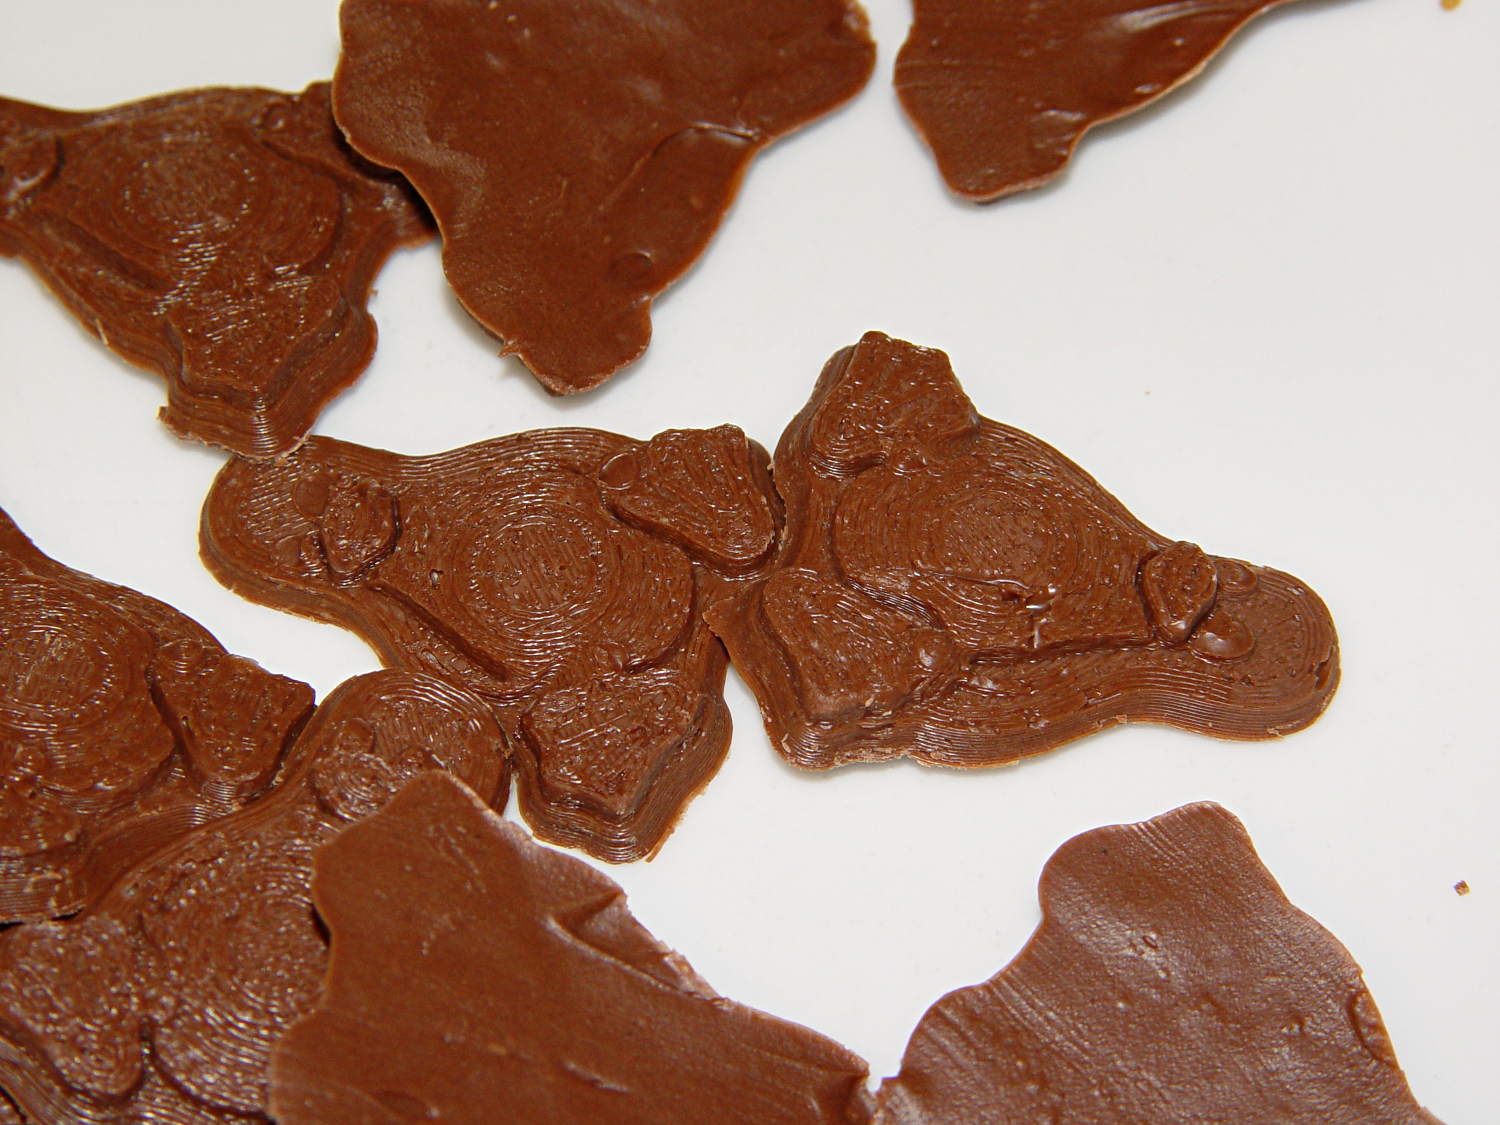
The semi-sweet Tuxes began to bloom almost instantly. I had heated the silicone mold to about 90°F in an attempt to keep the chocolate melty enough to fill 16 cavities before leveling them all at once, but I think it was too hot on the bottom; the four center pieces bloomed right out of the mold and a few others bloomed shortly thereafter.
The bloom highlights the mold detail, though:
Tux Gradient – semi-sweet chocolate bloom
I quickly destroyed all the evidence…
Each Tux weighs 2.5 to 3 g. You do the calorie count yourself, OK?
Although directly printing the 2×2 molds worked reasonably well, that does not scale to larger arrays, because OpenSCAD doesn’t handle the profusion of vertices with any grace. Duplicating the STL file created from the height map image, however, isn’t a problem:
Tux-Gradient – Slic3r layout
I actually did it in two passes: 4 molds to be sure they’d come out right, then another dozen. Figure a bit under two hours for the lot of them, no matter how you, ah, slice it.
A grid drawn directly on 1/16 inch = 1.5 mm acrylic sheet guided the layout:
Tux Gradient 4×4 – mold as-cast
I anointed the back of each mold positive with PVC pipe cement, the version with tetrahydrofuran to attack the PLA and acetone/MEK to attack the acrylic, lined it up, and pressed it in place. The positives have recesses for alignment pins, but even I think that’s overkill in this application.
Memo to Self: Flip the acrylic over before gluing, so the guide lines wipe neatly off the bottom.
Tape a cardboard frame around the acrylic, mix & pour the silicone, put it on the floor to ensure it’s level (unlike our kitchen table), wait overnight for the cure, then peel positive and negative apart:
Tux Gradient 4×4 – mold separated
As before, the top surface of the positives isn’t watertight, so the silicone flowed through into the molds. This isn’t a simple extruder calibration issue, because the thinwall boxes are spot on, all the exterior dimensions are accurate, and everything else seems OK. What’s not OK is that threads on the top and (now that I look at it) bottom surfaces aren’t properly joining.
A closeup of the positive shows silicone between the threads and under the surface:
Tux Gradient 4×4 – postive detail
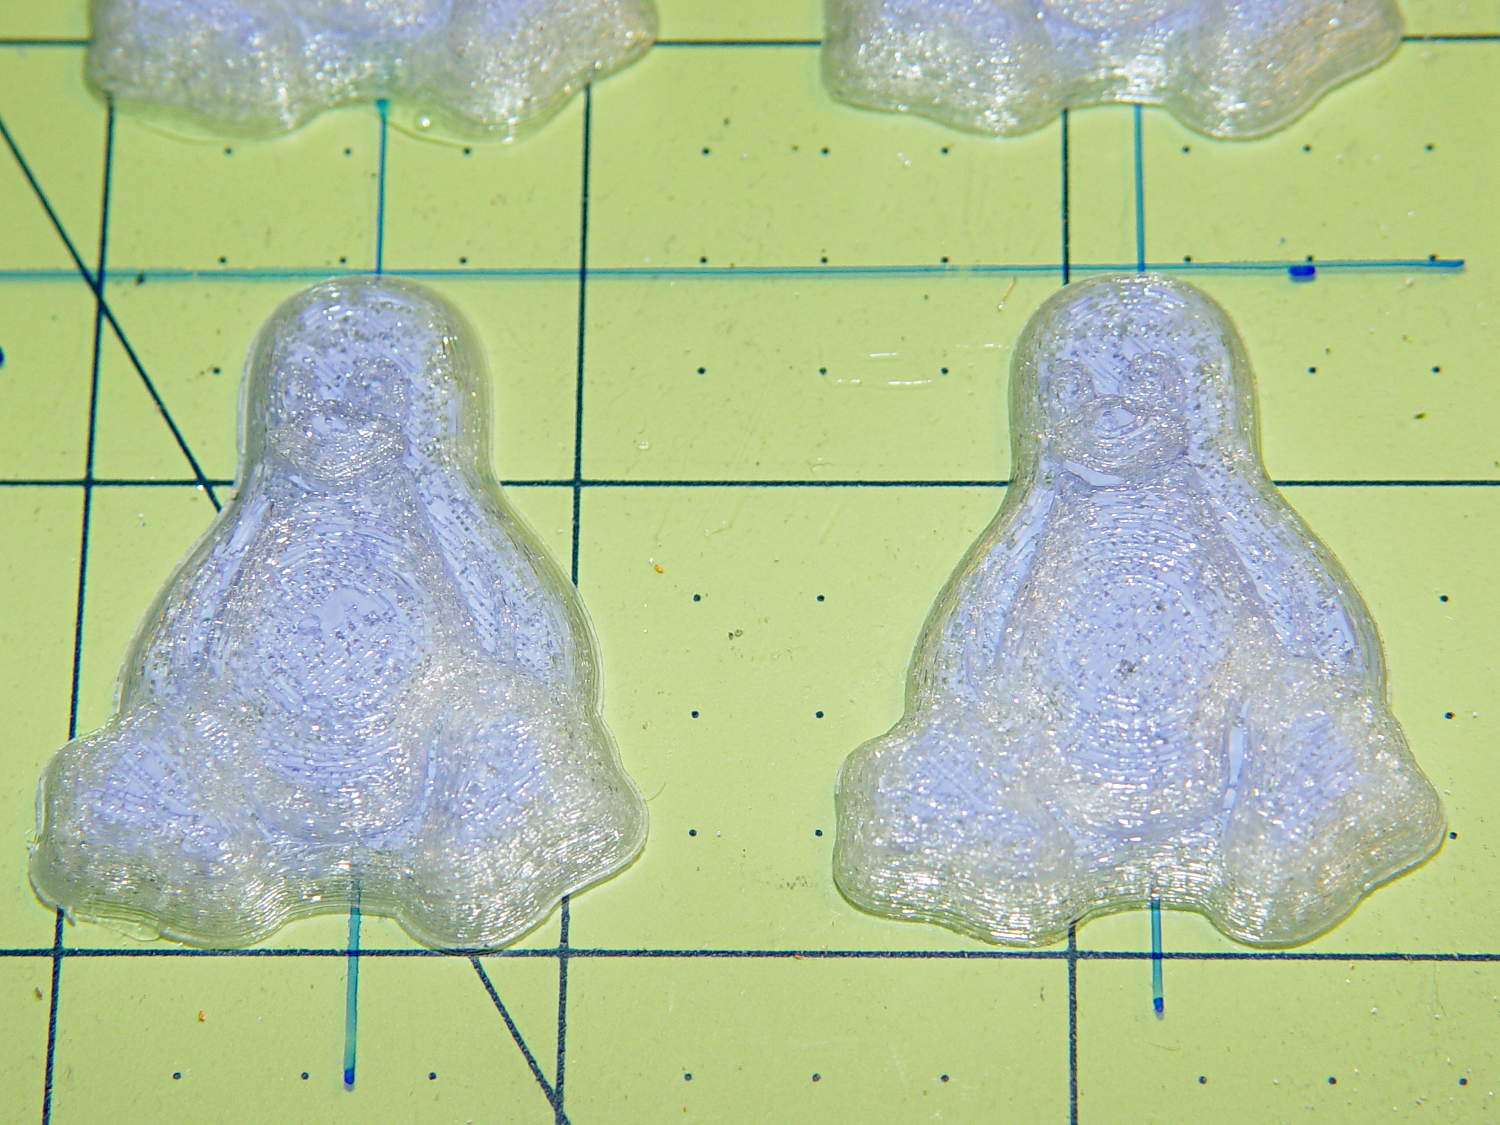
But the negative silicone looks just fine, in the usual hand-knitted way of all 3D printed parts:
Tux Gradient 4×4 – negative detail
Definitely fewer bubbles than before, although the flange between the flippers (wings? whatever) and the body isn’t as clean as it could be. Doing better may require pulling a vacuum on the silicone, which would mean the positives really must be air-tight solids.
Anyhow, the acrylic base produced a wonderfully flat surface that should make it a lot easier to run a scraper across the chocolate to remove the excess. Not that excess chocolate is ever a problem, but it’s the principle of the thing.
Recumbent Riders – North Grand Avenue Crossing – 2014-04-05
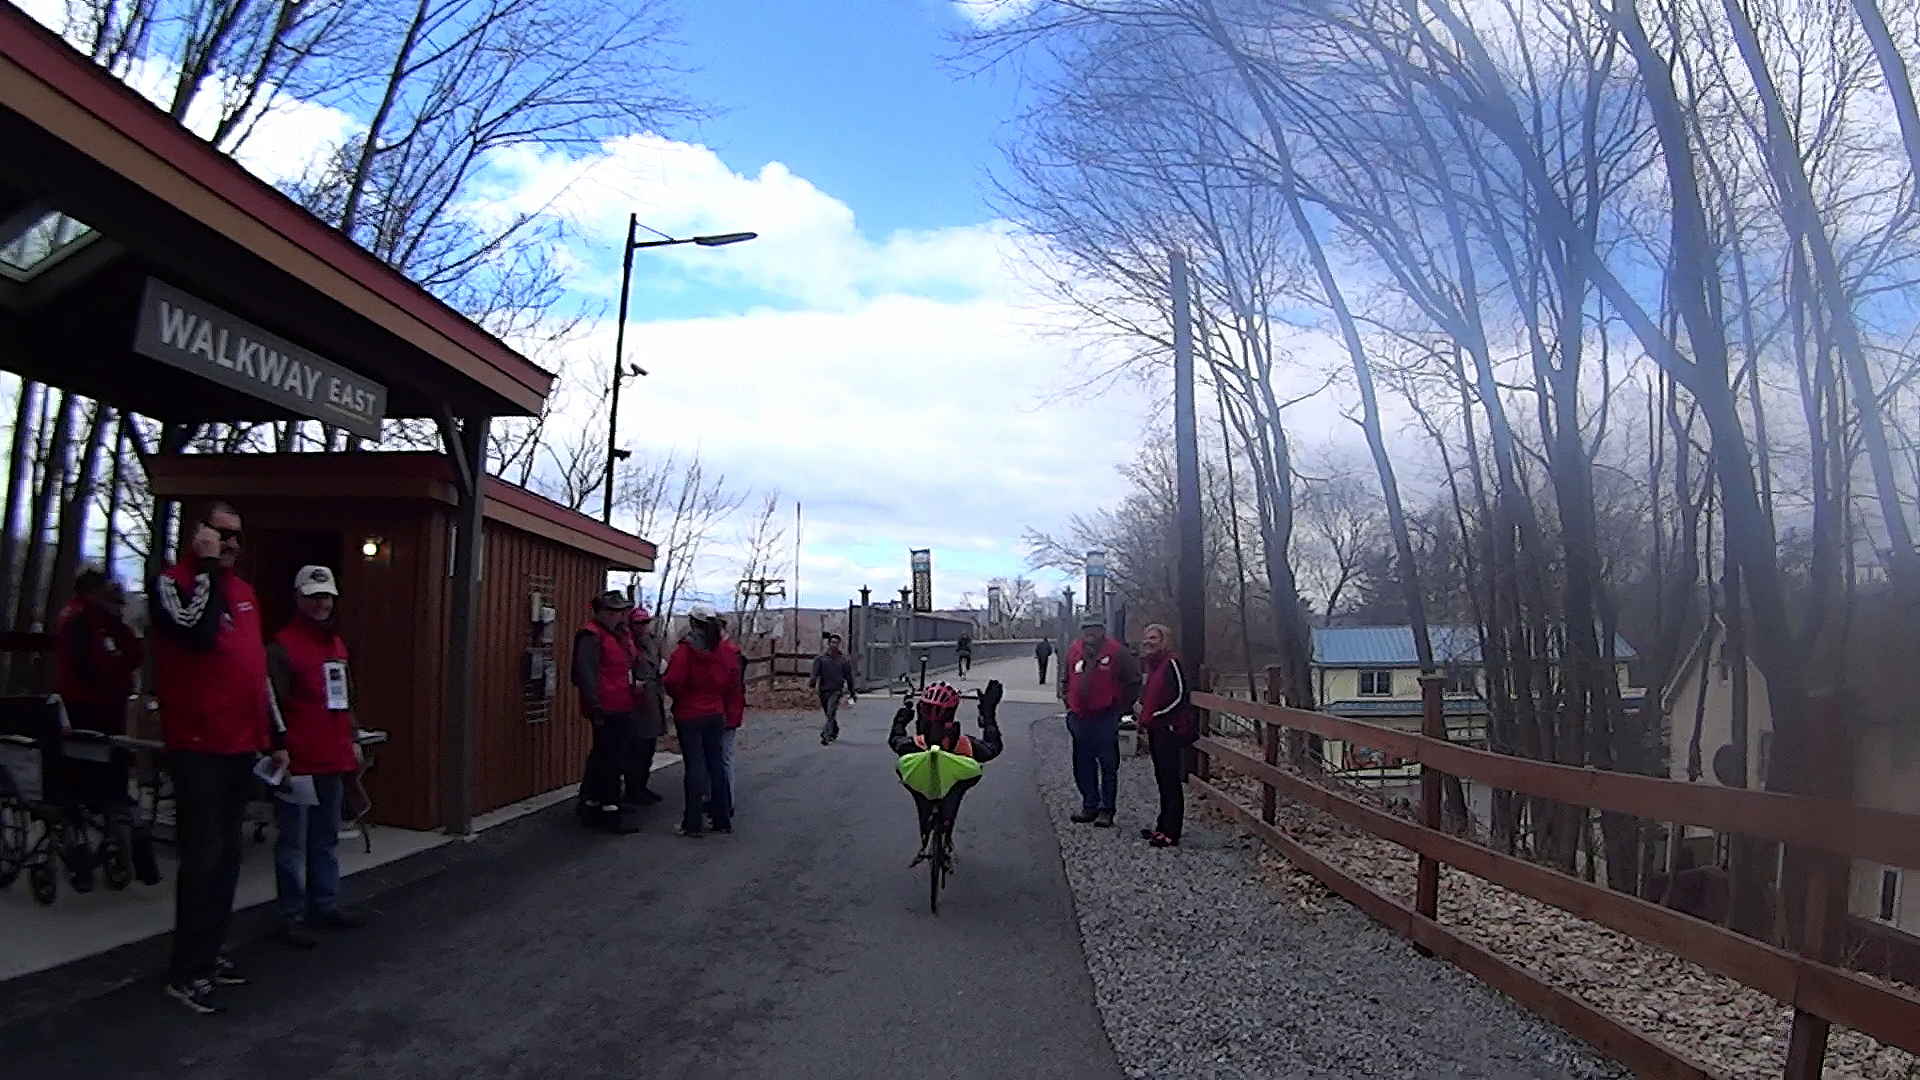
A highracer gingerly navigates the low-speed gauntlet to the Walkway Over the Hudson:
Recumbent Riders – Walkway Over the Hudson Entrance – 2014-04-05
The pix come from the Sony HDR-AS30V helmet camera video, set to 1920×1080 / 120° @ 60 frame/s. They’ve had a bit of refocusing and color adjustment, but nothing can dramatically improve them. The video looks better only because eyes aren’t as fussy with moving images. I’m not red-hot pleased with the resolution & compression, but the camera is what it is.
The lens carried a smear on the upper-right quadrant that shows the sensitivity of the optical path.
Memo to Self: Clean the lens and keep fingers off!
That’s harder than it may seem. The Start button is on the back of the body, recessed far enough into the skeleton frame to require an index finger rather than a thumb, and it’s remarkably easy to touch the bulging fisheye lens with your (well, my) thumb; a touch is all it takes to create a nice smear.
I started and ended at home, rather than at the Hopewell Junction end, but you get the general idea:
The avconv (formerly ffmpeg) image-to-video programs expect sequentially numbered files, with the numbers in a fixed-width part of the file name, thusly: dsc00001.jpg.
ll | head
total 286576
-rwxr-xr-x 1 ed ed 595708 Jan 23 19:14 dsc00940.jpg
-rwxr-xr-x 1 ed ed 515561 Jan 23 19:14 dsc00941.jpg
-rwxr-xr-x 1 ed ed 580190 Jan 23 19:14 dsc00942.jpg
-rwxr-xr-x 1 ed ed 571387 Jan 23 19:14 dsc00943.jpg
-rwxr-xr-x 1 ed ed 573207 Jan 23 19:14 dsc00944.jpg
-rwxr-xr-x 1 ed ed 571086 Jan 23 19:14 dsc00945.jpg
-rwxr-xr-x 1 ed ed 571600 Jan 23 19:14 dsc00946.jpg
-rwxr-xr-x 1 ed ed 571547 Jan 23 19:14 dsc00947.jpg
-rwxr-xr-x 1 ed ed 565706 Jan 23 19:15 dsc00948.jpg
A Bash one-liner loop does the renumbering:
sn=1 ; for f in *jpg ; do printf -v dn 'dsc%05d.jpg' "$(( sn++ ))" ; mv $f $dn ; done
The results look pretty much like you’d expect:
ll | head
total 286556
-rwxr-xr-x 1 ed ed 595708 Jan 23 19:14 dsc00001.jpg
-rwxr-xr-x 1 ed ed 515561 Jan 23 19:14 dsc00002.jpg
-rwxr-xr-x 1 ed ed 580190 Jan 23 19:14 dsc00003.jpg
-rwxr-xr-x 1 ed ed 571387 Jan 23 19:14 dsc00004.jpg
-rwxr-xr-x 1 ed ed 573207 Jan 23 19:14 dsc00005.jpg
-rwxr-xr-x 1 ed ed 571086 Jan 23 19:14 dsc00006.jpg
-rwxr-xr-x 1 ed ed 571600 Jan 23 19:14 dsc00007.jpg
-rwxr-xr-x 1 ed ed 571547 Jan 23 19:14 dsc00008.jpg
-rwxr-xr-x 1 ed ed 565706 Jan 23 19:15 dsc00009.jpg
Because you’re renaming the files anyway, don’t bother to normalize ’em:
sn=1 ; for f in *JPG ; do printf -v dn 'dsc%05d.jpg' "$(( sn++ ))" ; mv $f $dn ; done
And, of course, you can fetch ’em from the camera while doing that:
sn=1 ; for f in /mnt/part/DCIM/100MSDCF/*JPG ; do printf -v dn 'dsc%05d.jpg' "$(( sn++ ))" ; cp -a $f $dn ; done
That leaves the DSC*JPG original files on the camera, where you can delete all of them in one operation when you’re happy with the results.
If you don’t need the full resolution, reserialize and resize each picture on the fly:
sn=1 ; for f in /mnt/part/DCIM/100MSDCF/*JPG ; do printf -v dn 'dsc%05d.jpg' "$(( sn++ ))" ; convert $f -resize 50% $dn ; done
That’s based on combining several hints turned up by the usual Google search.
To assemble a quick-and-simple movie from the images:
avconv -r 30 -i dsc%05d.jpg -q 5 movie.mp4
The image quality certainly isn’t up to what you (well, I) would expect from a 1920×1080 “HD” file, but the Sony HDR-AS30V Zeiss camera lens seems to be a fisheye pinhole (170° view angle, 2.5 mm f/2.8) backed with relentless image compression:
Sony HDR-AS30V Action Camera
Memo to Self: It’s not worth creating and remembering Yet Another Script.
The cracker recipe I’m using produces eight sets of crackers, so this time I added a variety of toppings to see what would work out best:
Plain
Salt
Sugar
Cinnamon
Garlic
Chopped chocolate
Chopped cashews
Chopped walnuts
Garlic wins over everything else, hands-down, no contest, but the mixture of all the toppings in the bottom of the cooling bowl was wonderful.
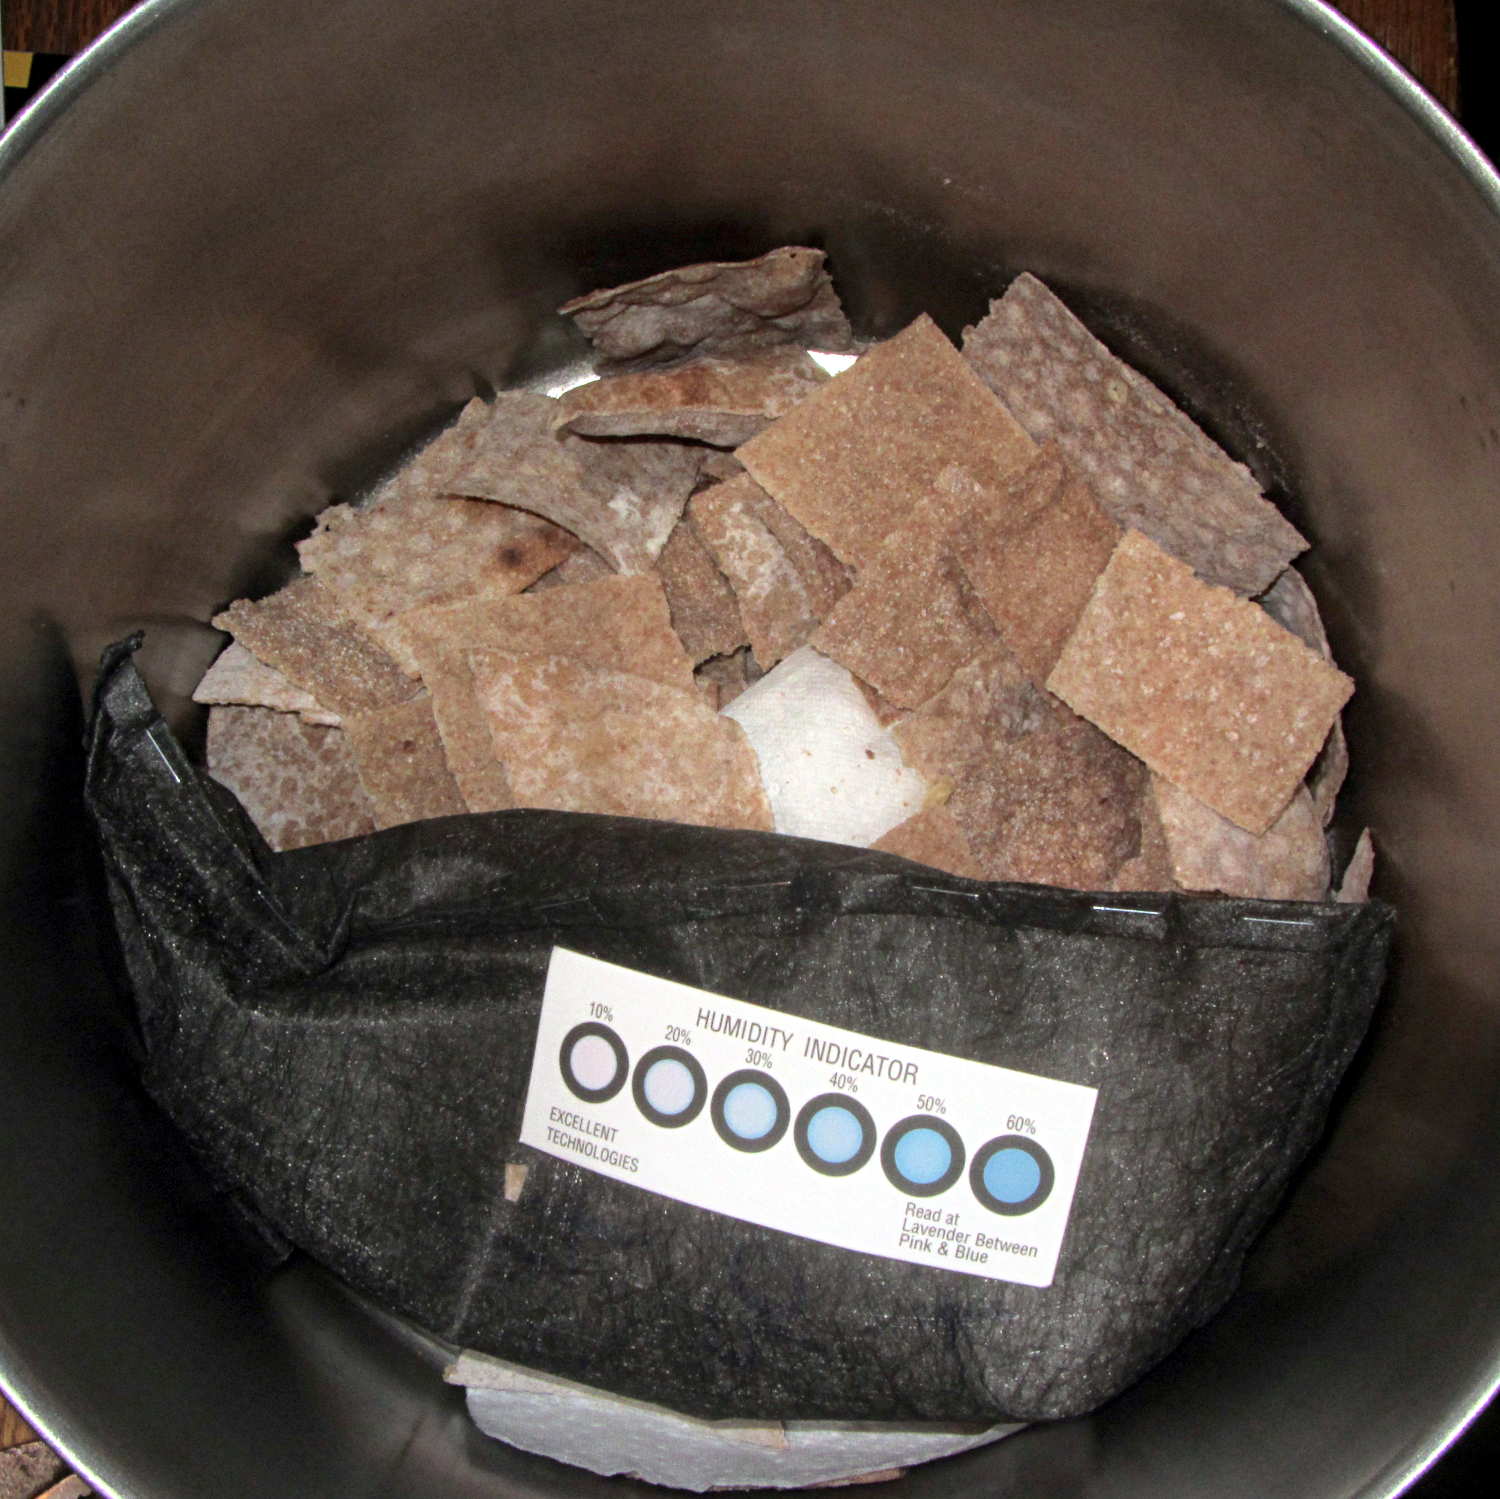
The crackers went into a large pot with a bag of desiccant:
Whole wheat crackers with desiccant
It pulled out 30 grams of water while reducing the humidity to 20% overnight; the crackers started out crisp and became really snappy. Definitely the right way to get the job done.
These vaguely resemble the Processor Crackers recipe in Flatbreads & Flavors (Alford & Duguid):
3 C hard whole wheat flour
1 tsp salt
1 C warm water, more as needed
Toppings
Water sprayer
I’m using coarse-ground red wheat that doesn’t soak up the water like fine-ground flour. The original recipe called for 1-½ C water, which produced a sticky ball.
Blend wheat & salt in food processor
Add water in a slow stream until dough firms up
Blend another minute
Knead half a minute on cutting board
Cover
Let rest 30 minutes while you prepare toppings
Finely chopped toppings work best; the nuts were too coarse.
Preheat oven to 500 °F
Divide dough in eight pieces, cover
For each piece of dough:
Roll to about 2 mm
Put dough on vented pizza pan
Cut cracker shapes with pizza cutter
Sprinkle topping
Spritz with water
Put in oven on top rack
Punch timer for 3 minutes
Prepare next piece
Swap pans
Iterate
Toss the crackers into a big bowl to cool, sampling as needed.
When crackers cool:
Dump into large pot
Add desiccant bag & humidity card
Cover
Snarf combined toppings from bowl
Leave crackers to dry overnight
Wonderful!
Memo to Self: Shredded Parmesan cheese would be pretty good…
My desktop box (an off-lease Dell Optiplex 780) work up dead a while back, but recovered; I figured an insurance policy might be a good idea, so a new-to-me off-lease Dell Optiplex 980 just arrived. It booted into Windows Vista Business, whereupon:
Apply all the usual Windows updates
Boot SysRescCD from USB, run GPartEd
Shrink the Windows partition (/dev/sda1) to 25 GB
Slide the recovery partition (/dev/sda2) over against it
Create 10 GB swap partition (/dev/sda3), likely never to be used with 4 GB of RAM
Create extended partition (/dev/sda4)
Create 35 GB Linux partition (/dev/sda5)
Then install Xubuntu 13.10 using the mini ISO USB, put GRUB in the MBR, reboot, and … get Vista again. Huh. This is not a nominal outcome.
For whatever reason, GRUB either doesn’t get control or defaults to the Windows partition. However, attempting to boot from the mini ISO transfers control to GRUB, thence to Xubuntu, and attempting to boot from SysRescCD works fine. Boot to Xubuntu, tinker with /etc/default/grub, run update-grub, and it still doesn’t work. Well, it boots Vista, but that doesn’t work for me; no error messages, either.
The box runs BIOS A07, so:
Fetch BIOS A14
Boot Windows, update the BIOS
Check the settings and discover that the hard drive is set to RAID mode
Change that to RAID Autodetect – AHCI
Ignore warnings about possible reinstall; box doesn’t come with a reinstall CD
Reboot and it’s all good: GRUB is now in full control
Both Vista and Xubuntu work fine
I think the problem came from having a single hard drive set to RAID mode. Dunno what they had in mind with that; it’s a small form factor box with no room for another drive…
Memo to Self: Yet Another Thing To Preemptively Un-Wedge